
31 Sewing Room Organization Ideas
This site contains affiliate links. We may earn a small commission, at no extra cost to you. Article may contain some images for illustrative purposes only .
The bobbins were the final straw. Fourteen of them, rolling loose in a drawer, threads unspooling into a tangled nest that swallowed my seam ripper whole. That was the moment I knew. My sewing room had become a fabric-strewn crime scene—rotary cutters buried under interfacing scraps, half-finished quilt blocks pinned to the ironing board like evidence, and a thread rack so overloaded it leaned sideways against the wall. Something had to change. Below, you’ll find 31 organization ideas I’ve collected, tested, and stolen from tidier sewists than myself—everything from pegboard walls and repurposed spice racks to clever bobbin storage, fabric-folding hacks using comic book boards, and dedicated stations that keep your cutting, pressing, and stitching zones from bleeding into one giant mess.
Paint Your Pegboard to Match the Wall
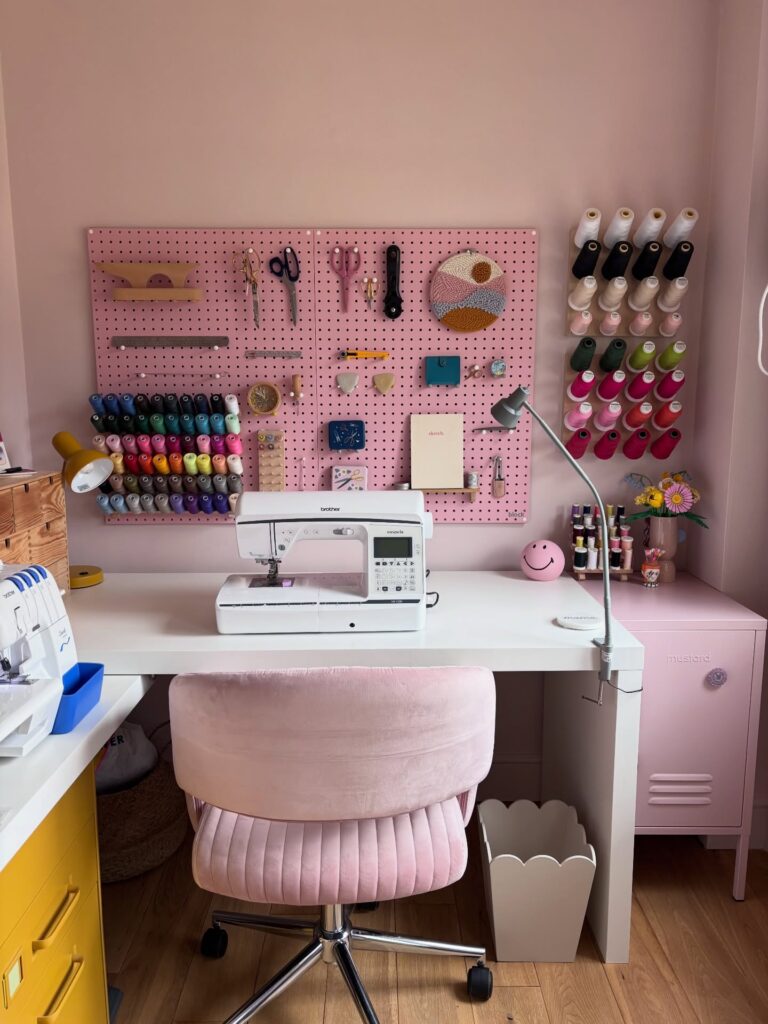
Mounting a pegboard the same color as the wall behind it makes the whole thing read as one surface rather than a board bolted onto a room. The pink-on-pink setup here is the reason the scissors, thread rolls, and small tools all stand out clearly — the background isn’t competing. Pick your wall color first, then get the pegboard painted to match before you hang anything.
If you already have a white or brown pegboard up, a can of spray paint handles it in an afternoon. The thread rack on the right wall works the same way, visually — lots of color, neutral backdrop. Worth doing even in a small corner.
Doesn’t need a dedicated room.
Pegboard sewing wall
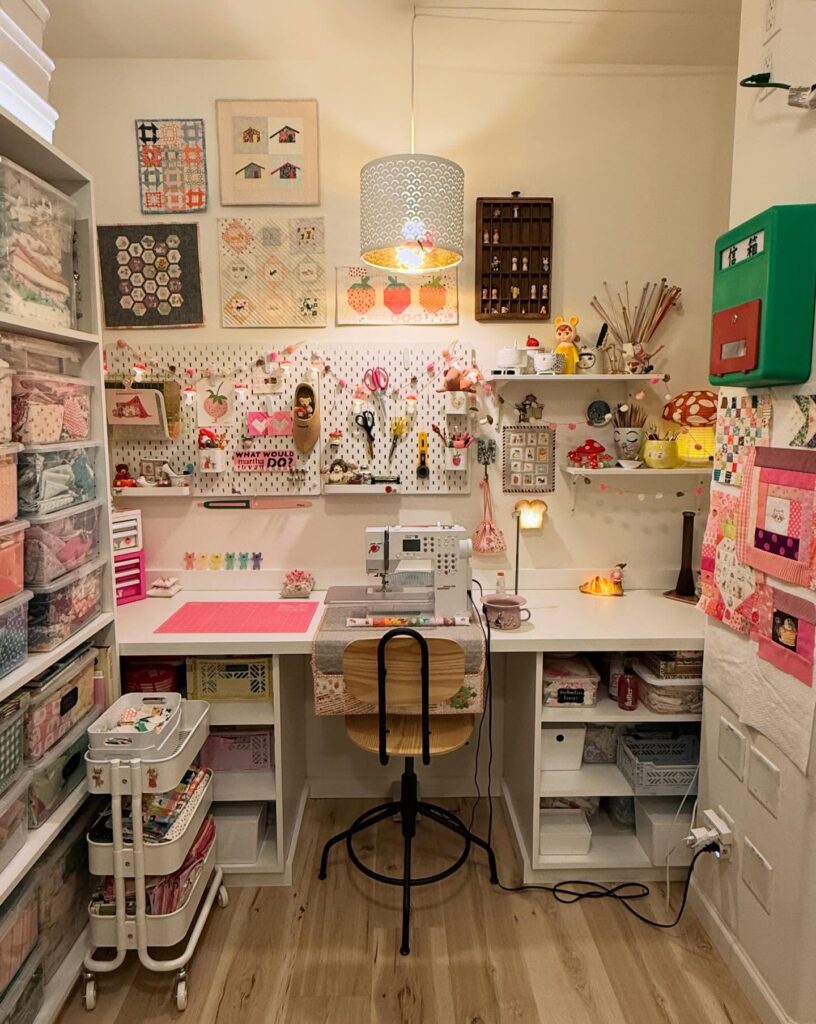
Above the desk is where the pegboard earns its keep. Keep scissors, hoops, rulers, clips, and the bits you reach for every ten minutes on hooks instead of letting them sink into a drawer. If you share the room, label a few cups, because loose tools wander back to the wrong place.
Very annoying. The shallow shelves beside it are useful for tiny display pieces, but I would keep only light things there, like thread cards or pincushions. Anything heavy should go in the lower cubbies or the rolling cart, especially if you sew with kids around.
Leave a blank strip of board near the machine too, so new tools have somewhere to land.
Store Fabric Behind Glass
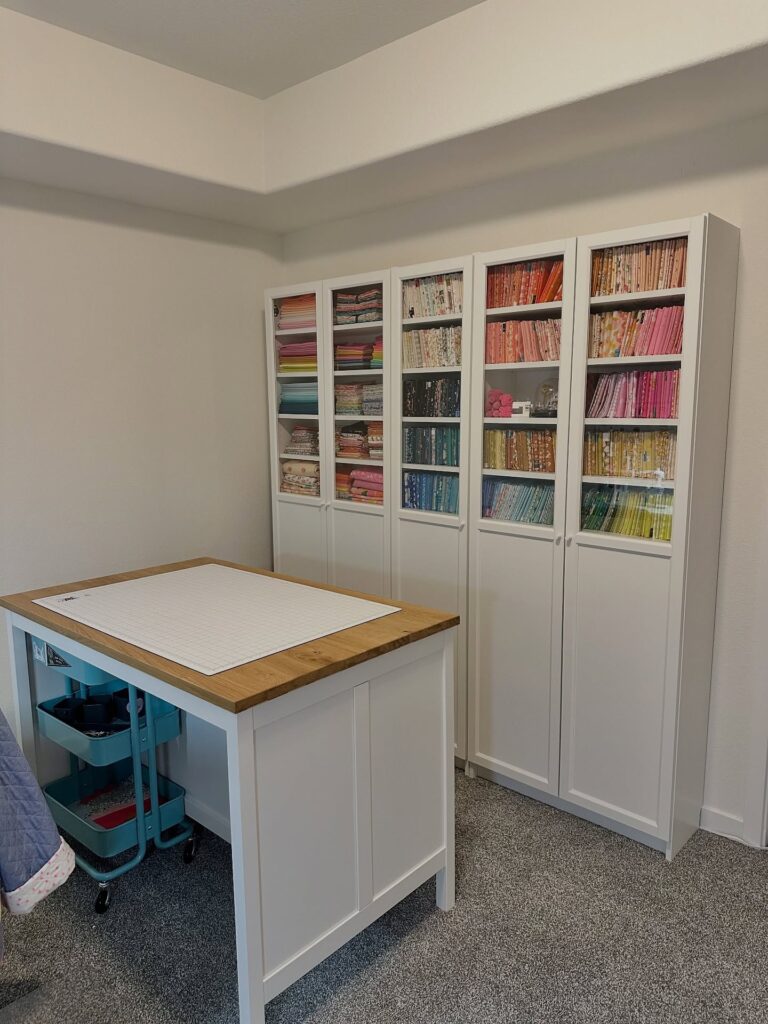
Five tall Billy bookcases with glass doors, lined up against the wall, sorted by color. That’s the whole trick. Glass doors matter more than you’d think here — fabric fades if it sits in direct sun for months, and dust settles into folds you’ll only notice when you pull out a fat quarter mid-project.
The doors keep both out while you still get to see what you own, which is honestly half the reason to organize fabric at all. Sort by color, not by type. You reach for a shade first, then decide if it’s cotton or linen.
One thing I’d change: the top shelf is too high to reach without a stool. Keep scraps or backing yardage up there, not the prints you actually use.
Thread wall above machine
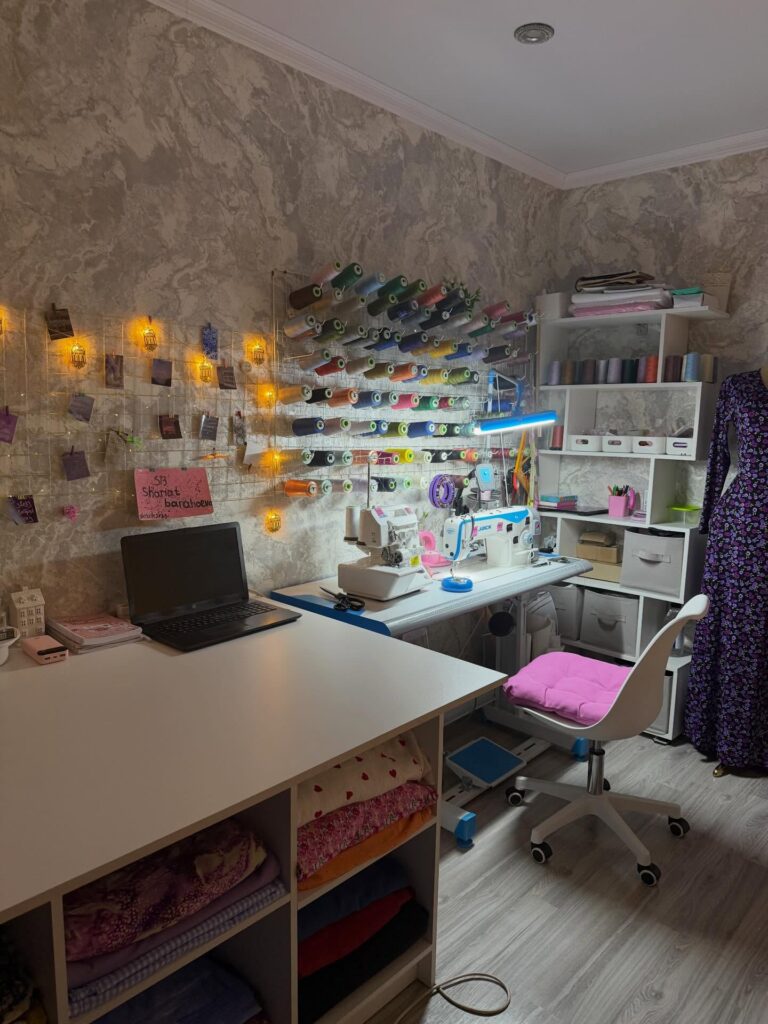
Putting the thread spools on a wall rack right above the sewing machine saves a lot of drawer digging. You see your colors straight away. That matters more than people think, especially if you switch threads often or sew for clients and need matching shades without opening five boxes.
Keep the rack close to the machine, not across the room, and leave just enough table space below for the lamp, tools, and the cones you use every week. The open cubbies beside it help too, but only if you give them jobs: interfacing on one shelf, trims on another, bobbins or clips in the small bins.
I would skip stuffing every cubby. Empty space helps. If dust bothers you, use clear front bins for the less-used thread and keep the everyday colors out where your hand already goes.
Use a Notice Board as Display Storage
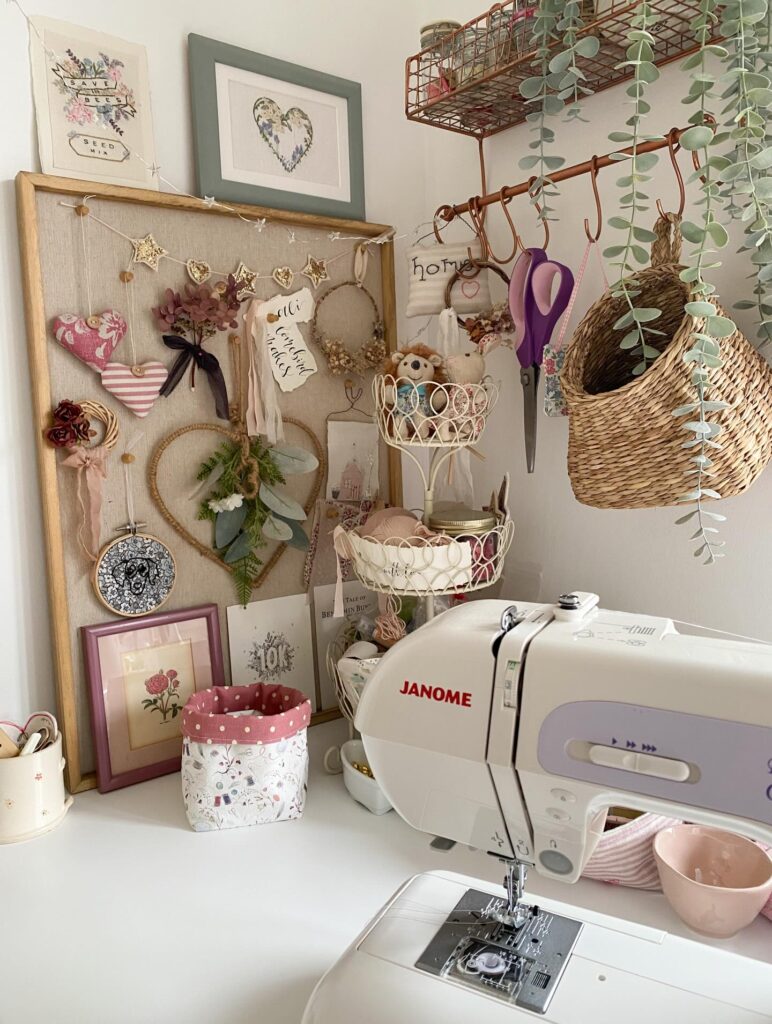
Pinning finished pieces, fabric offcuts, and little handmade ornaments to a linen-covered board means they’re visible while you work instead of buried in a drawer somewhere. The board here has a wood frame, which holds its shape better than the softboard ones that start bowing after a few months. Hang a small star garland or a ribbon across it and suddenly it’s doing two jobs — storing things and keeping the wall from looking bare.
A tiered wire basket stand next to it handles the overflow, yarn, notions, bits that don’t pin well. Worth noting: if your desk sits right underneath, things do fall off occasionally. That’s just the reality of a pinboard at arm’s reach.
Works best for people who actually make things regularly, so there’s always something new going up.
Pressing Station Nearby
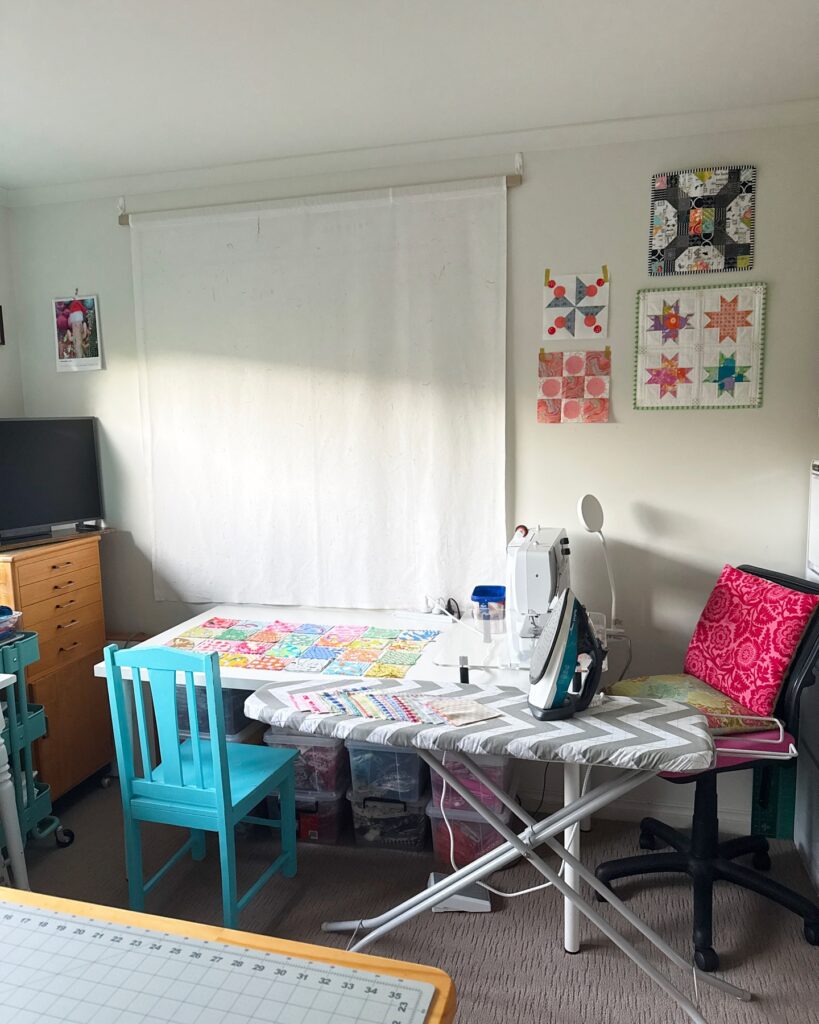
Right beside the machine, the ironing board earns its place because seams are easier to press while the fabric is still in your hands. Keep it open. If your room is tight, use a narrow board or a folding tabletop mat, but keep the iron, water cup, and scrap cloth in the same corner.
That part matters. Clear bins under the table can hold blocks waiting for pressing, so the ironing board does not become the place where every ruler, thread spool, and snack wrapper lands. I’d clip the iron cord to the board leg, because loose cords around rolling chairs are just asking for trouble.
Pegboard for thread spools
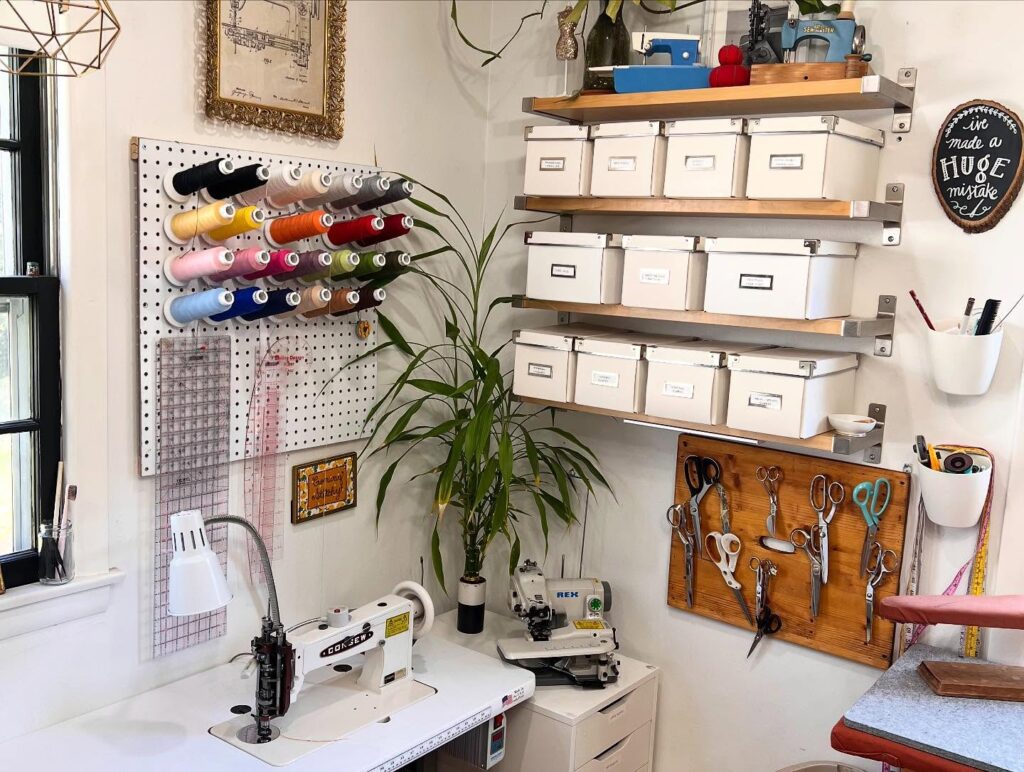
The thread rack on the left is doing a lot of work here. Wooden dowels pushed into a pegboard, spools sorted roughly by colour family — blacks and whites at the top, then yellows, reds, pinks, blues going down. You can see what you have. No digging through a drawer to find that one navy spool you know is somewhere.
Pegboard is cheap. Dowels you can cut from a single length at the hardware store. The only thing I’d change is hanging the quilting rulers separately, on their own hooks, instead of tucking them behind the spools where you have to lift things to get them out.
Works best if you actually sew often enough to justify the wall space. Otherwise a shoebox is fine.
Use a central island
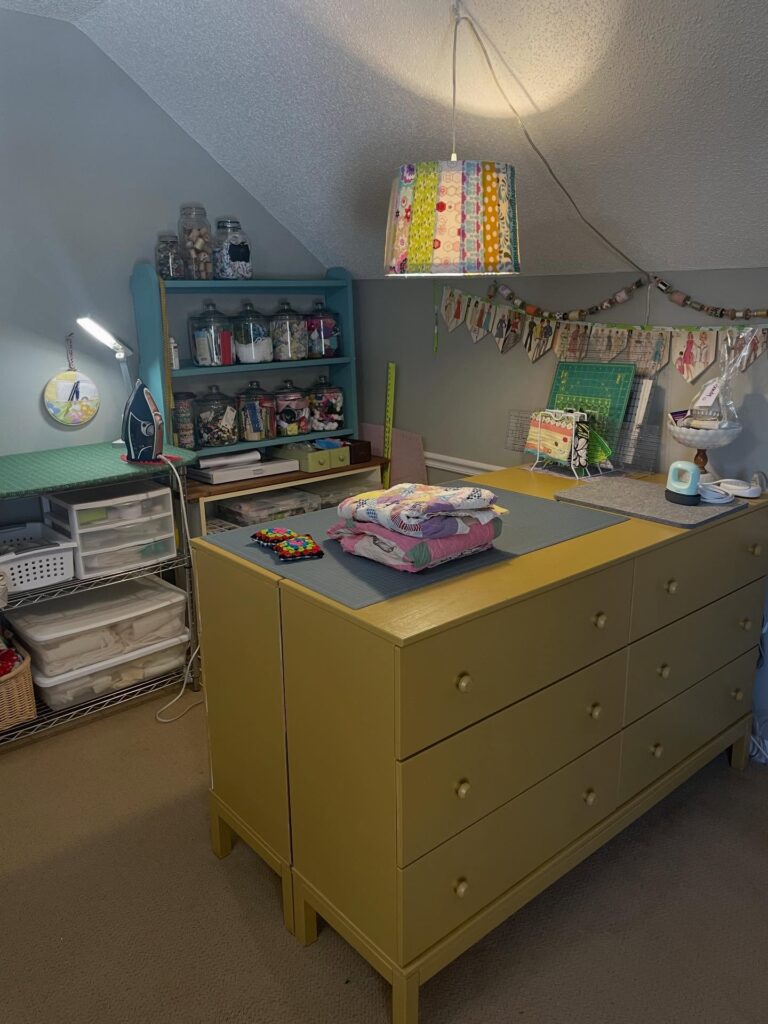
Put the biggest storage piece in the middle. A low dresser like this gives you a broad cutting surface on top and deep drawers underneath for fabric, batting, rulers, and the things that usually end up in piles.
The trick is sizing it so you can still walk all the way around without turning sideways every time you carry yardage or an ironing board. Those drawer knobs matter too, because in a tight room they catch sleeves and measuring tape more than you’d think.
Keep the top working, not decorative. A large cutting mat can live there full time, with only the current project folded at one end.
The open shelf along the wall helps. Jars and small tools stay visible, so the island drawers can hold the bulky stuff instead of becoming a mixed-up catchall.
Wire Baskets Inside an Open Shelf Unit
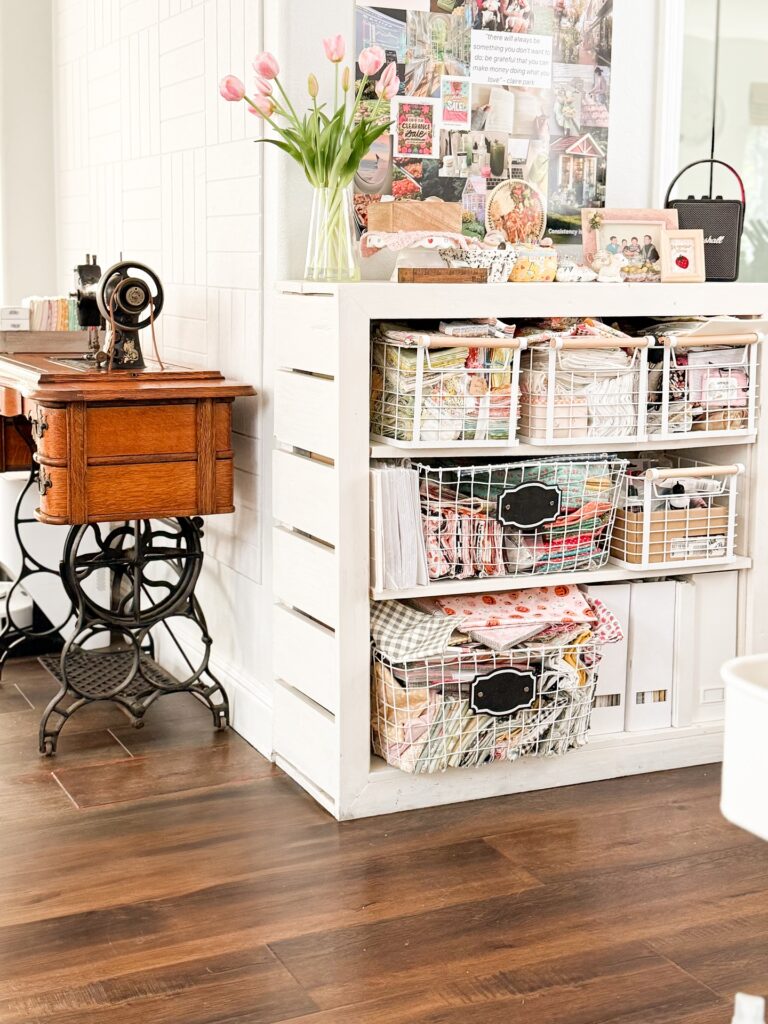
Those chalkboard labels on the baskets are doing a lot of work — without them, a shelf full of fabric scraps and notions just looks like a pile. The wire sides let you see roughly what’s in each basket without pulling everything out, which matters more than people expect when you’re mid-project and looking for a specific print. Three baskets per unit, stacked by category, keeps the whole thing from becoming one of those “organized chaos” situations that only the owner understands.
If you’ve got a white bookcase sitting around, this is basically the whole idea — add wire baskets with handle cutouts and stick chalkboard labels on the front. The antique treadle machine off to the side is its own thing entirely and not what’s making the storage work here.
Use rolling baskets
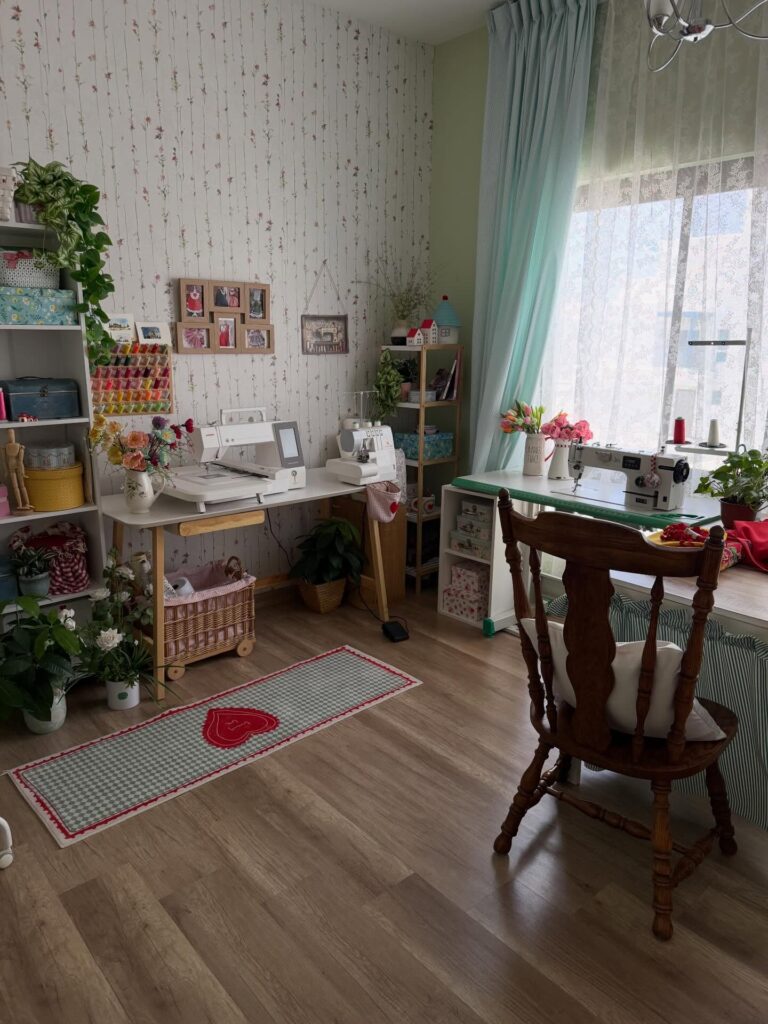
Under the sewing table, a basket on wheels makes more sense than another closed drawer. Keep the fabric you are cutting this week in it, or use it for scraps that still deserve a second look. Easy to pull out.
This works well because the floor space below a table is usually wasted, and you can still move the basket when you need to sweep or spread a pattern. Add one label on the front if you mix projects often, otherwise you will end up digging through it every time. I would skip using it for thread, though, because spools roll around and get messy fast.
Use the shelf beside it for those instead.
Rolling Island With Bolt Storage
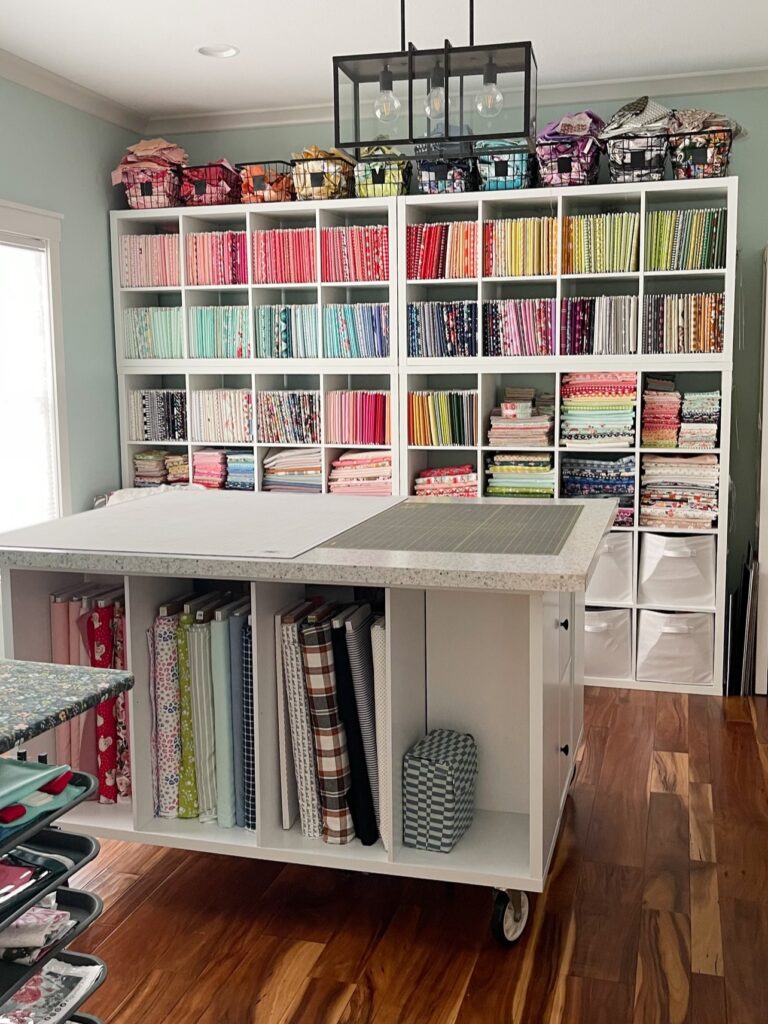
The cutting table here sits on casters, which is the detail worth stealing. Fabric bolts stand upright in the base cubbies, sorted loosely by print and color, and you can wheel the whole thing away from the wall when you need to cut a long piece or press something oversized.
A fixed island locks you in. A rolling one lets you work from all four sides.
If you’re building your own, use locking wheels — the heavier the top, the more it wants to drift while you cut. I’d also skip open cubbies on the side that faces the room if you have pets or a lot of sun. Fabric fades faster than people expect. Closed bins on one side, open bolt storage on the other is a fair compromise.
Put thread on display
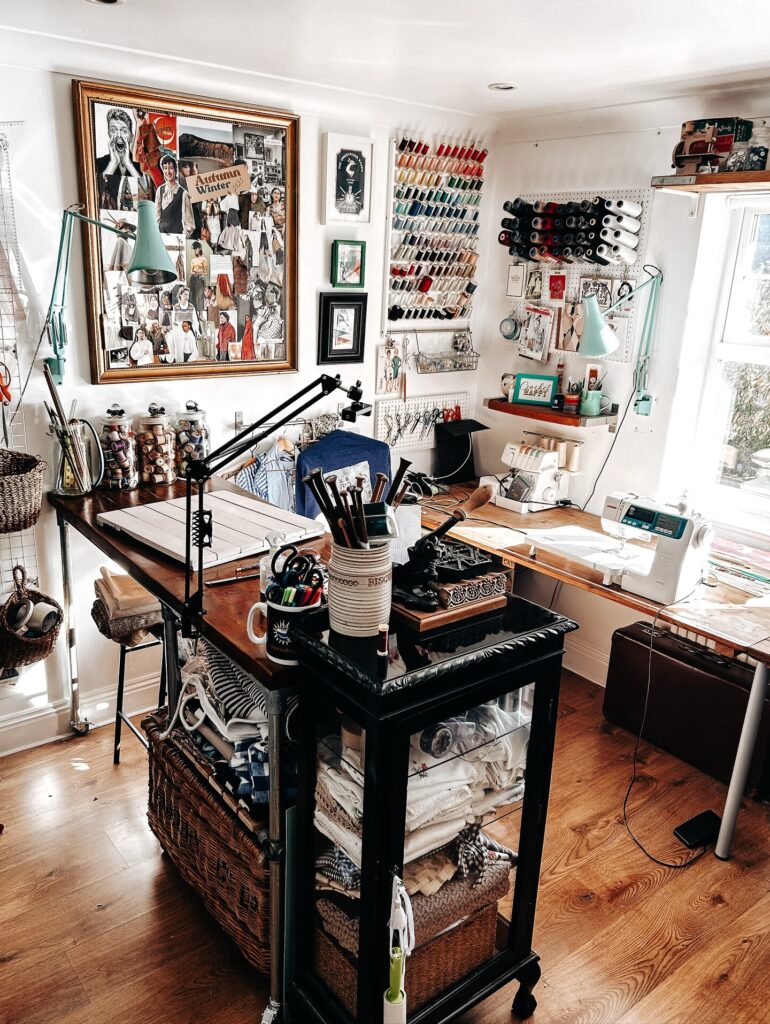
Start with the thread. A wall rack that holds dozens of spools does two jobs at once: it clears drawer space and lets you match colors without digging through a box. Hang it above the main work surface so you can reach it while sewing, then add a second rod or peg strip nearby for larger cones if you use serger thread or buy neutrals in bulk.
The little pegboard area matters too. Scissors, rulers, small tools, even reference sketches can sit upright and visible instead of getting buried under fabric. Much easier.
If you copy this setup, keep the cutting table in the middle and stash folded fabric underneath in baskets or on a lower shelf, because that dead space disappears fast in a sewing room. I would skip open storage for anything that sheds lint or wrinkles easily.
Two Tables Beat One Big One
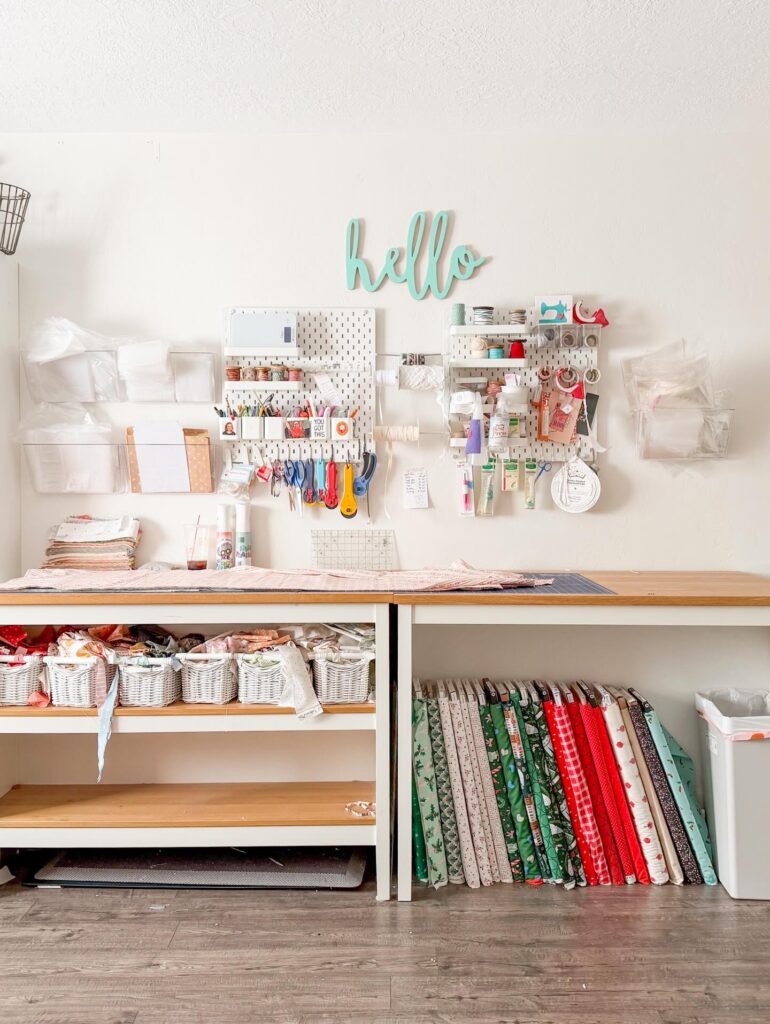
Running two separate tables side by side gives you a cutting surface and a staging area without either one getting buried. The fabric bolts standing upright in the gap between the tables — that’s the part worth copying. Rolled and stored vertically like that, you can actually see every print without unfolding anything.
The white wicker baskets on the lower shelf handle the scraps and smaller cuts that would otherwise pile up on top. If your room is narrow, one table with a rolling cart parked beside it does roughly the same job. The pegboards mounted above keep scissors and rotary cutters off the work surface entirely, which is where most sewing setups fall apart — tools creep onto the table and the usable space shrinks fast.
Cube Shelves For Fabric
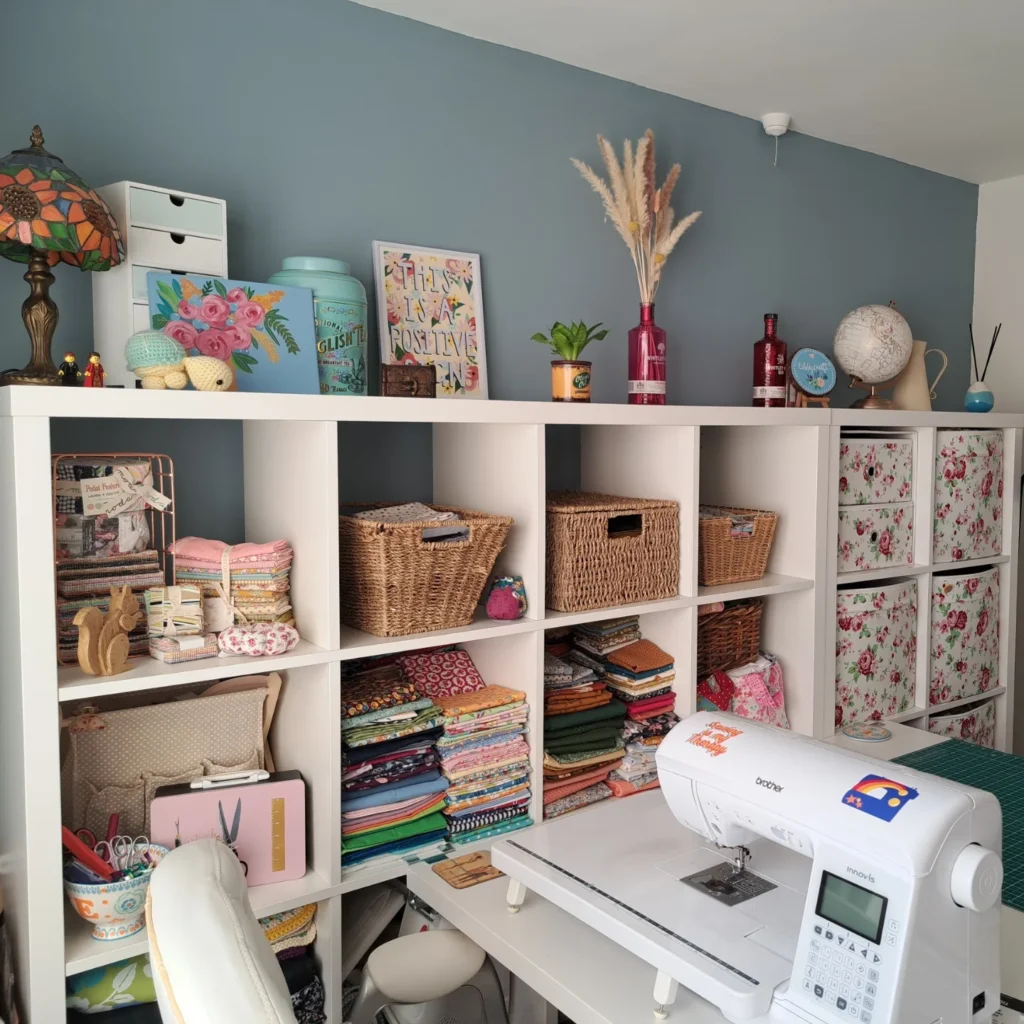
With cube shelves, fabric has a proper place without being hidden in a deep drawer where you forget half of it exists. Keep the folded stacks in open cubes, and use wicker baskets for the loose things that never sit straight, like elastic, scraps, trims, and interfacing pieces. Label the baskets.
If you sew with florals, solids, and holiday prints, give each one its own cube so you can pull fabric without messing up the whole pile. The floral storage boxes on the side are good for supplies you use less often, but I would avoid filling every cube with closed bins. You need some open shelves, or the room starts working against you.
Especially when cutting.
The Floor-to-Ceiling Craft Cabinet
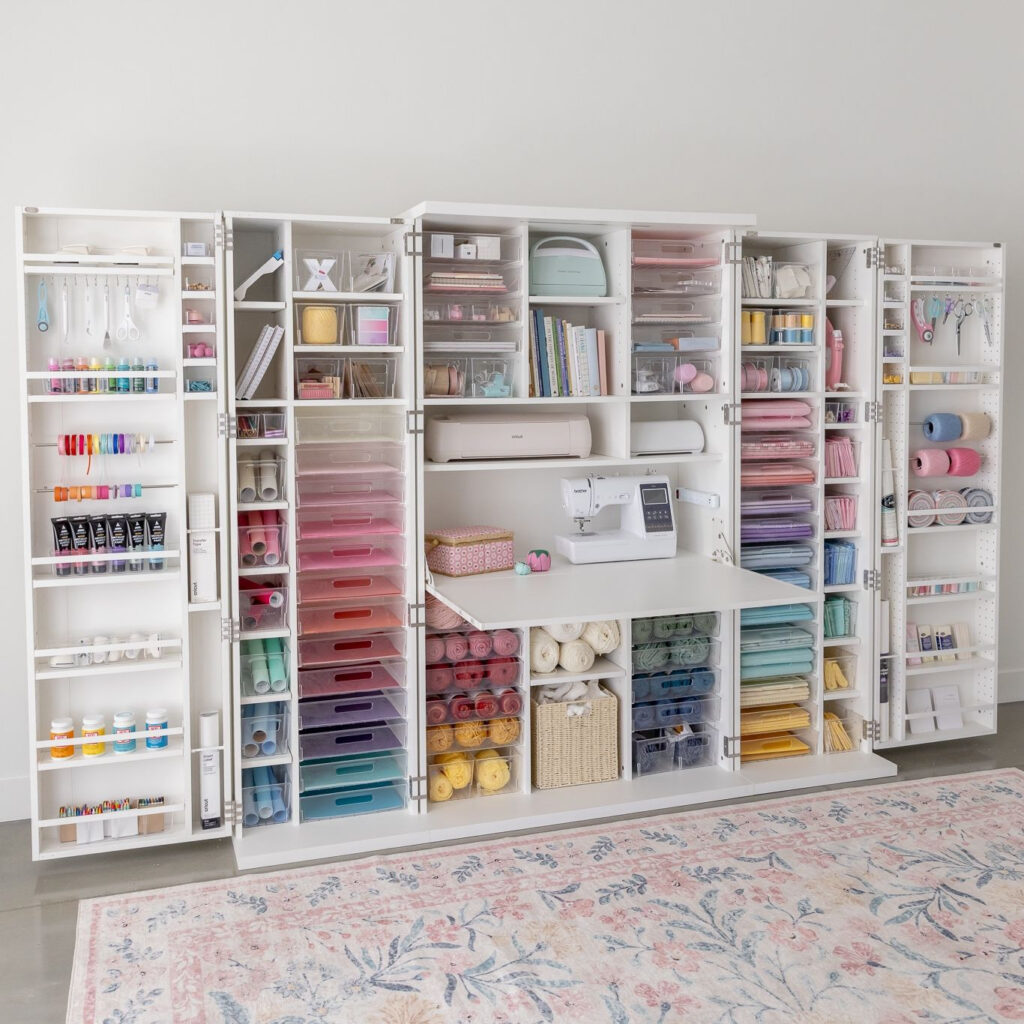
This is the dream for anyone who’s tired of hauling bins out from under the bed every time they want to sew a button on. What makes it work is the fold-down table in the middle — sewing machine stays put, and the surface tucks away when you’re done. Everything sorted by colour helps too. Yarn on one side, fabric folded on the other, ribbon spools on the door.
Honestly though, the rainbow arrangement only stays pretty if you’re disciplined about putting things back. Most of us aren’t.
If a full unit like this is out of budget, the idea still translates. A tall wardrobe with an added fold-out shelf. Clear acrylic drawers so you can see thread colours without opening anything. Door-mounted racks for scissors and small tools.
Thread wall behind machine
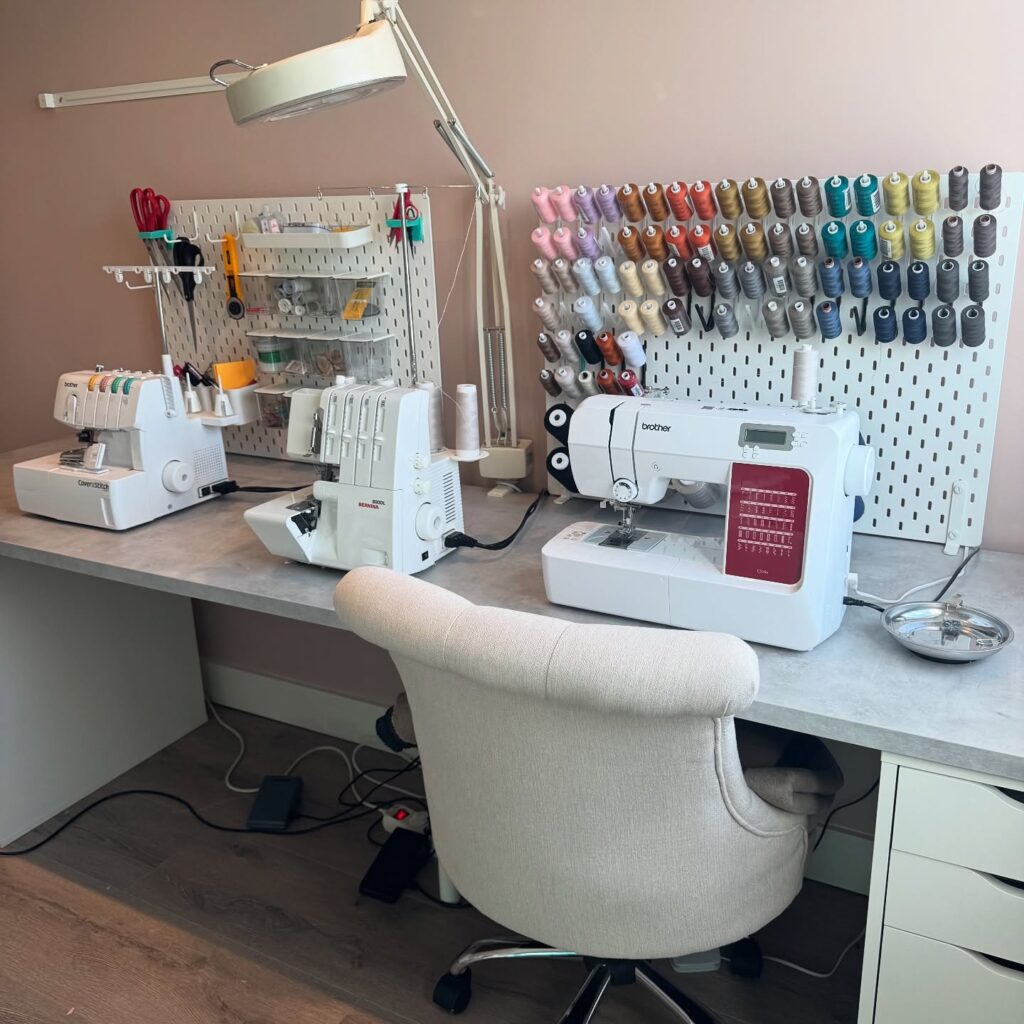
Put the thread storage right behind the sewing machine, not across the room or tucked in a drawer. That pegboard setup works because you can match, swap, and rethread without getting up every five minutes, and when you use a lot of greys, blues, creams, and pinks, seeing the shades side by side helps more than people think. Add a second pegboard for scissors, clips, rulers, and the bits that usually disappear. Keep categories shallow. Little bins are enough.
The long task lamp matters too. It throws light across the whole run of the desk instead of lighting one tiny spot, which is better if you switch between a sewing machine and a serger.
One thing I’d change. I’d run the cords under the desk in a cable tray, because foot pedals and chair wheels get annoying fast.
Use a Pegboard Above Your Cutting Table
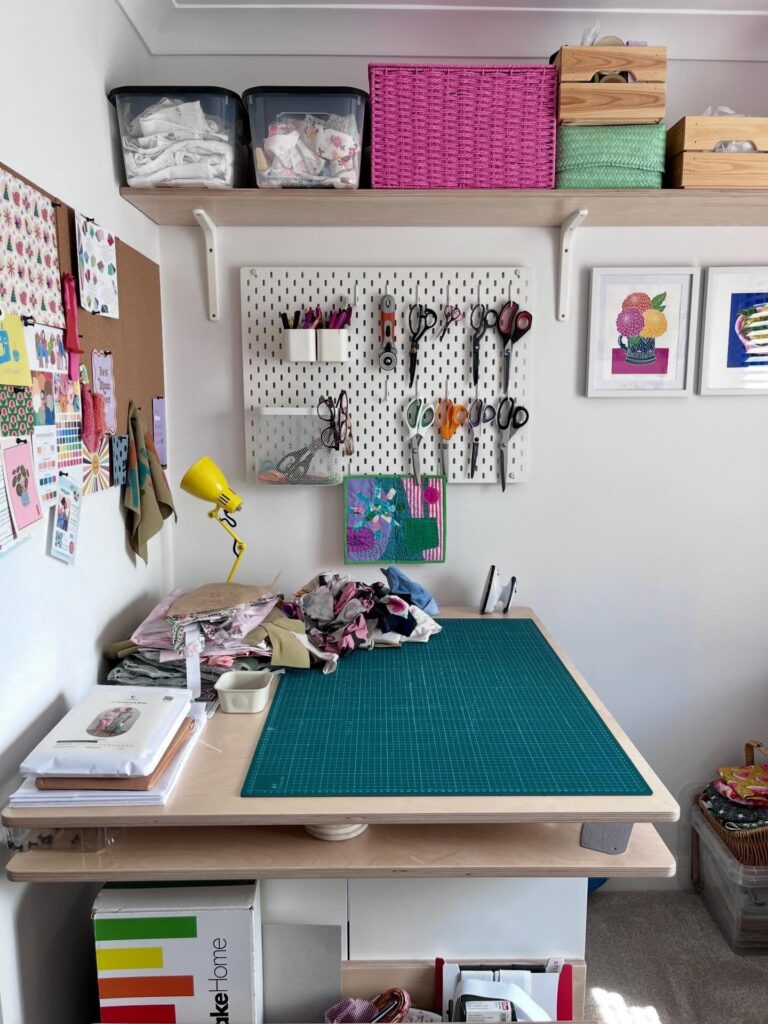
Mounting it directly above where you actually cut means the scissors and rotary cutters are within arm’s reach the moment you need them, which sounds obvious until you’ve spent ten minutes hunting for your good pair under a pile of fabric. The pegboard here holds at least five pairs of scissors plus a rotary cutter, all hanging on hooks at different heights. That variety matters — dressmaking shears, embroidery scissors, and paper scissors really shouldn’t share a drawer anyway.
The small shelf cups along the top edge hold pens and markers upright. If your wall space is tight, a half-size board still beats a drawer. One thing worth knowing: the hooks do shift around over time, so a small piece of sticky putty behind each one keeps them from sliding every time you grab something.
Use A Sideboard
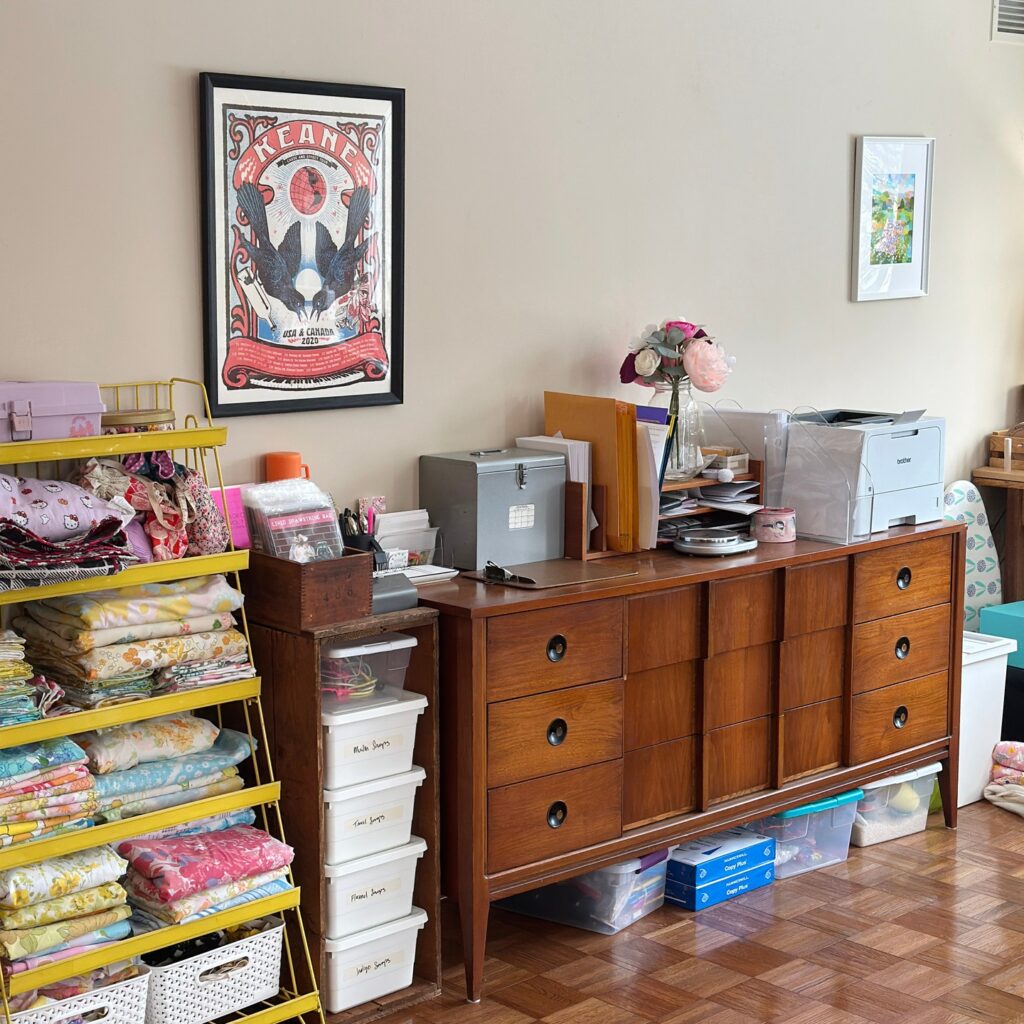
Under the sideboard is wasted space if you leave it empty, so slide lidded bins there for batting scraps, quilt blocks, or projects that are waiting for one missing zipper. Label the short end, not the lid. You’ll actually see it.
The drawers can take scissors, rulers, bobbins, marking pens, and machine feet, while the top holds the printer or cutting papers without eating into your work table. I like the yellow cart beside it for fabric that is in active use, because stacked yardage stays visible and does not disappear into a drawer. I’d skip open piles on the sideboard, though; they turn into paper nests fast.
Sort fabric by color on open shelves
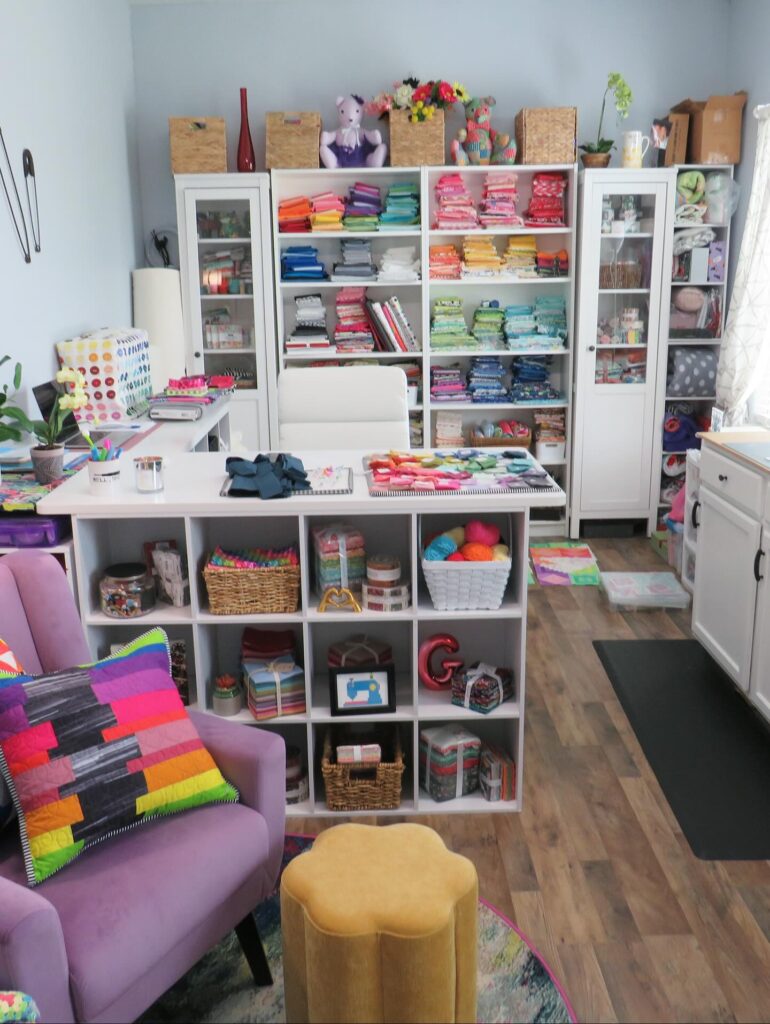
The rainbow shelving here does the actual work of an inventory system. When your fat quarters and folded yardage are grouped by color across a wall of open shelves, you stop buying that same coral print for the third time. You can see what you have.
A few things to make it work. Fold everything to roughly the same width so the stacks don’t lean — a comic book board or a piece of cardboard cut to size helps. Keep the tallest stacks at eye level, scraps and odd cuts up top in baskets like the woven ones above the cabinets.
One caveat: open shelves mean dust and sun fade. If your sewing room gets strong afternoon light, put your most-loved fabrics behind the glass-door section and let the everyday cottons live in the open.
Label your cube wall
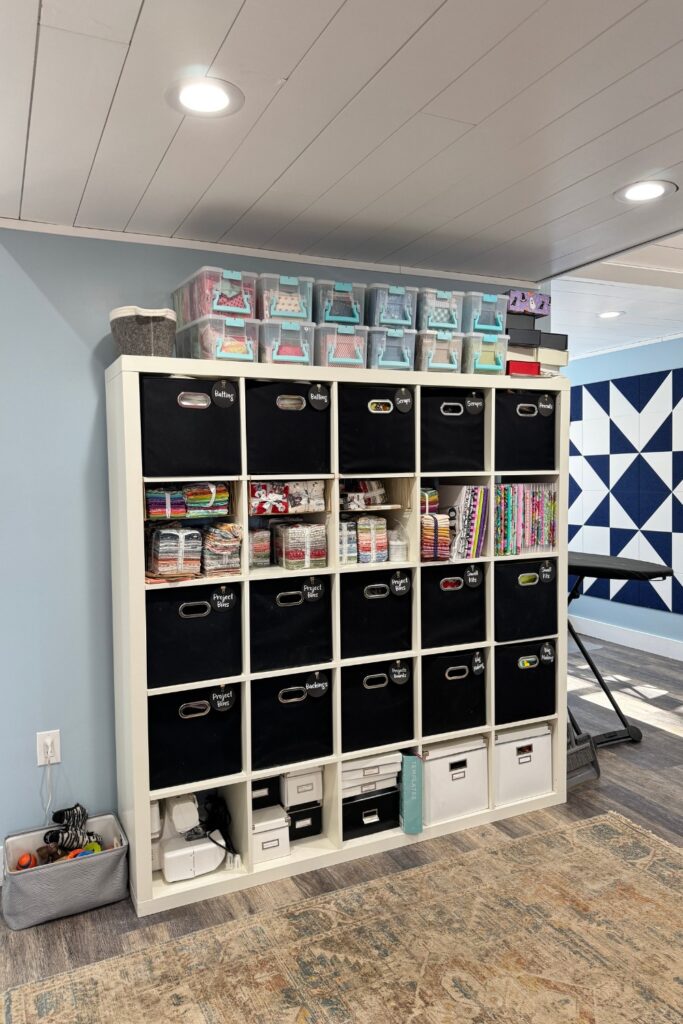
Those fabric bins only work if the labels do the sorting for you. Use one cube unit as the landing spot for broad categories like batting, scraps, project bins, kits, or backing, then keep the folded fabric in the open middle cubes where you can pull by color or print without digging through a deep tote.
The clear boxes on top are useful too. Put the things you buy in multiples up there, especially trims, precuts, or small cuts bundled by type, because you can see stock levels fast and stop overbuying. Very handy.
This setup suits anyone with a lot of fabric but not much closet space, since the whole wall starts doing storage duty. I would skip handwritten labels that are too small, though, because once every bin is black you need to read them from across the room.
Sorting Cardstock by Color Before Anything Else
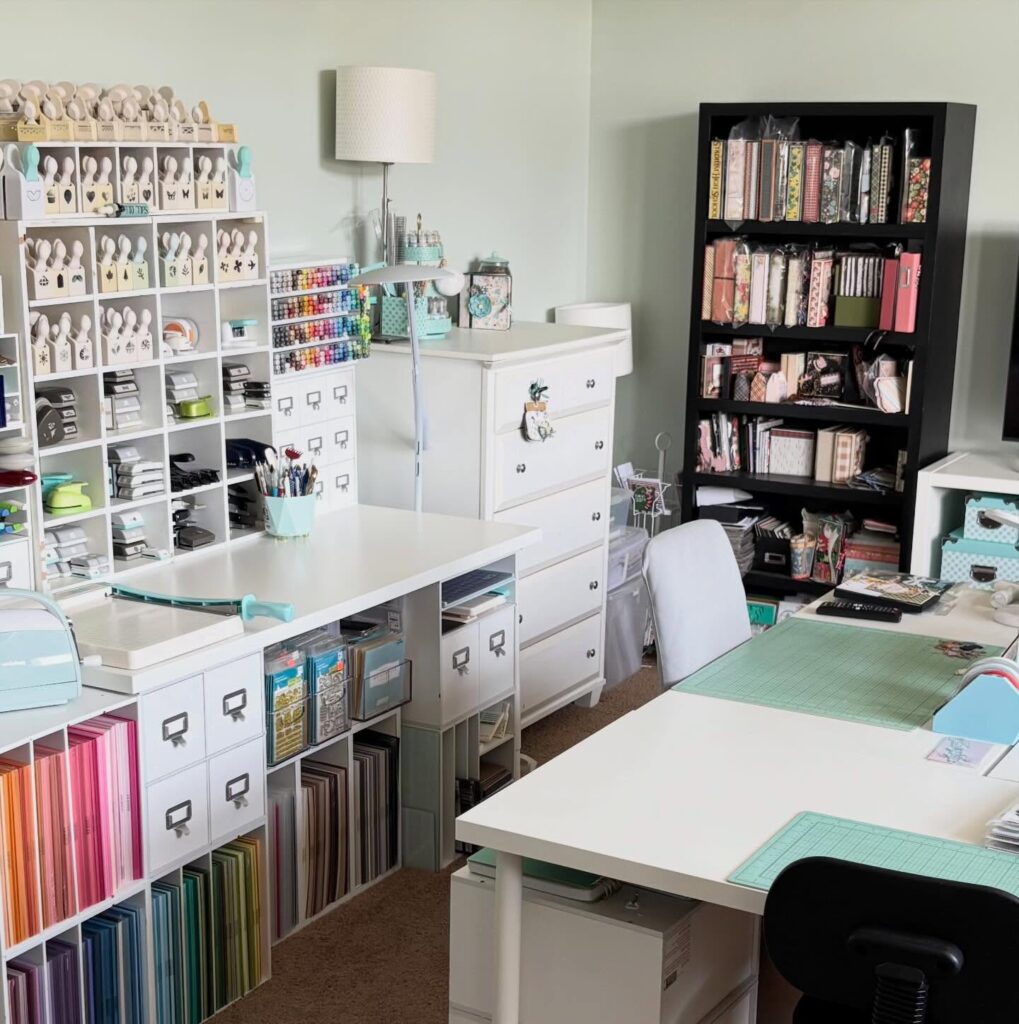
Those vertical slots along the bottom of the main unit are doing a lot of work — each one holds a different cardstock color, filed upright so you can flip through them the way you’d flip through record sleeves. The whole rainbow is visible in one glance, which means you stop digging through stacks mid-project. A cube shelf unit or even a row of magazine holders screwed to a low shelf can replicate this pretty closely.
What matters is keeping sheets vertical, not flat — flat stacks mean you’re always lifting the top half to find the color underneath. If you’ve got fewer than ten colors, this level of sorting is probably more effort than it’s worth, but once your collection grows past that, having each color in its own slot saves real time.
Use Cabinet Doors
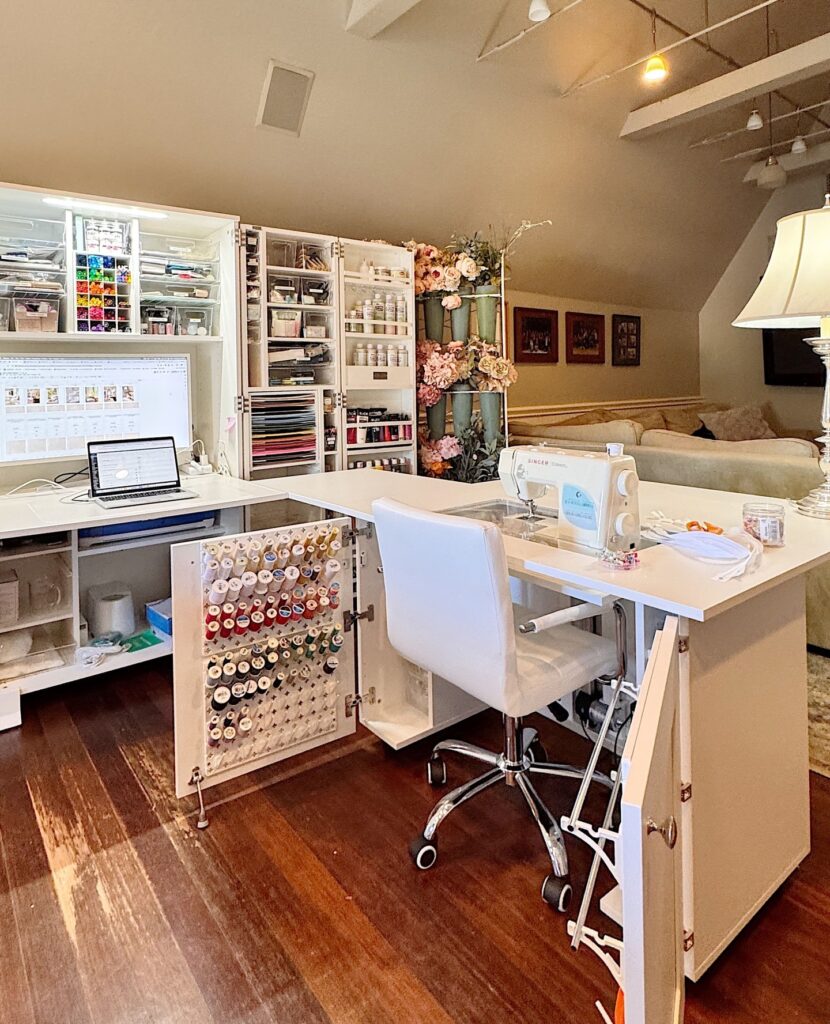
On the inside of the cabinet door, rows of thread spools are doing work that a drawer usually wastes. It saves drawer space. Use a pegboard insert or small dowels screwed into a panel, then place your most-used thread where your hand naturally reaches when sitting at the machine.
Label by color family or thread type if you switch projects often. The laptop shelf nearby also makes sense for patterns, invoices, or embroidery files, without stealing cutting space. I’d keep scissors and heavier tools off the door, though, because the weight can pull on the hinges over time.
Rolling Cart For Active Projects
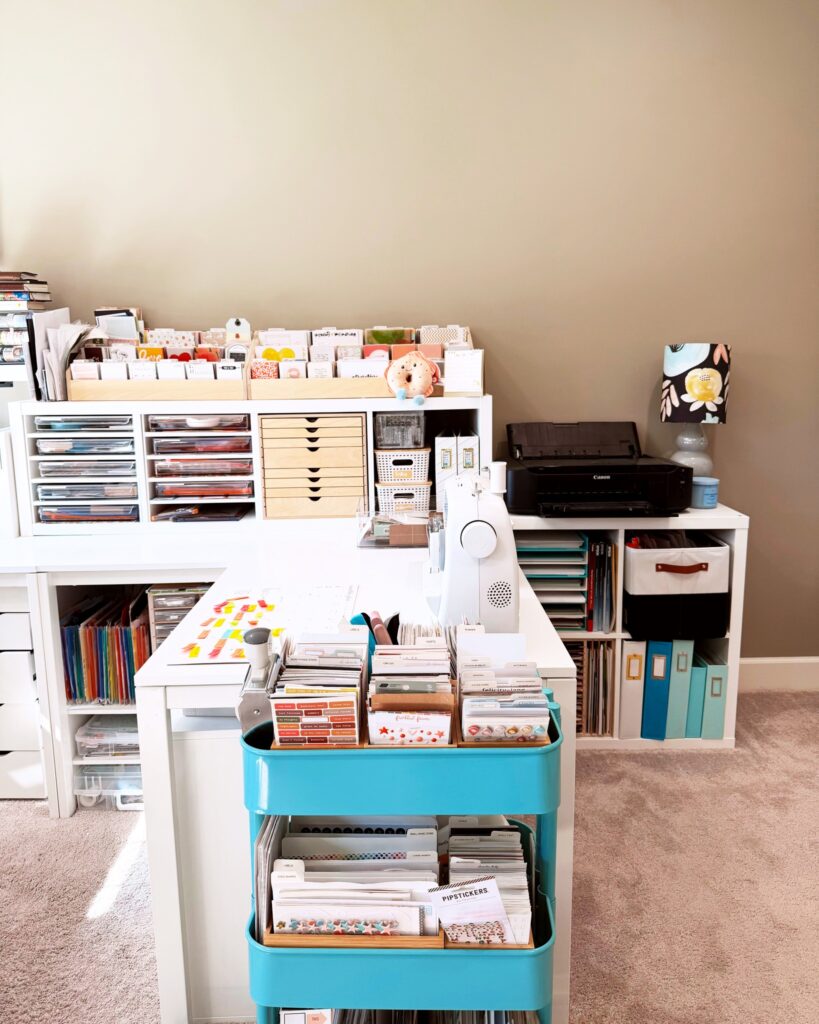
The turquoise cart parked at the end of the desk is doing the real work here. It holds the stuff you’re actually using this week — cards mid-assembly, sticker packs, envelopes — so your main desk stays clear for cutting and sewing. Three tiers is the sweet spot. Any more and the bottom shelf becomes a graveyard.
Roll it away when you need the floor space. Roll it back when you sit down. I’d skip the wire-basket versions if you store small items, because washi rolls and pins fall through the gaps. Solid sides, like this one, keep everything contained. Sort by project rather than by supply type, so grabbing the cart means grabbing everything you need for one thing at once.
Wall quilts as labels
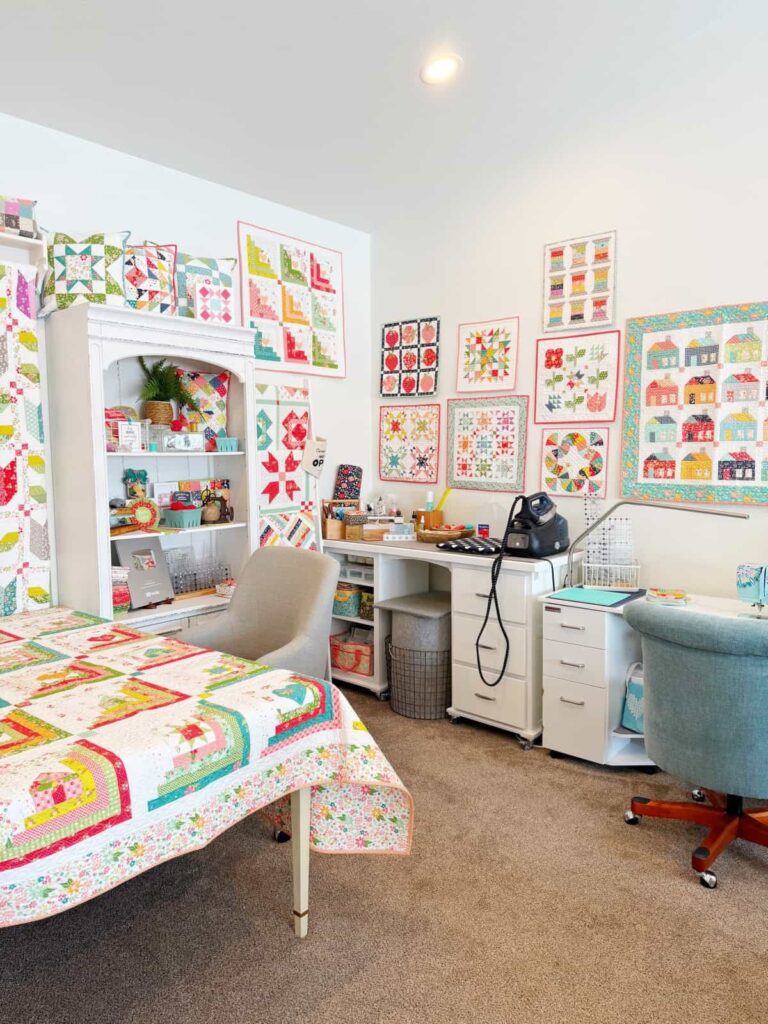
What works here is the wall doing half the storage job. Instead of stacking every sample, block pattern, or finished mini quilt in bins, frame or pin a few on the wall above the cutting table and desk so you can sort by project, color family, or technique and find things fast.
That part matters.
A long desk with drawers on one side and open cubbies below keeps the tools that get used every session within reach, while the bigger pieces stay visible and out of the way. If you sew quilts, this setup suits you more than deep cabinets because folded cottons and blocks disappear in those pretty quickly. I’d keep the small rolling basket tucked under the desk for rulers or batting scraps, but I’d skip overcrowding the shelves inside the alcove since display storage turns into dust storage fairly fast.
The All-White Everything Approach
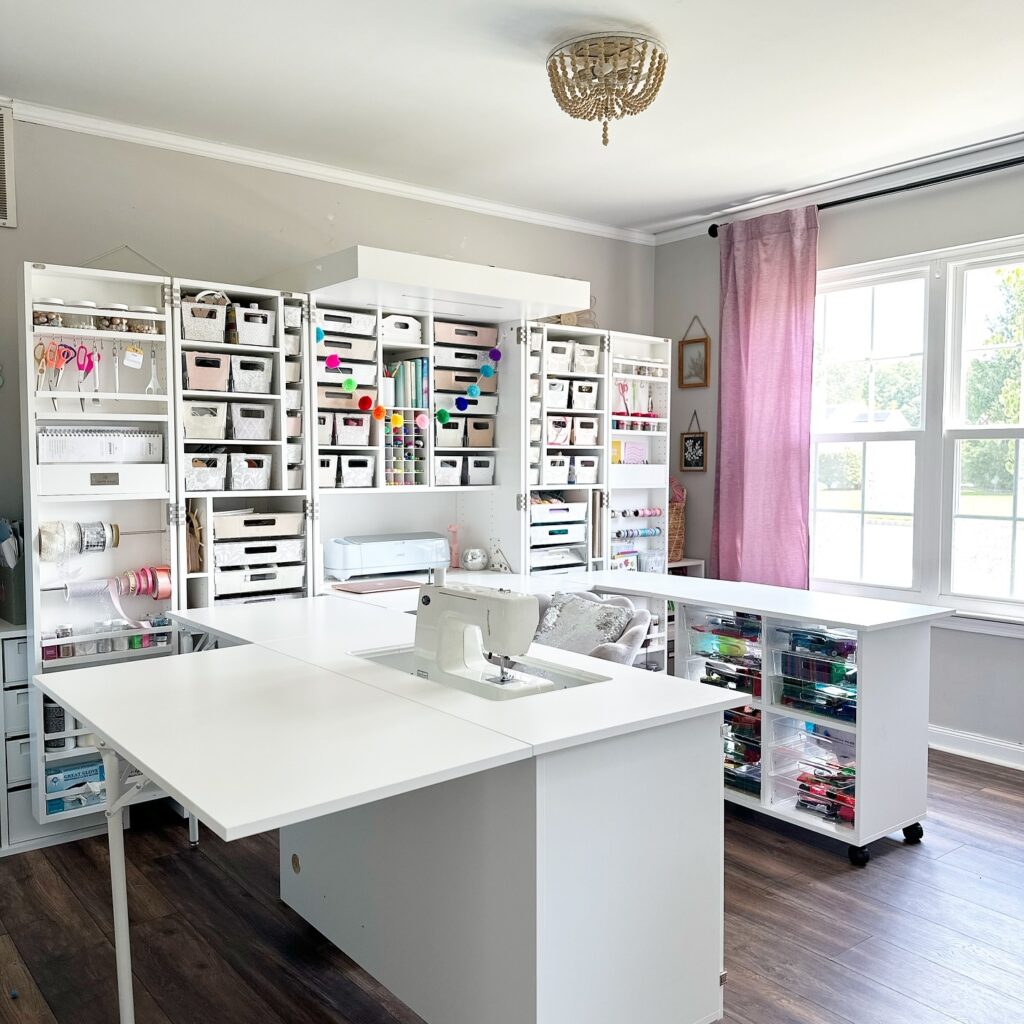
When every surface, shelf unit, and storage bin is the same white, your actual supplies become the only thing with color — which makes finding things faster than any labeling system would. The tall cabinet wall here works because the bins are uniform, so even though there’s a lot going on, nothing is competing visually. A sewing machine flush with the table surface is worth planning for early; retrofitting it later usually means cutting into a table you paid good money for.
The rolling cart on the right with clear drawers is the part I’d actually prioritize — grab-and-go access without opening anything. If full matching sets feel like too much budget at once, start with just the bins on one unit and expand from there.
Keep a project cart
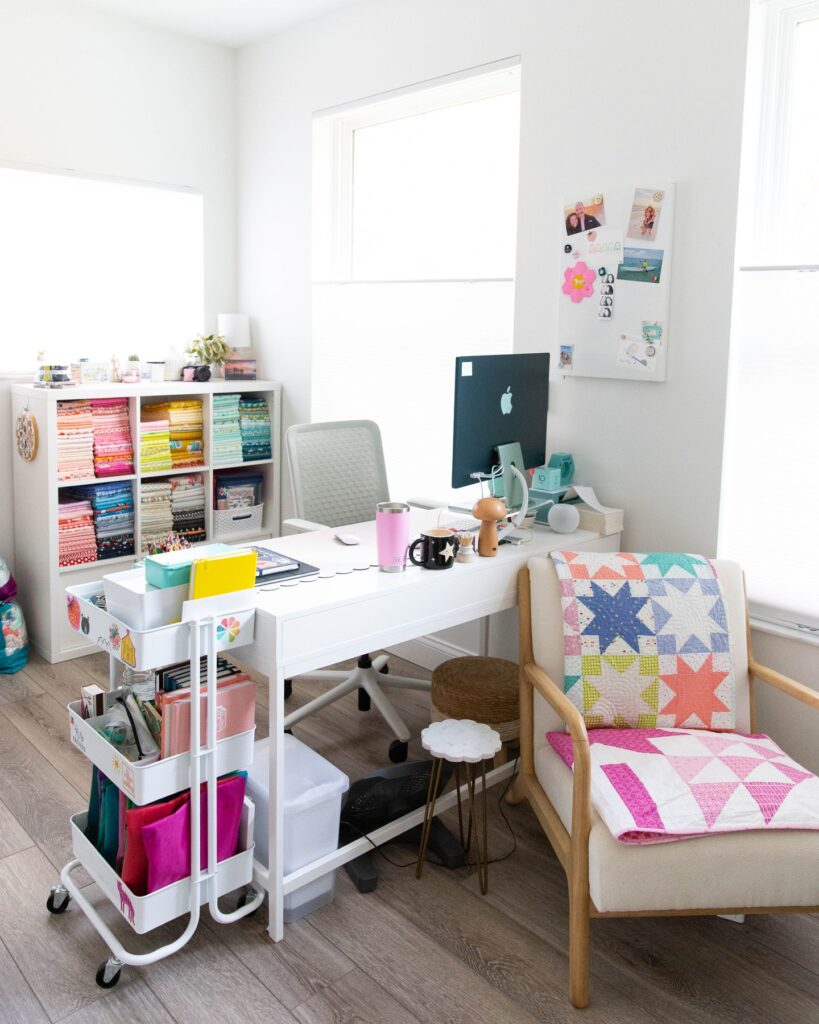
Right beside the desk, a rolling cart can hold the pieces you keep reaching for while sewing. Use the top tray for the current project, the middle one for scissors, clips, rulers, and bobbins, and the bottom for patterns or fabric pulls standing upright like the pink folders here. That matters.
When your fabric is already stacked by color in cubbies, the cart keeps half-used cuts from getting shoved back into the wrong pile. I would skip deep baskets for this setup because small tools disappear in them too quickly. Shallow trays make you put things back without thinking much.
Glass Front Cabinets For Fabric
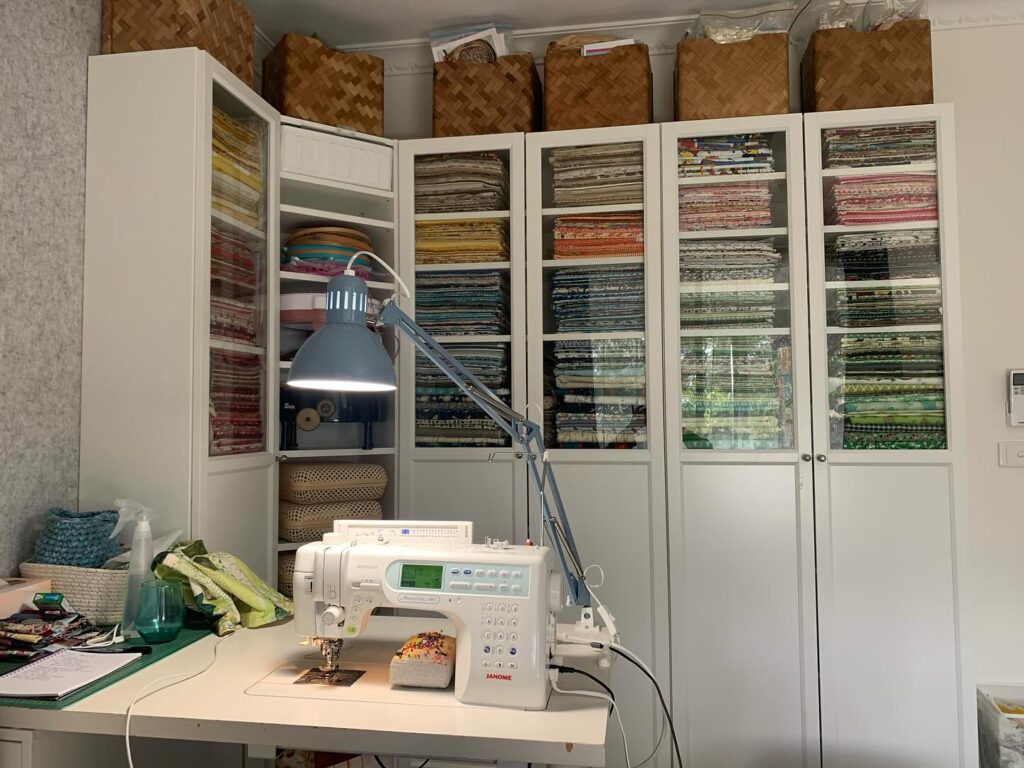
Sorting fabric by color behind glass doors turns your stash into the room’s reference chart. You can see what you have without pulling anything out, which is half the battle when you’re mid-project. The Ikea Billy with glass doors is what most people reach for here, and it works because the shelves sit close enough together to stack folded fabric without wasted vertical space.
A few things worth thinking about. Sunlight fades fabric, so keep these cabinets on a wall that doesn’t get direct afternoon light. The woven baskets on top are fine for scraps or wadding, but I’d skip storing anything you actually reach for up there. Too high, too much of a stretch. Fold your fabric to a consistent width — a comic book board helps — or the color-sorted look falls apart fast.
Wall unit work zone
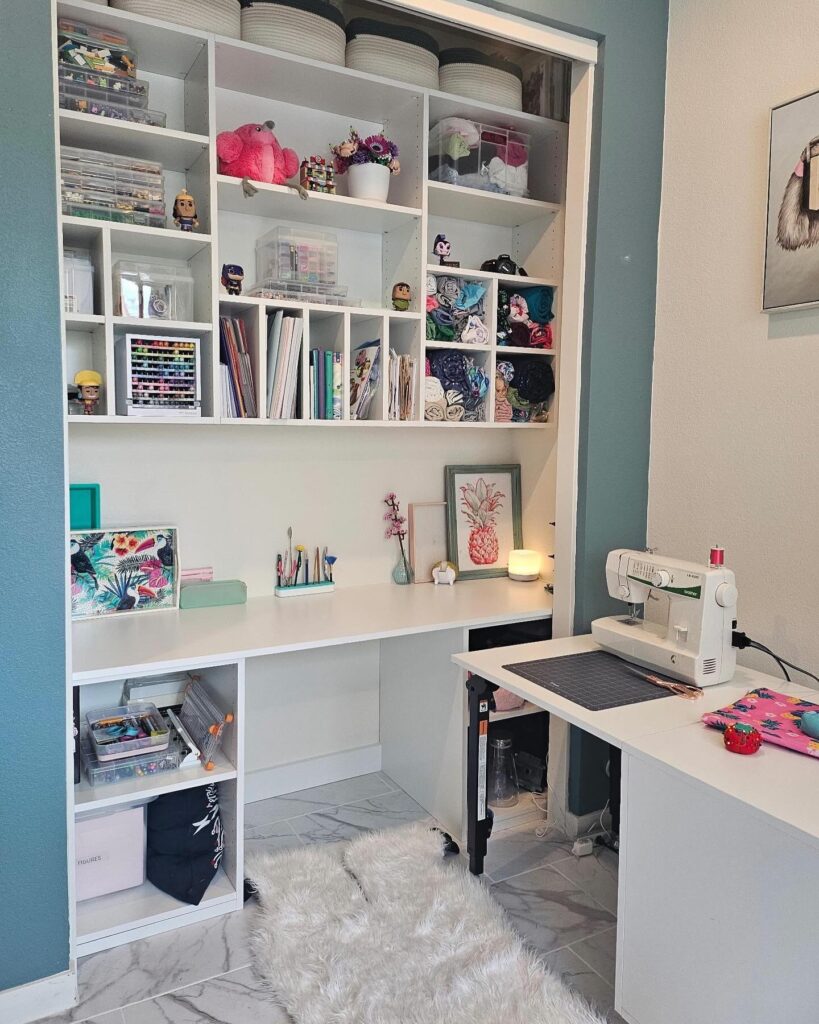
Built-in shelving over a long desk works best when you stop treating every cubby the same. Use the narrow squares for upright papers, pattern envelopes, and cutting mats, then keep the larger openings for clear bins of fabric, trims, or works-in-progress so you can pull one thing out without disturbing the rest.
The clear boxes matter here. You can stack notions, thread, and small tools by category, and because you can see through them, you spend less time opening five containers to find one zipper.
Leave the desktop mostly open. That part is important.
A setup like this suits anyone sewing in a spare room corner, especially if your machine sits on a separate table and the wall desk is doing the prep work. I’d skip the decorative bits right in the middle if space is tight, because that surface fills up fast.
Pegboard on a Rolling Cart
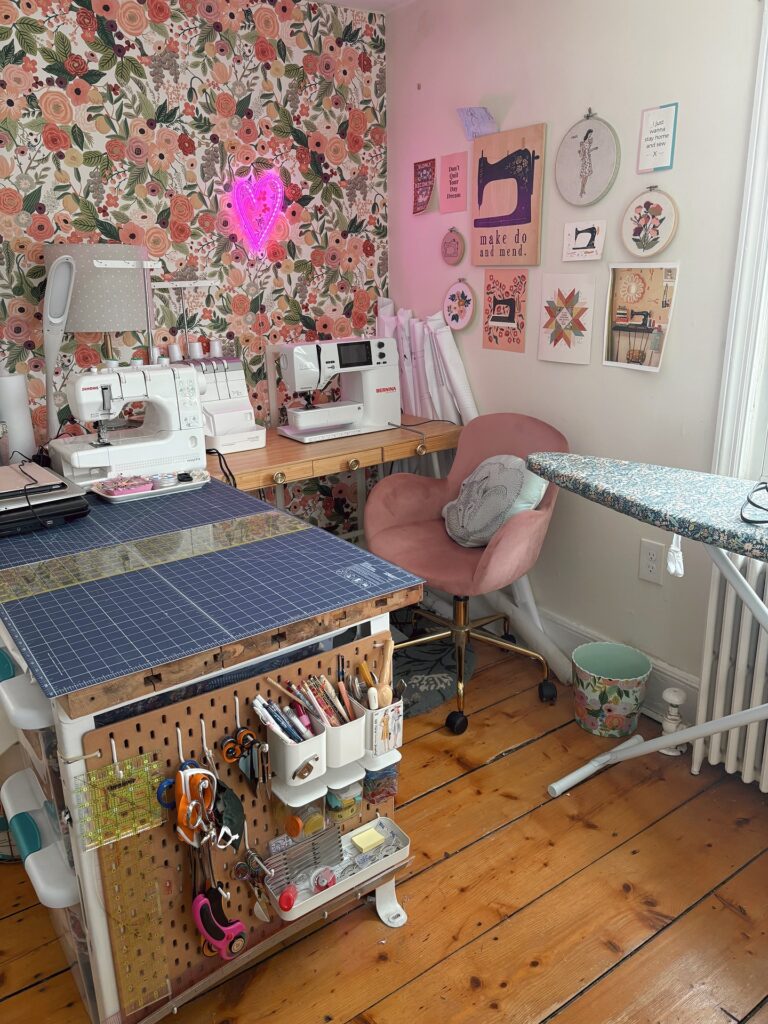
Attaching a pegboard panel to the side of a cutting table on wheels means your scissors, rulers, and rotary cutters travel with the work surface instead of staying behind on a wall. The orange-handled scissors and the white cup holders here are mounted low enough to grab without looking. Wheels matter more than people give them credit for — a cutting table you can’t reposition just becomes a permanent obstacle.
If your room is small, a single pegboard side is plenty; you don’t need four. The main thing is keeping the hooks and cups fitted tightly so nothing rattles loose mid-roll. Heavy tools like seam rippers and unpickers do fine on hooks, but thread should probably stay elsewhere — spools tend to snag.
Pegboard Thread Wall
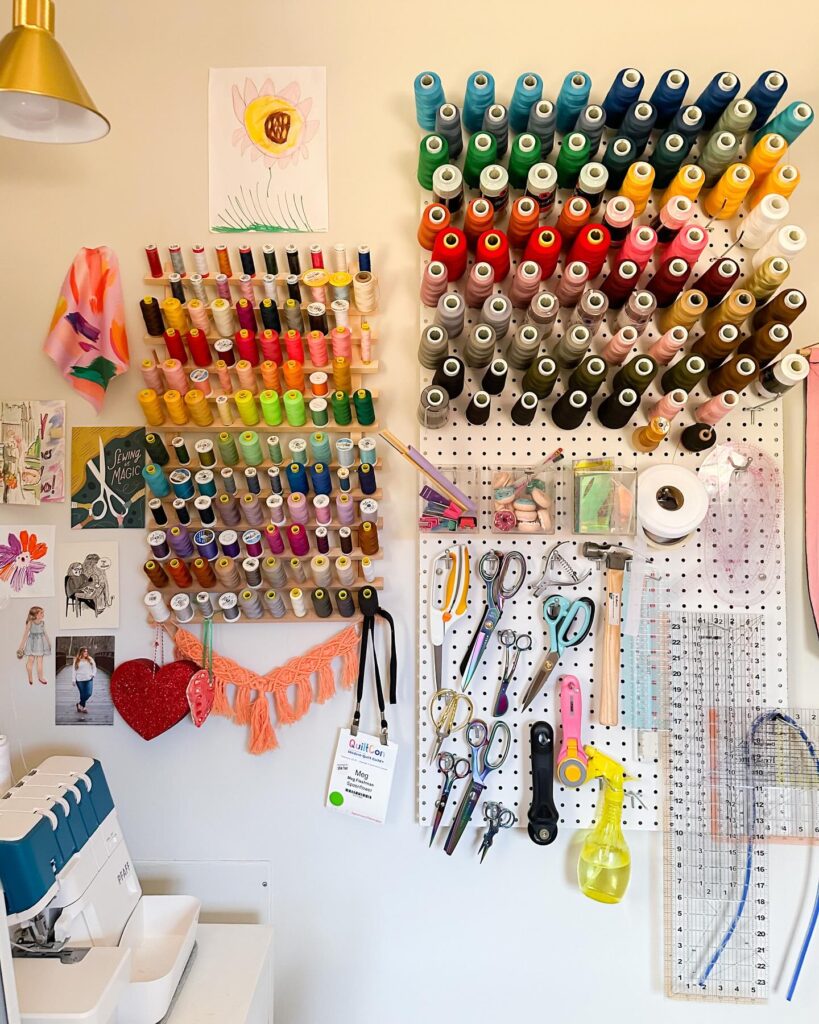
Start with the thread, because that is what usually takes over a sewing table first. A pegboard with long spool pegs lets you sort colors in rows, so you can see the exact red or green without digging through a plastic box. Keep the tools below it, like the scissors, rotary cutter, measuring tape, and small pliers, so the things you grab mid-project stay at hand.
Easy to reach. If you use large cones and small spools together, give the cones the top section and keep the smaller ones on a separate rack, or they’ll get hidden behind each other. I would skip hanging too many decorations here, honestly, because this wall works best when it stays useful.
Two Machines, One Small Desk
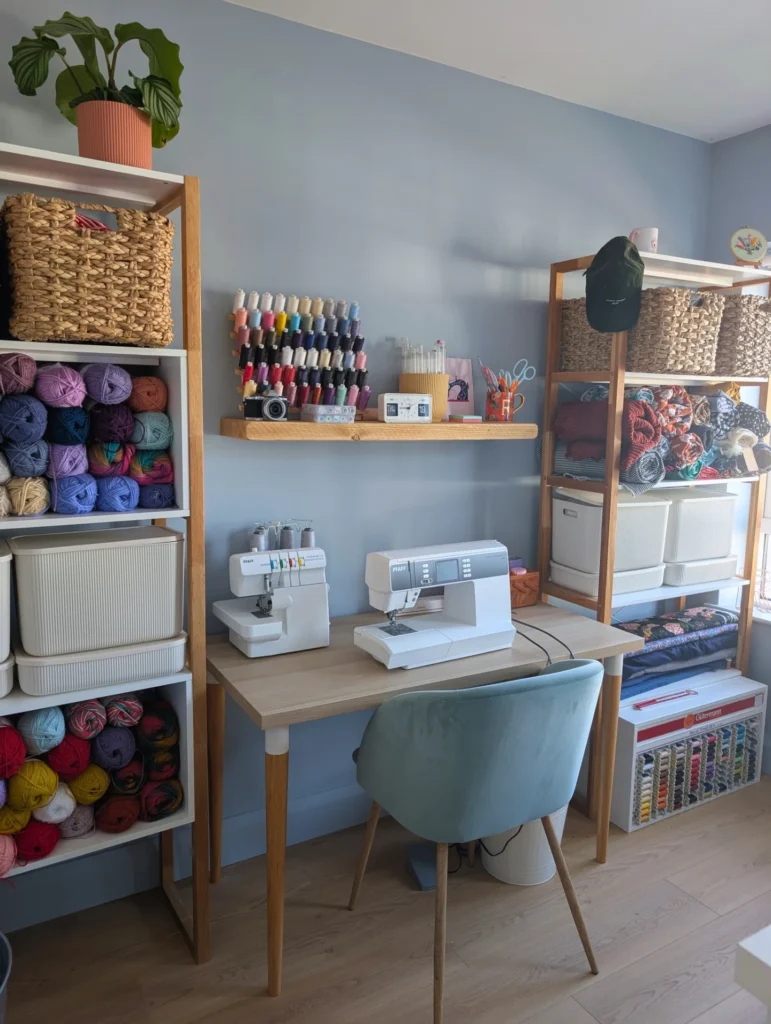
Running a sewing machine and an overlocker side by side on one narrow desk is the move if you sew garments regularly. You stop rethreading. You stop shuffling one machine off the table every time you need to finish a seam.
The desk here is barely wider than the two machines combined, and it works because everything else lives on the shelves around it — thread spools mounted vertically on the wall, scissors and pens in a mug, bobbins in a small tray. Nothing competes for surface space.
One thing I’d change: that velvet chair looks great but velvet and loose thread are not friends. You’ll be picking fibres off it constantly. A wipeable seat, even a plain wooden one with a cushion you can shake out, saves you the fuss.
Make the table work harder
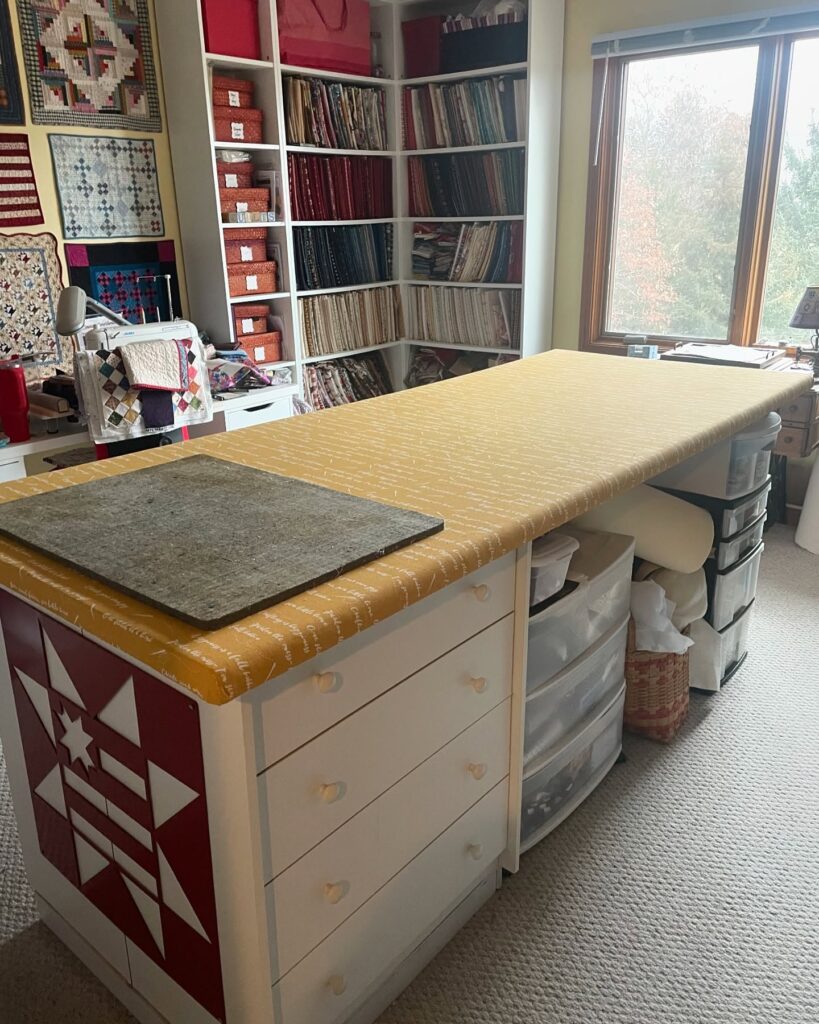
Start with the base, not the tabletop. A long cutting table like this only earns its floor space if the drawers on one side and the open cubbies on the other are doing different jobs, so keep tools in the drawers and bulkier supplies in pull-out bins underneath. That split matters more than people think. You don’t want to bend down for rotary cutters, rulers, or marking pens every time, but batting scraps, interfacing, and bagged projects can live below without slowing you down much.
The fabric wall helps too. Sort yardage by color depth or fabric type and keep the small handled boxes for trims, binding, or half-finished blocks. One caveat: I’d skip opaque bins if you forget what’s inside them, because then the whole setup turns into rummaging.
