25 Simple Halloween Decor Ideas
This site contains affiliate links. We may earn a small commission, at no extra cost to you. Article may contain some images for illustrative purposes only .
The plastic skeleton on my porch has been wearing the same crooked witch hat for three Halloweens now, and honestly, he’s earned his tenure. But this year, he needs backup. Something more than a lonely bag of cobwebs stretched across the mailbox. The good news? You don’t need a Michaels shopping spree or a Pinterest-perfect budget to make your house feel genuinely haunted. Ahead, 25 simple Halloween decor ideas—everything from floating ghost mason jars and dollar-store pumpkin topiaries to a five-minute “witch’s pantry” you can throw together with jars already collecting dust in your cabinet.
The Soft Pink Pumpkin Swap
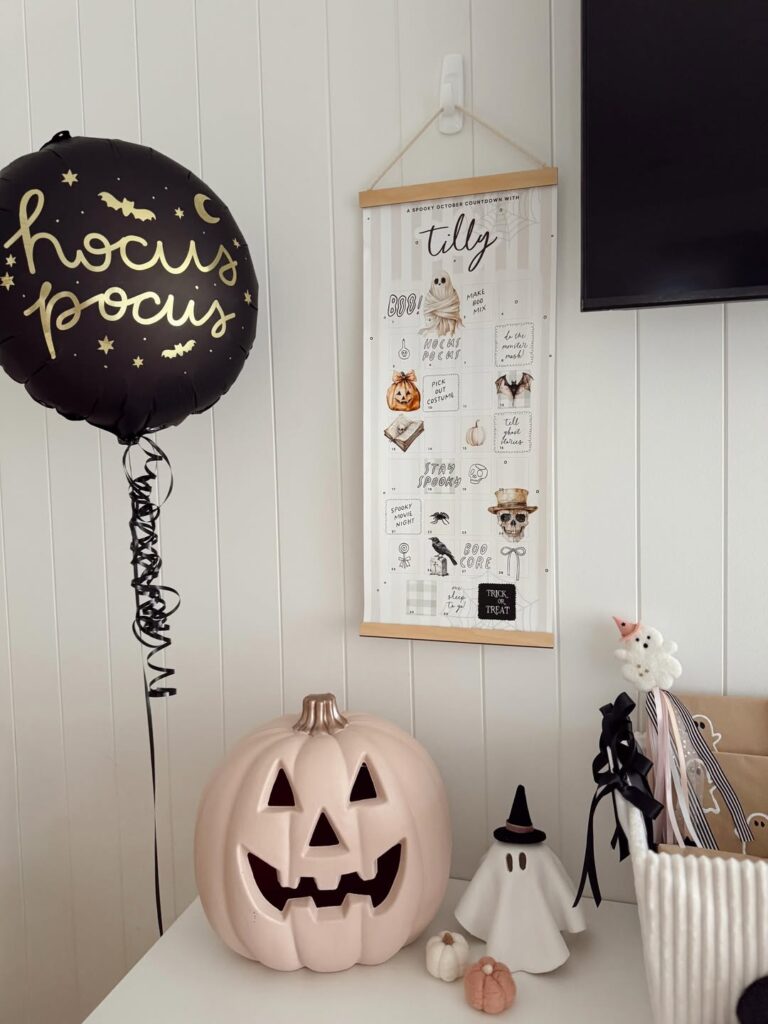
Skipping orange entirely is what makes this setup read differently to most Halloween displays. The blush ceramic jack-o’-lantern does most of the work — it pulls the whole thing away from the usual Halloween colour story without you having to think too hard about the rest. Pair it with a white ghost figurine and some small velvet pumpkins in the same dusty pink range and the palette holds itself together.
Black ribbon is worth keeping somewhere in the mix, like the bow on the ghost here, otherwise it can drift too far into just looking like general autumn stuff. Worth noting: ceramic pumpkins like this one chip easily on hard surfaces, so if it’s going on a shelf with kids around, maybe anchor it a little further back.
Shelf Mug Details
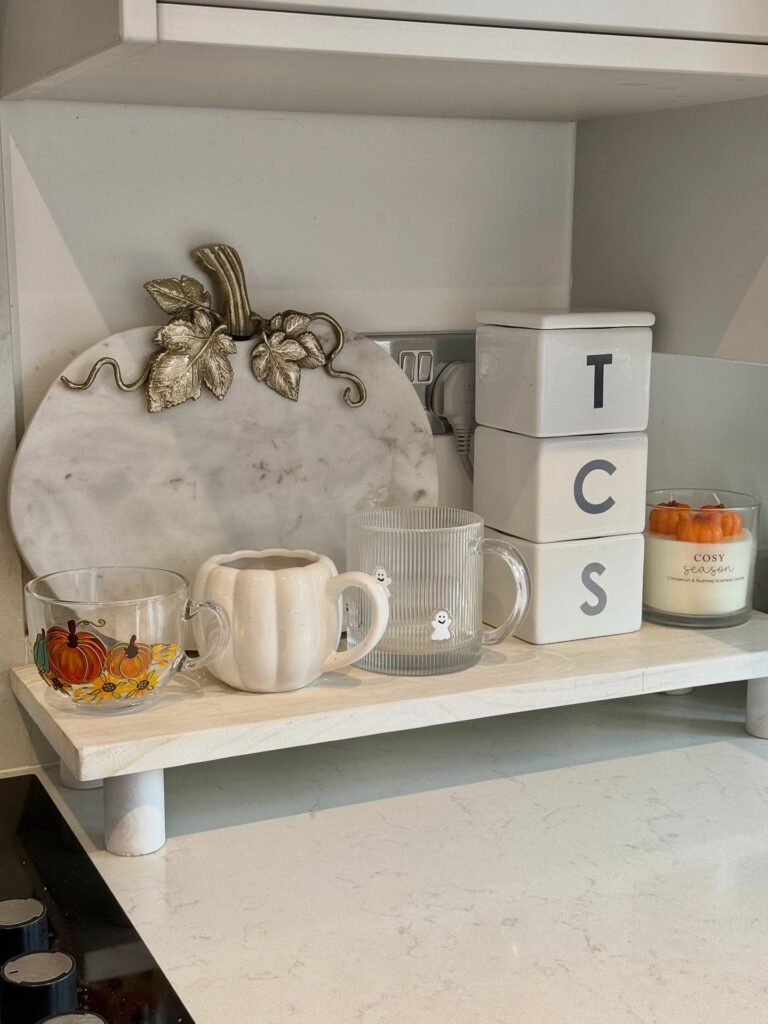
On a kitchen shelf, keep the Halloween bits small so they don’t fight with your everyday tea jars. That’s enough. A pumpkin-shaped creamer beside a ribbed glass mug with two tiny ghost decals gives the whole corner a seasonal note without moving the canisters or the chopping board.
Use one orange piece, one ghost detail, and leave the rest pale. The marble pumpkin board at the back works because it is tall, so it fills the empty wall socket area without adding another item to the counter. I’d skip burning the candle here if this shelf sits above a hob, because the glass will collect grease fast.
A Pumpkin On The Hearth
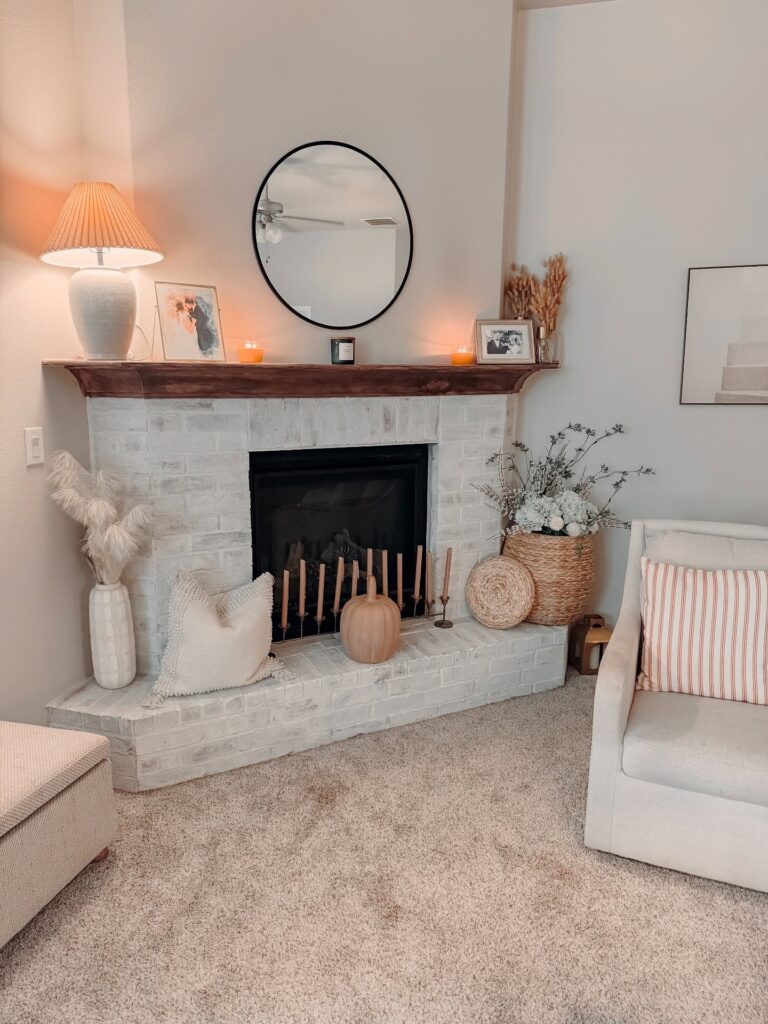
One matte pumpkin sitting on the brick, next to the taper candles. That’s the whole move. The pumpkin here looks ceramic, in a muted peachy tone that doesn’t fight the neutral room, and it works because nothing else on the hearth is trying to be Halloween.
If you already have a mantel you like, resist the urge to swap things out. Just add one object. A single pumpkin in a color close to what you already own reads as seasonal without looking like a display.
I’d skip the orange plastic versions for this kind of setup — they pull too much attention. Faux is fine, real is better if you’ll actually change it out before it caves in. Good for people who don’t want to store bins of decor.
Bedside autumn touch
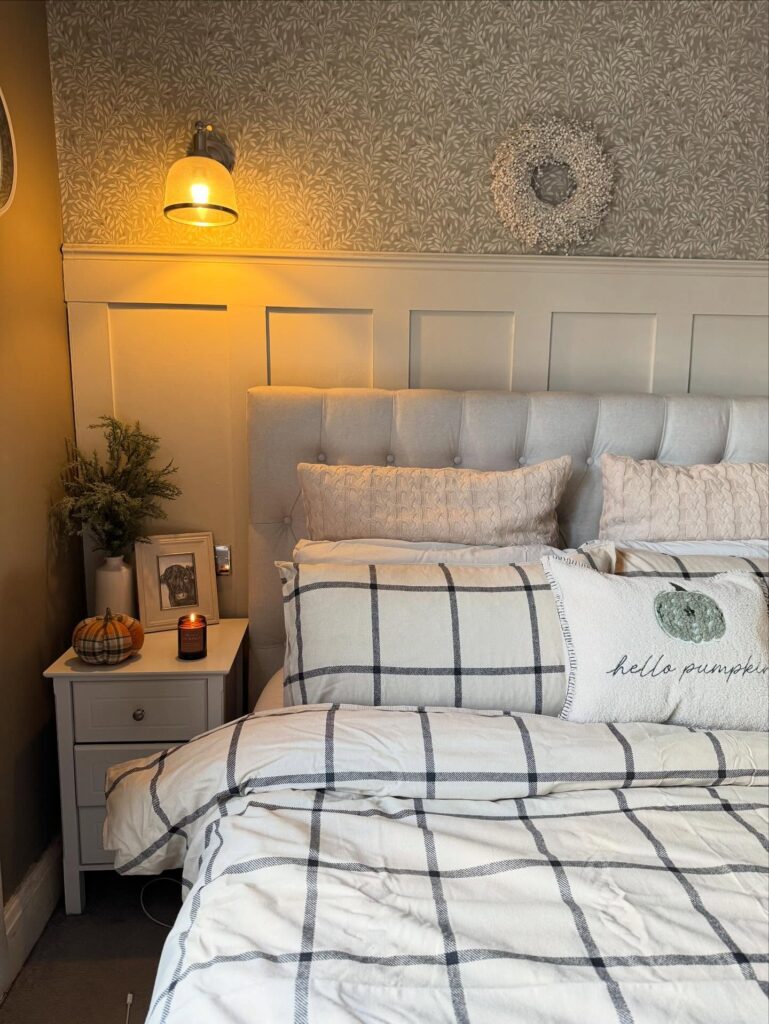
Start with the nightstand. A small pumpkin and one candle are enough here, because the bed already has a lot going on with the checked bedding and extra cushions, and adding more Halloween bits would make this corner feel busy fast.
The little “hello pumpkin” pillow does most of the seasonal work. If you already own neutral bedding, swap in one small themed cushion instead of a full orange duvet set, which is usually more money than it’s worth for a few weeks in October.
Keep the colours quiet. Cream, soft grey, muted green.
That works well if you want Halloween decor that still fits a main bedroom and doesn’t feel like it belongs in the living room with the kids’ stuff. I’d probably skip a strongly scented candle by the bed though, especially in a smaller room.
Pumpkins on a Fireplace Hearth
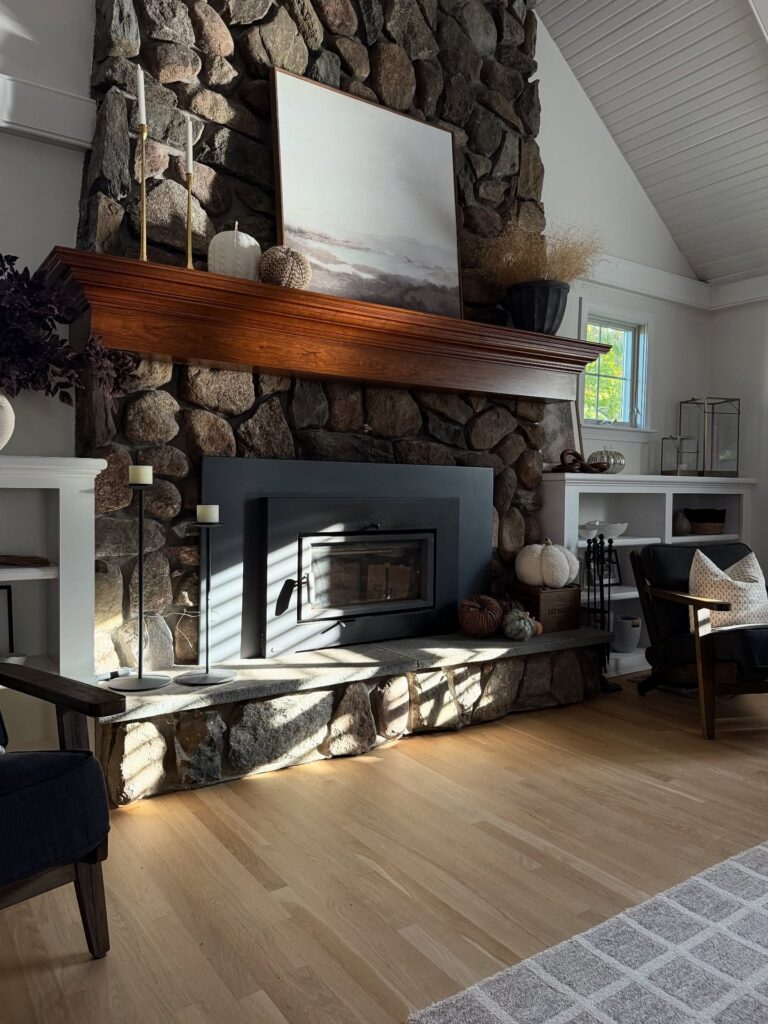
The raised stone hearth here is doing most of the work — a few white and green pumpkins clustered near the firebox opening, no arrangement required beyond setting them down. White and sage pumpkins read more “late fall” than Halloween, which means they stay useful longer. If your hearth is flat and low, grouping three different sizes stops it from looking like you just forgot to put them away.
The mantel above has a dried grass arrangement in a dark pot, and that’s worth copying — dried stems from a craft store cost almost nothing and they fill vertical space without competing with the pumpkins below. Skip the orange ones if the rest of your room is already warm-toned. They tend to disappear.
Ghosts on the table
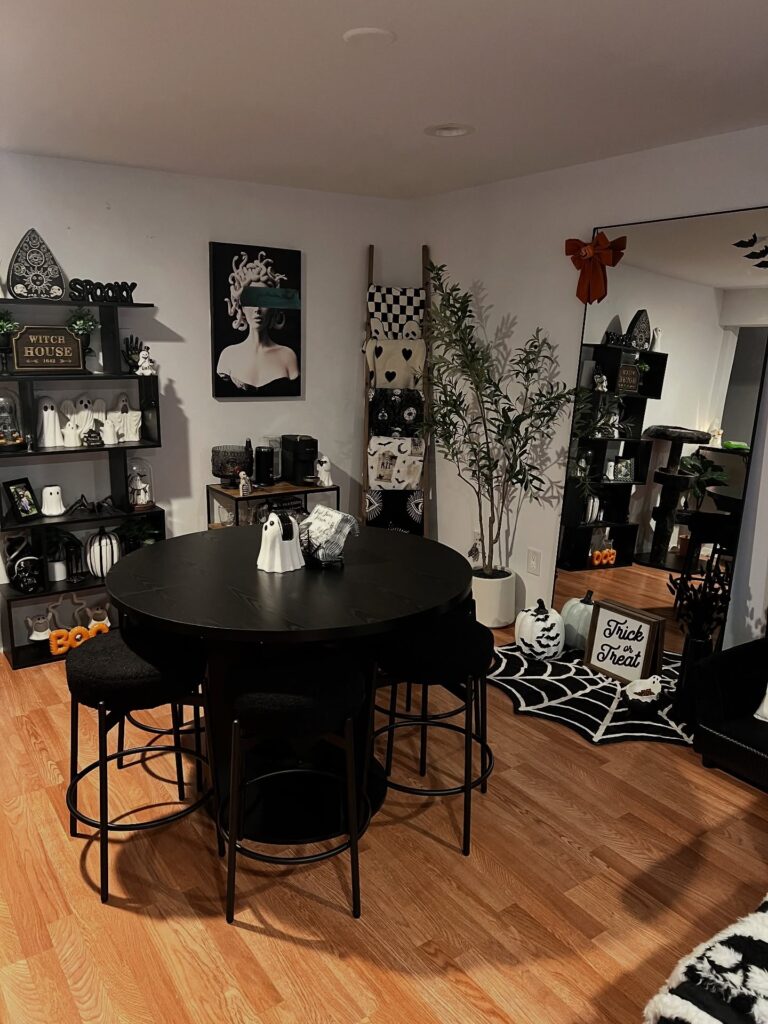
With a round black table, the Halloween pieces do not need much height. Keep them low. A couple of white ghost figures in the middle are enough, especially when shelves behind them already carry pumpkins, skulls, and signs.
This works well for small dining corners or apartments. If you want the same look, use one tray or cake stand so the decorations can move when you need the table for food. The spiderweb rug nearby helps.
I would skip tall candles here, because they can block faces across the table and make the whole setup more annoying than useful.
Suspended Witch Hats
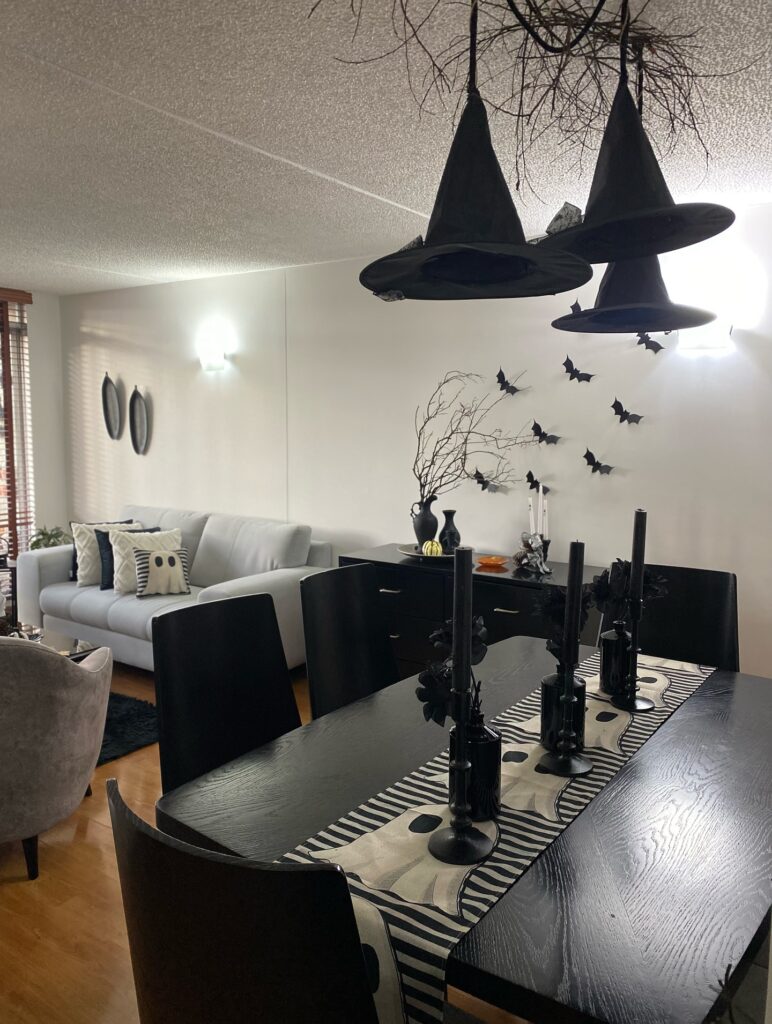
The three black hats hanging over the dining table are the whole trick here. Fishing line, a few pushpins into the ceiling, done. You want them at slightly different heights so it looks like the witches are mid-descent, not lined up for a photo.
Felt hats from any party store work, but the ones in this picture have twigs poking out the top, which is what sells it. Add that yourself with a hot glue gun and a handful of branches from the yard.
One thing I’d change. Hanging them directly over where people eat means someone’s going to knock into a brim reaching for the salt. Push them toward the center of the table, or over an entryway instead. The bats climbing the wall behind carry the theme so the hats don’t have to do everything.
Halloween lamp shade
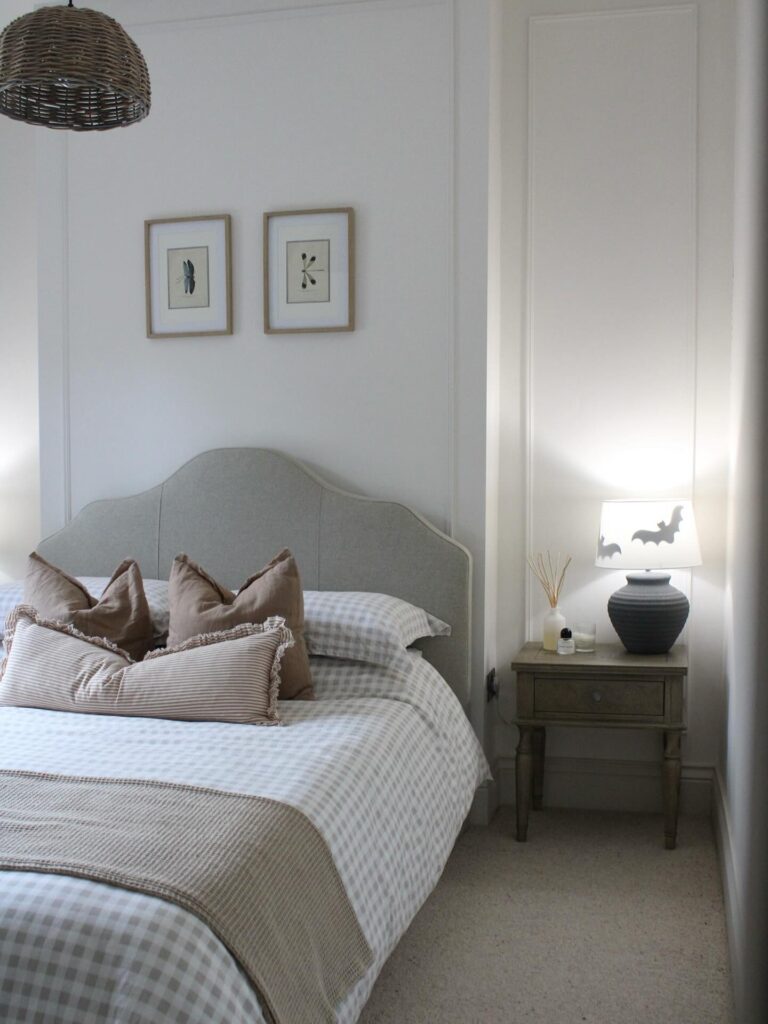
Start with the lamp, because that is doing most of the Halloween work here. A plain white shade with black bat cutouts gives you something seasonal without dragging the whole bedroom into party-store territory, and the glow behind the shapes makes them show up much better at night than stickers on a wall would.
Keep the rest quiet. The brown pillows, pale checked bedding, and woven pendant already have enough texture, so one themed lampshade feels deliberate instead of scattered.
This suits people who want a nod to Halloween in a bedroom, guest room, or even a hallway table. If you want to copy it, use removable vinyl bats or a printed shade cover rather than painting a shade freehand. Much easier. I’d skip adding fake cobwebs here since they would catch on the lamp, collect dust, and ruin the clean look.
Layer the doormat and welcome sign
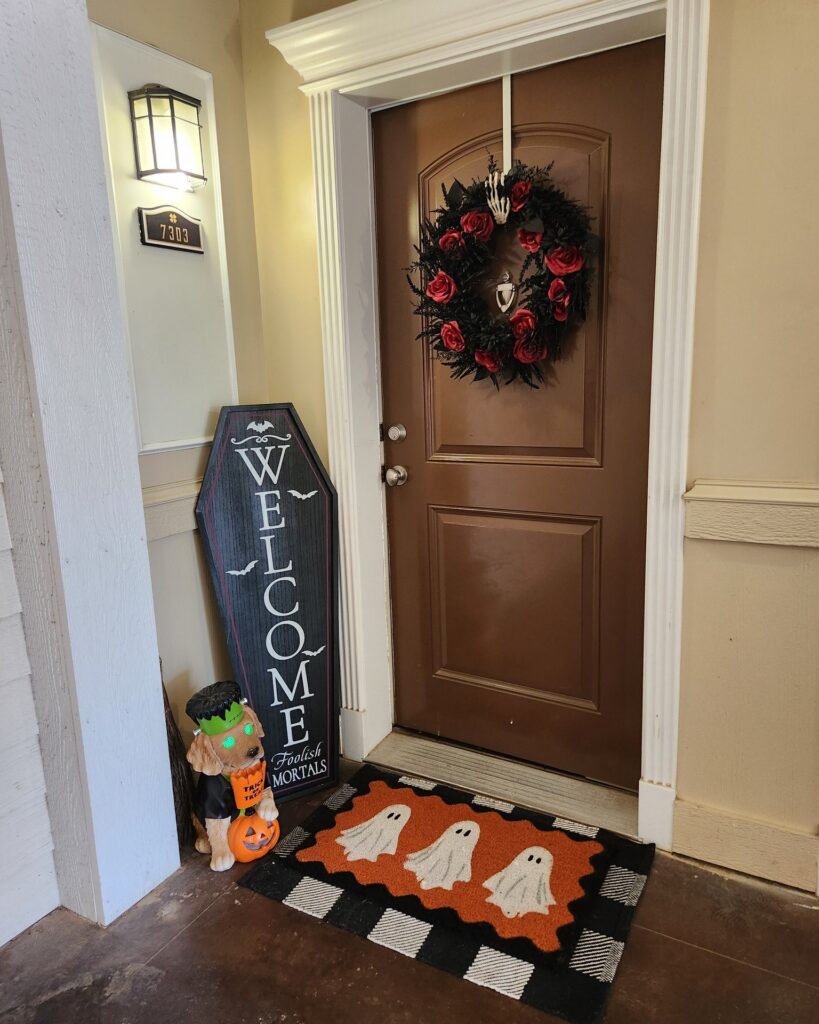
Two rugs stacked — the black and white buffalo check underneath, the ghost print on top — read as one unit rather than an afterthought. The coffin-shaped “Welcome Foolish Mortals” sign leaning against the door frame does a lot without being mounted anywhere, which matters if you’re renting. Both pieces are findable at Target or HomeGoods around early October, and they sell out fast so don’t wait.
I’d skip the ceramic dog figurine personally; it pulls focus without adding much. The wreath with the skeleton hand is the real anchor of this whole setup, so if you’re going to spend money on one thing, let it be that.
Ghost garland shelf
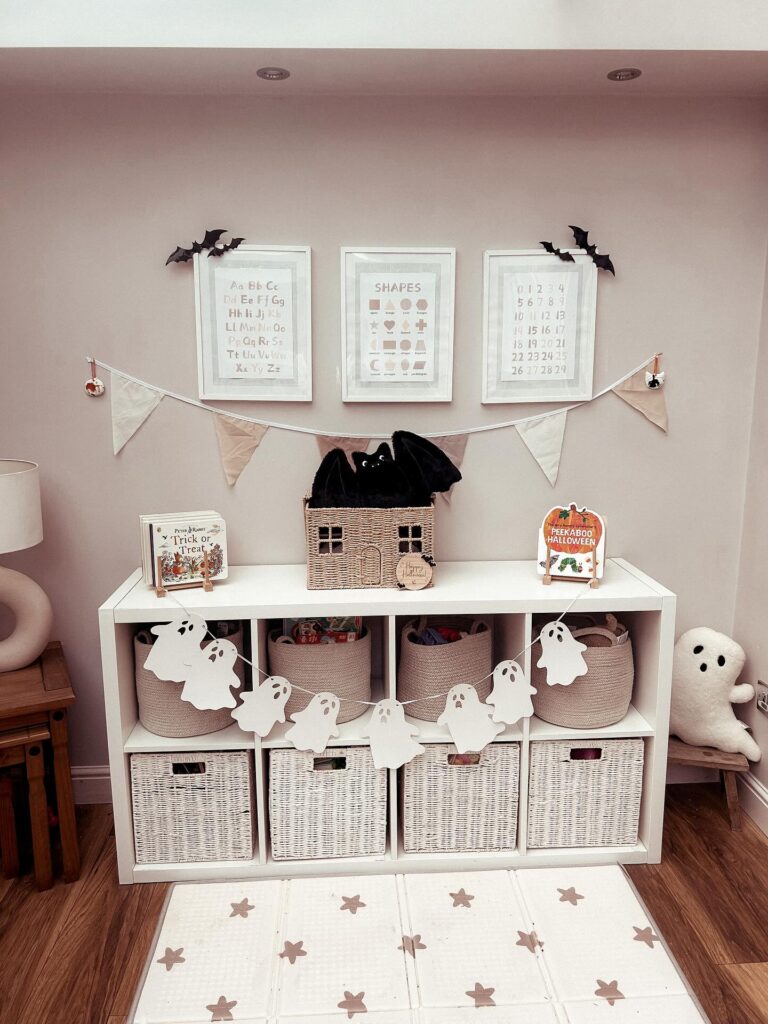
Across a low cube shelf, hang a paper ghost garland where kids can see it but not pull every piece down. Use tape, not pins. The best part here is how the ghosts sit in front of toy baskets, so you do not need to clear the whole shelf before decorating.
Leave the books out. A small Halloween book on a stand does half the job, and a stuffed bat in a wicker basket gives you one bigger shape in the middle. I would skip extra loose bats near the frames.
They start to look like clutter fast.
The Cauldron Centerpiece
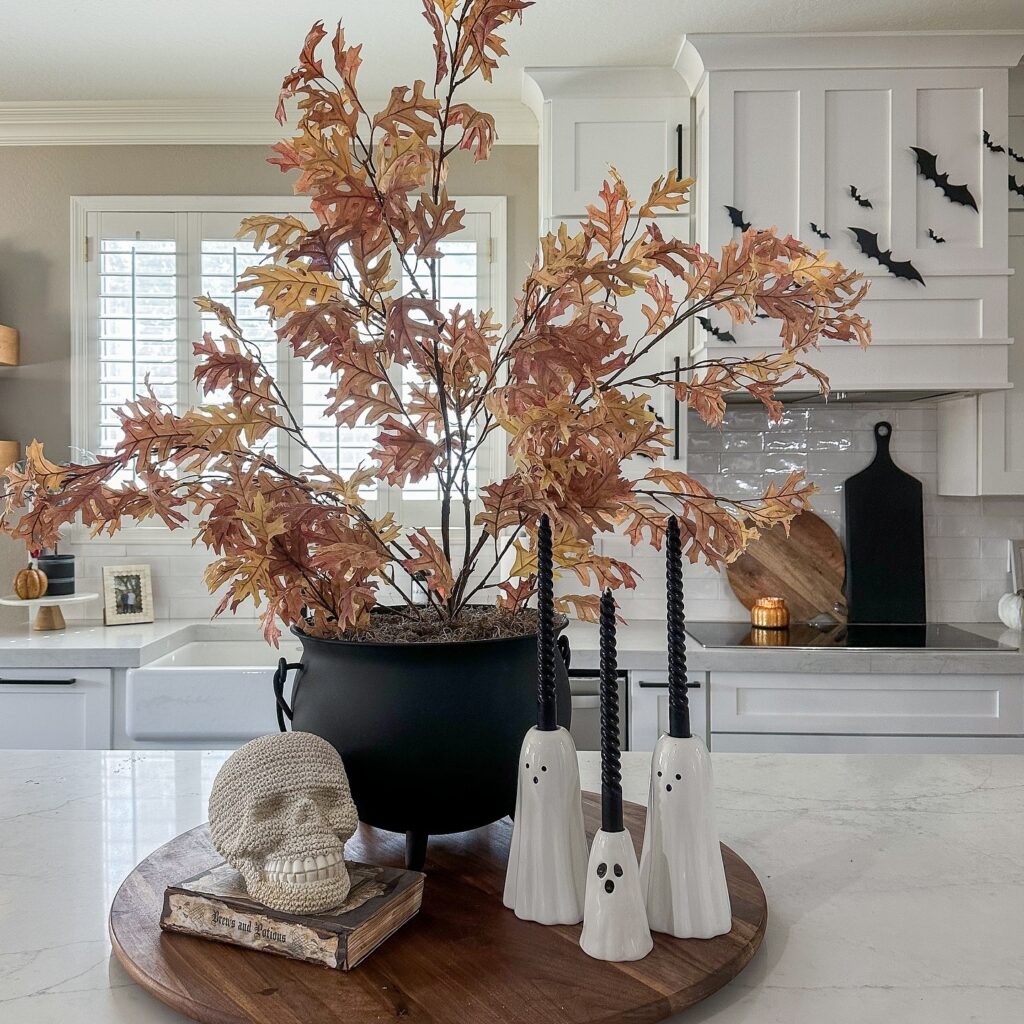
A black cauldron holding oak branches does more work than any store-bought Halloween arrangement. The branches here are faux, which I’d stick with — real ones drop leaves everywhere within a week. Pair it with something small and strange in front. Ghost candlesticks, a skull on a battered book, whatever you have. The wooden riser underneath pulls the whole grouping together so it reads as one thing instead of scattered objects.
If you don’t own a cauldron, a black stockpot works. Really. Fill the base with floral foam and moss to hide the mechanics. The branches should tower — short arrangements look apologetic on a kitchen island this size. One thing I’d change: three ghost candlesticks feels crowded next to the skull. Two ghosts, or move the skull to the other side of the island entirely.
Ghost rug in the bathroom
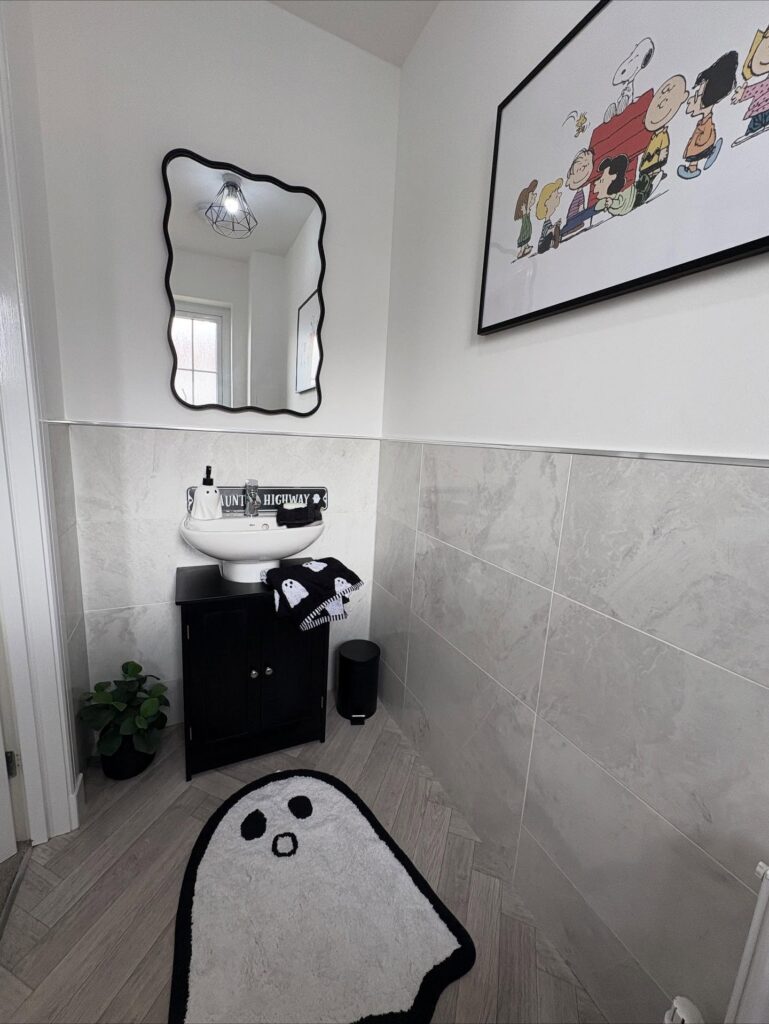
Start with the floor. A ghost bath mat does most of the work here because it lands in a place people don’t expect Halloween decor, and that surprise is half the point. Keep the rest tight: a black vanity, a small black bin, and one hand towel with a matching ghost print are enough to make it feel deliberate instead of thrown in last minute.
The black wavy mirror helps too, especially in a narrow bathroom where one odd shape breaks up all the straight tile lines without taking up any room at all. If you don’t want to buy seasonal pieces, just swap in a white mat with a black border and add one small ghost accessory by the sink.
I’d skip anything orange here. It would fight the black, white and grey setup.
Crow Takeover on a Sideboard
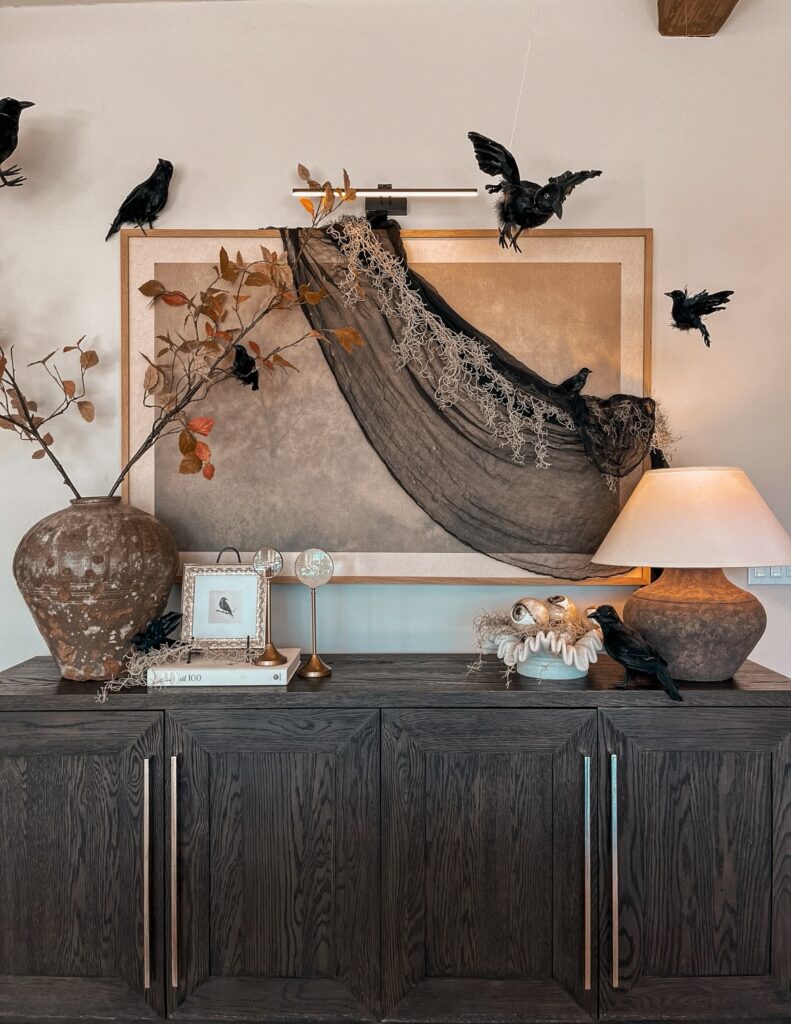
Fake crows are doing a lot of work here. A length of dark cheesecloth draped across a large framed print, a few black bird figures scattered on the sideboard, and then three or four more mounted on the wall mid-flight — that layering up the vertical space is what makes it feel like an actual scene rather than a shelf with some Halloween stuff on it. The existing earthy vases and lamp aren’t swapped out, the crows just land around them.
If you don’t have a big print to drape fabric across, a plain wall works too, especially with a picture rail or some removable adhesive strips to hang the flying ones at different heights. Most craft stores sell these birds in multipacks around October.
Dresser Halloween Corner
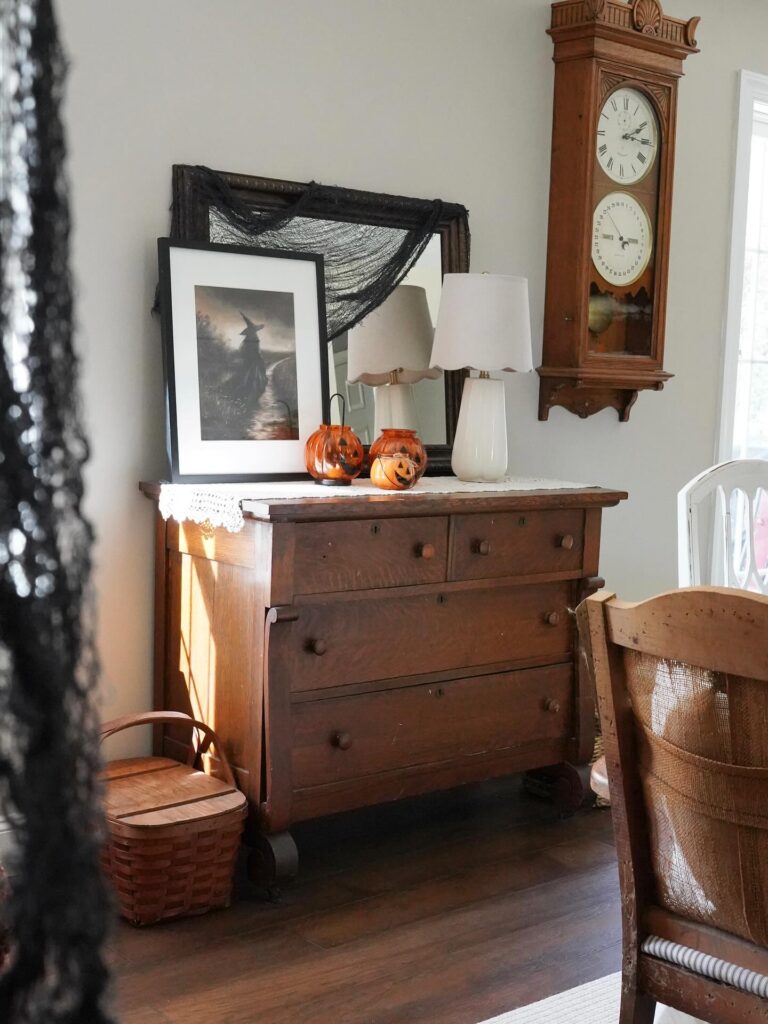
Over a mirror, that black gauze does most of the work without needing much else around it. Let it sag a little at the top and tuck the ends behind the frame, so it looks placed but not too neat. Add one framed Halloween print in front, then keep the pumpkins small like these glass ones, because the dresser already has height from the lamp and wall clock.
That is enough. If your dresser top is used daily, I’d skip loose fake cobwebs here since they catch on sleeves and dust too fast. A lace runner or old doily underneath helps the whole setup feel like it belongs on the furniture, not like party supplies dropped there.
Group Halloween Pieces On A Riser
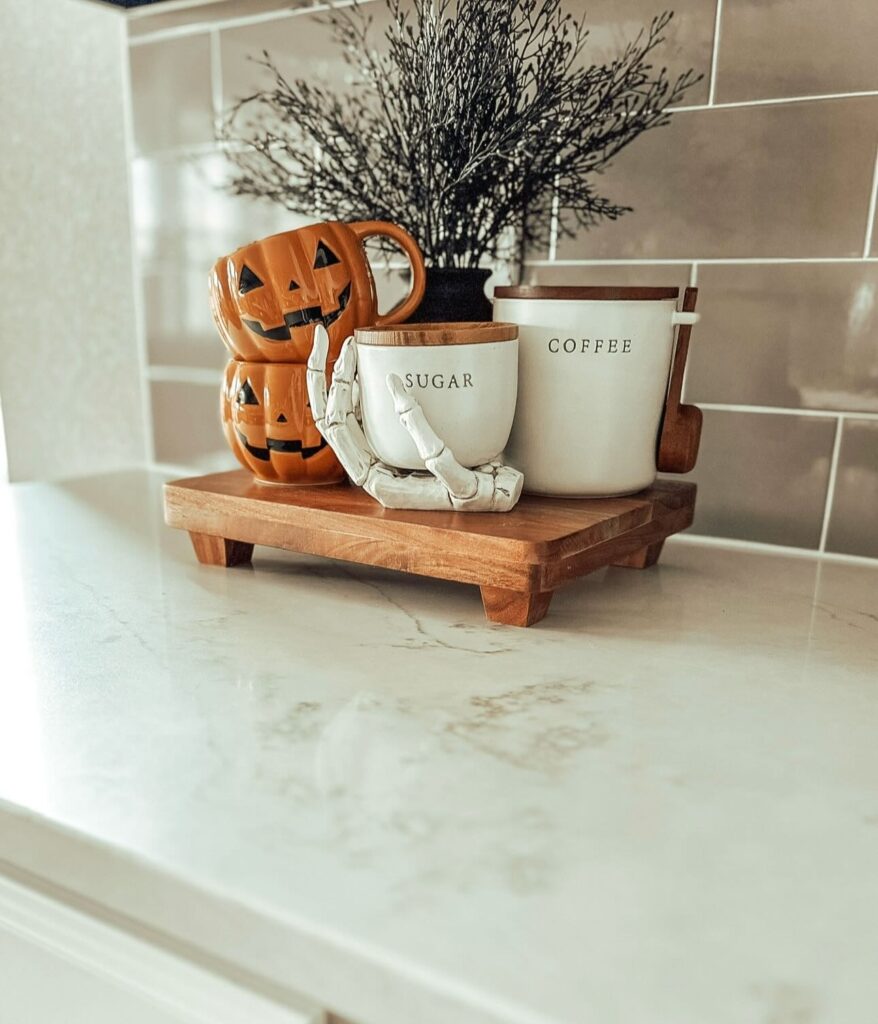
A small wooden riser does most of the work here. Stack two jack-o’-lantern mugs on one side, put your everyday sugar and coffee canisters on the other, and slip a skeleton hand around the sugar jar so the seasonal bit isn’t shouting. The black branches in the back vase pull the whole thing together without adding another orange object.
This one suits people who don’t want to box up their normal kitchen stuff for October. You’re borrowing two shelves worth of counter items you already use daily and just tucking Halloween in around them.
If I were redoing it, I’d skip the second stacked pumpkin mug. One reads as decor. Two starts to look like storage you haven’t dealt with.
Dining table pumpkins
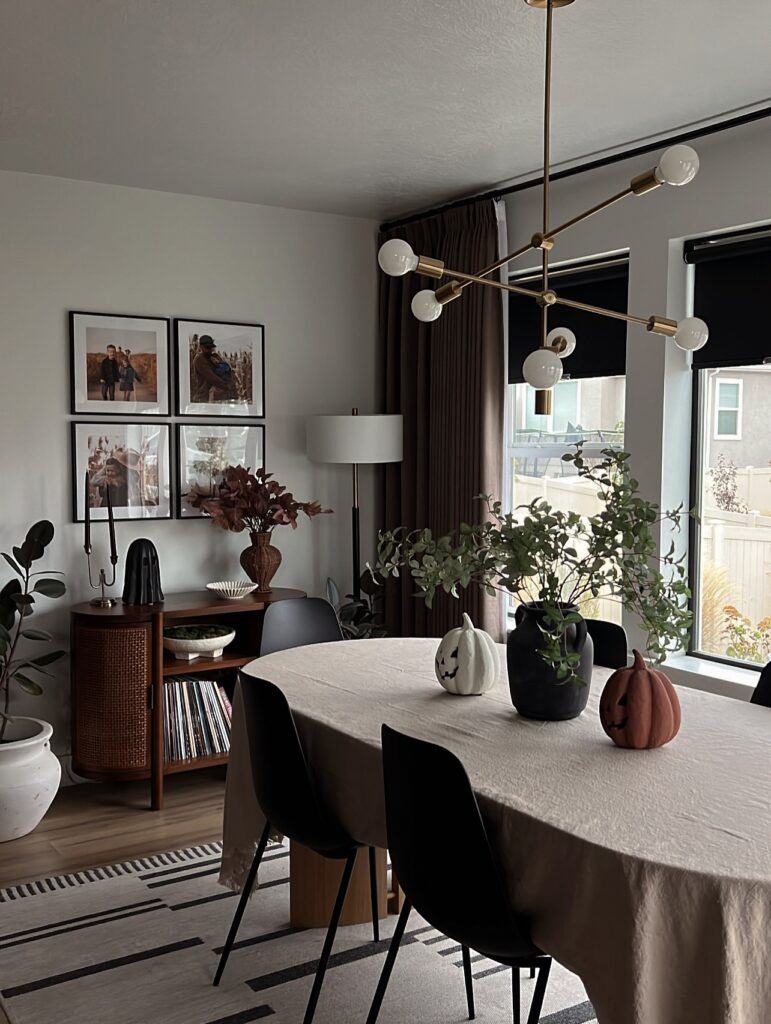
Try this on a dining table that already has clean lines. A plain linen tablecloth, two or three matte pumpkins, and one dark vase with loose branches are enough to shift the room toward Halloween without dragging in fake cobwebs or bright orange everywhere.
What makes this work is the contrast. The black chairs, dark window shades, and brass light fixture give the pumpkins something to sit against, so even a white pumpkin reads clearly from across the room.
Keep the center low. You still want people to see each other over dinner, and tall arrangements get annoying fast in a real house.
If you don’t have ceramic pumpkins, painted craft-store ones are fine. I’d skip anything glittery here. It would fight the quieter look and make the whole setup feel more themed than lived in.
Pumpkin Candle on the TV Unit
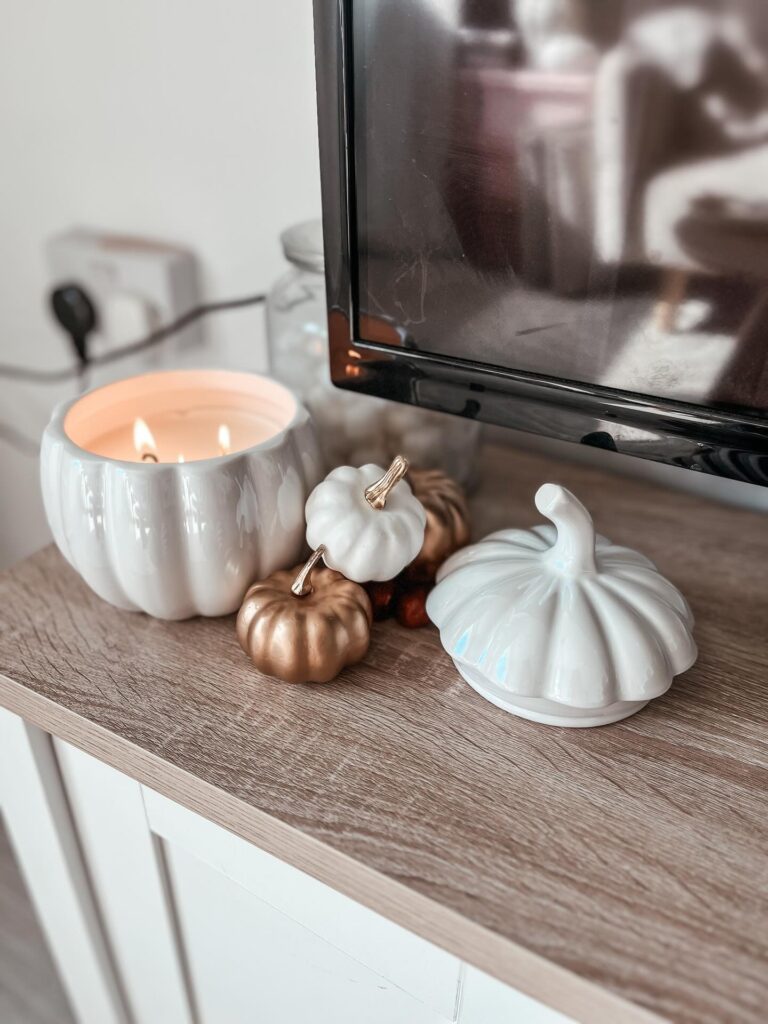
That white ceramic pumpkin candle is doing most of the work here — it’s the biggest piece, it’s lit, and everything else just sits around it. The two smaller decorative pumpkins, one bronze and one white glossy, aren’t really a matching set but they look fine together because the shapes are the same. If you’ve got a TV unit with a flat wood-tone surface like this one, a cluster of three or four pieces lands better than spreading things across the whole shelf.
Keep them to one end, near the screen edge. The bronze pumpkin is a nice detail — without it the whole thing would read a bit flat. I’d probably skip the lidded white dish unless it’s actually holding something.
Ghost Pillow Stack
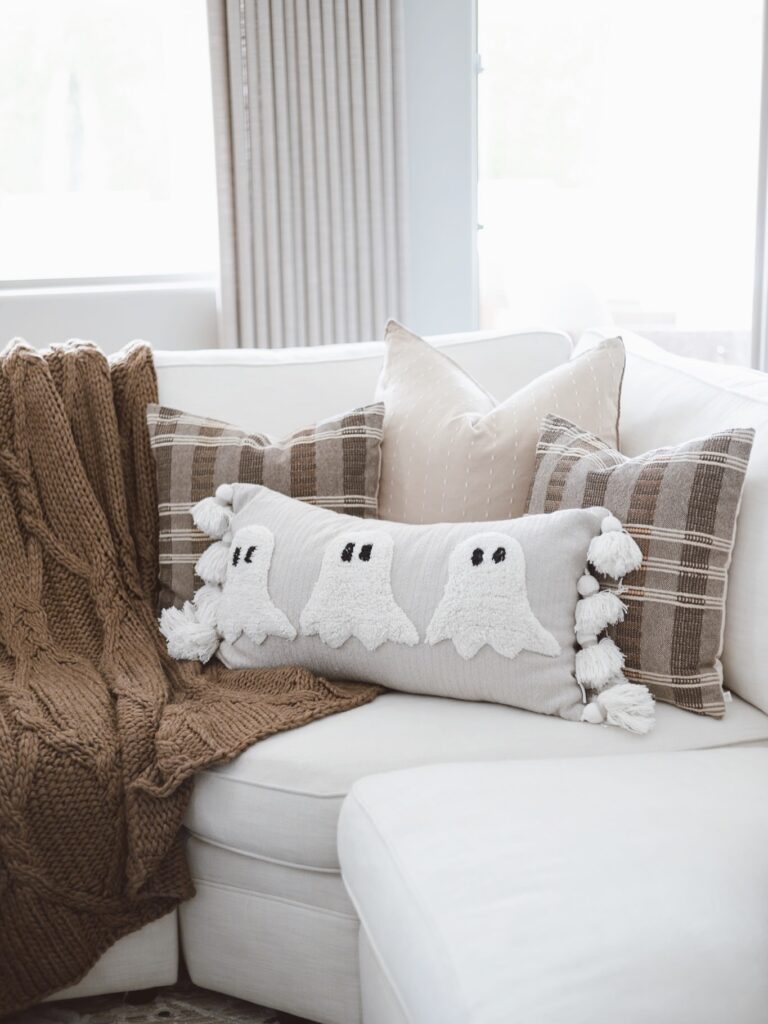
Start with one ghost pillow in front, then let the regular plaid pillows do most of the filling behind it. This works well on a white sofa because the ghosts stand out without needing orange pumpkins everywhere. Keep the colors close to what you already use, like brown, cream, beige, or gray, and add one chunky knit throw over the arm for texture.
That’s enough. I’d skip adding fake cobwebs here, since they catch on tassels and make the whole seat annoying to actually use.
Towel Ghosts on the Counter
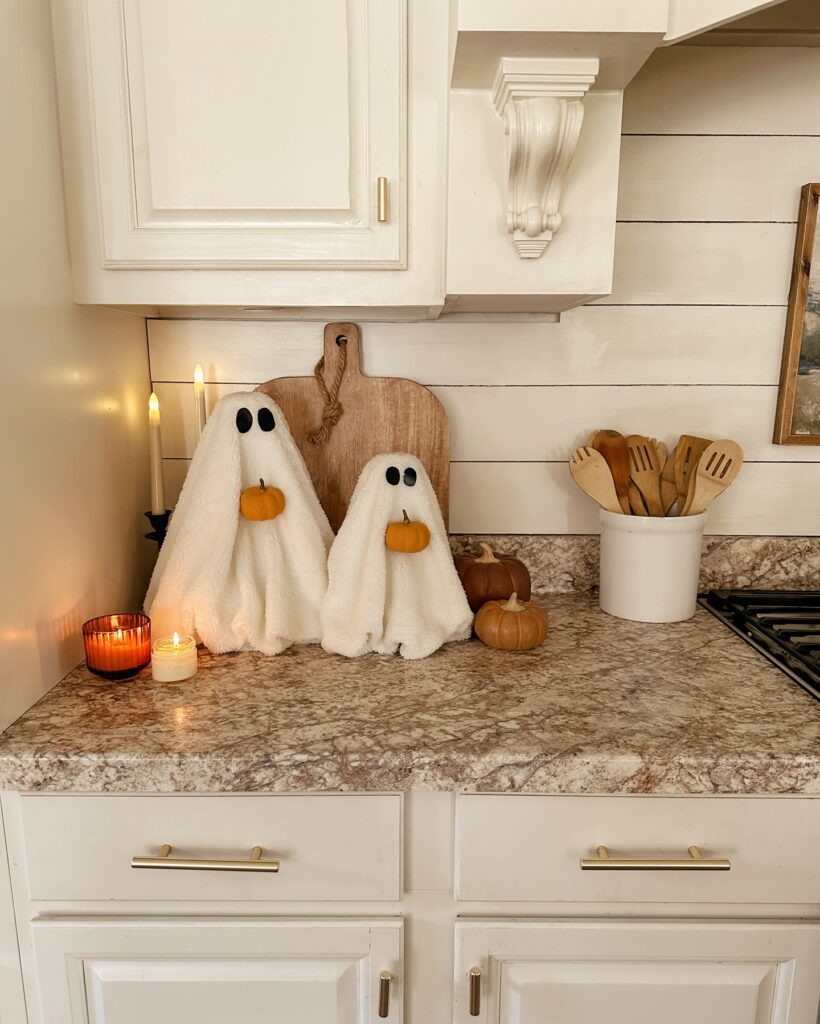
These are just hand towels draped over something ghost-shaped underneath — probably a bottle or a small vase — with felt eyes stuck on. Cheap and quick. The little pumpkin tucked into the “arms” is what sells it, otherwise they’d look like laundry.
Put them somewhere you already have a vignette going. Here it’s the cutting board leaned up as a backdrop, the candles, the utensil crock still doing its normal job. That mix is what keeps it from looking like a kid’s craft table.
One thing I’d change: the flameless taper candle on the left reads a little fake next to the real jar candle. I’d use two of the same kind. And skip the googly eyes if you can — flat black felt circles look more intentional.
Skeletons on the steps
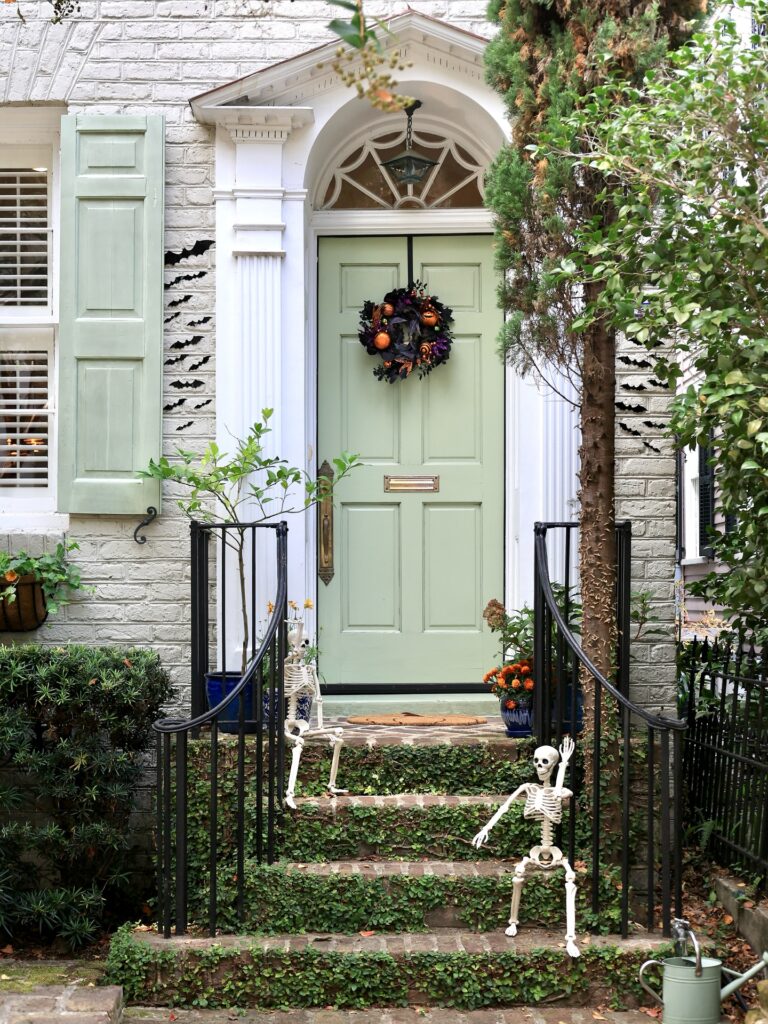
Try two lightweight skeletons on the front steps instead of covering the whole porch. One sitting off to the side and one half-standing near the rail is enough to make the entry look dressed, especially if your door already has a wreath doing some of the work up top. Keep them loose.
If every limb is posed too neatly, they start looking like store display pieces, but a bent knee, one arm over the railing, or a hand lifted in a crooked wave feels better. The ivy on the risers helps soften all that bone white, so this works especially well on older brick or planted entries. A pair of small mums by the door ties it together.
I’d skip anything motorized here. These narrow steps already have plenty going on, and tripping over a motion sensor prop gets old fast.
Skull and Rose Door Wreath
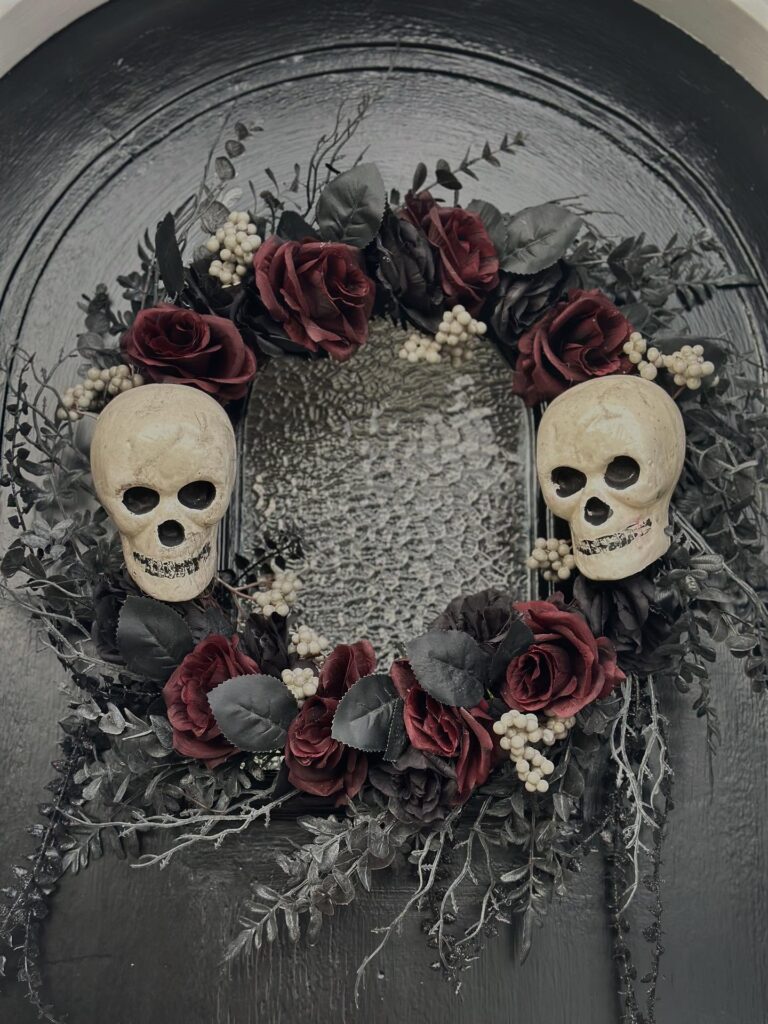
Two resin skulls sit on either side of the wreath, which keeps it from looking like a regular floral piece someone forgot to swap out in November. The dark red roses and blackened leaves do most of the heavy lifting — so if you’re building this yourself, don’t go hunting for anything too bright or orange-toned. Dollar store skulls work fine here.
Hot glue them onto an existing grapevine or faux greenery wreath, then fill gaps with deep burgundy stems and small white berry clusters like the ones visible in the photo. Black door, big impact. The arch shape behind this one helps frame it, but any front door gets the same effect.
Floating Witch Hats
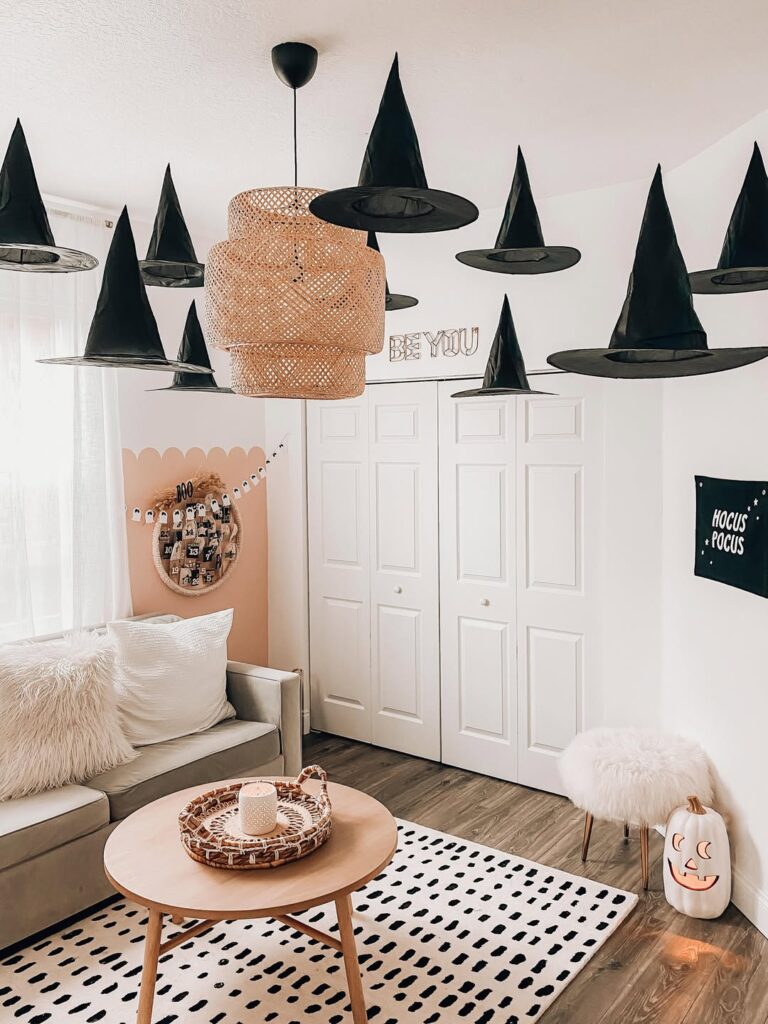
Start above eye level, because the hanging witch hats only work when they feel like they have drifted into the room rather than been taped to a wall. Use clear fishing line and tiny Command hooks, then hang the black hats at different heights. Keep the brim loose.
That little sag makes them look less like party-store leftovers. If your ceiling has a rattan pendant or any light fixture in the middle, let the hats circle around it instead of fighting for the same spot. I would skip placing one directly over a candle or low lampshade, since the fabric can dip more than you expect.
One near the corner is enough.
A Ghost and a Pumpkin
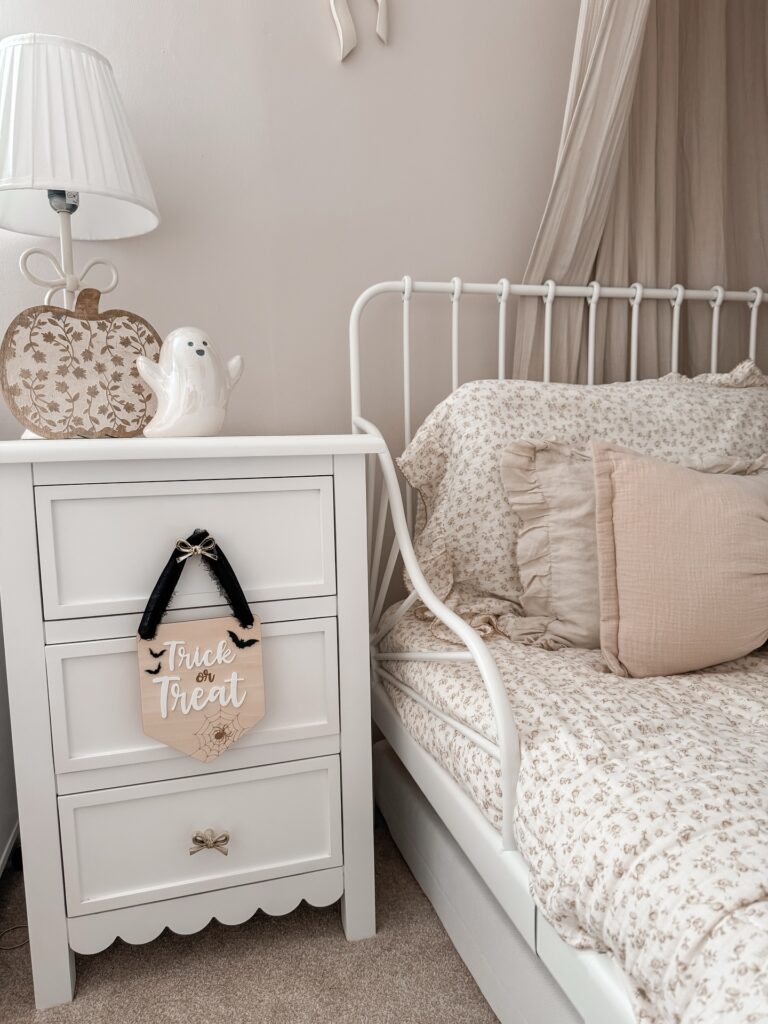
Two objects on the nightstand. That’s the whole move here — a little ceramic ghost next to a wooden pumpkin with a floral pattern, and the corner reads Halloween without anyone having to try. This works well in a kid’s room because it doesn’t get scary.
The ghost has a face you’d describe as friendly, and the pumpkin leans more autumn than horror. If you want to copy it, keep the palette tight. Cream, wood tones, maybe black for a small accent like the ribbon on the Trick or Treat sign hanging off the drawer.
I’d probably skip the sign personally, since the two figurines are already doing the job, but it depends how much you like a banner. Small surfaces don’t need much.
Window ledge ghosts
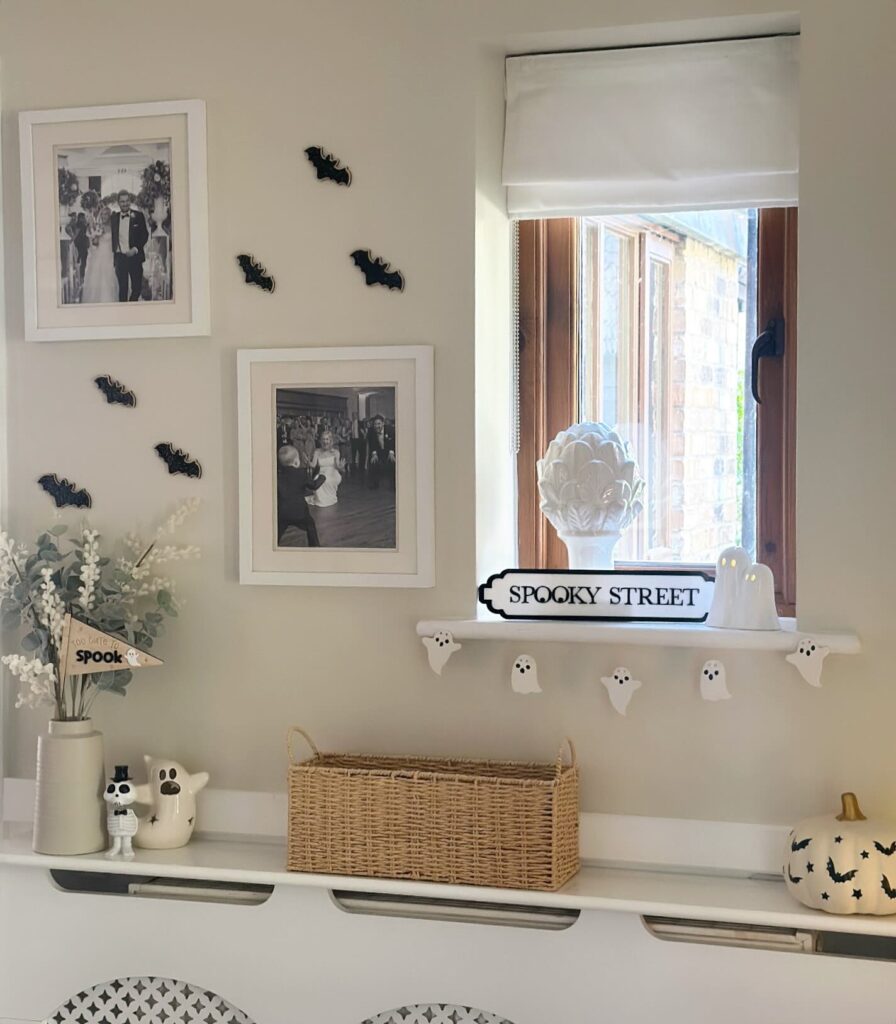
Start with the sill. A short sign, two little ghost figures, and a small garland hanging from the ledge is enough to make that window look dressed without dragging bins of decor out of storage.
What works here is the scale. The bats on the wall are small, the shelf ghosts are small, and the black-and-white palette keeps everything tied together even with framed photos and a basket already nearby.
Use removable wall dots for the bats if this is going up in a hallway or by family pictures. Much easier.
If you want the same look for less, skip the ceramic pieces and cut ghosts from card, then hang them with thread under the shelf. I’d probably leave the sign out unless the rest of the house is fairly plain, because words plus shapes can start to feel a bit busy fast.
Neutral Tones for Halloween Decor
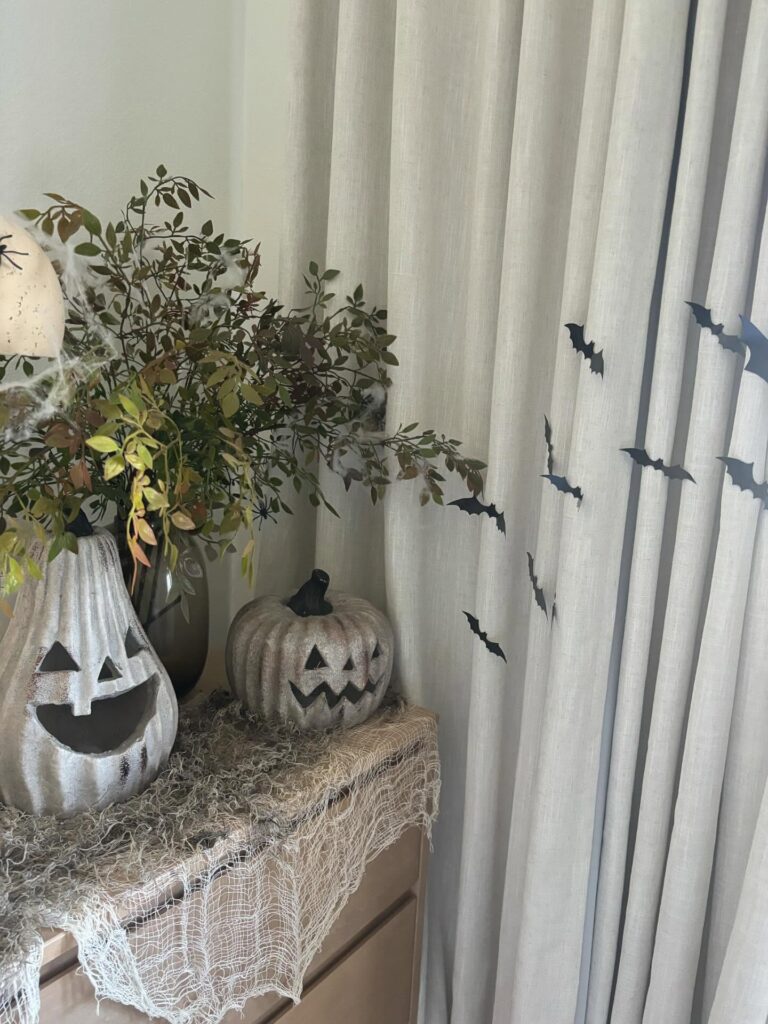
Cement-look jack-o’-lanterns do a lot of the work here without needing orange anywhere in the room. The cheesecloth draped across the surface looks deliberately rough, and that’s the point — it reads Halloween without being loud about it. Small black bat cutouts stuck directly onto the curtain fabric are probably the easiest thing in this entire list to do, and they’re removable.
If your space already runs neutral, this whole setup drops in without fighting anything. The greenery in the vase is just regular foliage, slightly dried out, which actually helps. Worth noting: the faux cobweb material can look thin and cheap if you don’t bunch it up enough — pile it, don’t stretch it.
Neutral Pumpkin Corner
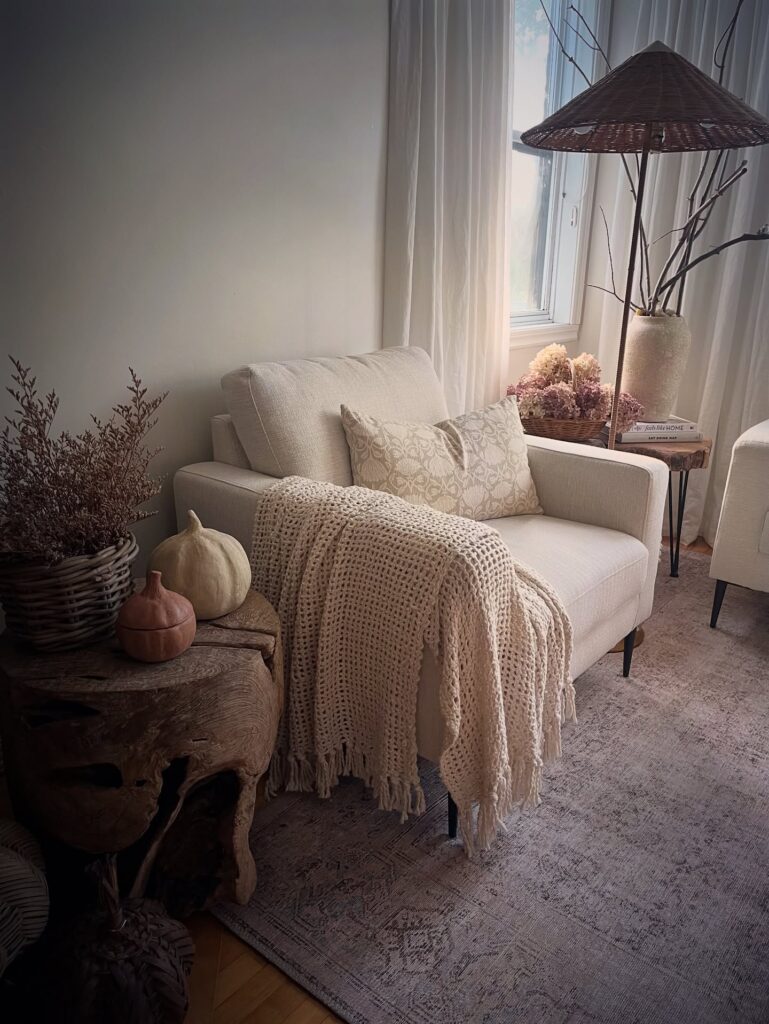
Beside the chair, keep the pumpkins low. That is enough. A stump, a side table, or even a thick basket turned upside down gives them that same grounded look without needing a full Halloween setup.
Skip the plastic shine. Use one pale pumpkin with one clay-colored pumpkin, then let the chunky throw and patterned pillow do the softer part of the job. The dried branches help too, because they already feel a bit October without shouting about it.
I’d skip fake cobwebs here, since they would fight with the clean curtains and the woven lamp shade.