Cheap and Easy DIY Rustic Farmhouse Home Decor Ideas
This site contains affiliate links. We may earn a small commission, at no extra cost to you. Article may contain some images for illustrative purposes only .
Creating a cozy rustic retreat doesn’t require deep pockets or a design degree. The beauty of farmhouse style lies in how it weaves together reclaimed materials and straightforward, functional design (the kind of things you can actually make yourself).
Maybe you want to tackle just your living room, or perhaps you’re ready to transform your whole house. Either way, these DIY projects bring genuine character to your space without that hefty designer bill. Like imagine mason jar sconces casting a soft glow, or handcrafted pallet furniture that tells a story. Here are cheap and easy DIY ideas that will turn your place rustic in no time.
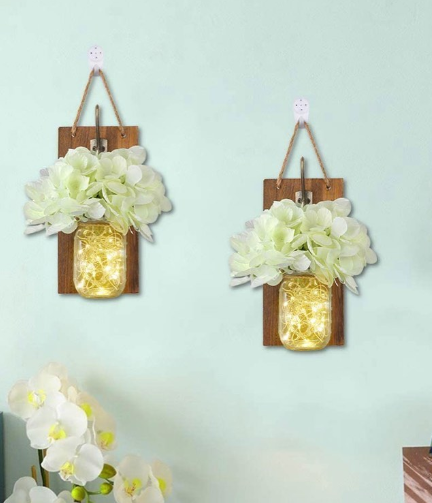
Mason Jar Wall Sconces With Fairy Lights
Time required: 30–45 minutes
Materials: mason jars, scrap wood board, metal pipe clamps, screws, drill, battery fairy lights
Mason jar wall sconces are one of those cheap projects that make your house feel instantly warm and inviting. All you have to do is attach mason jars to scrap pieces of wood held together by metal pipe clamps. Add some battery-powered fairy lights to each mason jar and you’ve got yourself the perfect lighting solution.
Not only can you use these almost anywhere in your home (hallways, bathrooms, living rooms, you name it), but they also give off major farmhouse chic vibes without costing you a fortune.
Use wall anchors when mounting the wood board so the mason jars stay secure. Filled jars can become heavier than expected, especially if you use thicker glass jars.
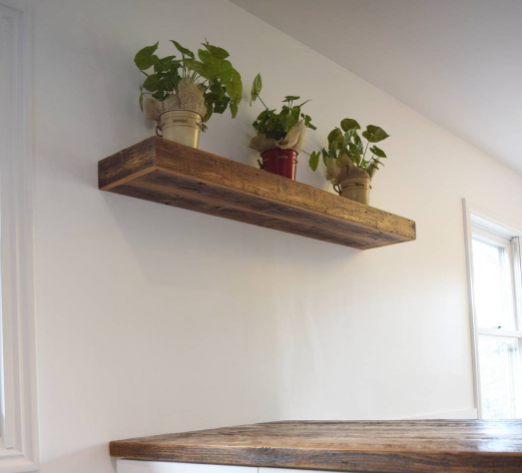
Reclaimed Wood Floating Shelves
Time required: 45–60 minutes
Materials: reclaimed wood boards, hidden shelf brackets, drill, screws, sandpaper, clear wood sealer
Floating shelves are a great way to show off your pottery collection, other treasures, and family photos. Weathered barn wood, old fence posts, and pallet wood can easily be found at salvage yards and on Craigslist or Facebook Marketplace.
Just sand down any jagged edges, brush on some clear sealer to maintain that weathered look, and secure them to the wall with hidden shelf brackets. If you plan to display heavier items like pottery or cookbooks, install the shelf brackets directly into wall studs for extra support.
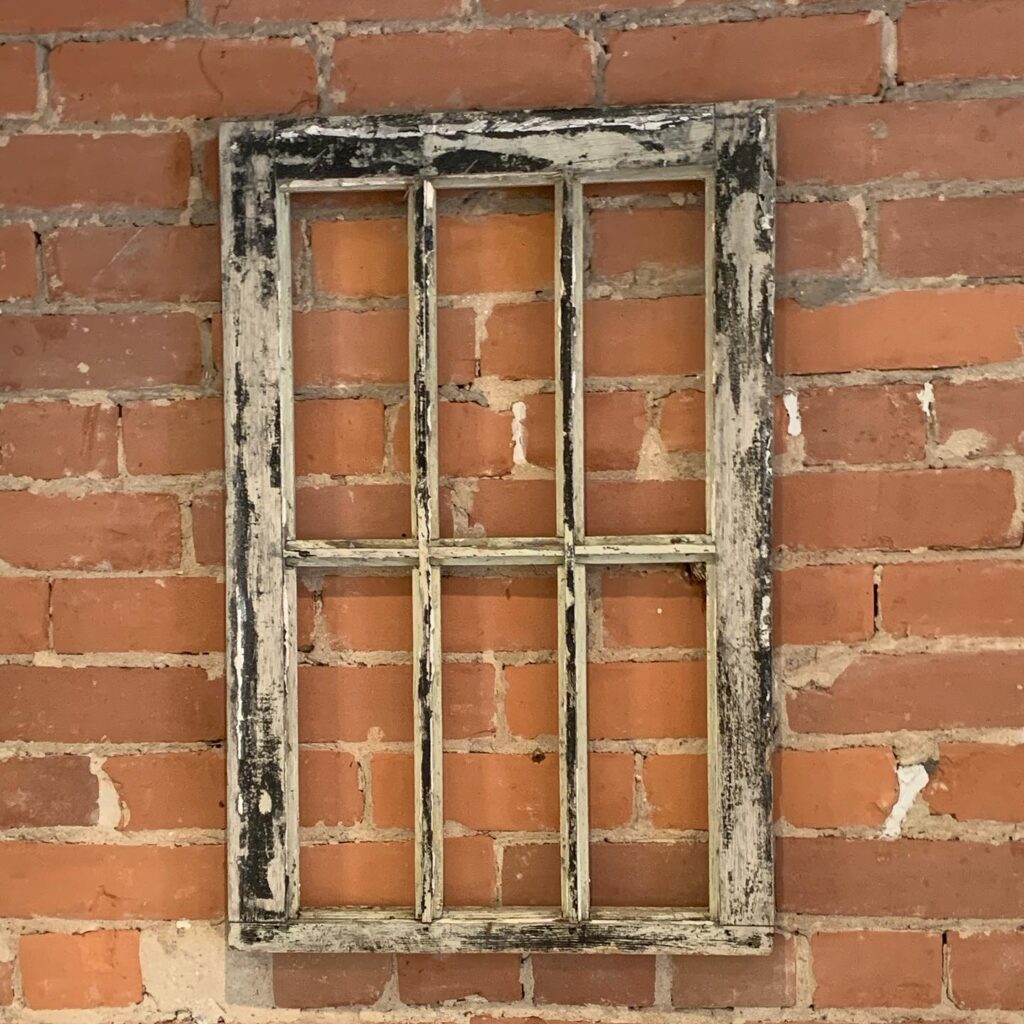
Vintage Window Frame Photo Display
Time required: 30 minutes
Materials: vintage window frame, sandpaper, chalk paint (optional), photos, mini clips or clothespins, twine or wire
Vintage window frames make such awesome photo displays and they’ve got that old-world charm that tells a story. You can find these frames at thrift stores or flea markets for under $25, which is pretty good deal. Make sure you clean them really good and sand down any rough edges so no one gets hurt. If you want you can add a light coat of chalk paint to give it a fresh look.
The best part is putting your family photos behind each pane. You could also use small clips instead which makes it super easy to switch out the pictures whenever you want. It creates this interchangeable gallery that looks really elegant and nostalgic on any wall in your house.
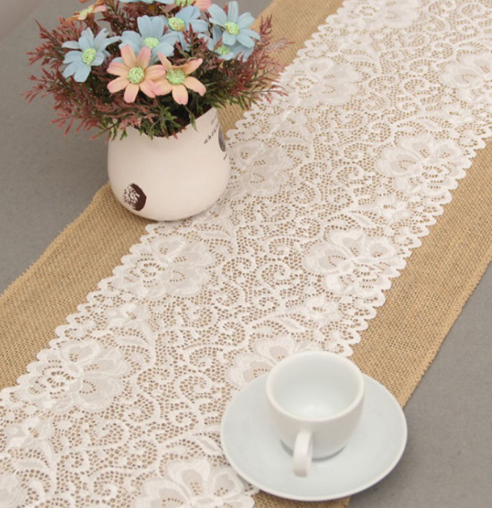
Burlap Table Runner With Lace Trim
Time required: 30 minutes
Materials: burlap fabric, lace trim, scissors, fabric glue or needle and thread, measuring tape
Nothing makes your dining table feel instantly farmhouse chic than a burlap table runner trimmed with lace. Pick up a roll of burlap at your local craft store. Cut the burlap to your desired length and use fabric glue or needle and thread to secure lace trim along each edge. Personalize your table runner with seasonal stencil art or even your family’s monogram painted in the center of the runner.
This project requires no special skills and is super easy. The rough texture of the burlap pairs perfectly with the femininity of lace trim. If you don’t want your burlap edges to fray, you can hem them prior to adding lace trim. Alternatively, you can let them fray and create a more undone look.
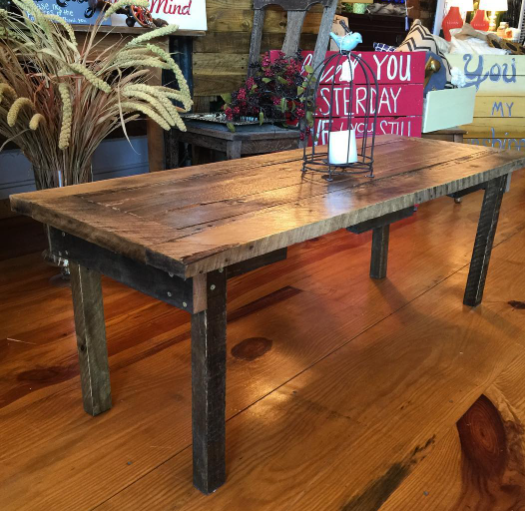
Wooden Pallet Coffee Table
Time required: 1–2 hours
Materials: two wooden pallets, sandpaper, wood stain or paint, caster wheels, screws, drill
Coffee tables made from wooden pallets are one of the easiest DIY projects you can do and they look great in any living room. All you’ll need is two wooden pallets. Stack them on top of one another to create height.
Sand down any rough areas. Nobody wants splinters! Next, stain your coffee table with a warm stain color. Darker stain colors will give your coffee table that rich farmhouse appeal. Allow the stain to dry prior to taking on the next step. Here comes the practicality.
Attach caster wheels to the bottom of your coffee table. Now you can easily move your coffee table whenever you need to. Trust me, this small addition will change your life when it comes to cleaning and moving furniture around.
Bonus: Add a glass top to your coffee table. Guests can safely set drinks on your coffee table without having to worry about things falling through the cracks. It also helps protect your coffee table from dirt and wear.
Always check pallets for a “HT” stamp, which means they were heat treated. Avoid pallets marked “MB,” as those may contain chemical treatments.
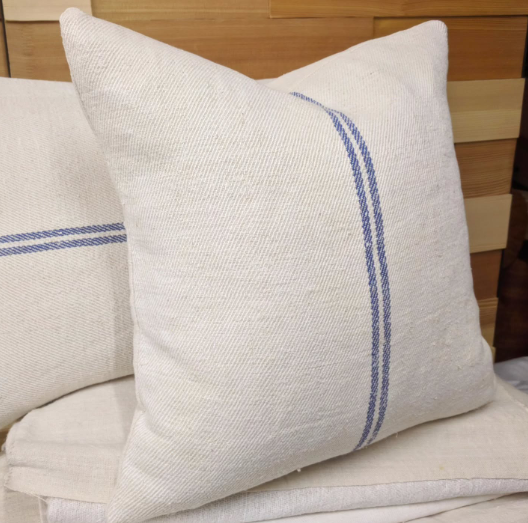
Farmhouse Style Throw Pillows From Grain Sacks
Time required: 45–60 minutes
Materials: grain sack fabric or drop cloth, pillow inserts, sewing machine or needle and thread, scissors, fabric paint (optional)
Your pallet coffee table looks beautiful, now let’s dress it up with some cozy pillows. Authentic vintage grain sacks are ideal for creating pillow covers because they already have those nice natural fibers and simplistic stripes. Wash out your old grain sack.
Cut to size and sew into a pillow cover. If you don’t have old grain sacks laying around, that’s ok! You can create the grain sack look by using drop cloths and painting on diagonal blue or red stripes with fabric paint. Sew a small zipper along one side so you can easily remove the pillow cover for washing.
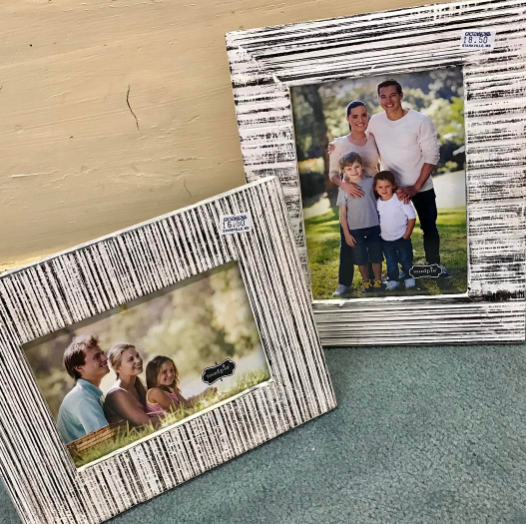
Distressed Picture Frames
Time required: 30–40 minutes
Materials: wooden picture frames, chalk paint, paintbrush, sandpaper, antiquing wax (optional)
If your picture frames look more Pinterest than farmhouse chic, there’s an easy fix! Grab your sandpaper and lightly sand down wooden picture frames. Once you’ve created that worn texture, paint them with chalk paint. Cream and white chalk paint will work best for this project.
After your paint has dried, use your sandpaper one more time. Rough up areas around the edges and corners to reveal some of the wood beneath. This will create that weathered, worn-in look we all love. For an extra aged effect, rub some antiquing wax on your picture frames.
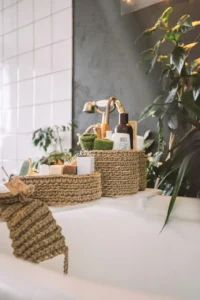
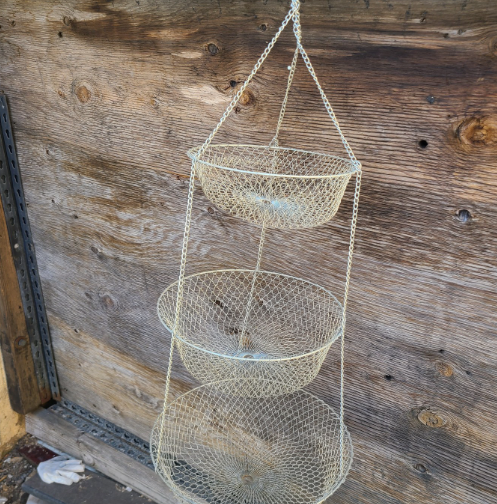
Wire Basket Wall Storage
Time required: 20–30 minutes
Materials: wire baskets, wall hooks or screws, drill, wall anchors
Wire basket wall storage is another DIY project that looks high-end but is definitely not. You can find vintage-looking wire baskets at your local thrift store or the dollar store. All you’ll need is some strong wall hooks to hang your baskets. Wire baskets are great for storing mail, magazines, small potted plants, utensils, you name it.
That’s what I love about this piece; it’s functional and doubles as a rustic decor element. Paint your wire baskets with chalk paint for a more aged vintage look. You can leave them plain for a more authentic farmhouse feel. Attach small chalkboard tags to each basket so you can easily label items like mail, keys, or kitchen utensils.
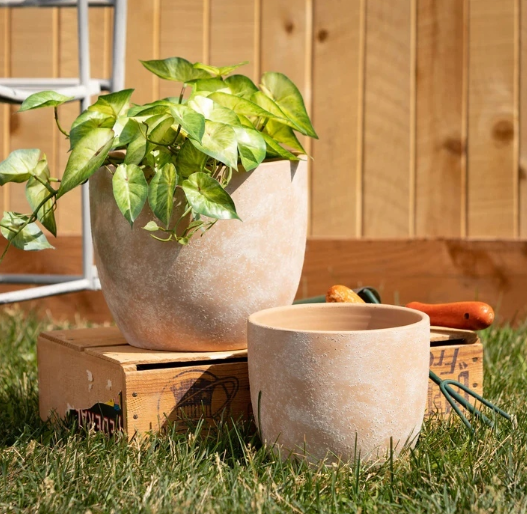
Whitewashed Terracotta Planters
Time required: 20 minutes
Materials: terra cotta pots, white paint, water, paintbrush, rag
Grab yourself some inexpensive terracotta pots from your local garden center. The hardest part about creating these beautiful, whitewashed terracotta pots is the perfect paint mixture. Combine white paint and water. You want the consistency to be 1 part paint to 2 parts water.
Paint your clean terra cotta pots with your whitewash mixture and let sit for about a minute. Grab a rag and wipe away excess paint that hasn’t soaked into the terra cotta pot. You’ll be left with a weathered clay look that resembles a pot you could’ve found at an antique store. Seal the finished pot with a matte sealer to prevent the whitewash from fading when watering plants.
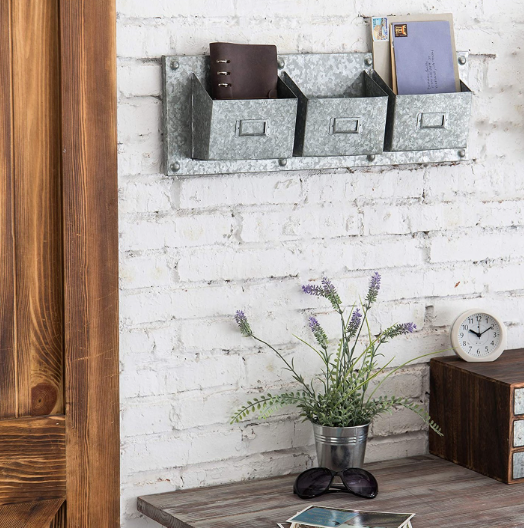
Galvanized Metal Wall Organizers
Time required: 20–30 minutes
Materials: galvanized buckets or trays, screws or wall hooks, drill, wall anchors
Galvanized metal looks incredible on walls. Convert mail sorters, metal buckets, or metal trays into wall organizers for your entryway or home office. Look for these at your local hardware store or find unique vintage styles at flea markets. They’re super easy to hang on your wall.
Just be sure to secure them so they don’t fall on your guests. Use them for whatever you’d like; hang family photos, sort through mail, or keep your keys and sunglasses handy. They hold more than you think and they look a lot more aesthetically pleasing than having clutter on your counters or tables.
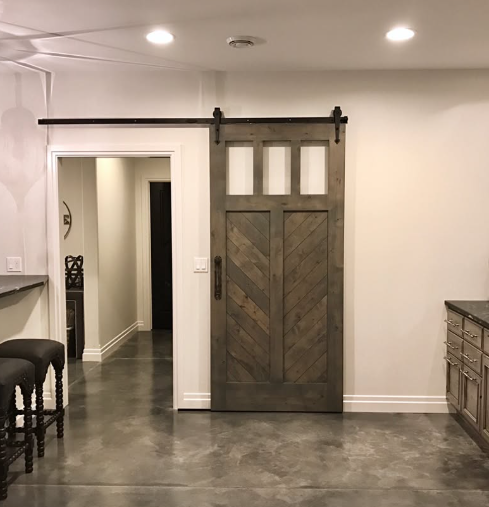
Barn Door Inspired Wall Art
Time required: 1 hour
Materials: reclaimed wood boards or canvas, trim boards for X design, wood glue or nails, paint or stain, paintbrush
Barn doors are taking the farmhouse decorating world by storm. You can create your own DIY version using wall art. Grab some reclaimed wood, pallet boards, or even a canvas if you’re in a pinch. Paint your wood or canvas with distressed white paint or that trendy weathered gray.
Add on X-braces and some metal hardware to really sell the look. Hang it on your wall and boom! You have yourself a beautiful piece to anchor any room in your home.
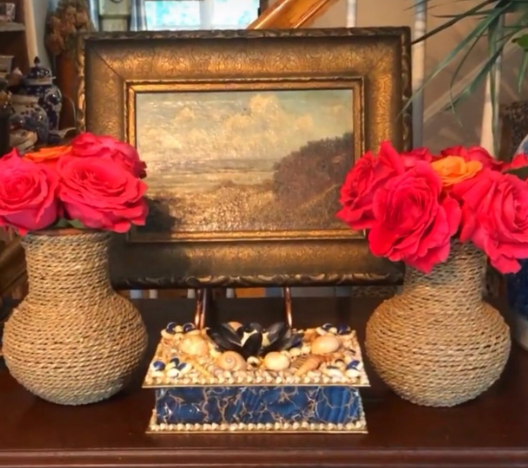
Rustic Rope Wrapped Vases
Time required: 20–30 minutes
Materials: glass vase, jute rope or sisal rope, hot glue gun, glue sticks
Plain ole glass vases can be transformed into rustic show pieces with a little bit of natural rope. Wrap sisal rope or jute rope around your glass vase and secure with hot glue as you go.
Once you’ve covered the entire vase, you can add fun accents like twine, small pieces of burlap, or even dried wheat stems to bring some farmhouse flair to your vase.
These rustic vases look stunning when filled with wildflowers. You can also display them empty on top of your wooden shelving units.
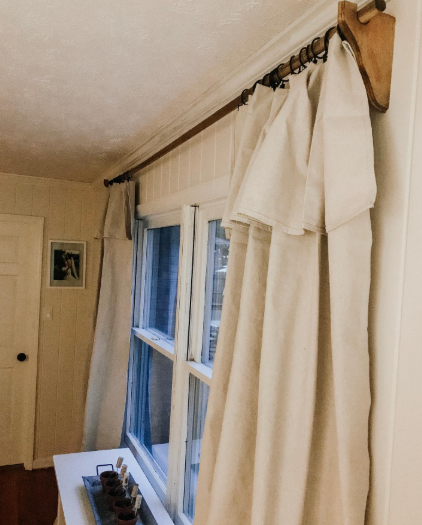
No-Sew Drop Cloth Curtains
Time required: 30–40 minutes
Materials: canvas drop cloth, curtain rings or clothespins, curtain rod
Drop cloths are my go-to way to add that rustic touch to any room in your home. Easily transform these inexpensive canvas sheets into beautiful curtains without having to sew a stitch.
All you need are metal rings or even normal clothespins. Clip onto your curtain rod for instant farmhouse style.
Be sure to wash your drop cloths first. This will help break in the fabric and you can start pulling at your drop cloth edges to create that frayed look.
DIY Wooden Sign With Inspirational Quote

Time required: 1 hour
Materials: wooden plank, sandpaper, paint, paintbrush, letter stencils, clear sealer (optional)
A DIY wooden sign with an inspirational quote is honestly the perfect finishing touch to your rustic farmhouse themed home. There’s just something about handmade wood signs that bring everything together. Purchase a wood plank from your local hardware store. Sand down your wood plank.
Once you’ve created texture on your wood plank, paint on a white wash paint base coat. Allow your paint to dry. Using your stencils, paint on your quote in any color that contrasts your base coat. The last step is to take your sandpaper and gently distress the edges of your wood plank.
Repurposed Ladder as Blanket Display
Time required: 15 minutes
Materials: vintage wooden ladder, sandpaper, wood stain or paint (optional)
Use an old wooden ladder as a blanket display in your rustic styled room. Lean a vintage ladder up against your wall and start draping your favorite quilts and throw blankets over the rungs. This is not only practical for storage, but it also looks so cozy.
Chicken Wire Message Board

Time required: 45 minutes
Materials: wooden frame, chicken wire, staple gun, staples, wire cutters, clothespins
A chicken wire message board is one of those things that looks way harder to make than it actually is. You basically just stretch some chicken wire across a wooden frame and secure it down. Then grab some clothespins and your good to go – clip up photos, recipes, random notes, whatever you need to keep track of.
The frame part is pretty flexible depending on what vibe your going for. A distressed white paint job screams farmhouse, but honestly leaving the wood natural looks just as good and its way less work. I’ve seen people spend hours trying to get that perfect “distressed” look when natural wood already has character built in.
They’re perfect for entryways where you need to see important stuff everyday like permission slips, appointment cards, that kind of thing. It’s one of those projects that doesn’t take forever to make but you’ll use it all the time.
Milk Can Makeover

Time required: 45–60 minutes
Materials: vintage milk can, chalk paint, paintbrush, stencils, clear sealer (optional)
Those old milk cans you see at antique shops or sitting in your barn can become really cool decor pieces if you get a little creative with them.
First thing you need to do is clean your milk can really good. Then paint it with chalk paint in cream or gray colors.
After that you can add stenciled letters that say stuff like “Farm Fresh” or maybe some flower designs. Your going to turn something that used to be just practical into a nice vase for flowers or even a place to put umbrella’s.
Wood Slice Coasters

Time required: 45–60 minutes
Materials: small tree branches, saw, sandpaper, polyurethane sealant, felt pads
Wood slice coasters are perfect for adding that rustic vibe to your place, and people always ask about them when they come over. Your going to need some small tree branches, a saw, sandpaper, and polyurethane sealant to make these.
First cut the branches into slices about half an inch thick. Then sand down the edges until their nice and smooth. After that you’ll want to put on two coats of the sealant and make sure you let it dry all the way before you use them. The felt backing is really important to add on the bottom so you dont scratch up your tables or anything.
These coasters give such a farmhouse feel and there super easy to make once you get the hang of it.
Shiplap Accent Wall

Time required: 3–5 hours
Materials: pine boards or MDF boards, nails or nail gun, spacers or nickels, paint, paintbrush
A shiplap accent wall can totally transform your space without costing a fortune. Just head to your local hardware store and grab some affordable pine boards, then get them cut to the size you need.
Paint them white or whatever color goes good with your room. The installation part is pretty straightforward; you just nail the boards directly to your wall.
Make sure you use small spaces between each plank though, that’s what creates that classic shiplap gap look everyone loves.
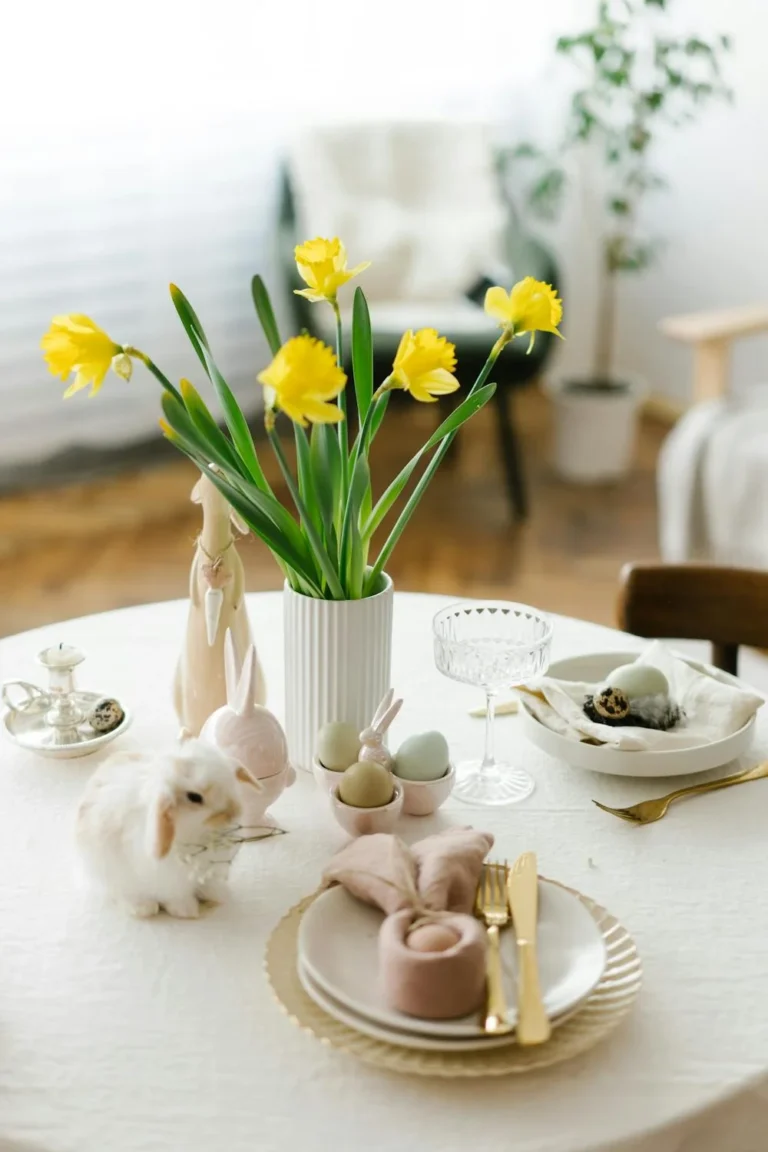
Antique Bottle Centerpieces

Time required: 10–15 minutes
Materials: vintage glass bottles, twine or burlap ribbon (optional), flowers or dried wheat
Old glass bottles are seriously the easiest way to make your dining table look farmhouse chic. You can grab them at thrift stores for like nothing, or sometimes you’ll find them free at old dumps if your lucky.
Give them a good scrub when you get home. Then put three bottles together that are different heights. Throw in some wildflowers, wheat stalks, or even just one stem. That’s literally all it takes to get that authentic vibe.
If you want to make them even more special, wrap some twine or burlap ribbon around the necks. Its such a simple touch but it makes a difference.
These bottles work great for regular dinners or when you’ve got people coming over. Their super versatile and you probably spent less than five bucks total.
Weathered Wood Candle Holders

Time required: 45 minutes
Materials: reclaimed wood block, drill, spade drill bit, sandpaper, beeswax or wood oil
Weathered wood candle holders are honestly one of the easiest ways to add that rustic vibe your looking for. Just grab some old fence boards, driftwood from the beach, or even scraps from an old barn if you can find them. Drill out some holes that fit your tea lights or pillar candles (whatever size you want really).
Sand down any rough spots so you dont get splinters, but don’t go crazy with it. The whole point is keeping that weathered look thats already their. If you want a little bit of shine without making it look to polished, rub on some beeswax. It gives just enough of a sheen to make it look finished but it wont cover up all the character that makes these pieces cool in the first place.
Farmhouse Style Kitchen Scale Display

Time required: 10 minutes
Materials: vintage kitchen scale, small tray or cutting board, decorative items like lemons, herbs, or recipe cards
Vintage kitchen scales make amazing focal points in farmhouse kitchens and their pretty easy to find. You can pick them up at thrift stores or flea markets without spending a lot of money.
The best spot to show them off is on open shelves or right on your counter where people can see them. I like to style mine with different things depending on the season. Like in winter I’ll add some pinecones around it, and in summer I use lemons which looks really fresh.
If you want to make the display even better, try putting a small herb plant next to it or even some old recipe cards. It adds that extra farmhouse vibe and makes the whole thing feel more lived-in and authentic.
Vintage Crate Wall Shelving

Time required: 45–60 minutes
Materials: wooden crates, sandpaper, wood stain or paint (optional), screws, drill, wall anchors
Old wooden crates make really cool shelves if your going for that farmhouse look. You can find them at flea markets or antique stores, and sometimes your grandparents probably have some laying around in there garage or barn.
All you really need to do is sand them down a bit, so you don’t get splinters, maybe stain them if you want. Then just mount them on the wall really good so they don’t fall down.
The best part is filling them up with stuff like mason jars, old books, or those little plants everyone has now. It looks super authentic and doesn’t cost a lot if you find the crates cheap.
Where to Find Cheap Materials for Rustic DIY Decor
One of the best parts of farmhouse decor is that many of the materials can be found for very little money. Before buying new supplies, check places where reclaimed materials are easy to find.
Good places to look include:
- thrift stores for old frames, bottles, and baskets
- flea markets for vintage tools, crates, and scales
- Facebook Marketplace for pallets and reclaimed wood
- salvage yards for barn wood and window frames
- yard sales for ladders, milk cans, and metal buckets
Repurposing older items not only saves money but also gives your home more authentic farmhouse character. We have even linked a few general stuff if you can’t find them online (I know, so helpful).


Classic Rustic Farmhouse Colors
Farmhouse decor works best when the colors stay simple and natural. Using a small palette helps different DIY projects look good together in the same room.
Common farmhouse colors include:
- warm white
- cream
- soft gray
- weathered wood tones
- muted sage green
- black metal accents
These colors pair well with natural materials like burlap, jute, wood, and galvanized metal.
Quick Safety Tips for DIY Decor Projects
Before starting any DIY project, a few simple precautions can help prevent accidents.
- always sand reclaimed wood to remove splinters
- wear gloves when handling old metal or wire
- check pallets for nails before cutting or sanding
- work in a ventilated area when staining or painting wood
- secure wall decor properly with anchors if needed
Conclusion
You’ve now got a toolbox of farmhouse magic at your fingertips! Picture your space revamped with weathered wood catching morning light, soft burlap textures warming cold corners, and mason jar lights casting gentle shadows across your walls. There’s something deeply satisfying about creating with your own hands. Whether you tackle one project or all twenty-three, you’ll breathe new life into your home while honoring rustic traditions that never go out of style.