
21 Easy Painted Pumpkin Ideas
This site contains affiliate links. We may earn a small commission, at no extra cost to you. Article may contain some images for illustrative purposes only .
Folk Flowers on White
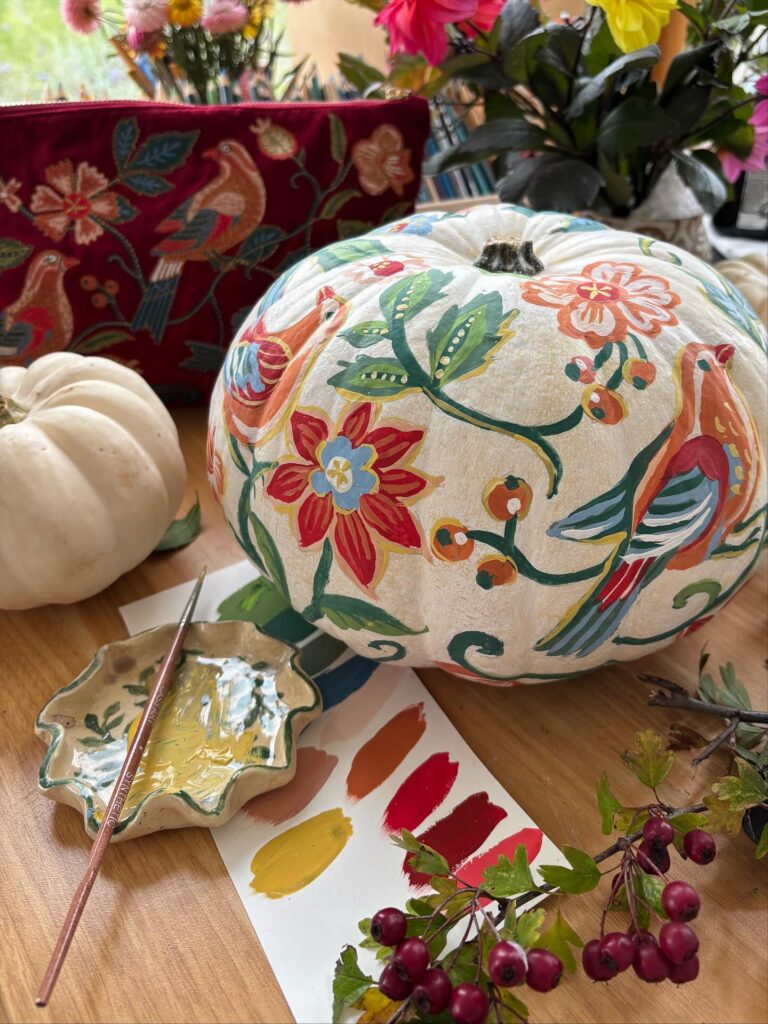
A white pumpkin works like a blank page, and folk-style flowers are a forgiving way to fill it. Each bloom is a ring of petals around a small center, so you repeat one shape and nobody expects the copies to match. Green vines with curled ends tie the flowers together and cover any gaps between them. The orange berries are single dots with a smaller dot inside.
Start with the flowers and vines. The bird is harder. If your hand isn’t steady yet, paint one more flower where the bird would go, and the pumpkin still looks finished.
Paint a swatch card before you touch the shell, like the strip lying next to this one. A handful of colors is enough: a yellow, an orange, a couple of reds, a pink, and two greens. Testing them on paper shows you which ones look muddy next to each other. A thin brush with a fine tip handles the petal outlines and the vine curls much better than a flat one.
Fox Face Pumpkin
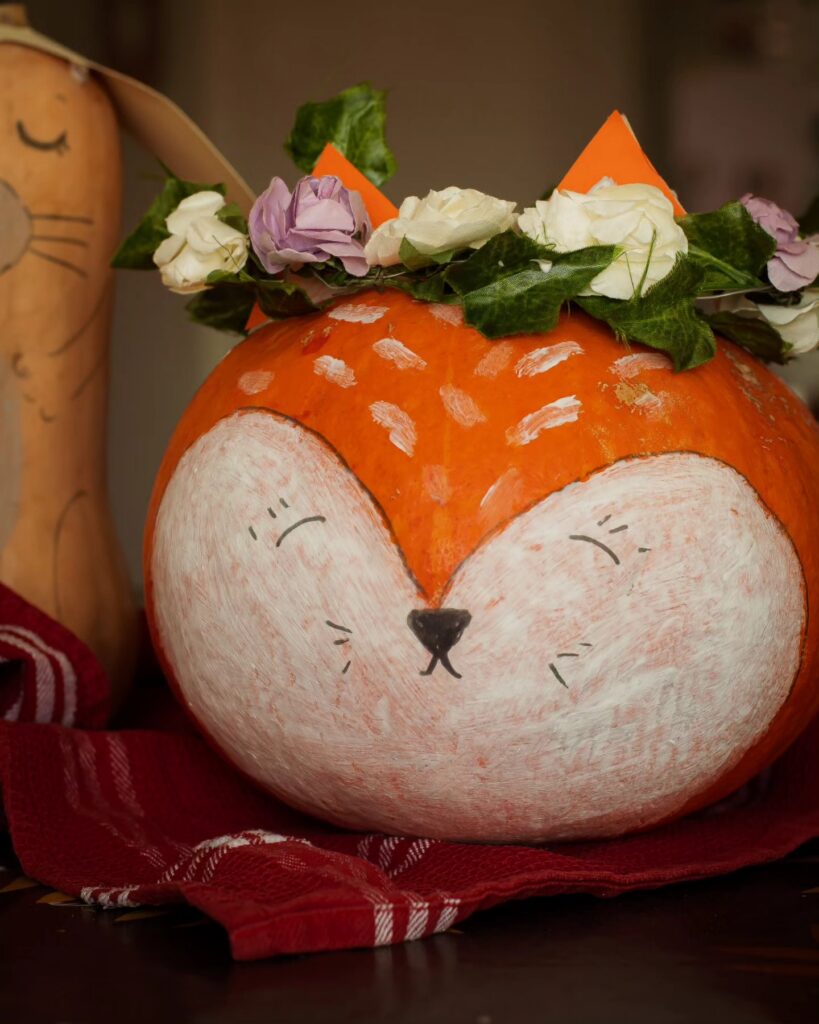
A fox face pumpkin is easy to read from across the room, and the painting is simple. You just need an orange pumpkin, a large white face shape, and a few black lines for the eyes, nose, and whiskers. Keep the features closed-eye simple.
That is what makes it quick. The white face takes up most of the front, so uneven brushwork does not matter much, and a few pale marks on top can stand in for fur. Small triangle ears finish it.
In the image, the ears sit at the top edge, which helps the round pumpkin look more like an animal head. This suits kids’ tables, entry setups, or any softer fall display.
Cartoon Dog Faces With Ears
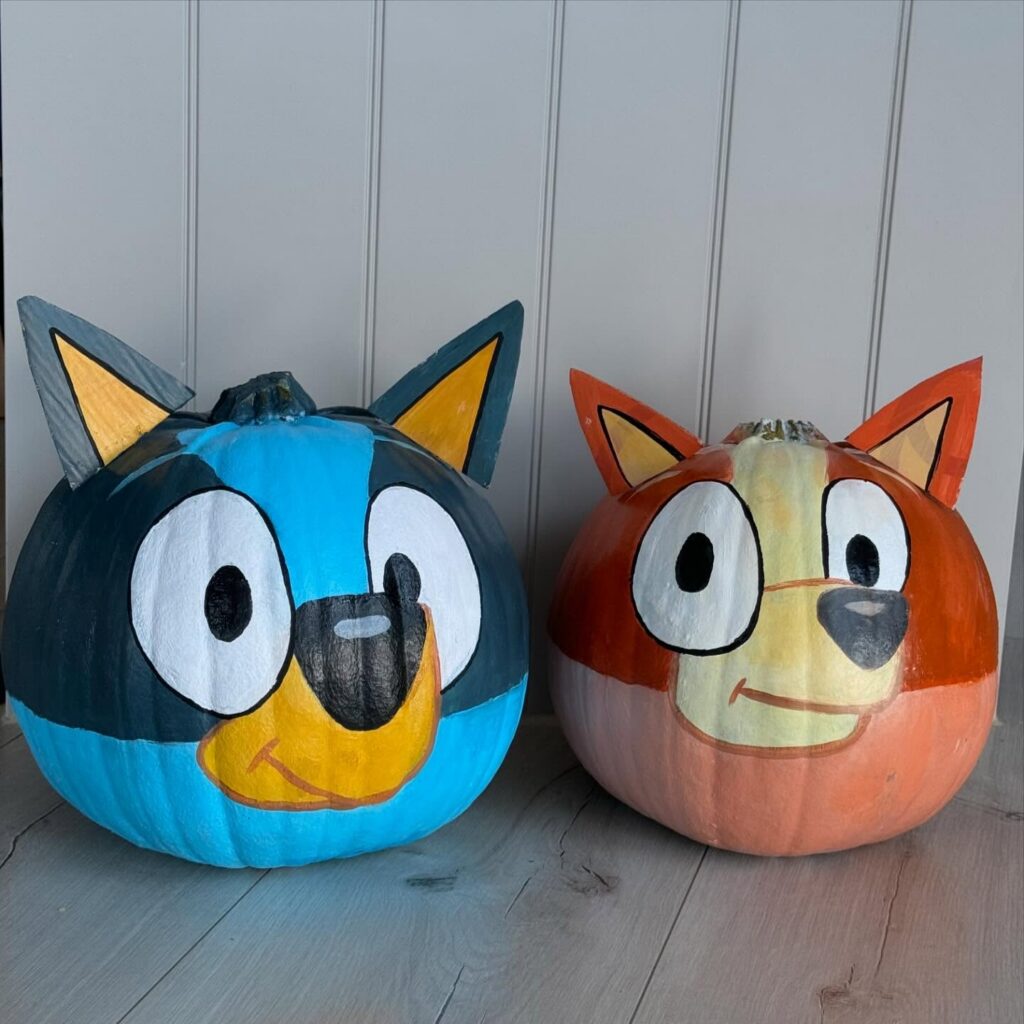
Kids will ask for their favorite show characters, and flat-colored cartoon dogs are about as forgiving as it gets. Each face is built from big blocks of color: a darker top half, a lighter band around the bottom, and a pale muzzle in the middle. Paint those first and let them dry.
The eyes come next, as two large white ovals with a black dot near the inner edge of each. A thin black outline around the eyes and muzzle matters most. Use a small brush there and go slowly, since a shaky line is the one thing that makes these look off.
The ears are flat triangles cut from stiff card or foam, painted in two colors and fixed to the top on either side of the stem. Skip the extra details. These dogs read fine without fur, whiskers or shading, which keeps the project manageable for a younger kid with some help.
Rainbow striped pumpkins
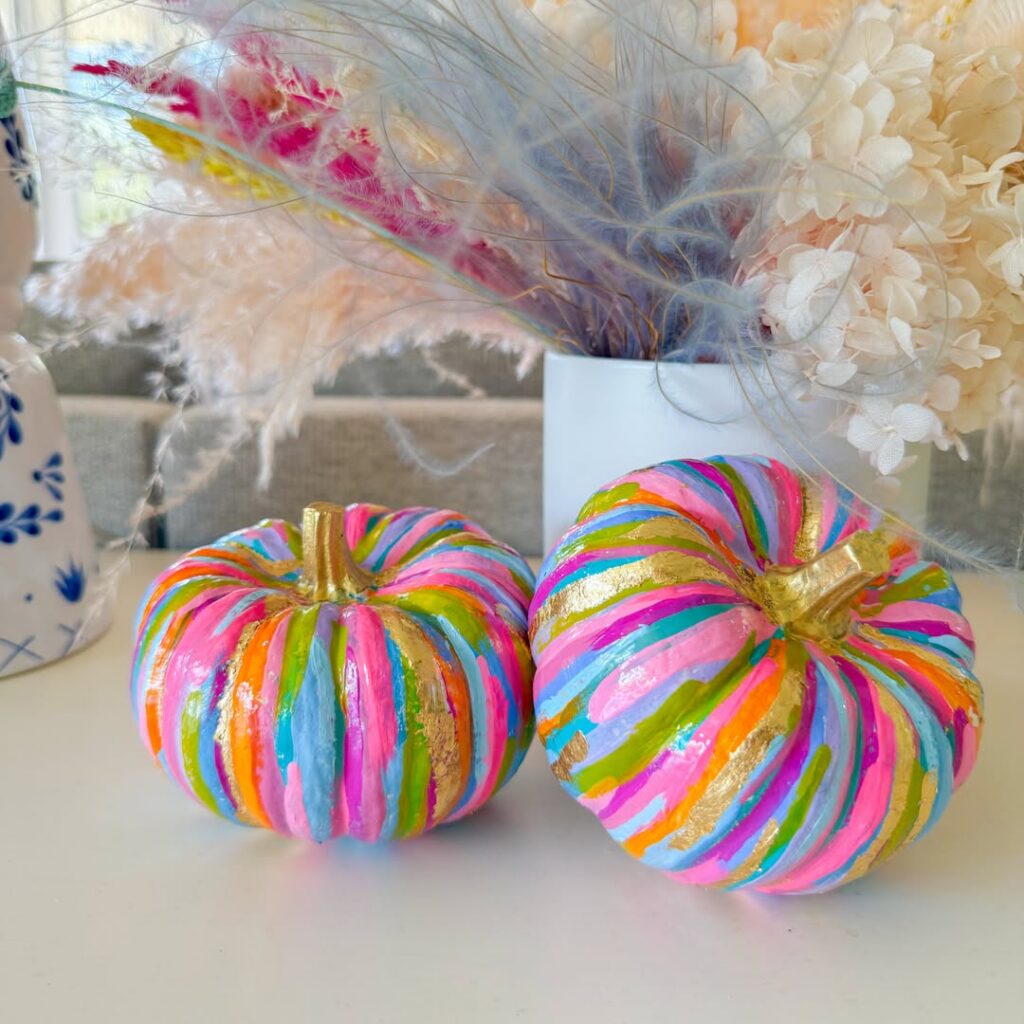
Paint each rib a different color, then let the pumpkin shape do most of the work. The rounded grooves keep the stripes from needing straight edges, so this suits kids, first-time painters, or anyone who wants a quick table project. Go bold.
The pumpkins here use pink, blue, orange, green, and thin gold lines, with gold stems to tie the colors together. Use a small brush for the grooves and a wider one on the raised sections. If metallic paint feels too fussy, swap it for white, black, or one pale color between the brights.
Loose Hand-Painted Florals
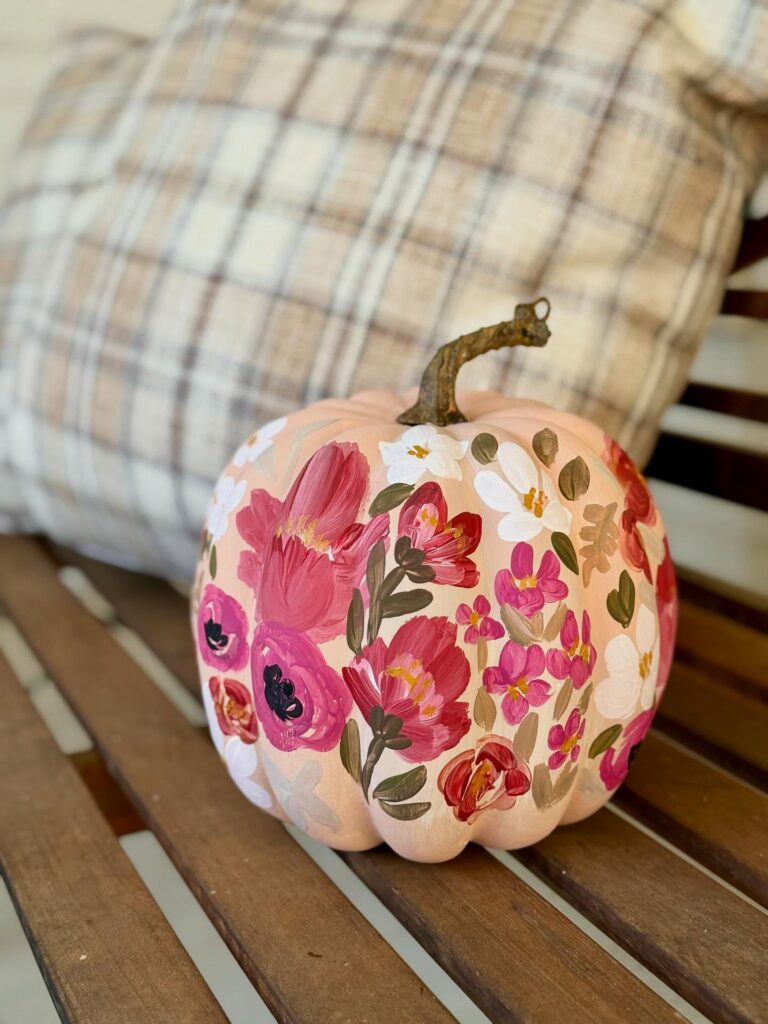
Flowers painted in quick, rounded strokes are easier than they look, because nothing has to be exact. Each bloom here is a few dabs of pink, red, or white with a small yellow center, and the leaves are plain olive-green ovals. If one petal comes out lopsided, it still reads as a flower.
Start with a pale peach base coat so the colors stand out, and let it dry fully. Paint the largest blooms first, then fill the gaps with smaller ones and add leaves last. Crowding the flowers close together hides mistakes, so don’t leave big empty patches.
This pumpkin looks like a smooth, fake one, and that’s the better choice for paint. Real pumpkins have uneven skin that makes small brushstrokes harder to control. A craft pumpkin also lasts for years.
Set it next to a plaid cushion, as shown, and the soft colors hold up against the pattern.
M&M character pumpkins
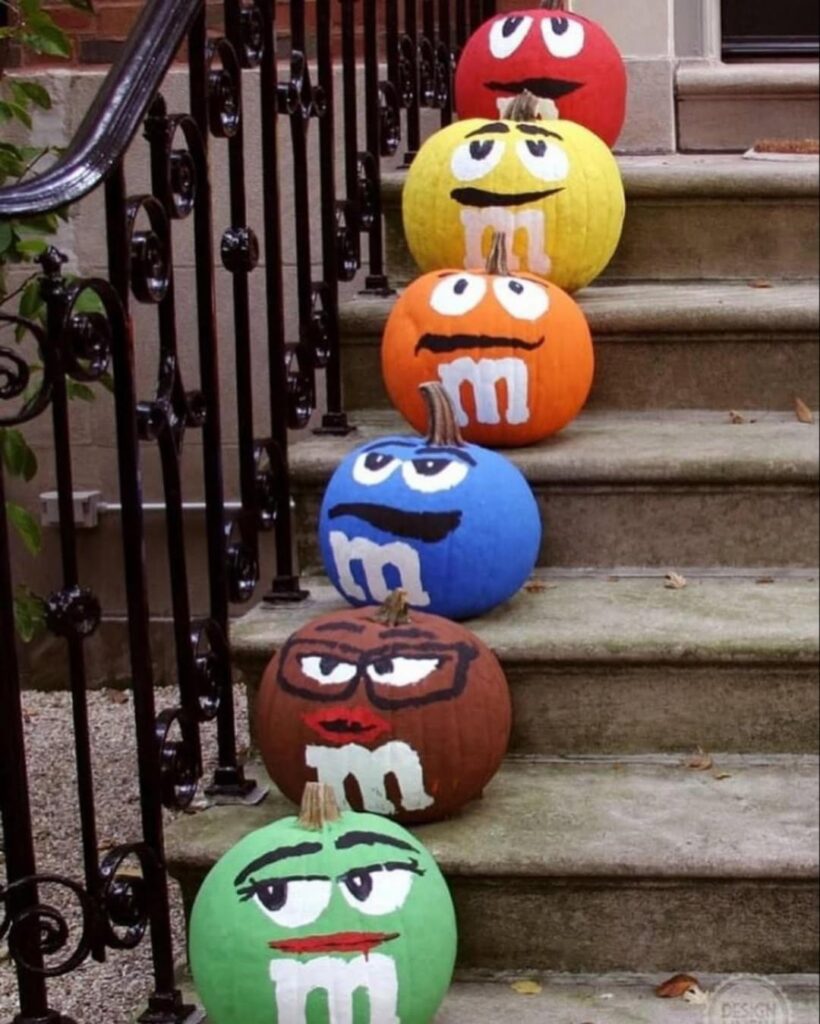
Turn each pumpkin into an M&M face for a painted Halloween display that reads fast and does not need carving. It is easy. Paint the whole pumpkin in one candy color, then add wide eyes, a black mouth, and a white lowercase “m” on the front.
The set works best with mixed sizes lined up on steps. Brown, blue, green, orange, yellow, and red are enough. Skip tiny details unless the pumpkin is large.
Cartoon Characters on Matched Shapes
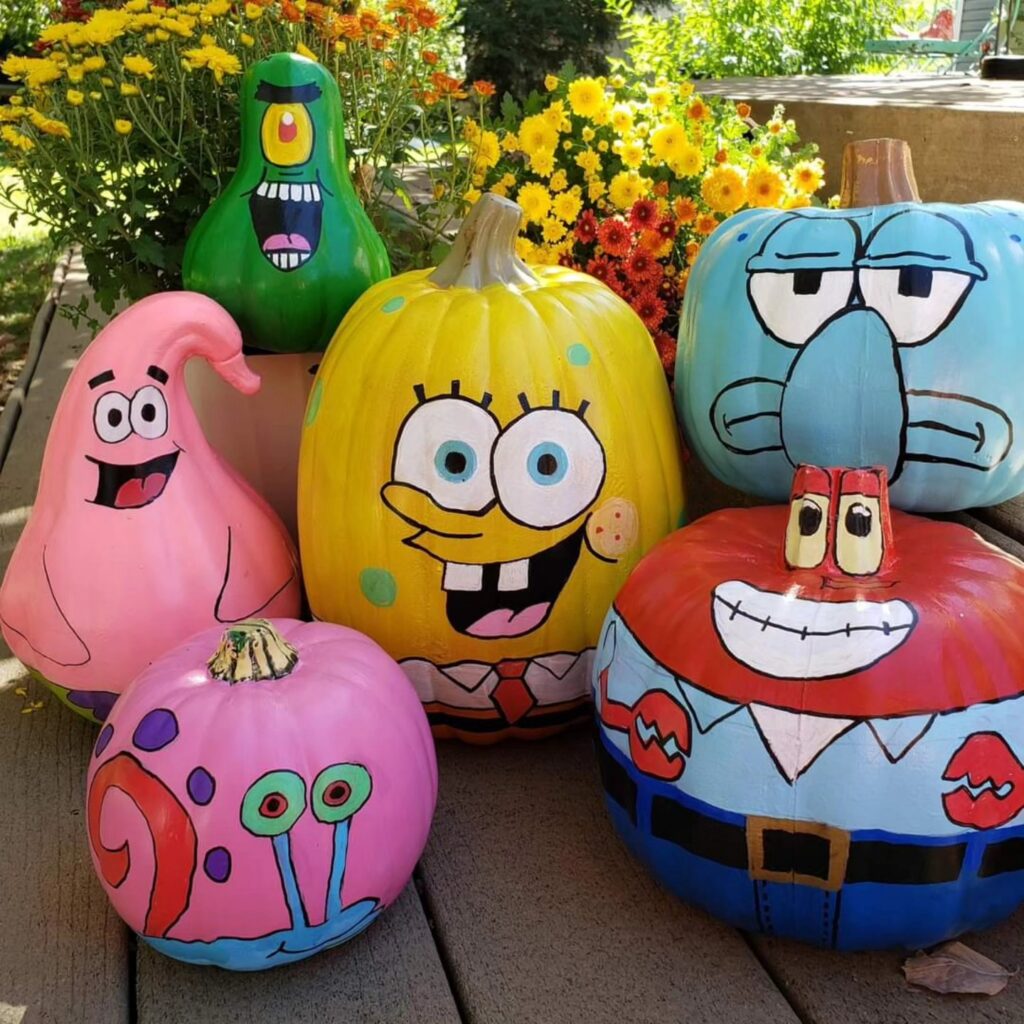
Pick the gourd first and let its shape decide the character. Here a long-necked gourd bends over like Patrick’s pointed head, and a small green pear-shaped gourd stands in for Plankton. Mr.
Krabs gets a squat pumpkin with his eyes painted up the stem. That’s the whole trick. Base-coat each one in a flat color, then outline every feature in thin black paint, which covers wobbly edges.
Any cartoon family works if the shapes vary enough.
Spa Face Pumpkin
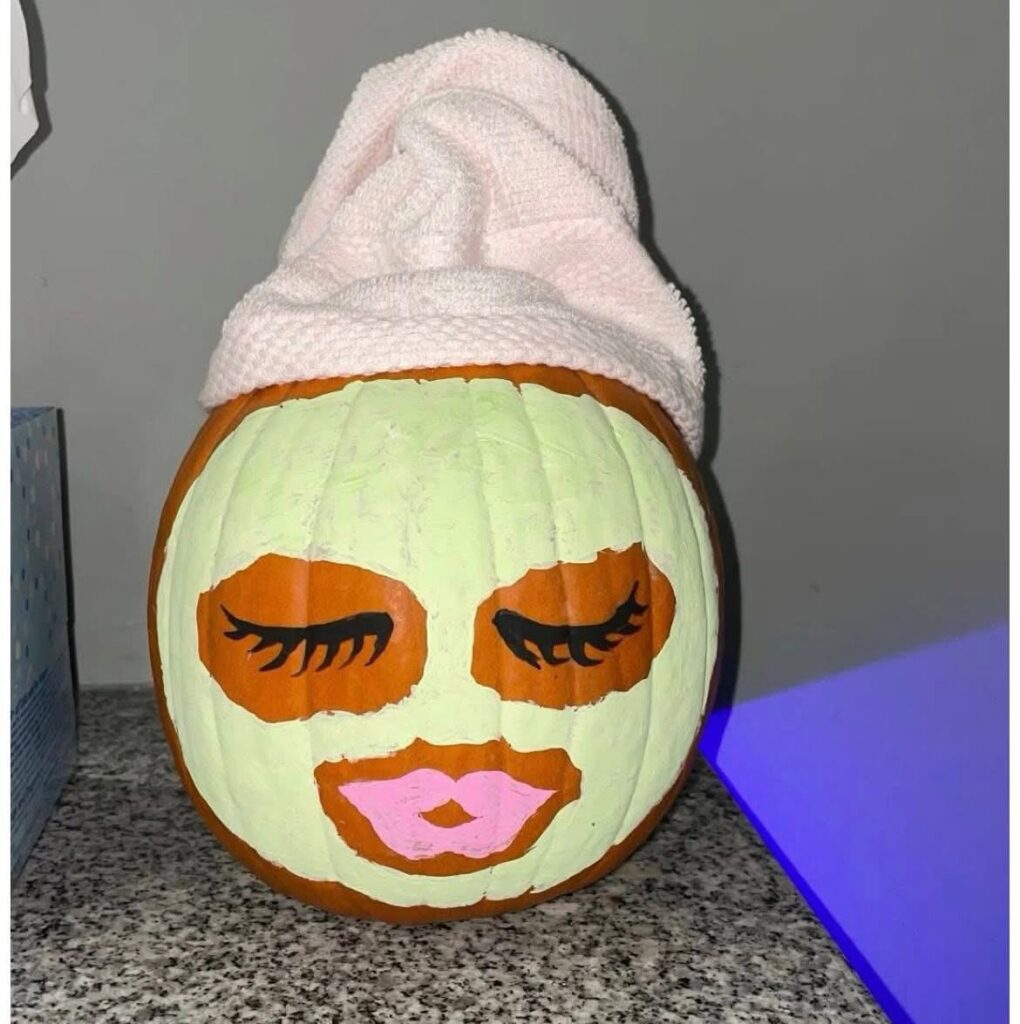
Turn a pumpkin into a little spa-night face by painting a pale green mask over the front and leaving orange shapes open for the eyes and mouth. The idea suits this list because the lines can be rough, and the paint does not need to cover every ridge. Add black lashes across the orange eye shapes, then paint a small pink mouth below.
That is the whole face. A folded hand towel on top makes the pumpkin read as a person with wet hair wrapped up, and it hides the stem if you do not want to paint around it. Swap the green for blue, cream, or white if that is what you have.
Use a smaller pumpkin for a bathroom shelf or a larger one by the front door.
Stacked Striped Pumpkin Tower
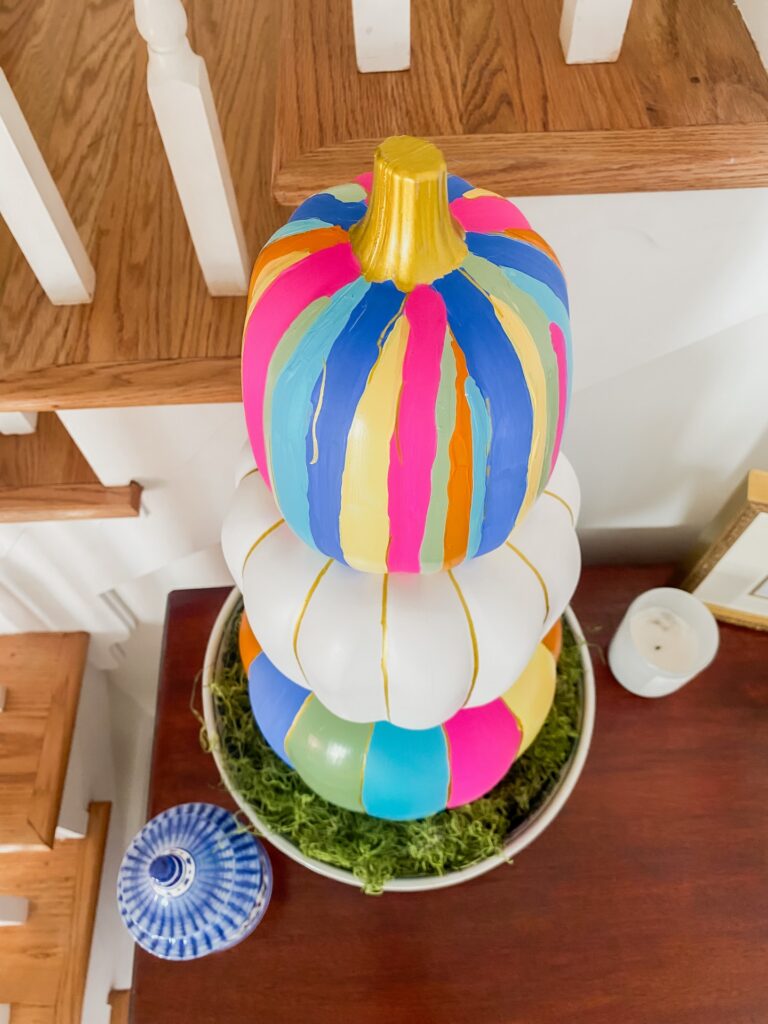
Three pumpkins stacked in a bowl look like more work than they are. Each one is a craft pumpkin with vertical stripes painted from stem to base, no taping needed. The drips are part of the look, so you can stop worrying about steady lines.
Pink, blue, yellow, orange, green, and aqua cover the top and bottom pumpkins. The white one in the middle gives your eye a place to rest. A thin gold line traces each rib on it.
Paint the stem gold too. Set the stack on a bed of moss in a shallow bowl so it stays put.
Sugar Skull Pumpkins
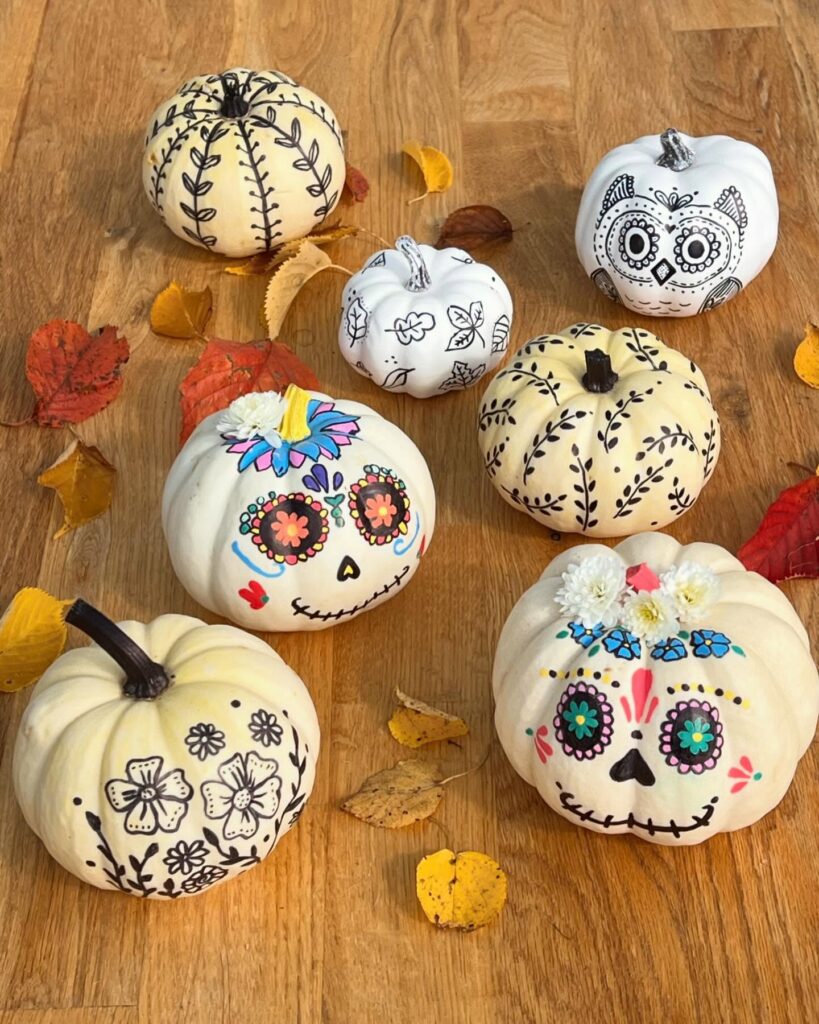
Sugar skull pumpkins are an easy painted idea because the shape does most of the work. You just paint a white base, then draw simple eyes, a nose, and a stitched mouth in black. Add color after that.
Flowers, dots, and small petal shapes around the eyes are enough to get the look. This suits small pumpkins too, since the face stays clear on a short, round surface. Faux flowers on top work well, but a painted flower crown is less effort.
Black and White Movie Pumpkins
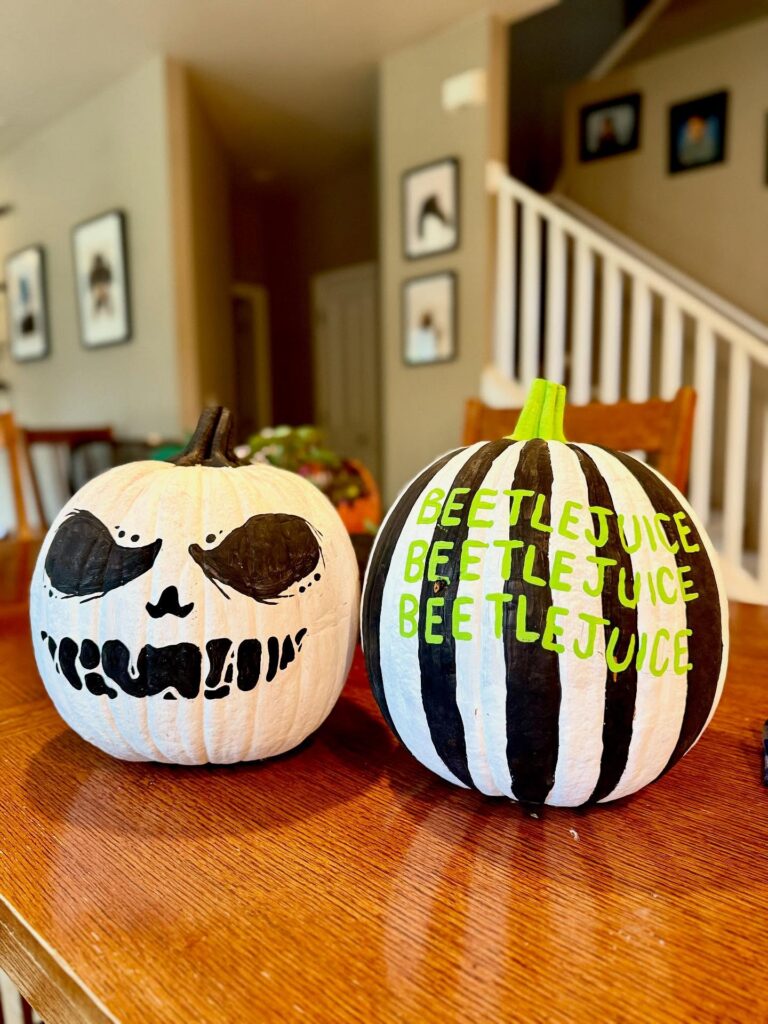
Two paints do the work. Coat each pumpkin white first, then add black: wide oval eyes and a stitched grin on one, vertical stripes on the other. The pumpkin’s own ribs act as guides for the stripes, so you can skip the tape.
Lime green lettering spelling “Beetlejuice” three times finishes the second one. Paint the letters last, once the black has dried, because any smear shows up against white.
Candy Color Pumpkins
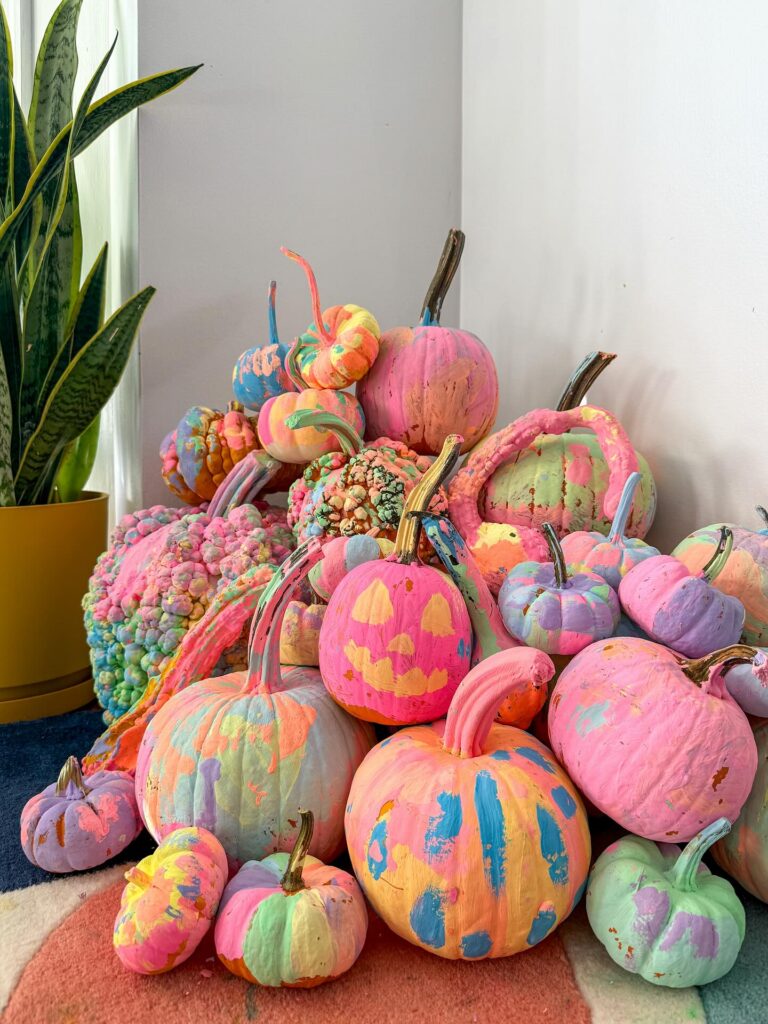
Paint each pumpkin with loose patches of pink, mint, blue, orange, and yellow, then let the brush marks show. This idea works because the finish does not need clean lines. Mess is allowed.
Use several pumpkin sizes so the colors repeat across the group, like the small ones tucked around the larger round pumpkins here. Leave the stems mostly bare, or drag a little paint over them if the brush is already loaded. A simple face can go on one pumpkin, but keep most of them plain so the pile does not look too busy.
For less cleanup, set them on a drop cloth and paint one side at a time. Swap in craft pumpkins if these need to last past one season.
Chinoiserie Bird Pumpkin
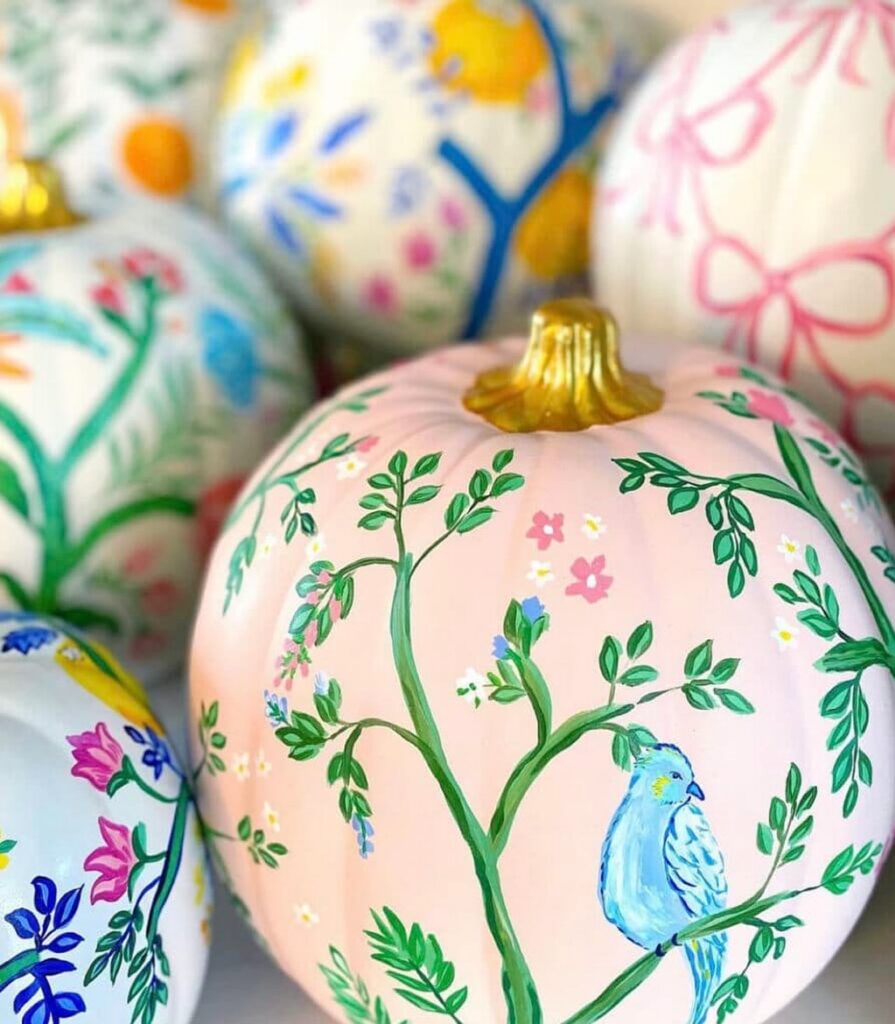
Paint the pumpkin a pale pink first, then let it dry fully before you add anything else. The branch is the easy part. One thick green stem climbs up from the bottom, and the thin offshoots and small leaves are just quick strokes with a fine brush.
Add a blue bird sitting on one branch. Tiny pink and white flowers fill in the gaps. A gold-painted stem gives the top a finished look.
The design looks hard, but it only uses a few repeated shapes. Skip the pencil sketch if you’re nervous about it looking stiff. Loose, uneven branches look better here than careful ones, and a few crooked leaves won’t be noticed.
Daisy Painted Pumpkin
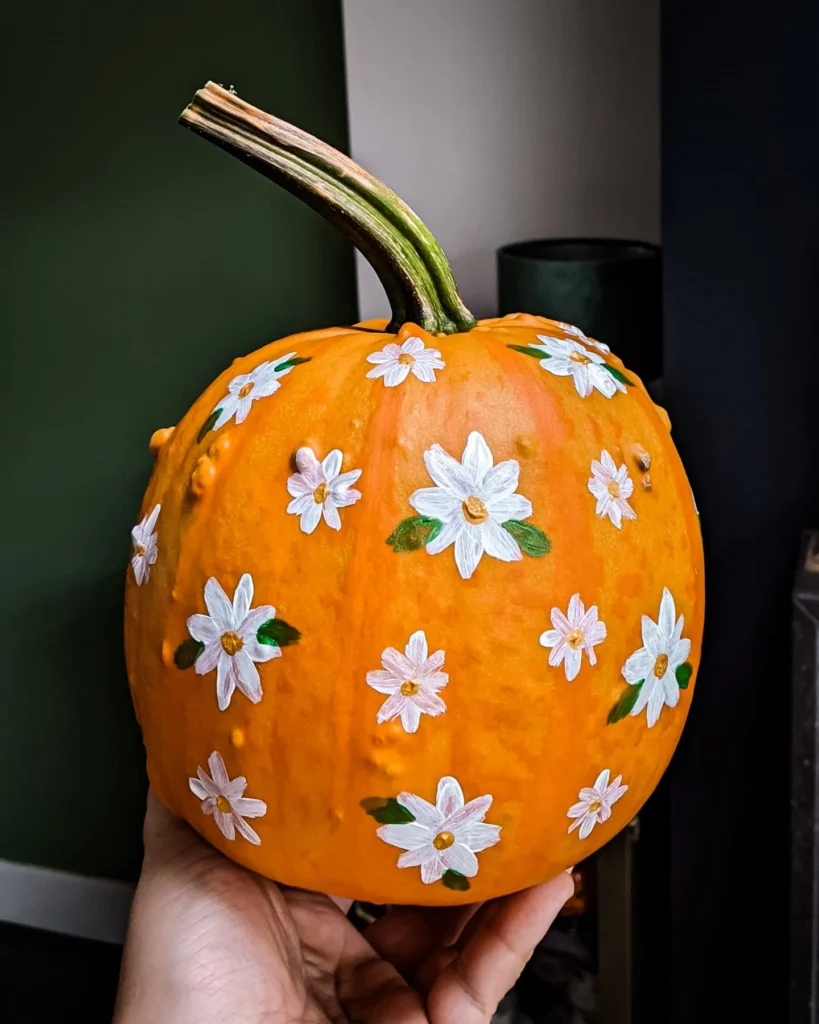
A daisy painted pumpkin is an easy way to dress up a plain orange pumpkin without carving a thing. Keep the flowers small. Scatter white daisies with yellow centers across the surface, and add a couple of green leaves under some of them so the pattern does not look flat.
This works well for people who want a softer fall look. A real pumpkin suits it, since the bright orange shows through between the flowers.
Pink Pumpkin With Tiny Ghosts
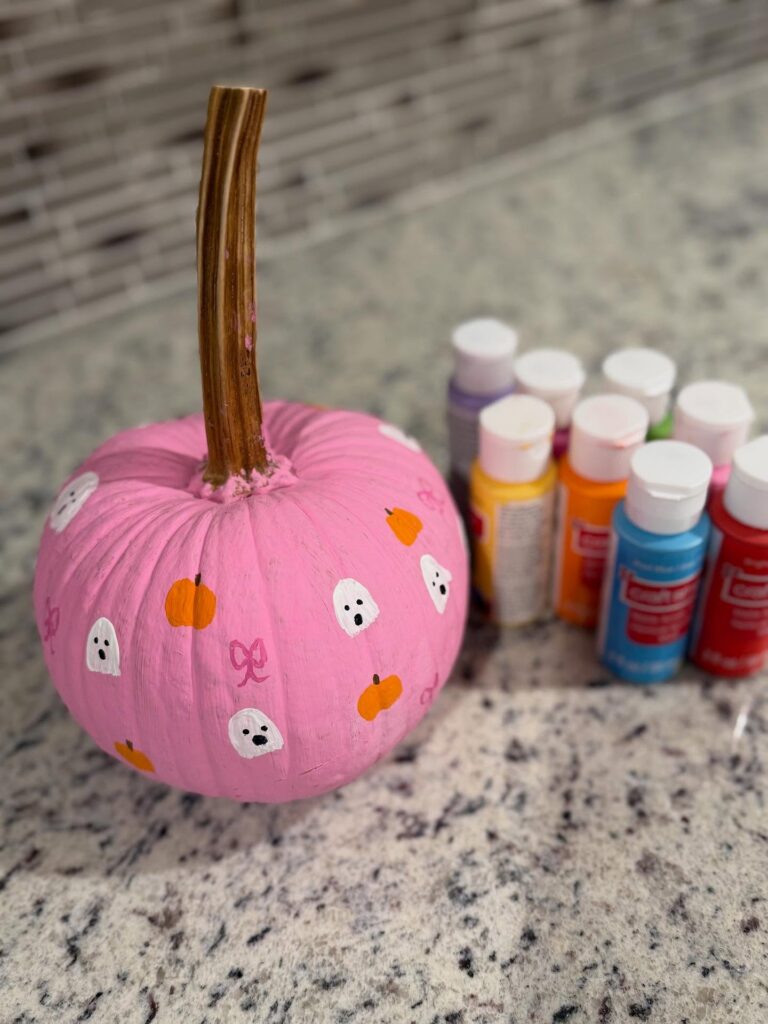
Paint the whole pumpkin a flat bubblegum pink, then scatter small ghosts, mini orange pumpkins and thin bows over it like a print on fabric. Each shape takes a few brushstrokes. A ghost is a white rounded blob with two black dots for eyes and one for a mouth, and the pumpkins are orange ovals with a tiny stem.
The bows are two loops and two tails in a darker pink, so they stay quiet. Space everything loosely and tilt a few shapes in different directions, so the pattern looks hand-drawn rather than stamped on. Small bottles of craft acrylic cover well here.
Let the pink base dry completely before you add any of the small details on top. Tape off the stem first. In the photo, pink paint crept up its base, and a clean brown stem would look sharper.
Pastel Jack O Lanterns
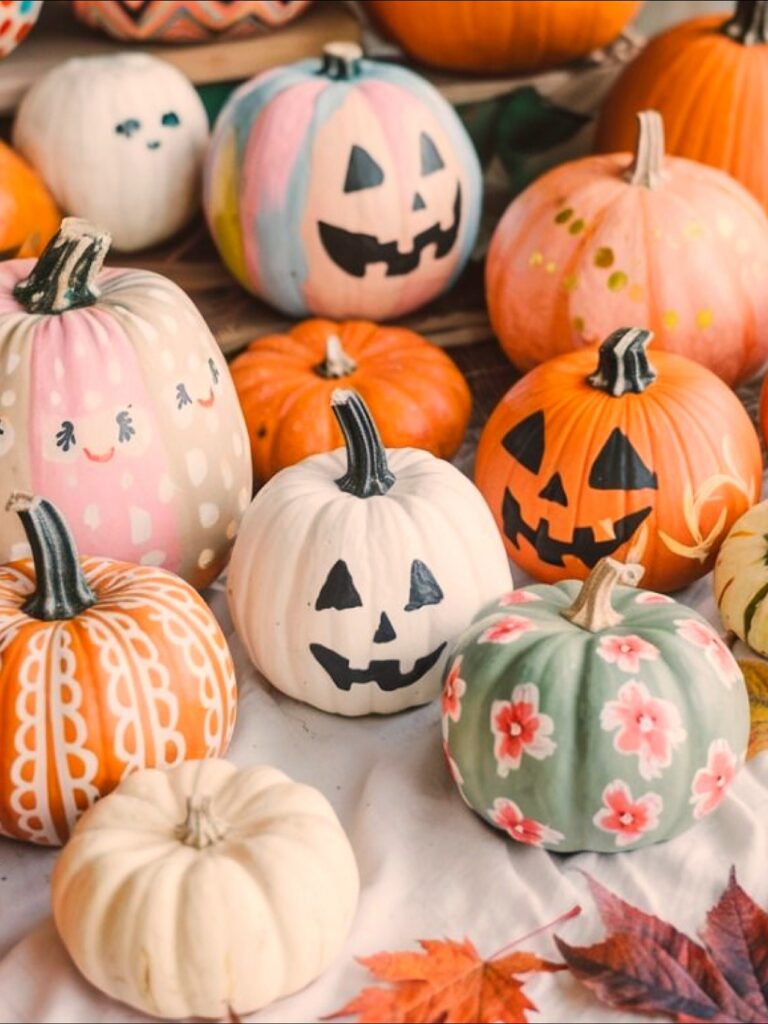
Start with pastel jack-o’-lantern pumpkins if carving sounds like a mess. Paint the whole pumpkin first, then add a face after the base coat dries. The black triangle eyes and broken smile in the image work because they need only a small brush, not a stencil.
Keep it simple. Pale pink, blue, cream, or peach all still read as Halloween once the face goes on. For kids, draw the features with pencil first and let them fill in the shapes.
For a cleaner edge, use painter’s tape for the triangle sides, then fix the corners with a tiny brush. Mini pumpkins suit this idea better than huge ones because the faces do not need much detail. Swap the pastel base for orange if you want the same method with a more standard pumpkin look.
A matte finish hides brush marks better than glossy paint.
Painted Pumpkin Face Stack
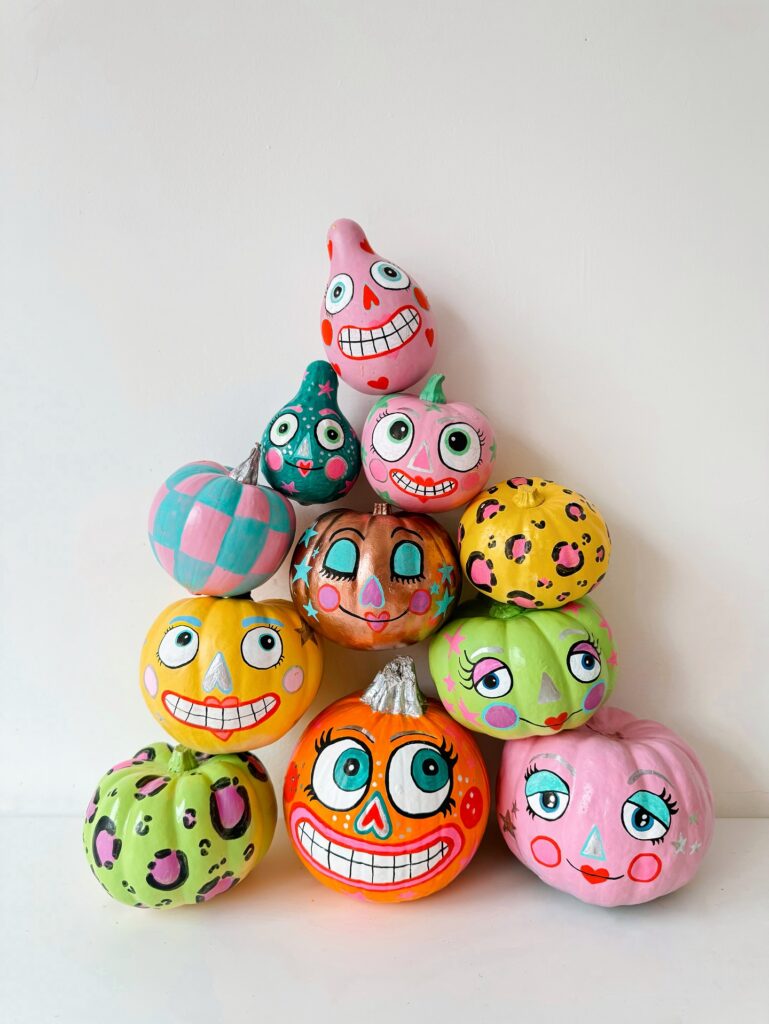
Faces are the easiest way to make a painted pumpkin look finished, because the eyes do most of the work. Here, each pumpkin gets the same basic setup: big white eyes with a colored iris, round pink cheeks, a small triangle nose, and a wide grin with white teeth. Then every one gets a different base coat, so they read as a group instead of copies. A few are plain pink, yellow, or orange. Others get leopard spots or a pink and teal checkerboard.
Paint the base first and let it dry fully. Add the whites of the eyes next, then outline everything with a fine black marker or brush. Silver paint on the stems is a quick finish.
Skip the stacking if your pumpkins are heavy. A flat row on a shelf works fine.
Bright Pattern Pumpkins
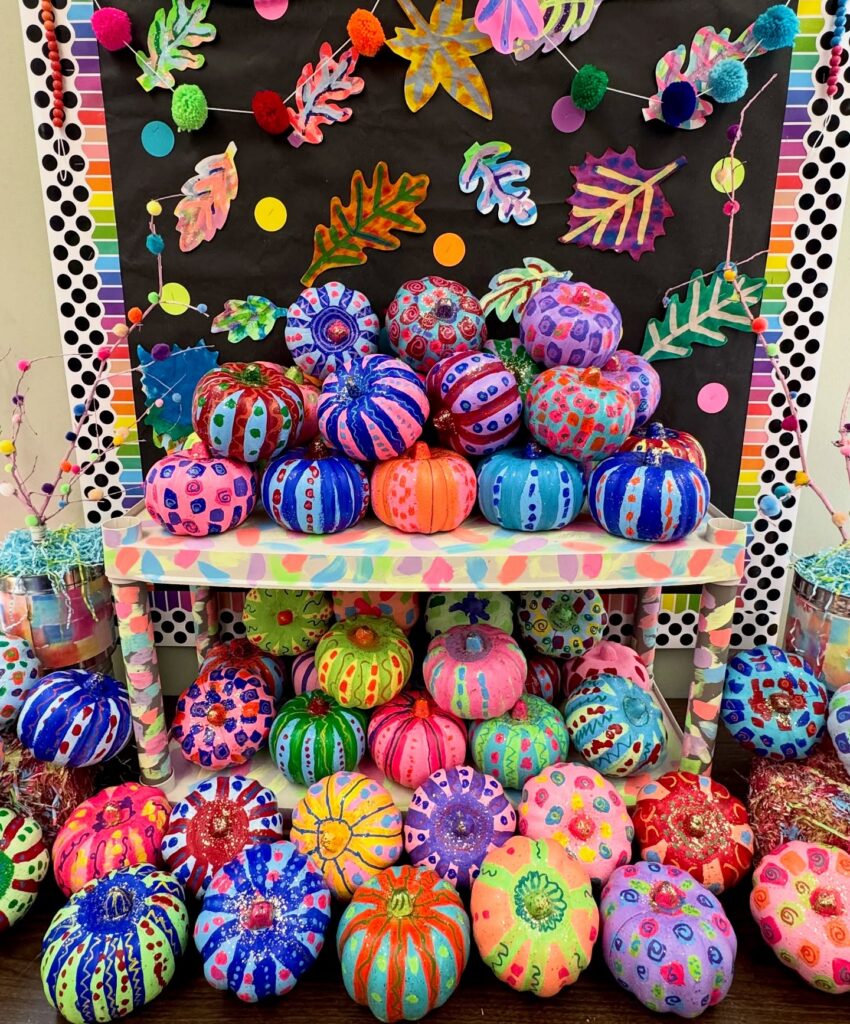
Start with solid painted pumpkins, then cover them in loose stripes, dots, swirls, and short lines in a few bold colors. This one is easy. The shapes do not need to match, and that is what makes it work for a quick project. A blue pumpkin with white stripes and red dots looks just as good as a pink one filled with small circles.
Small pumpkins suit this best because you can group a lot of them together and let the color do the work. Keep the base coats bright, then add simple marks with a thin brush or paint pen. Repeat one or two colors across the set so the mix still feels tied together.
This idea suits kids, classrooms, and anyone decorating a table or shelf. Skip faces. The all-over patterns already give each pumpkin enough to look at.
Bow-Tie Pasta Bat Pumpkin
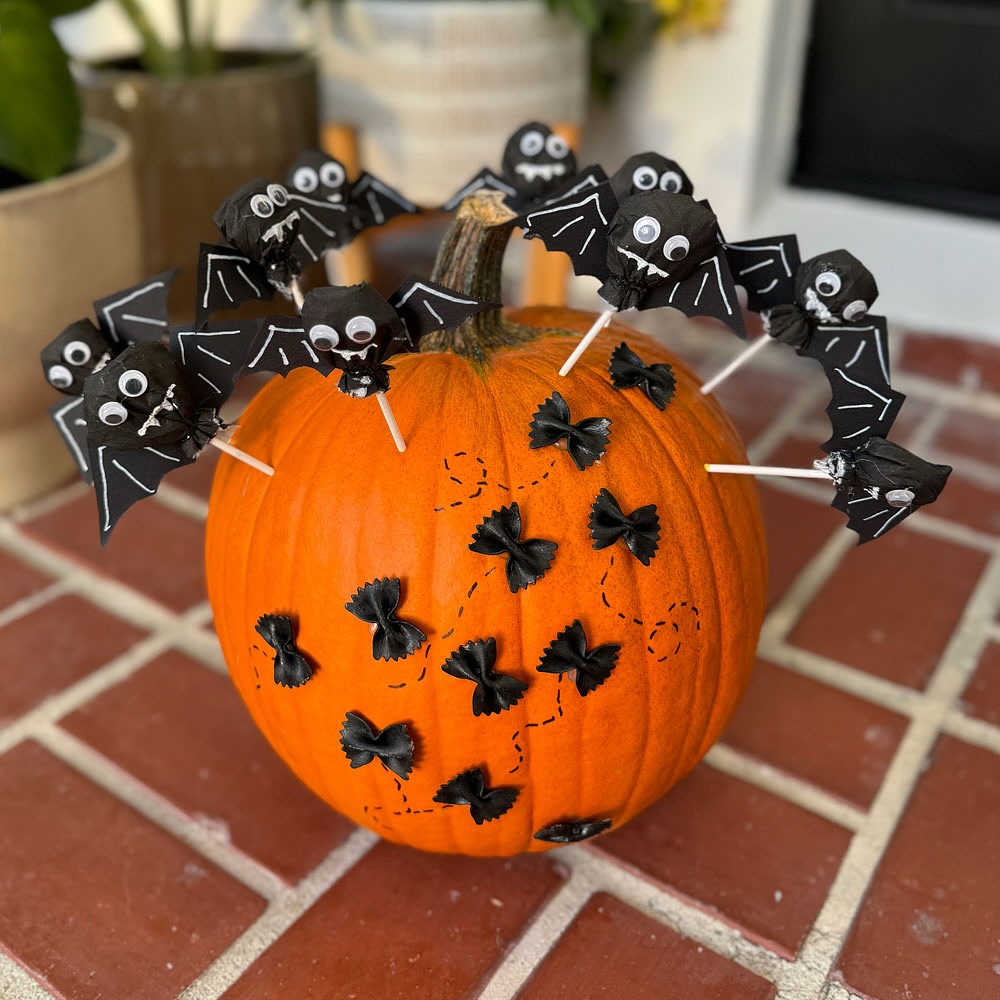
Bow-tie pasta painted black already looks like a bat, which is why this one is so easy. Spray a handful of dry pasta black, let it dry, then hot-glue the pieces across the front at different angles. A thin black marker adds dashed flight paths that loop between them.
That step matters. It makes the bats look like they’re moving instead of stuck in place. The bigger bats sticking out of the top are lollipops wrapped in black tissue, with googly eyes and paper wings, pushed into the shell on their sticks.
Kids can handle that part alone. Skip them if you’re short on time and only want the pasta and marker. The pasta alone carries the idea.
Black Leaf Pumpkins
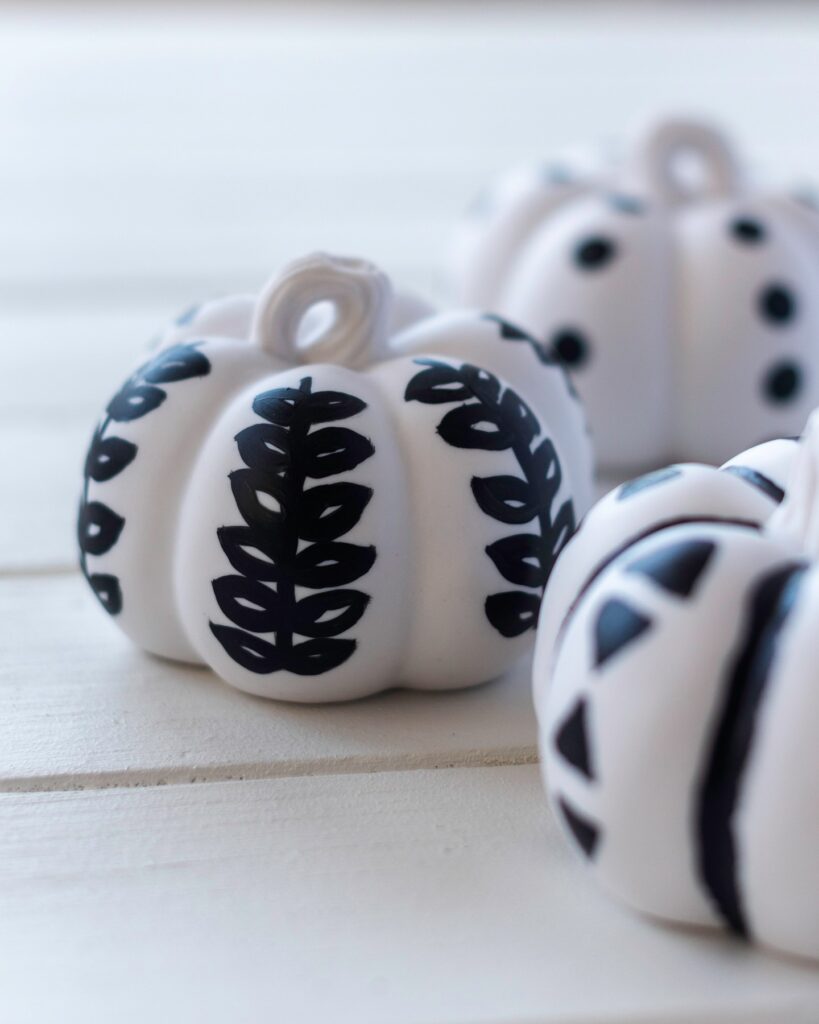
Paint black leaf sprigs on small white pumpkins, letting each pumpkin rib act like its own panel. The look stays easy because the shapes are basic: one center line with oval leaves on both sides. Use a fine brush for the stem of the design, then fill in the leaves with black paint.
Keep the stems plain. That small break at the top helps the pattern look cleaner. If leaves feel too fussy, swap in dots, short dashes, or half-moon shapes, like the other pumpkins nearby.
This idea suits anyone who wants fall decor without orange, glitter, or a long drying setup. It also works well in groups, since each pumpkin can carry a different black pattern while still matching the rest.
Dots, Stripes and Squares
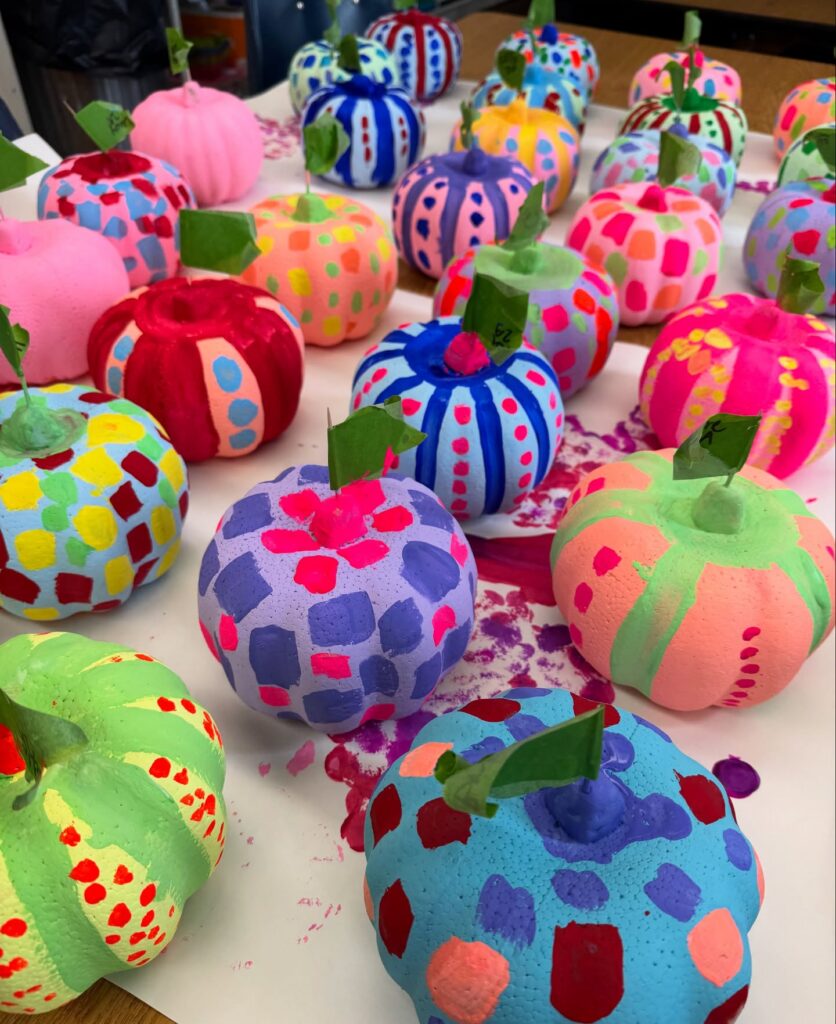
Foam pumpkins take paint well, which makes a whole batch easy to do in one sitting. Pick a base color for each one, let it dry, then add a single repeating shape: dots, dashes or little blocks. Stripes along the ridges work too.
Green paper stems folded and taped on top finish them. Keep the colors loud and let each pumpkin be different from its neighbor. This is a good one for a group or a classroom table, since nobody’s pumpkin has to match.

