
17 Easy Pumpking Carving Ideas
This site contains affiliate links. We may earn a small commission, at no extra cost to you. Article may contain some images for illustrative purposes only .
Big Grin, Loose Teeth
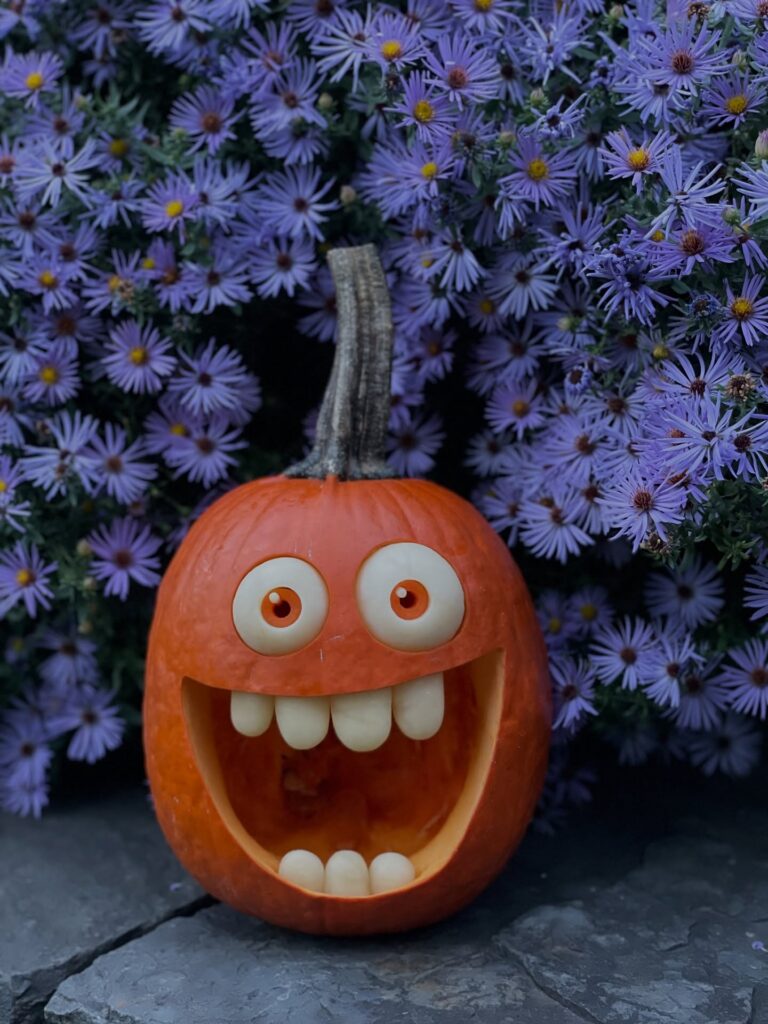
Start with the mouth, because everything else hangs off it. Cut one wide crescent, nearly the full width of the pumpkin, and leave the top lip thick enough that the eyes have somewhere to sit. The teeth are separate pieces. Shave them from the flesh you scooped out, or from a pale pumpkin if you have one, then push each into the rim with a toothpick. Four on top, three on the bottom, none quite matching.
For the eyes, I’d use halved ping-pong balls with an orange circle drawn on over carving sockets and discs by hand. Same look, a fraction of the work. Put the pumpkin in front of something dark, like those asters, so the white stands out.
Star Cutout Pumpkin
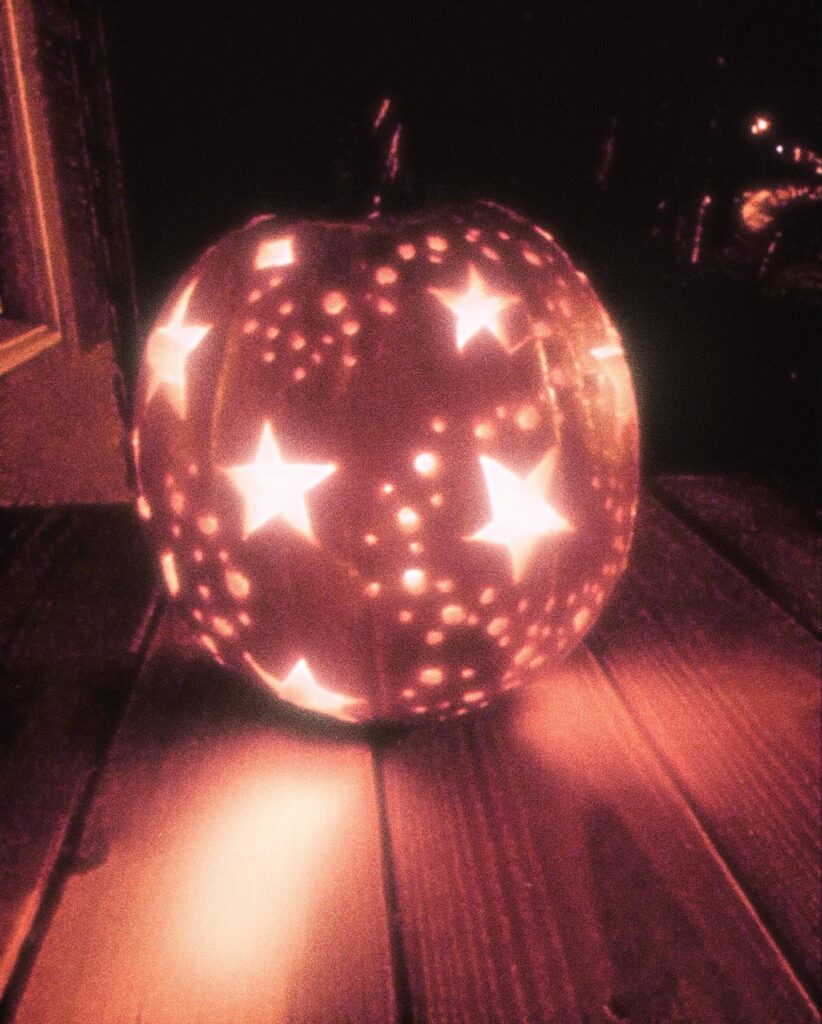
Start with the big stars. They do most of the work here, and they’re much easier to cut neatly than a whole lace pattern across the pumpkin. Use a small knife for five-point stars, then add the tiny round holes around them with a skewer, drill, or metal straw so the surface ends up looking scattered rather than crowded in one patch.
That mix matters.
The larger openings throw the strongest light, while the pinholes fill in the gaps and make the pumpkin look brighter from farther away, especially if you set it near a wall or on floorboards where the light can spread out a bit. This one suits people who want something detailed without having to carve a complicated face. I’d skip a real candle here, though, because all those little holes can soften and warp faster from the heat.
Classic Zigzag Grin
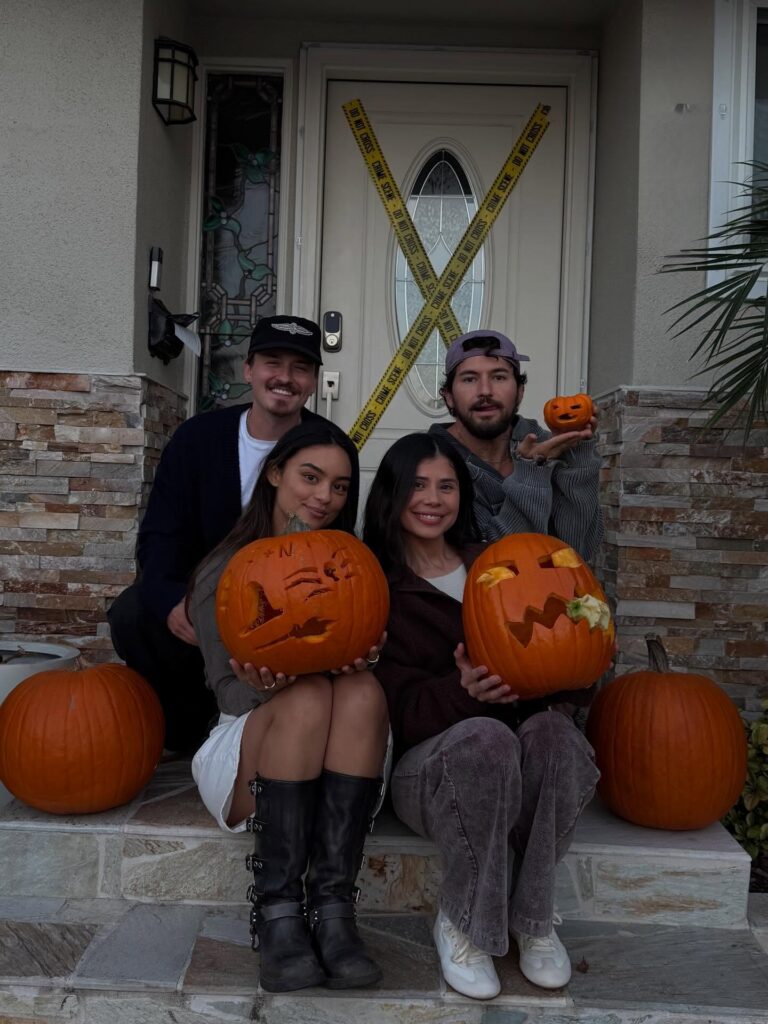
Start with the mouth, since it’s the part people recognize from across the street. The pumpkin on the right has a wide zigzag running almost ear to ear, and the trick is drawing it with a marker first, keeping each tooth roughly the same size so the line doesn’t drift to one side halfway through. Eyes come after.
Two slanted triangles, nothing fancy. A couple of the cut-out pieces look like they’ve been left wedged back in the openings, which gives it a lopsided, half-squinting face. Probably an accident, but worth copying if you want some character without extra work.
Use a serrated kitchen knife instead of the flimsy kit saws. They bend on a pumpkin this thick. If you’ve got kids helping, this is honestly the one to hand them.
Moon And Stars
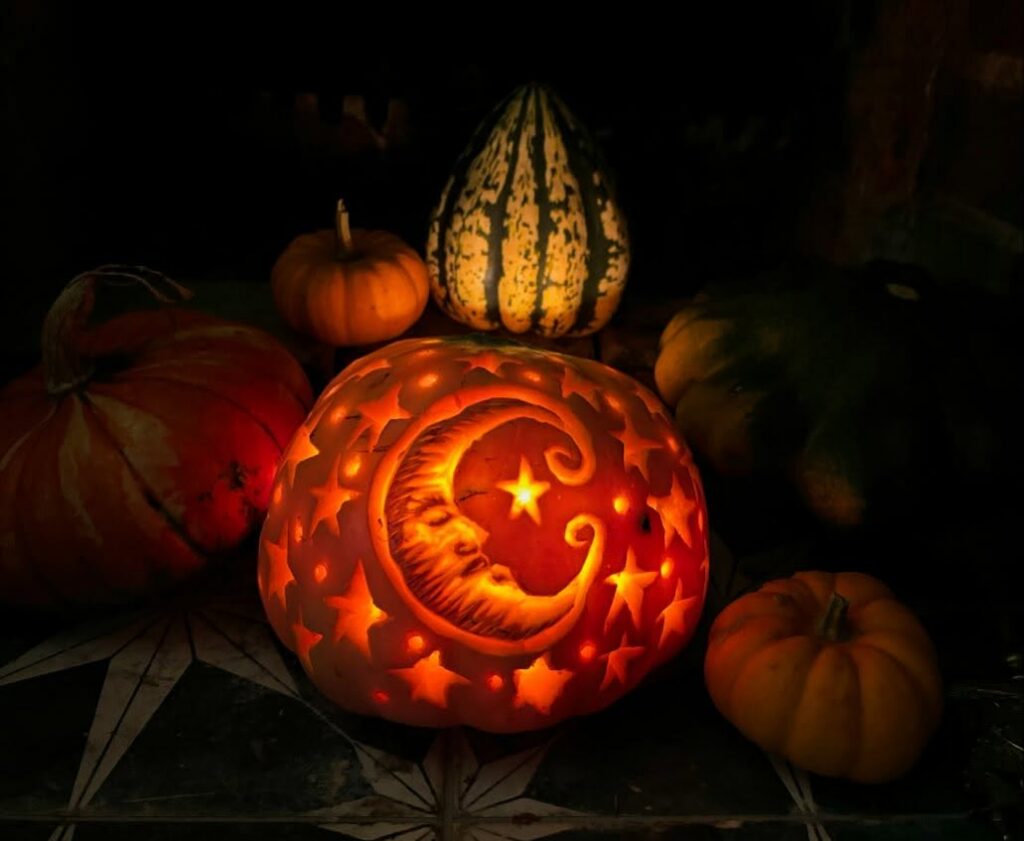
Start with the crescent first, because that face shape needs the most space and one bad cut can make the whole pumpkin look messy. Use a marker to sketch the moon, then shave the skin around it instead of cutting every part all the way through, so the candle gives that soft orange glow. Keep the stars simple.
A few full cutouts, a few tiny drilled dots, and the pattern already looks full without taking hours. The upright striped gourd behind it works well as a plain background piece, so I’d place this carved pumpkin in front of uncarved ones rather than making every pumpkin compete. Use a battery light if kids are helping.
Swan With Shaved Details
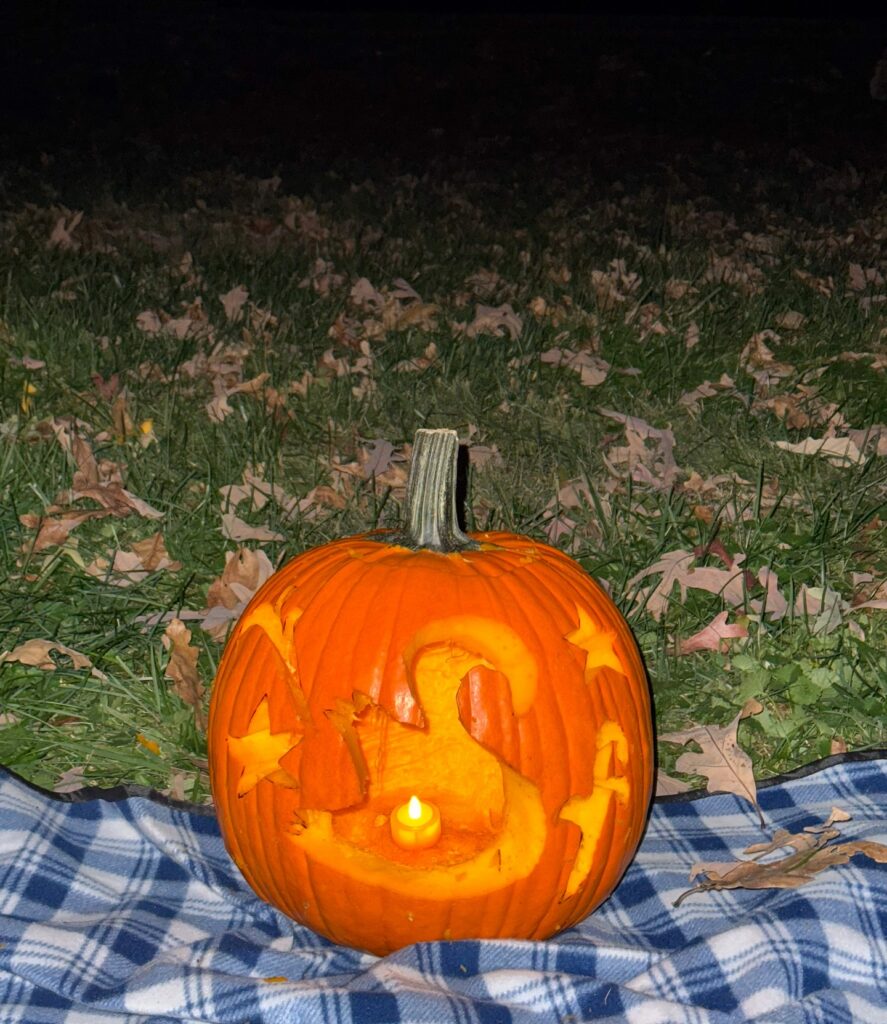
Peeling the skin off instead of cutting through is what makes the swan glow orange rather than show up as a hole. You scrape away the outer layer with a loop tool, leave the flesh underneath, and the light comes through thinner there. Easy.
Draw the neck curve first in marker, because a wobbly line on a swan reads as a bent noodle. The stars around the edge are the forgiving part. A small cutter or a paring knife does it, and nobody notices if one comes out lopsided.
A battery tea light is plenty, like the one sitting in this pumpkin. I’d skip a real flame if the pumpkin is going on a blanket.
Pumpkin with a doorway
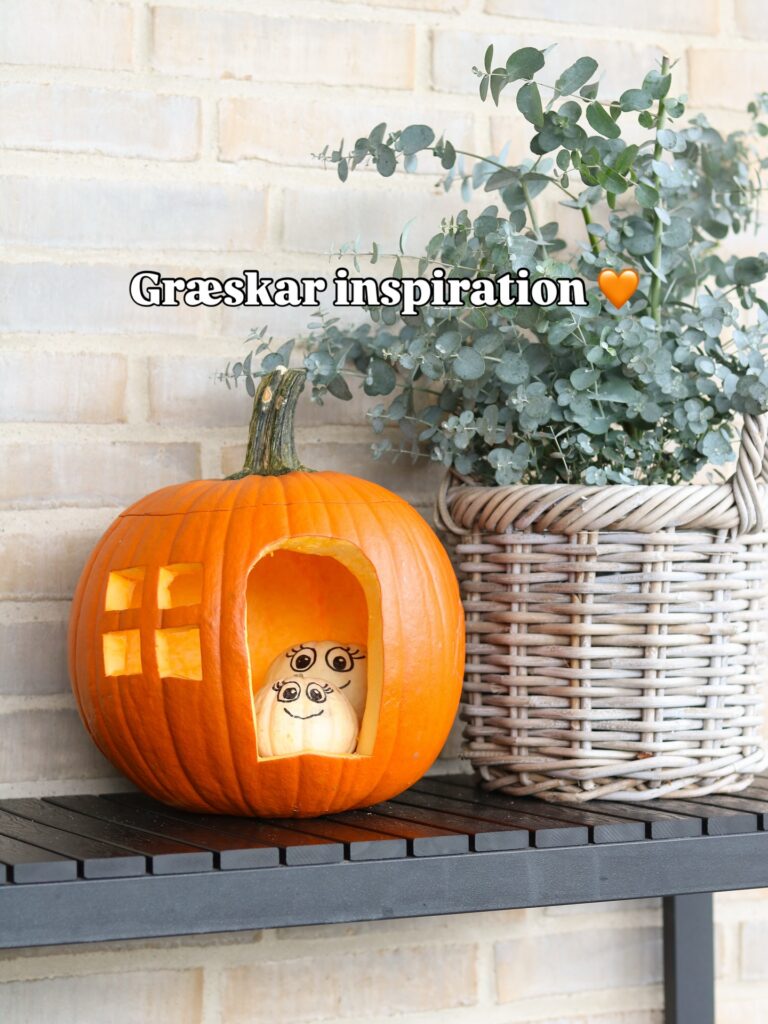
Start with a tall doorway cutout instead of a face. It gives you one big opening to work with, so this suits anyone who wants a carved pumpkin without fussing over tiny teeth or detailed shapes. Add a small four-pane window off to one side, and the whole thing reads like a little house right away.
The smaller pumpkin inside is what makes this one. Draw a simple face on it with marker, tuck it into the opening, and you get that layered look without having to carve extra details into the main pumpkin wall. Very little carving.
A battery tea light behind the small pumpkin works better than a candle here, since the inside piece takes up space and you do not want heat building up in that hollow. I’d skip overly perfect cuts. Slightly uneven edges actually help this one.
Witch Against a Glowing Moon
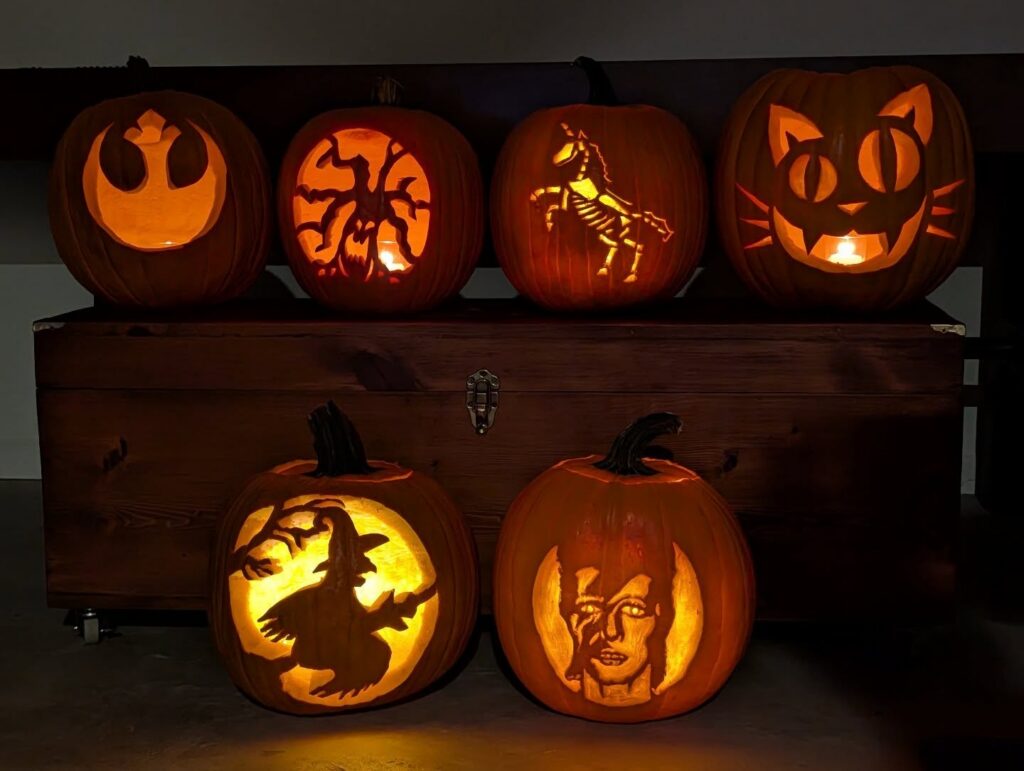
Nothing on the witch pumpkin actually gets cut through. You draw a big circle, then shave the skin inside it down until the flesh is thin enough for the candle to show through, leaving the witch, her broom and those bare branches as untouched orange skin. That’s the whole trick.
Since no pieces fall out, a wobbly line on the broom handle won’t ruin anything, which makes this a good pick for anyone nervous about knives. A lino cutter or a melon baller works for the shaving. Swap the witch for a bat, a howling wolf or a cat sitting on a fence and it still reads clearly from across the street.
I’d hold off on the Bowie face sitting beside it, though. That kind of shading takes hours.
Glowing Jagged Face
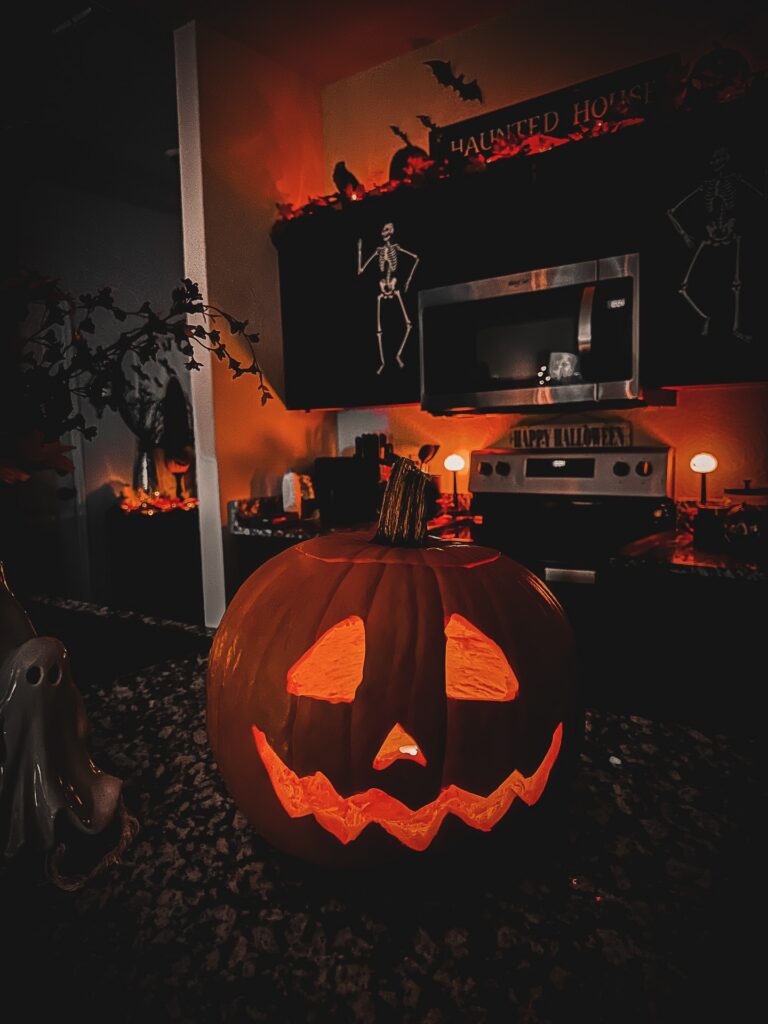
Start with the mouth first, because that uneven zigzag is doing most of the work here. Then add the nose. Make the eyes tall, with a soft dip at the bottom, so the face does not look too crowded once it is lit.
Big cuts glow better. If you are placing it on a counter like this, put a battery tea light inside and another orange light behind it, near the backsplash or under a cabinet. That gives the carved edges more color without needing a difficult design.
I would skip tiny teeth here, since they break easily and get lost once the lights are low. A haunted house sign, paper bats, or one plastic skeleton in the background will make the pumpkin feel tied to the rest of the setup.
Spiral Eyes, Nothing Else
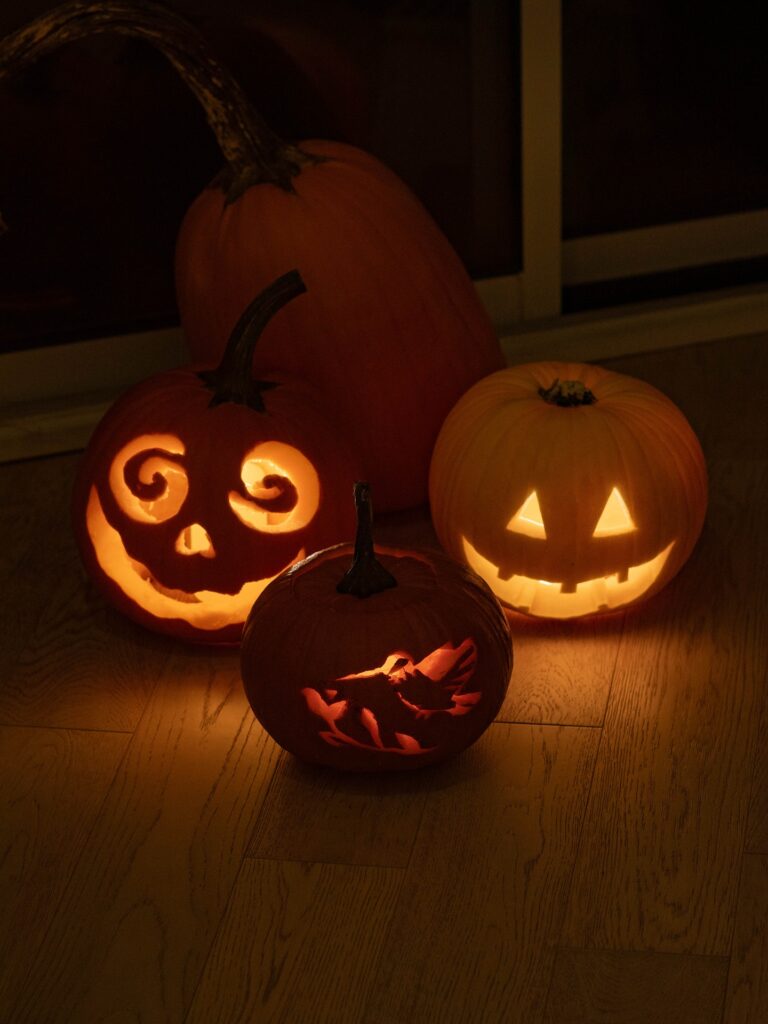
The spiral eyes are the only hard part, and they’re not that hard. Draw a circle, then a curl inside it that stays attached to the rim at one end, and cut only the gaps beside the curl. Keep the curl about as thick as your thumb.
Thinner than that and it snaps the moment you push the cutout through. Give it a tiny triangle nose and one long curved mouth with no teeth, so the eyes do all the work. Use the small serrated saw from a cheap carving kit, since a kitchen knife won’t turn that tight.
I’d skip this design on a pumpkin with thin walls. Scrape the eye area down first if the wall is thick, or the light barely reaches the spiral.
Pumpkin cottage windows
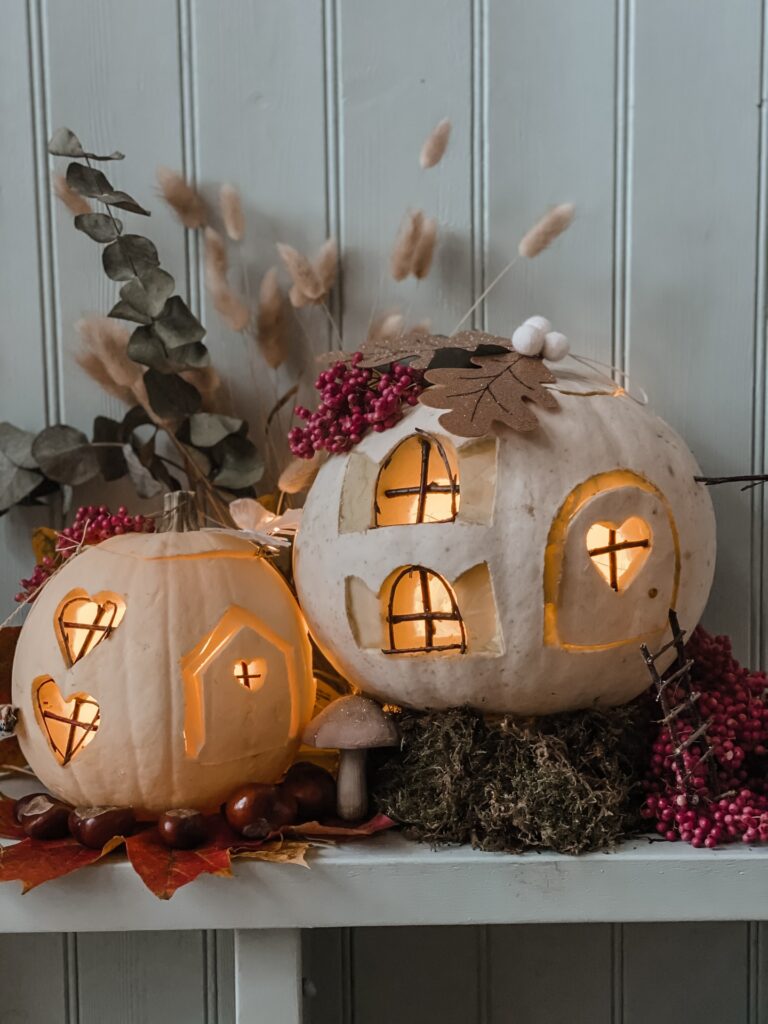
Start with the windows. This idea works because the cutouts are small and a bit uneven, so the pumpkin reads like a tiny house instead of a standard jack-o’-lantern with extra holes.
Sketch two arched windows and one door, then cut them with a craft knife rather than a big serrated pumpkin tool, because you need tighter turns and cleaner edges around the little crossbars. Leave a narrow rim of flesh around each opening so the light glows through the thickness instead of looking flat.
The wire-style grids help a lot. You can fake them with black floral wire, trimmed skewers, or even thin twigs pressed into the openings after carving.
Use a pale pumpkin if you can. The warm light shows up better, and the whole thing has that soft storybook look without much extra work.
Pumpkin Fairy House
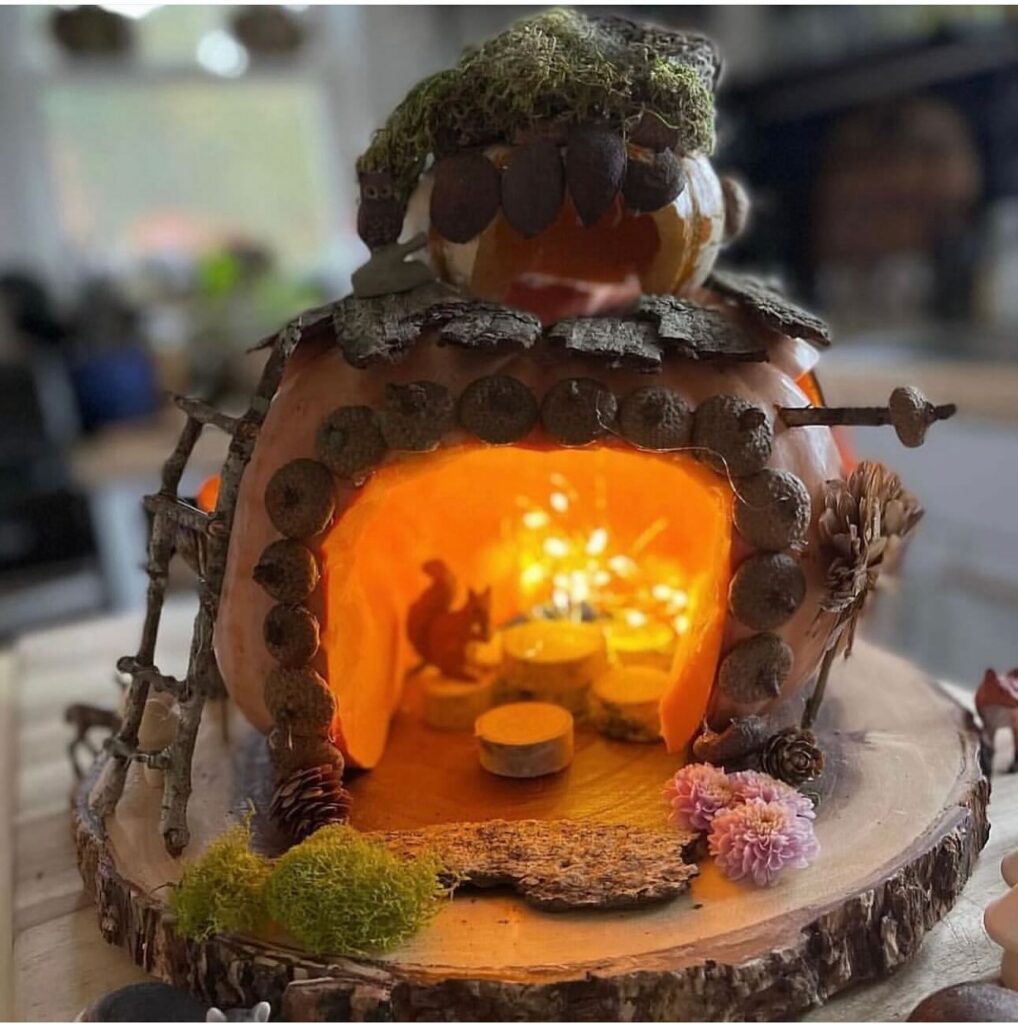
The door is really the only cut that matters here, and it’s a big one, a wide arch taken out of the side so you can see right in. Scoop the walls thin on that side. After that it’s mostly hot glue and whatever you picked up on a walk: acorn caps lined around the opening, strips of bark for roof tiles, a bit of moss on top.
Tiny wood slices make the stools and table. Use battery fairy lights inside, and don’t swap them for a candle. Dry moss near a flame is a bad idea.
I’d skip the second pumpkin stacked on top, because it’s fiddly to balance and the house looks finished without it. Kids love doing the inside.
Stacked Pumpkin Faces
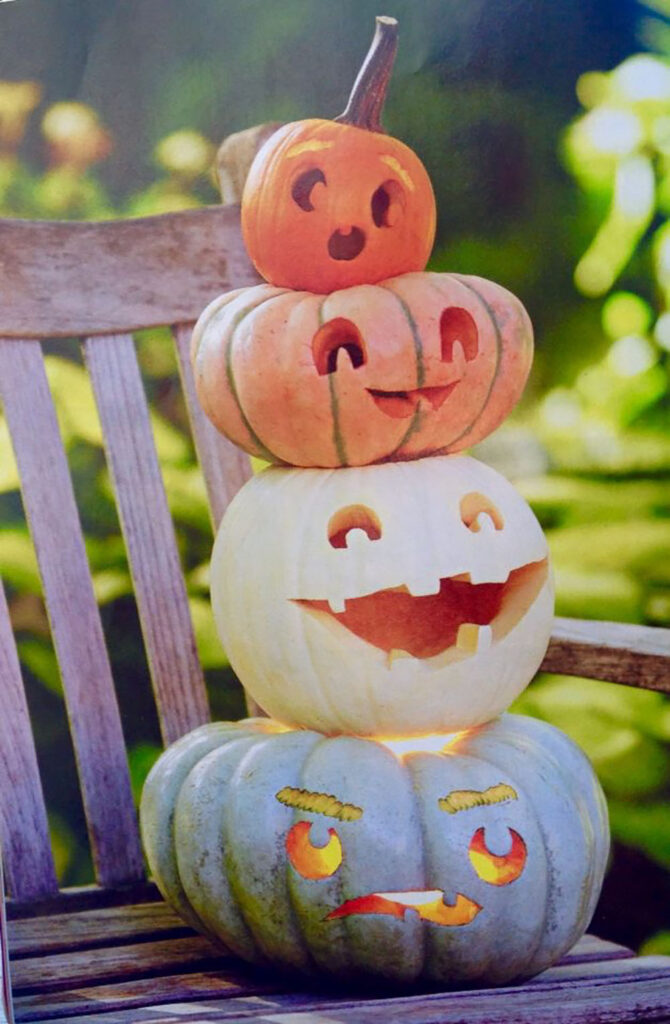
Start with the heaviest pumpkin at the bottom and trim its base flat. Use battery lights. The trick is carving different expressions on each layer, because the little wink, the big open mouth, and the sleepy eyes make the stack feel like a group instead of one decoration.
Keep the cuts simple. A small serrated knife is enough for the half-moon eyes, while the big mouth on the white pumpkin needs a cleaner outline so the teeth do not snap. Push a wooden dowel through the center if the pumpkins are real, or use hot glue if you are working with craft pumpkins.
I would skip candles here, since the upper pumpkins sit too close.
The Sleepy Eyes Pumpkin
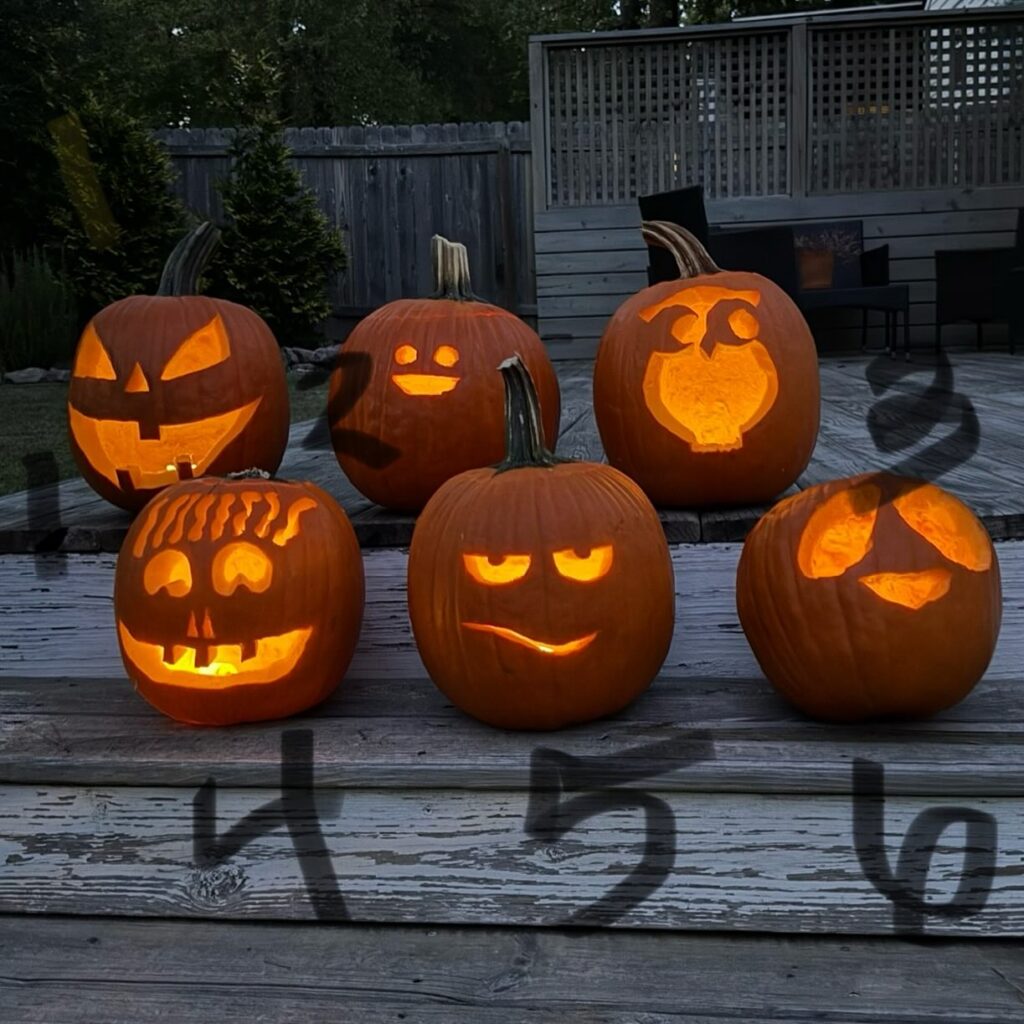
The flat tops on the eyes are doing most of the work here. Cut each one as an oval, then slice the top edge straight across, and the pumpkin looks like someone who’s heard this joke before. The mouth is a single thin line that curls up on one side.
People overthink that part, but you only push the knife through once and drag it, no rounding off or cleanup. Flip the curl the other way and you get a smirk. Three cuts total.
Because so little is removed, the front stays sturdy, so this one holds up longer on a porch than the toothy grins do.
Monster mouth pumpkin
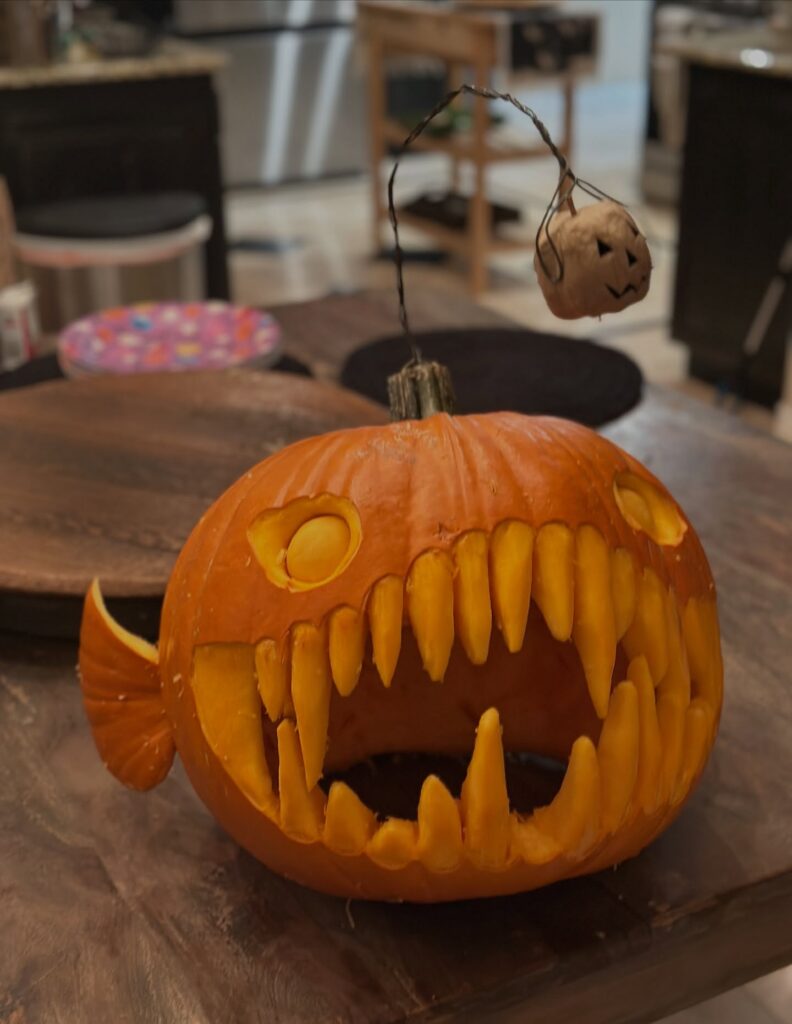
Go big with the mouth. That wide opening is what sells this one, and the long pointed teeth cut from the removed pumpkin flesh make it look much better than a basic triangle-face jack-o’-lantern. Keep the eye holes small and a little uneven so the mouth stays the main thing people notice first.
The hanging bait helps. A bent wire pushed into the stem area with a tiny carved pumpkin or round gourd at the end gives it that snapping, fish-like look without much extra work. Clever detail.
I’d sketch the top and bottom teeth before cutting, because once you start narrowing them, a few can snap off if the walls are thin. For kids, this suits older ones better since the teeth need slower knife work. A battery tea light works best here, especially with that deep open center.
Spider-Man Web Face
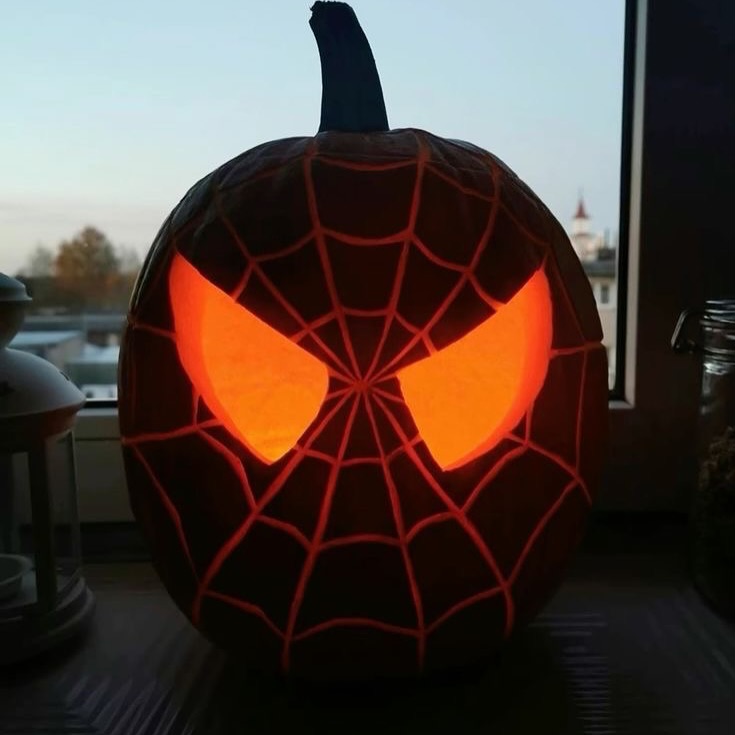
Only the two eyes on this one are actually cut all the way through. Every strand of that web is just the skin peeled off, so the light pushes through a thinner layer of flesh and shows up as glowing lines instead of holes. A lino cutter or clay loop tool handles this better than a knife.
Start between the eyes. Draw the spokes out from there in marker, then join them with curved rungs that sag a little in the middle, the way a real web does. Scrape the inside wall thin or the lines won’t glow.
Carve the eyes before etching. If you do them last, the web around those sharp inner corners tends to flake off, and that’s the exact bit everyone looks at.
Pumpkin Eating Pumpkin
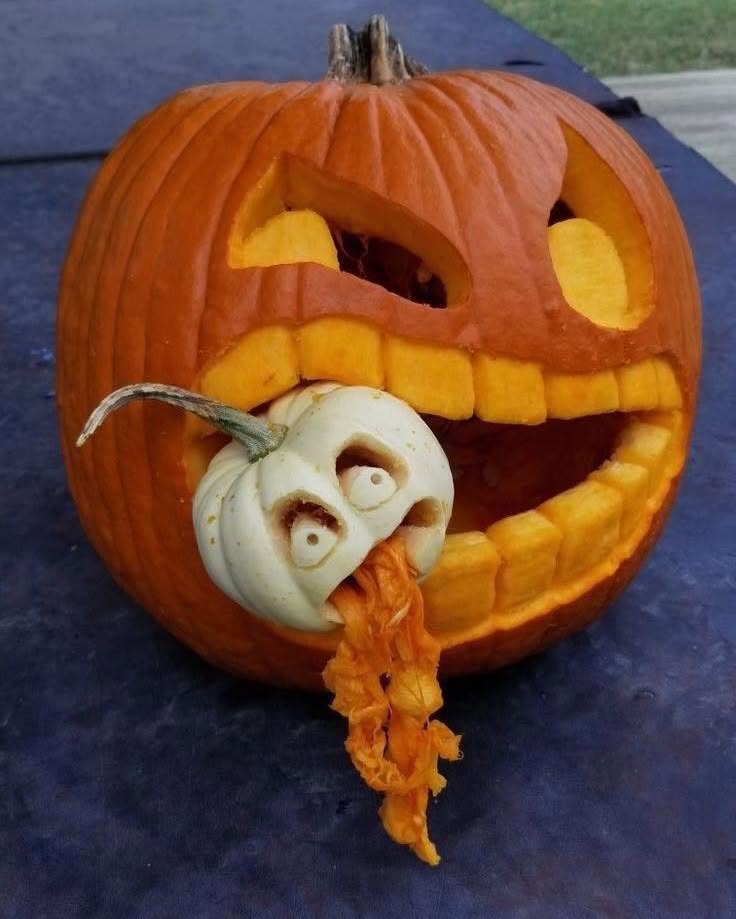
Before you touch the eyes, cut that wide lower mouth first so you know how much space the small white pumpkin needs. Use chunky teeth, not thin spikes. They show better from the porch, and they are less likely to snap while you are pushing the smaller pumpkin into place.
The white pumpkin only needs two rough eyes and a sagging mouth, because the messy orange strands will do most of the acting here. Keep the guts attached. Pull a few strands through its mouth so it looks like the larger pumpkin has already made a proper mess.
I would skip tiny cuts on the big pumpkin’s eyes; the slanted shapes are enough.
Bat Silhouette Pumpkin
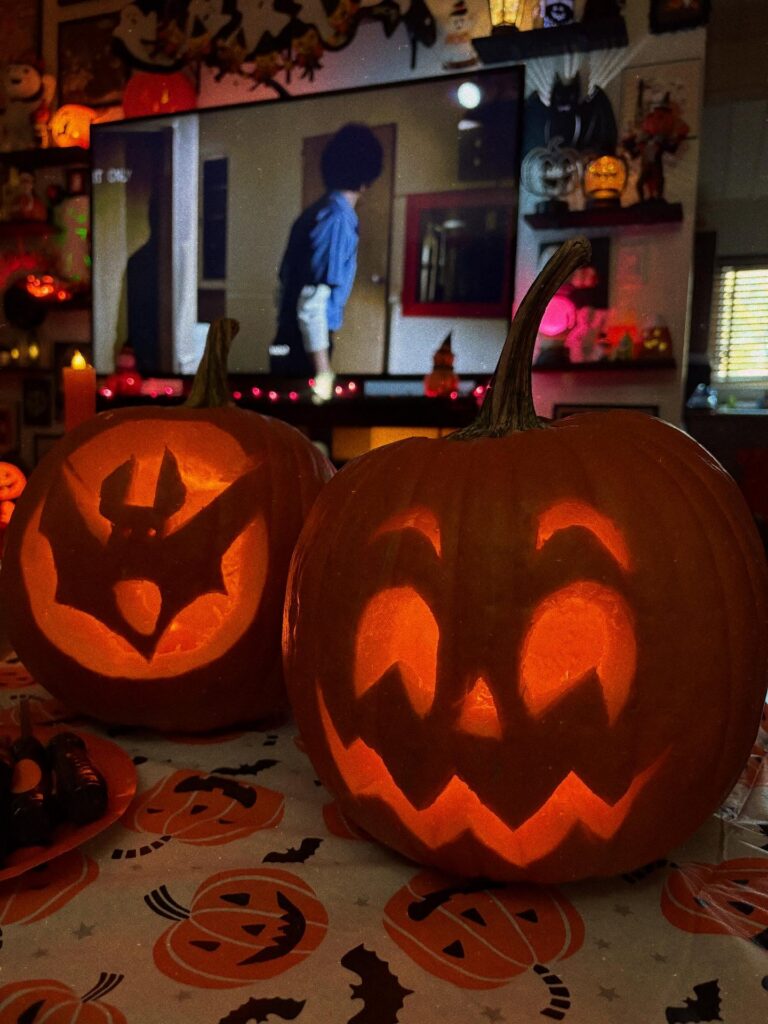
Pick the bat if teeth aren’t your thing. You leave the bat standing and cut away the pumpkin around it, so it shows up as a dark shape against the candle. Wings are where it goes wrong.
Keep the tips thicker than feels necessary, because they snap when you push the cut pieces out from behind, and a snapped wing is hard to disguise. Print a stencil and tape it flat before you poke the outline. The grinning one beside it, with the curved eyes and zigzag mouth, takes a bit longer but the cuts are all forgiving.
Carve both and set them together. I wouldn’t add a third.

