
How to organize all the little things in your home
This site contains affiliate links. We may earn a small commission, at no extra cost to you. Article may contain some images for illustrative purposes only .
Most advice about small things says to buy a set of bins and sort everything into them. That puts the cart before the horse. Bins are only containers, and they can’t tell you where a thing belongs. Start with the item itself. Look at what it is, where you use it, and how often you reach for it. Then give it a home close to that spot. The ideas below cover the many small things that pile up around a house, from the odds and ends you use daily to the ones that get lost. Pick one and try it today.
Clear Cubby Bins
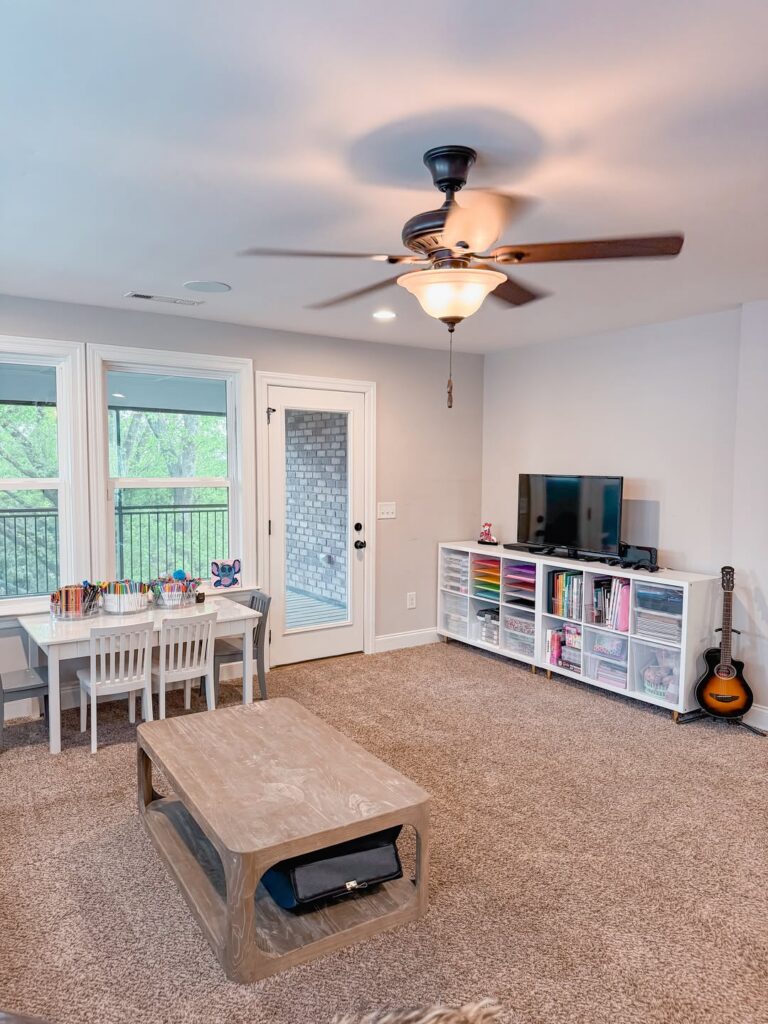
Clear bins keep small supplies grouped without hiding what is inside. Set one in each cubby for items that tend to spread across a room, such as pens, craft pieces, cords, or batteries, and give each bin one category. The see-through sides make it easier to spot what you need before pulling anything out, while the cubby keeps the containers from sliding into a pile. A shelf with a mix of open spaces and bins can also hold books or larger items beside the small things.
The clear sides matter more than the exact container size. If every box were opaque, you would have to open several just to find a handful of markers or a spare cable, and the neat rows would turn into a search. Use bins that fit the shelf depth, and leave a little room to lift each one out. If the compartments are too full, the bins become hard to return and loose items start collecting on top.
Sort Small Supplies Into Bins
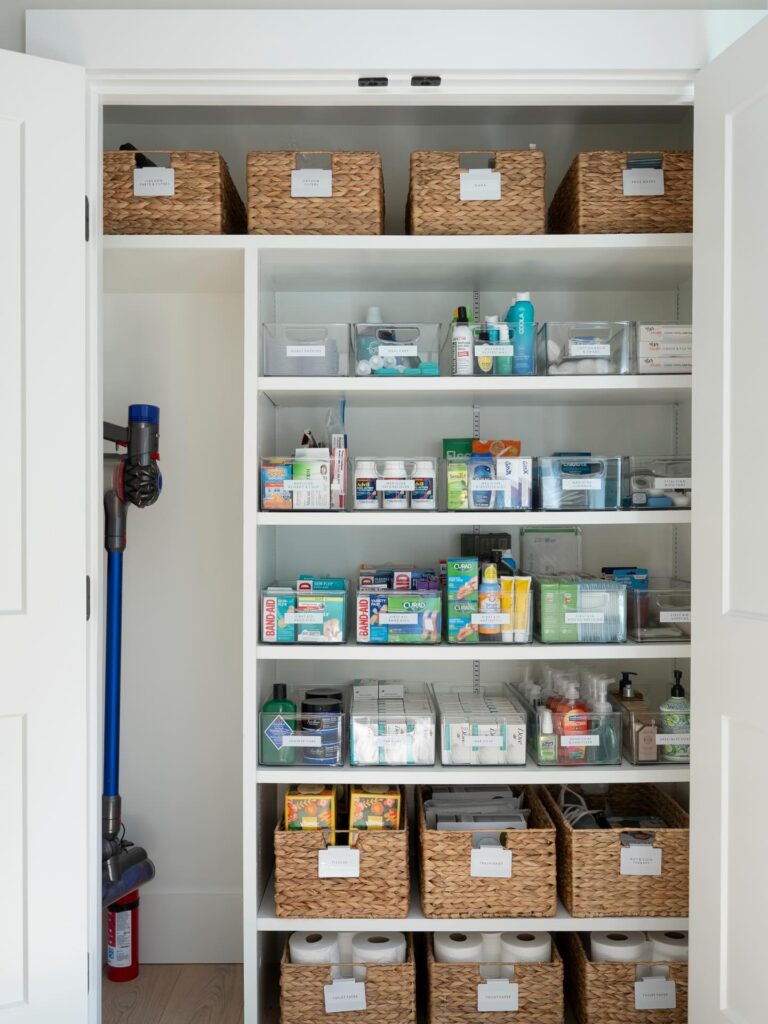
On a hall closet shelf, give each group of small supplies its own bin: bandages, dental care, spare soap, and travel toiletries. Use clear bins at eye level so you can check what’s left without pulling everything out. A label on the front helps everyone put things back in the same spot, even when the contents change.
Near the bathroom, this setup gives spare supplies a place outside the drawers you use every morning. Keep open packages toward the front and refills behind them. For the things you reach for often, choose a bin you can lift out and set on the counter rather than sorting through loose boxes on a deep shelf. Larger baskets on the upper shelves can hold less-used extras, leaving the shelves within reach for all those smaller daily needs.
Sort Reusable Bags by Size
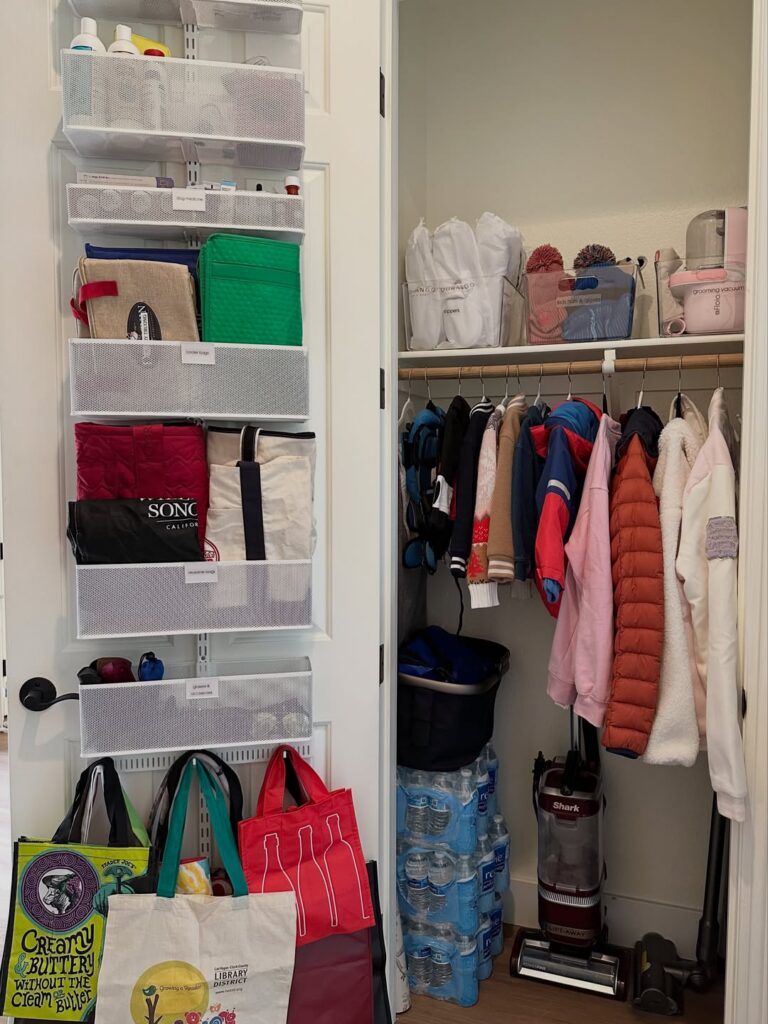
Bags fold down to very different sizes, so grouping them by size and material keeps any one shelf from turning into a pile. Insulated cooler bags sit upright on the upper mesh shelves, flatter quilted ones stack in the middle, and the big canvas totes hang from hooks along the bottom edge. Each shelf has a small label on the front.
I’d put the bags you grab most on the lowest shelf, at hand height.
Labeled Supply Rack
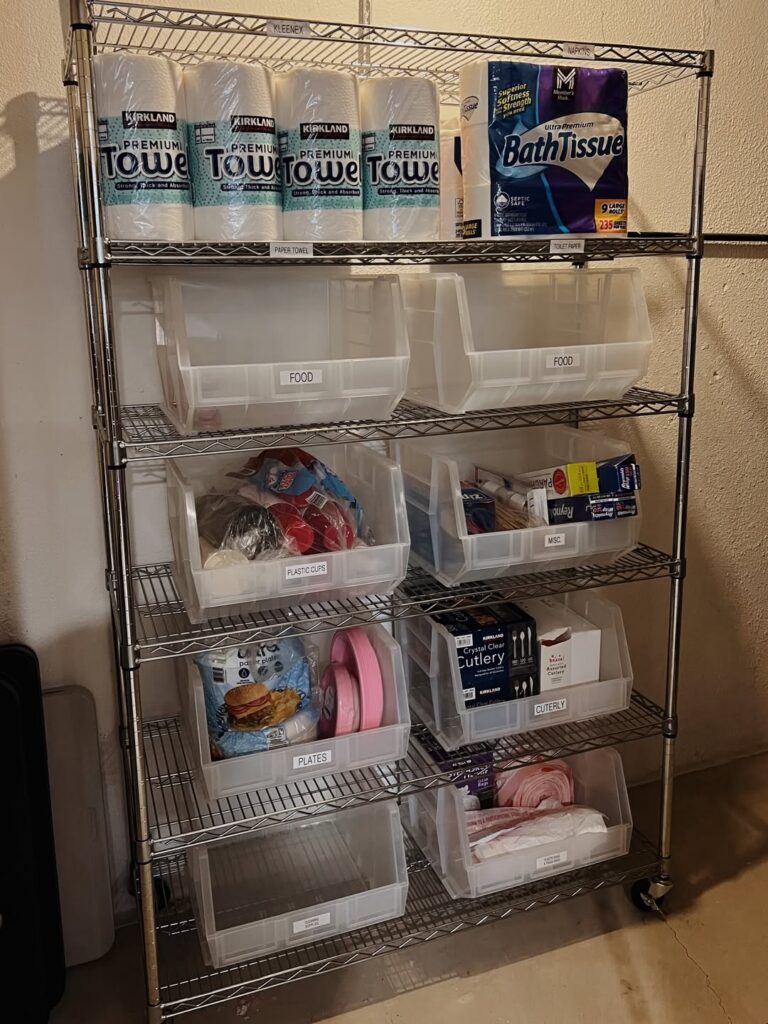
Paper towels can sit on the top shelf, with smaller supplies sorted into labeled clear bins below. This setup is useful in a basement, pantry, or craft room where household items arrive in bulk and need to stay easy to count. Clear sides let you spot what is running low, and labels such as “plates” or “cutlery” help other people put things back without asking. A rolling metal rack also works for a household that rearranges storage or needs to reach supplies from more than one side.
It takes up vertical space, so it suits rooms with a free wall and enough clearance to pull bins out. The open shelves do little to hide mismatched packages, and they offer less protection from dust than closed storage. If you mostly store tiny pieces or want supplies out of sight, drawers or cabinets will be a better choice. Keep the heaviest packages on lower shelves to reduce the chance of the rack tipping.
Group Pantry Staples in Bins
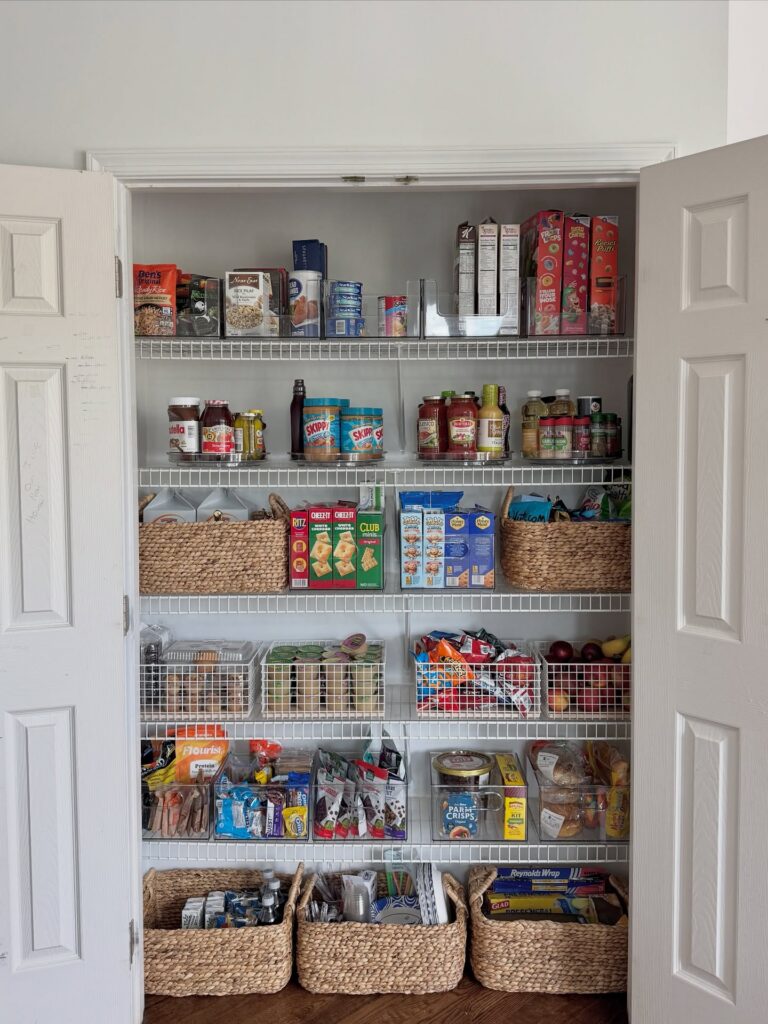
Gather loose packets, snack bars, and small bags into bins by what you reach for together. Start by emptying one shelf, checking dates, and sorting its contents into groups such as baking supplies, lunch snacks, and crackers. Do this before choosing containers so you know how much room each group needs.
Measure the shelf depth and the gap above it, then choose bins you can pull out without tipping. Clear bins let you see small packets at the front, while woven baskets on the bottom shelf can hold larger bags and spare supplies. Leave enough space above each basket to lift things out.
Give each bin one job. That is the step that matters most: a snack bin stops helping when spare jars and baking packets start landing in it. Put opened packs toward the front and refills behind them. When groceries come in, unpack them into their groups rather than filling whichever gap is closest. Leave a little room in each bin for the next refill.
Clear Bins for Baby Gear
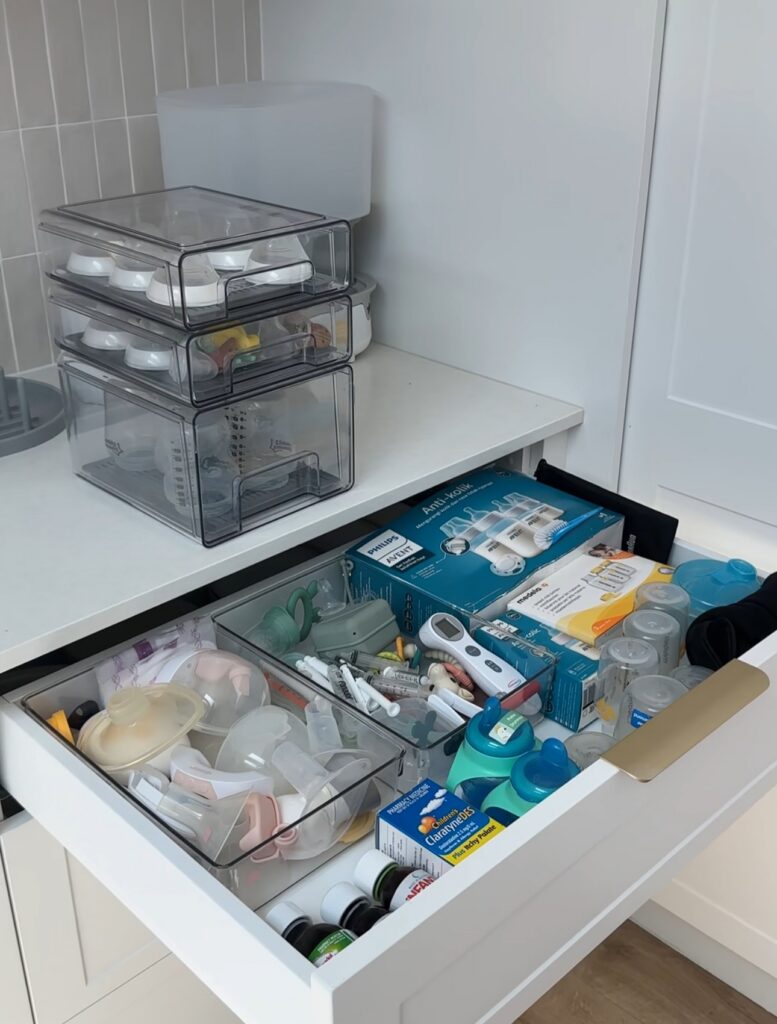
Baby supplies come in dozens of small parts, so a drawer for them works best when it’s divided into bins by type. The bins here are clear plastic with open tops, set into a wide white drawer. One holds pump parts, another holds syringes, a thermometer and pacifier cases, and the sippy cups sit loose along the right side. Because the plastic is clear, you can see what’s inside without pulling anything out.
On the counter, three clear drawers stack on top of each other, and they hold bottle nipples, rings and collars. That’s a good fit for parts that get lost easily.
If you don’t have bins like these, shoe-box-sized plastic containers or the clear trays sold for fridge shelves will do the same job. Cardboard boxes work too, though you lose the see-through part, so I’d tape a label to the front of each one. Measure the drawer first and buy bins that fill it with only a little space left over, so nothing slides around when you close it.
Sort Lunch Gear
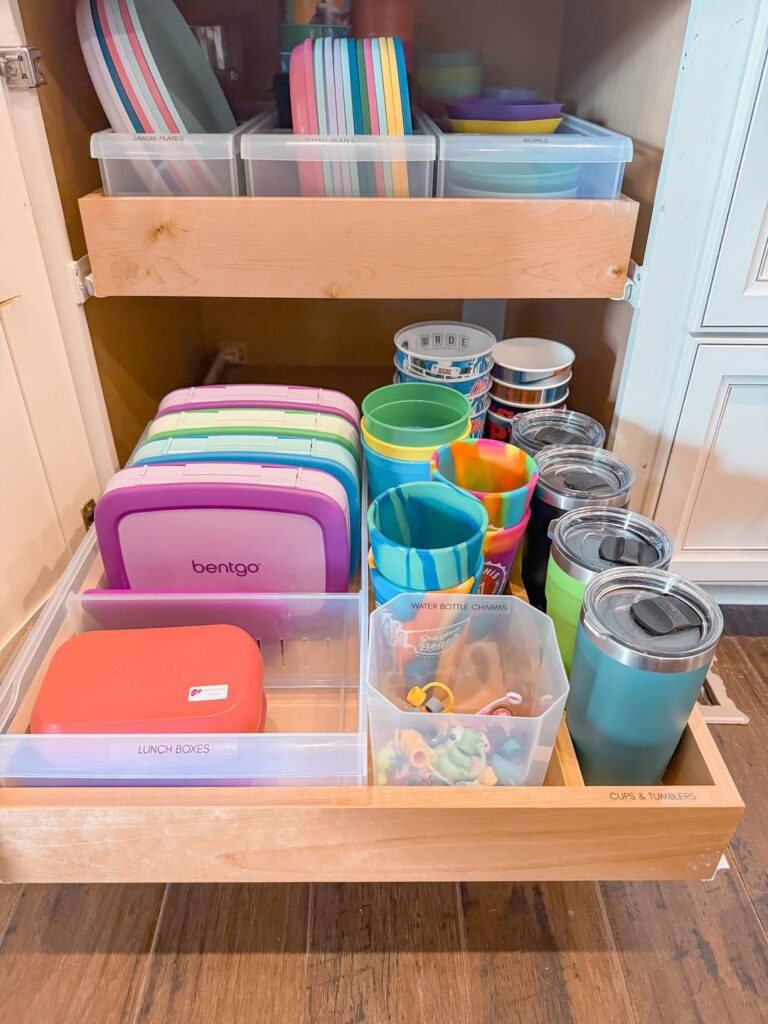
Once lunch boxes, cups, and loose bottle parts share a drawer, small pieces sink to the bottom and taller items block access. Give each group its own open bin, label the front, and leave room to lift things out without shifting the rest.
Stack matching containers, and keep lids with their cups or bottles; a bin of mixed lids quickly becomes another rummage pile. Check the layout after a week and move anything that repeatedly lands in the wrong section.
Divide Gift Wrap Supplies
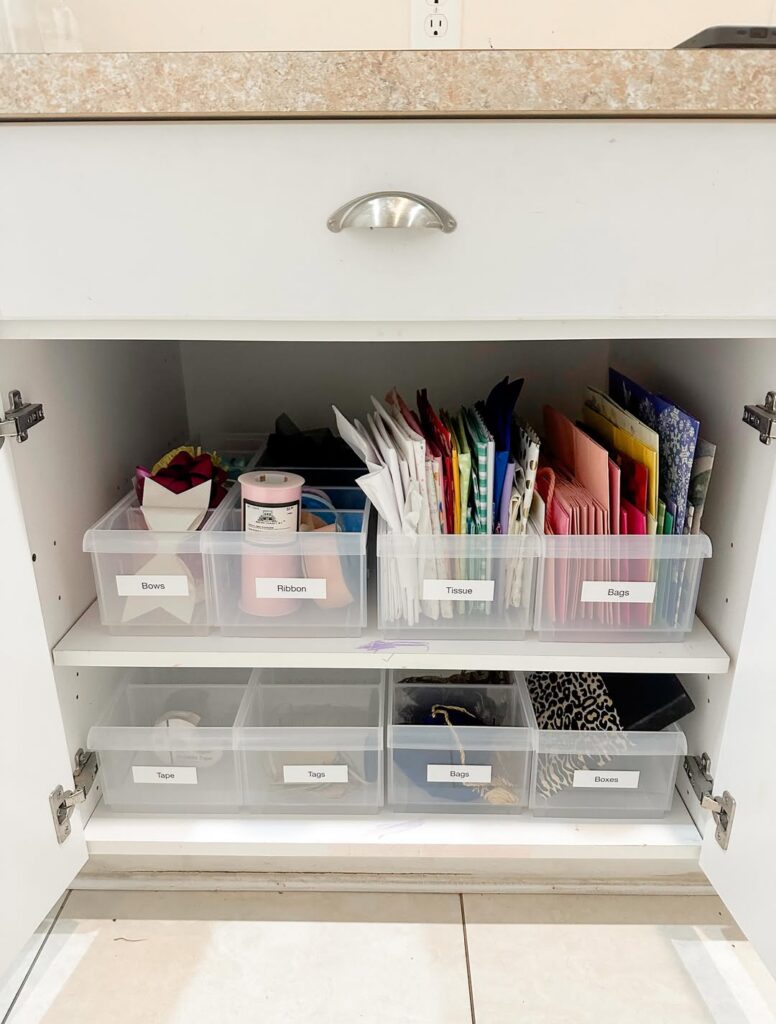
Give tape, tags, ribbon, and gift bags their own labeled bins inside a cupboard. Clear plastic lets you see what’s left without pulling every container off the shelf, while labels mark where each item goes.
For the smallest supplies, choose narrower bins rather than giving every category the same width. Tags need much less room than folded gift bags, and a wide bin lets them scatter across the bottom. A narrow container keeps them together and leaves more shelf space for bulky supplies. Check that you can still reach inside to lift out a roll of tape or a handful of bows. If your fingers barely fit, go one size wider.
On the shelf above, use wider bins for bags and tissue paper, with both stored upright rather than stacked flat. The open tops let taller pieces extend above the rim. Measure the shelf clearance before buying containers so you can pull a bin forward without catching the paper on the shelf above.
Give Daily Extras Their Own Cabinet
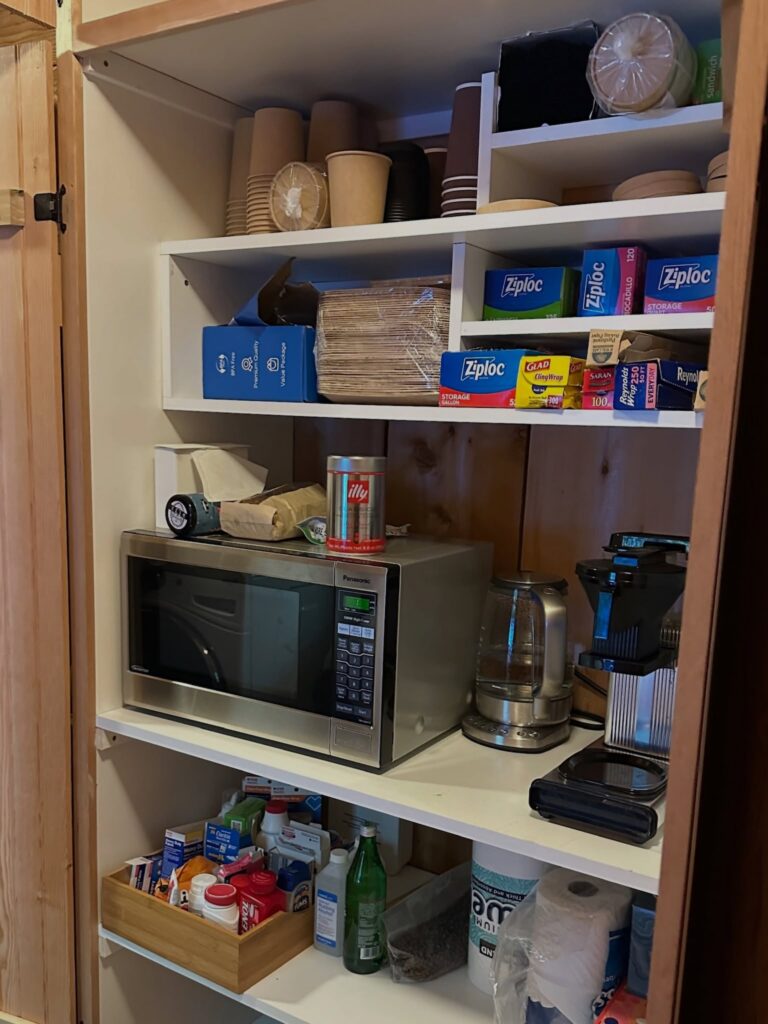
One closed cabinet can hold everything a household reaches for without thinking: cups, plates, food bags, a kettle, a microwave, a box of bandages. Sorting by how often you use things does most of the arranging. Paper cups and plates go up top, wraps and storage bags sit at eye level in narrow slots, and the appliances take the shelf at waist height.
This is right for a house with a spare closet or a deep cabinet near the kitchen, especially if you host often enough that disposables and coffee supplies keep spilling onto the counter. It only works if there’s an outlet inside, because the kettle and coffee maker need somewhere to plug in.
If you can’t give up a whole cabinet, pick a different idea from the list, one that works in a drawer or on a counter. The same goes for anyone with small children. I’d move the medicine from the bottom shelf to the top, since a wooden tray at floor level is easy for small hands to reach.
Group Supplies by Task
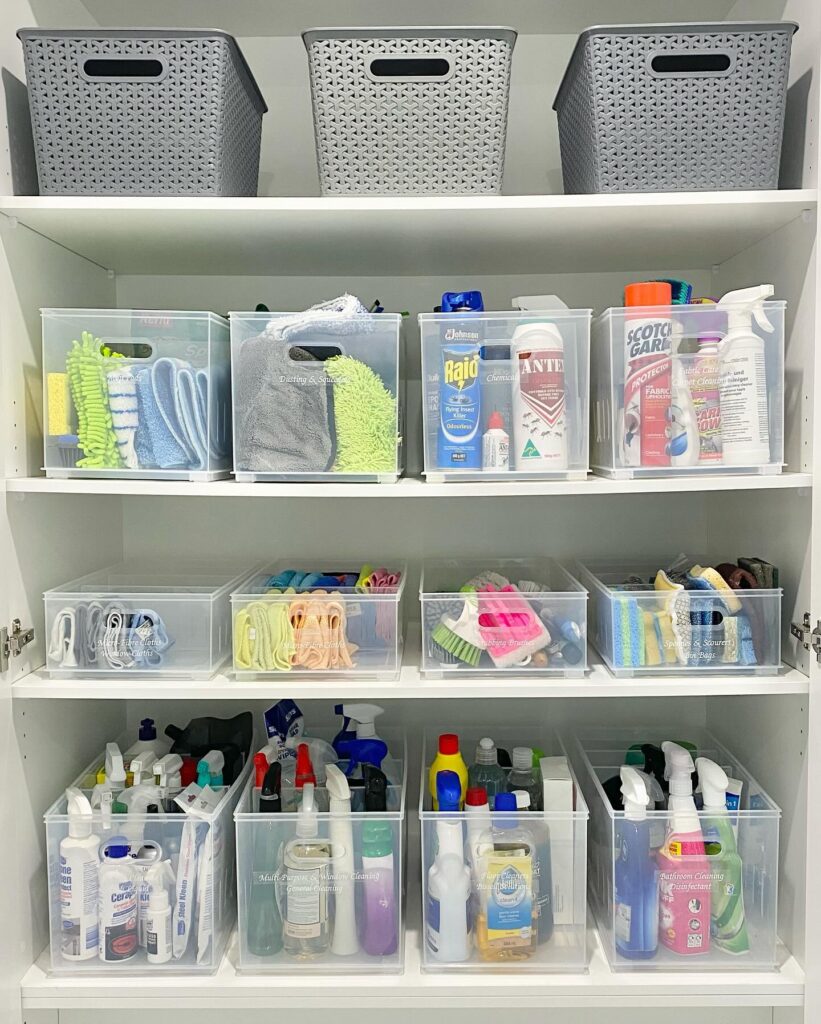
Cleaning supplies tend to scatter when cloths, sprays, and spare brushes share a bin. Give each category its own clear bin, then group related bins on the same shelf; microfiber cloths and dusters can sit together, while sprays stay separate.
The usual problem is making bins too full, so small items disappear at the bottom. Leave room to see what is inside, and label the front so supplies go back to the right place.
Add Closet Door Storage
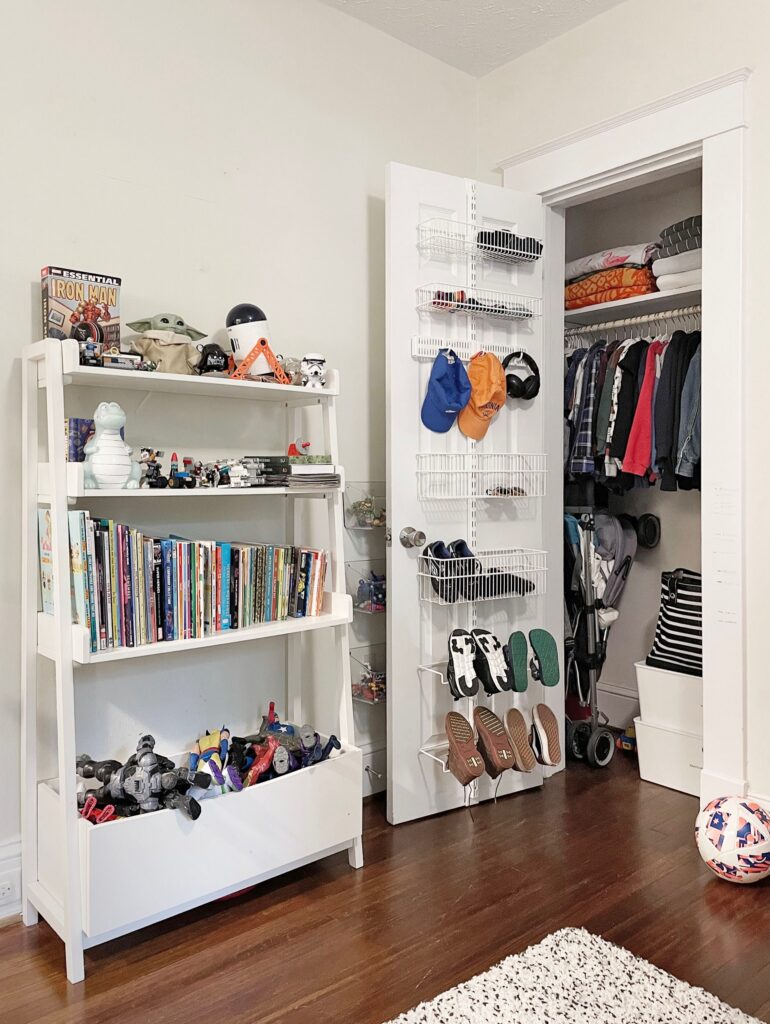
Use the back of a closet door for small things, with a rack made from metal rails and wire baskets. Choose baskets with close spacing for loose items, then add hooks for caps and lower holders for shoes.
If you don’t have a wire rack, a fabric shoe organizer with pockets can hold socks, caps, and other small accessories. An over-door version needs no screws, but check that its top hooks leave enough room for the door to shut without scraping the frame.
Use a Closet as a Supply Shelf
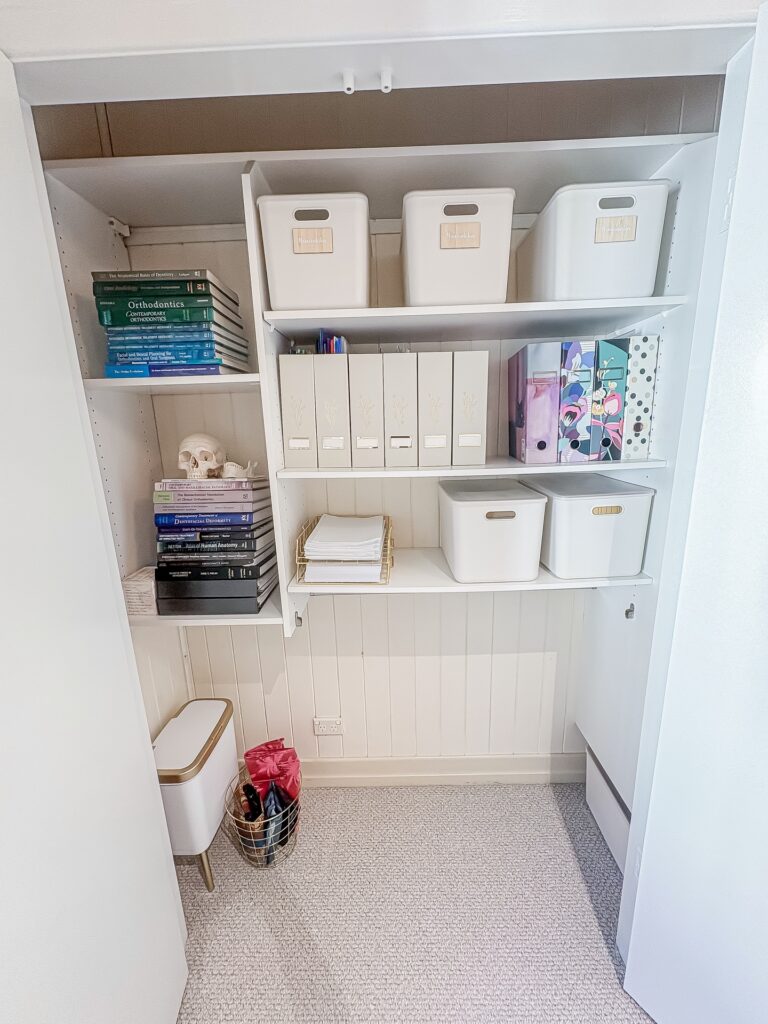
Start by emptying the closet completely and sorting everything into piles by what it is: books, paper, pens, loose odds and ends. Only then decide which shelf gets which pile. Heavy things go lowest, so the textbooks sit on the bottom shelves of the left side, stacked flat with the spines facing out.
The step that matters most is labeling. Lidded white bins hold the small stuff, and each has a small tag on the front, so anyone can find the tape or the spare cables without opening three of them. Put the bins you use least on the top shelf and keep the daily things at chest height.
Magazine files are good for loose papers, since they stand up on a shelf without leaning. I’d pick one color for the bins and let the files be the only variety.
Divided Vanity Drawers
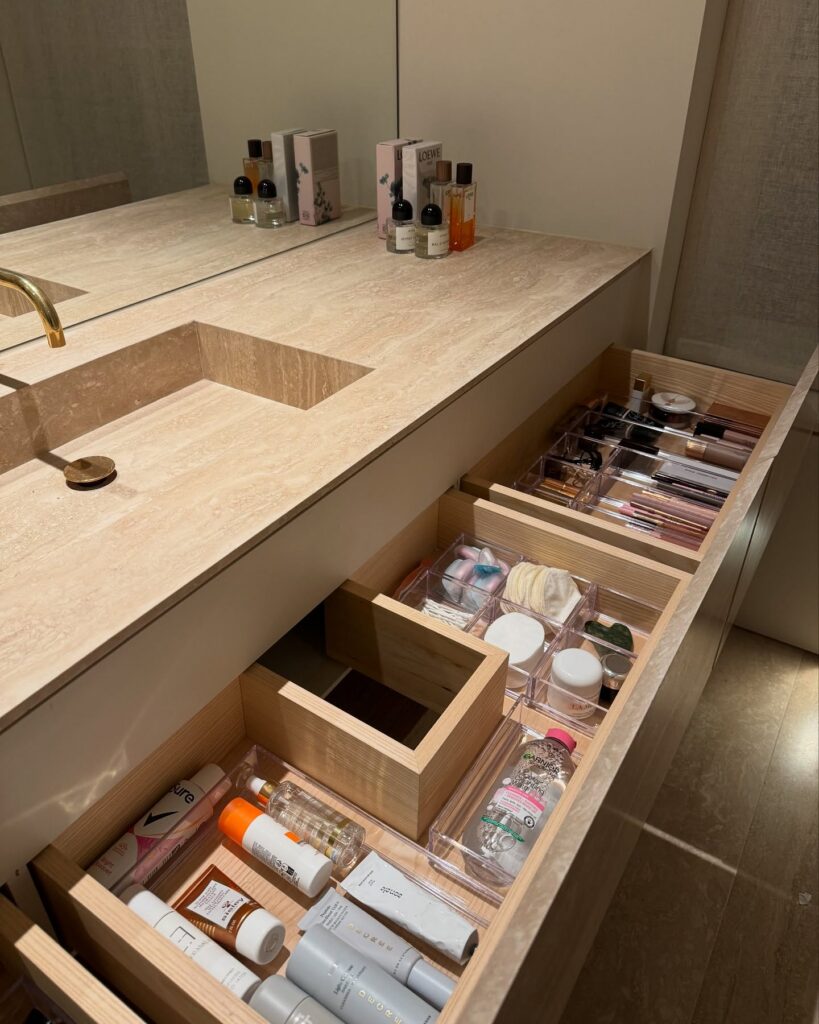
Divided vanity drawers keep small bathroom supplies in set places, with makeup in one row and skin care in another. Use clear trays for tubes, jars, brushes, and cotton pads, then reserve a deeper wooden compartment for items that do not sit neatly in shallow sections. This setup works best beneath the sink or along a dressing table, where everyday products stay close at hand without crowding the counter.
Clear Boxes by Category
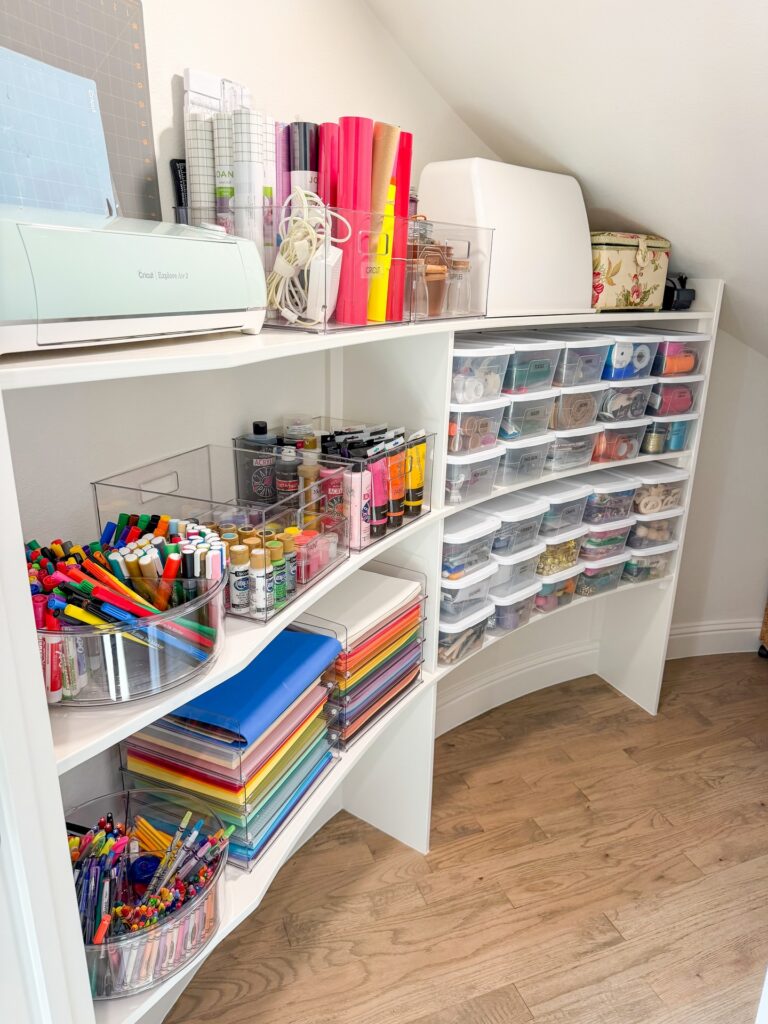
Give each type of small supply its own clear box, rather than putting everything into one deep bin. Use shallow boxes with lids so you can stack them on a shelf and still see the contents through the front. Rolls of tape and spools of thread can each have a box; without those divisions, the little things settle to the bottom of a larger bin, and finding one means pulling everything else out.
Clear Bins With Labeled Fronts
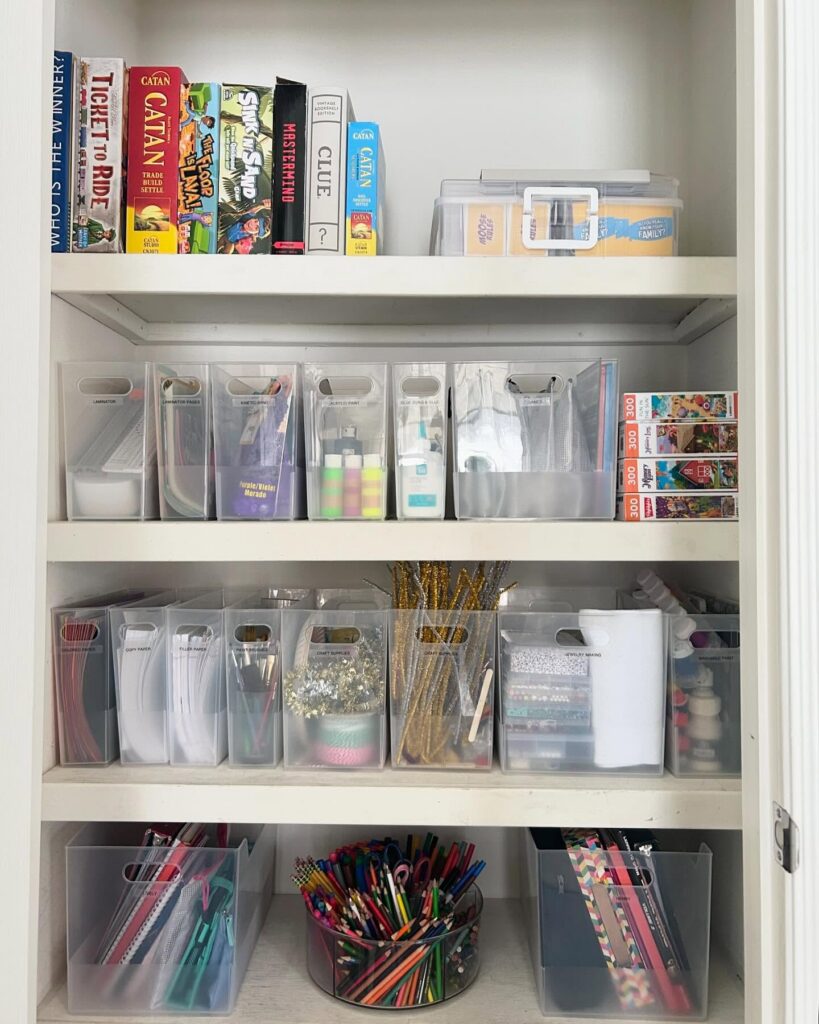
Clear bins with a handle cutout and a label on the front work well for small supplies, but they go wrong when the labels get too broad. A bin marked “craft supplies” turns into a catch-all within a month, and then you’re digging through it again. Narrow the labels to what the bin actually holds, like laminator pages, acrylic paint, or filler paper, so there’s only one place each thing can go.
The other common mistake is buying bins before you’ve sorted what goes in them. Pile everything by type first, then buy containers sized to the piles. Tall, narrow bins suit paper and flat items, while a wide, shallow one fits loose tubes and bottles better. Sparkly pipe cleaners and glitter stems can stand upright in a deep bin, which keeps them from bending.
I’d leave a little empty room in each bin. A bin packed to the rim gets restocked by stuffing, and the labels stop meaning anything after that.
Baskets by Shelf
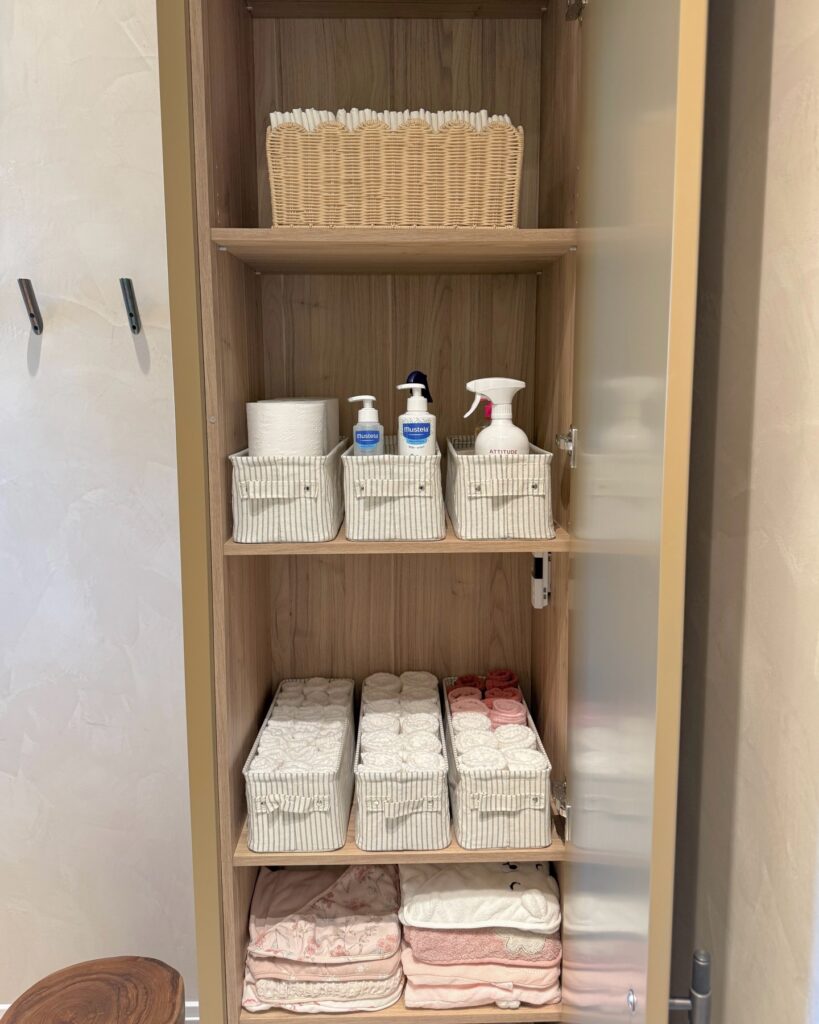
Small cloth baskets can divide a bathroom cabinet by task: one for paper goods and bottles, another for rolled washcloths, and a lower space for folded linens. This setup works for a family or anyone grouping care items, especially with a cabinet that has full shelves. If you have one narrow shelf or want to see every item at a glance, open trays may be easier.
Divide Cubbies With Small Baskets
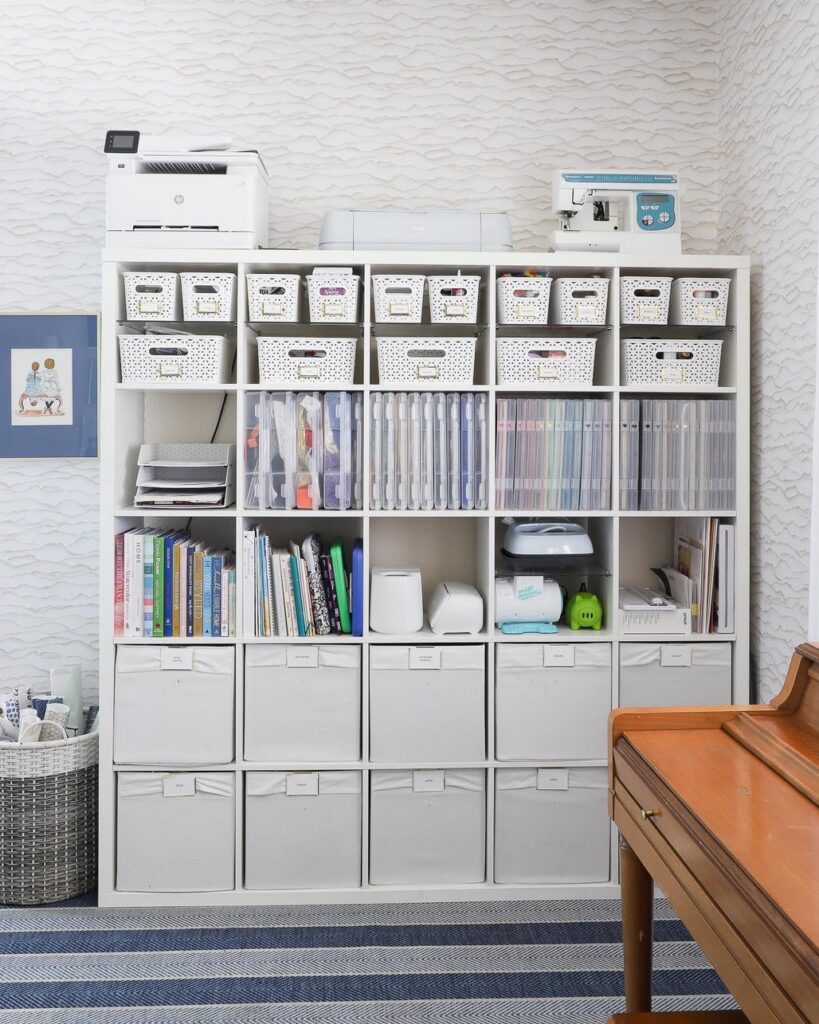
Use small labeled baskets to divide shelf cubbies into separate spots for little supplies. Two baskets side by side give each category its own container, while labels tell you where to put things back. One large bin in the same spot would let those small items mingle again.
Clear Bins for Medicine
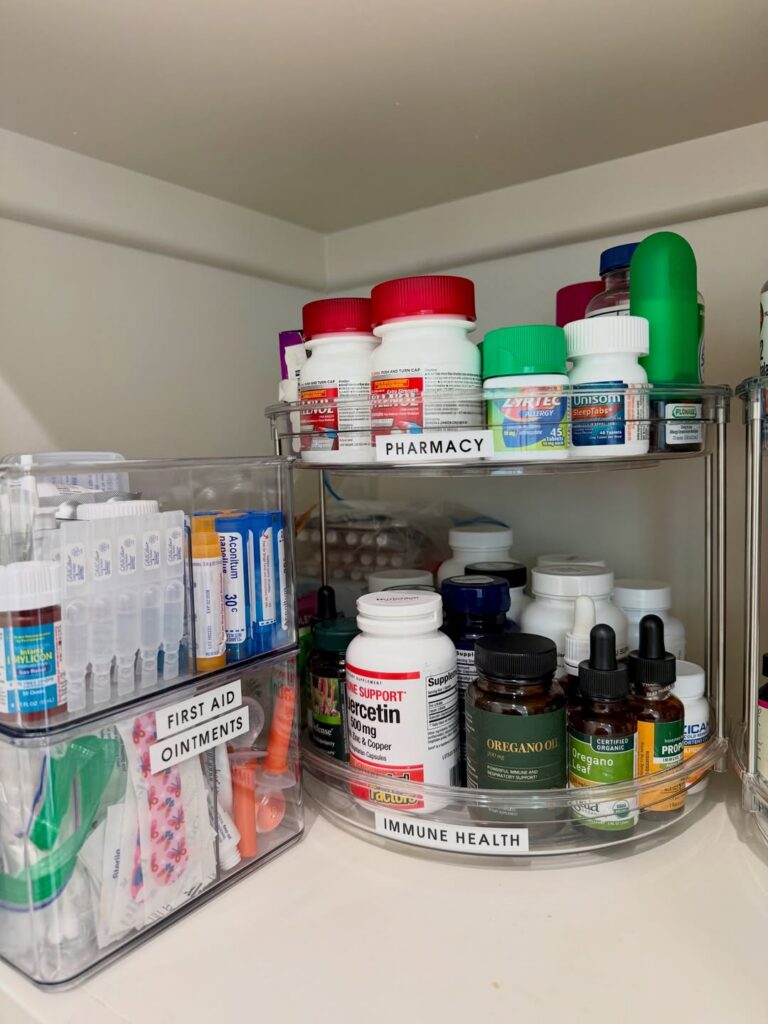
Medicine is easier to sort when you can see through the container. Clear plastic lets you read the caps and the labels on the bottles, so you can tell what’s running low without lifting anything out. An opaque bin would hide all of that, and you’d end up opening each one to check.
I’d put the bottles on a two-tier turntable and the first aid supplies in a stacked clear bin. Short white labels on the front edge name each group.
Give Pantry Items a Place
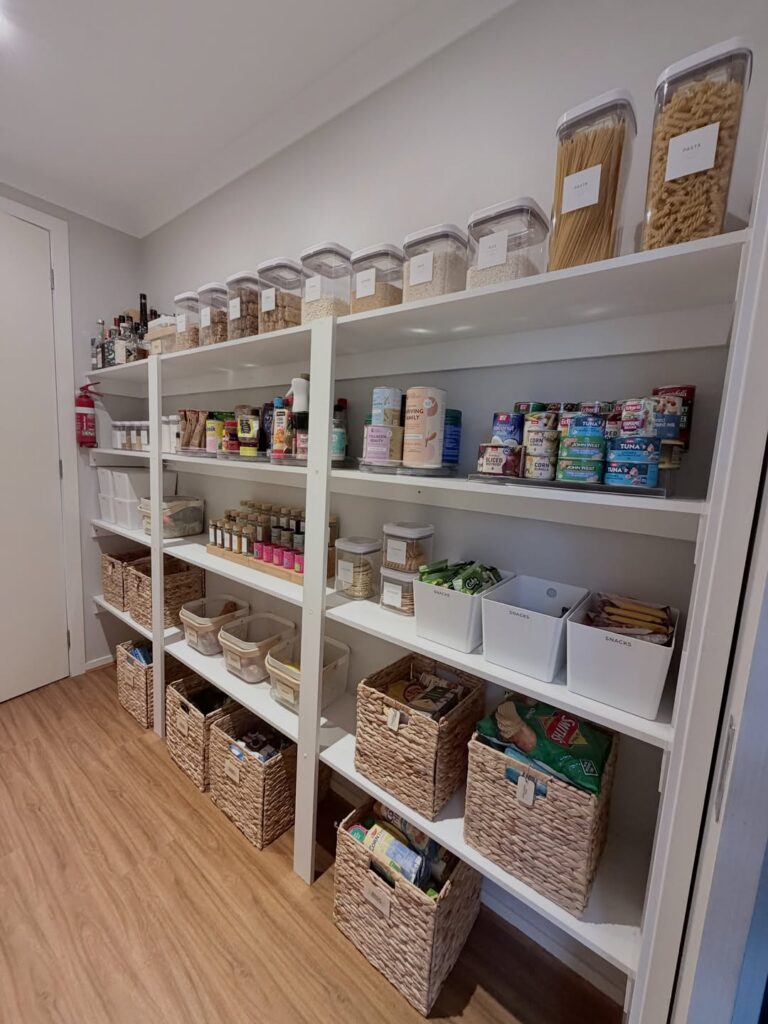
Give pantry items a fixed place by grouping them around how often you use them. Dry goods such as pasta, rice, cereal and flour can go into clear, lidded containers on an upper shelf, with labels facing out so you can spot the contents at a glance. Put cans and jars together at eye level, where you can scan what is running low while making a shopping list.
Lower shelves are a good place for baskets of packets, snack bags and small boxes that tend to slide behind larger groceries. Use separate bins for categories the household reaches for every day, then return each item to its own bin after unpacking groceries. Leave some room at the front of each shelf; tightly packed rows make it harder to see duplicates and reach food behind them.
Label Bins for Cleaning Supplies
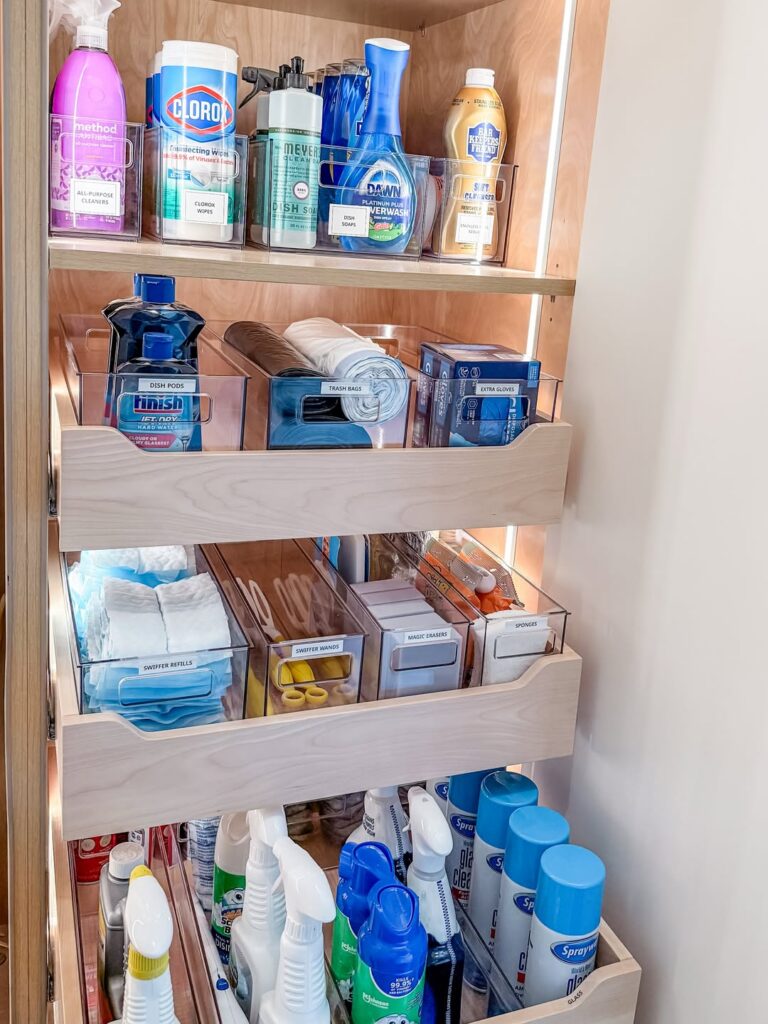
Sort cleaning supplies by task before putting them into clear bins: dish soap together, trash bags together, and sponges in their own spot. Measure each shelf or pullout first, leaving enough room above the bins to lift out bottles.
Give each bin a label on the front so loose refills still have a place once their packaging is gone. The key is to size each bin for what you actually store, rather than dividing every shelf into equal sections that leave supplies squeezed in.
Adjustable Wooden Drawer Dividers
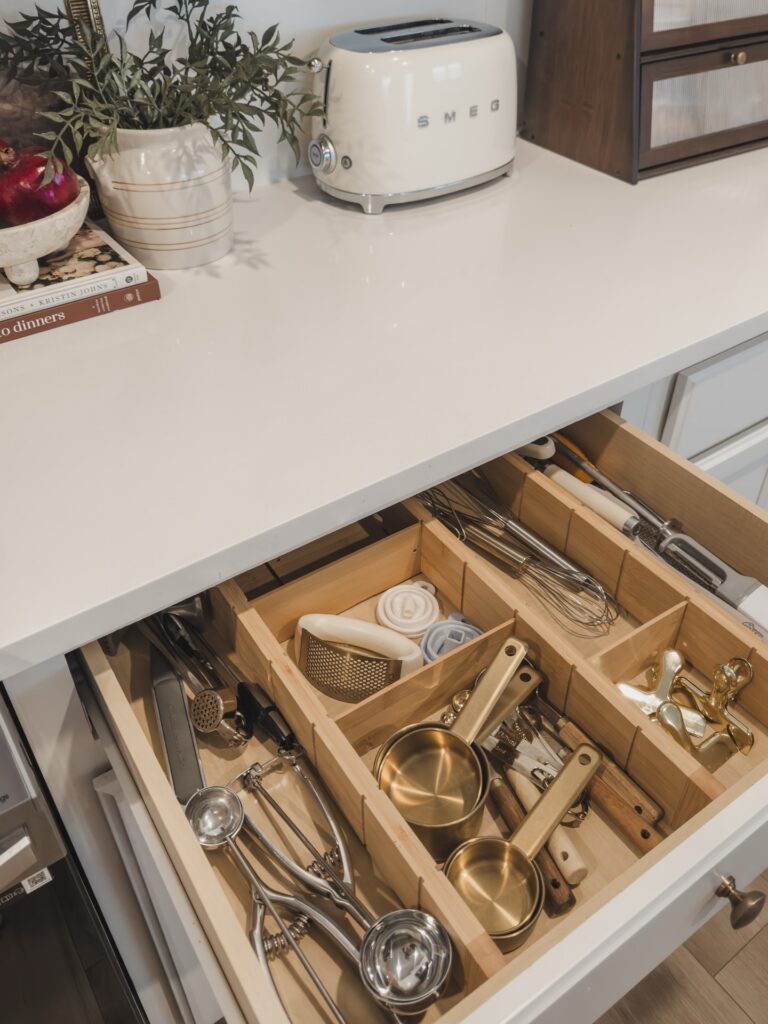
Utensil drawers work best with a bamboo or wood divider set that expands to fit the drawer. Compartments of different sizes hold whisks, measuring cups, and scoopers without tangling. If you don’t have one, use small boxes, or cut cardboard to size and tape the joints.
Sort Small Garments
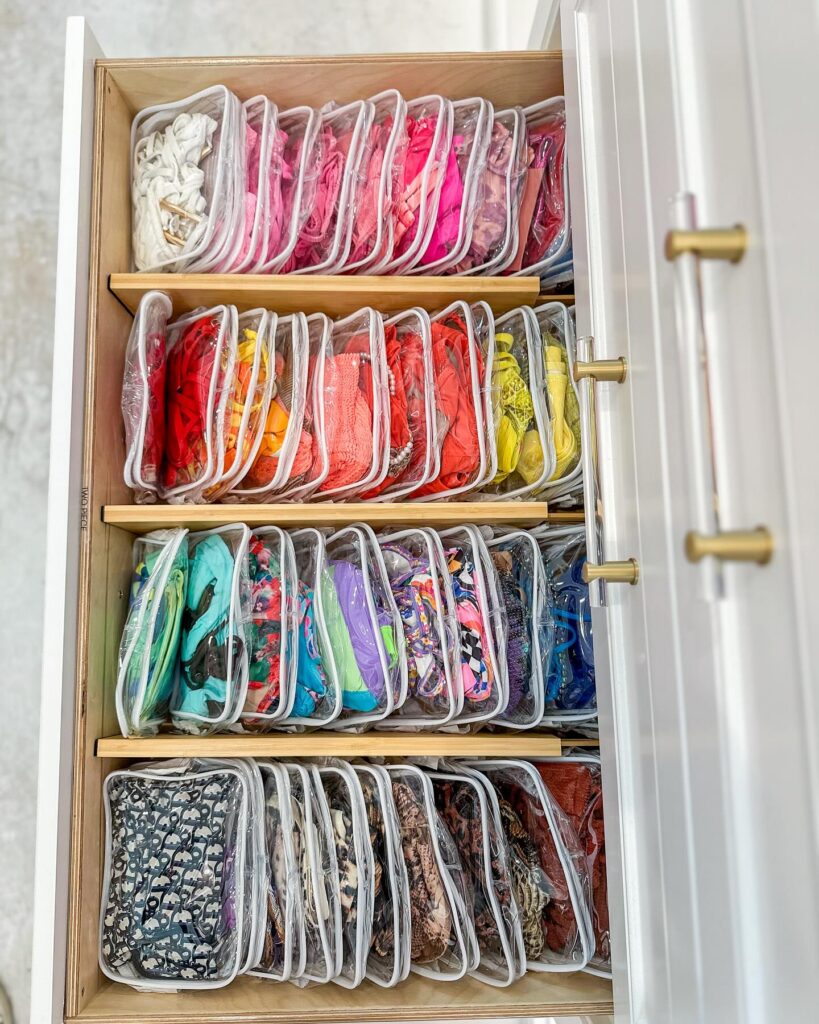
Small garments are easy to lose in a deep drawer, especially when they are piled together. Gather them in one place, sort by type, then remove anything that no longer fits or gets worn.
Fold each group to a similar size and place it in a clear zippered pouch, with the clear side facing out so you can see the contents and take one out without unpacking the rest. Stand the pouches upright on shallow shelves and group like items together; color order can help if you have several of one type. The important step is choosing a pouch that holds each group without squeezing it, so the pieces stay visible and are easy to put back.
Divide Pantry Drawers by Size
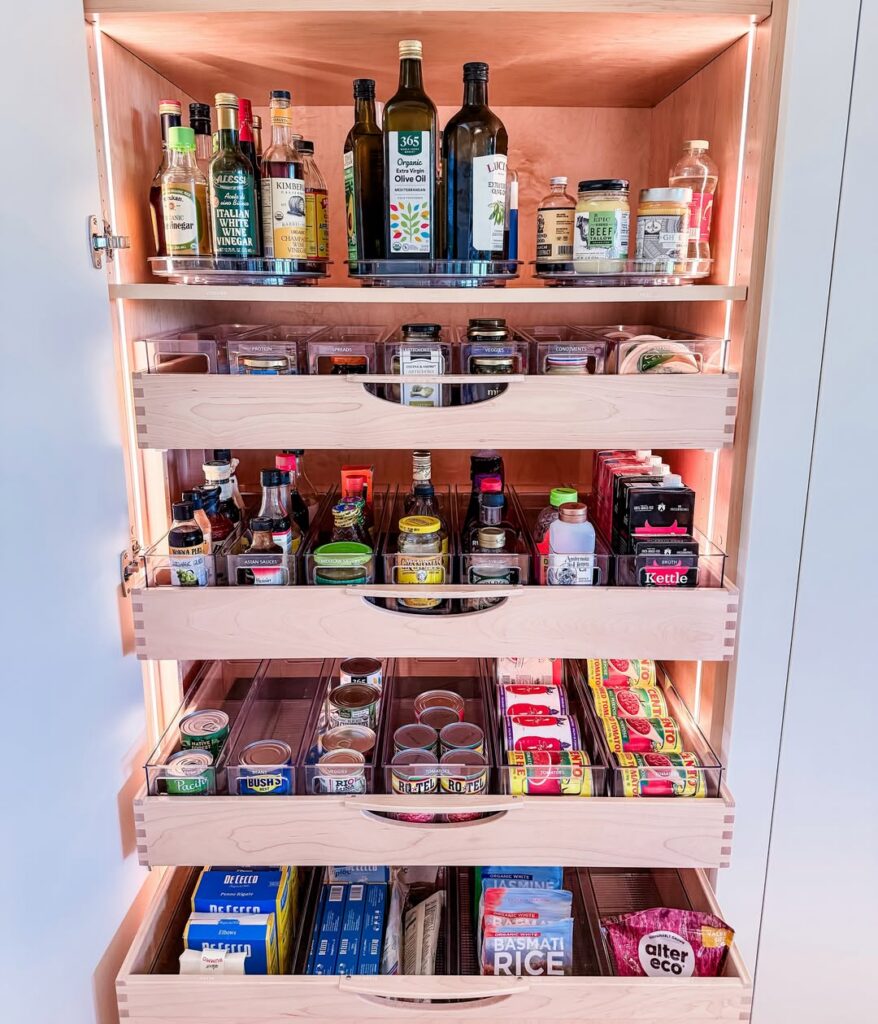
Divide pantry drawers with clear bins that match the width of what you store. Narrow bins hold cans in single rows, while wider ones give sauce bottles and bags of rice enough room without squeezing them together. Measure the drawer’s inside width before choosing bins, and leave enough clearance for the tallest item when the drawer closes.
For small packets, use a shorter bin so the sides don’t hide the labels. Stand packets upright with their names facing forward, and keep each type in its own row so you can pull one out without disturbing the rest.
Clear Bins Inside Drawers
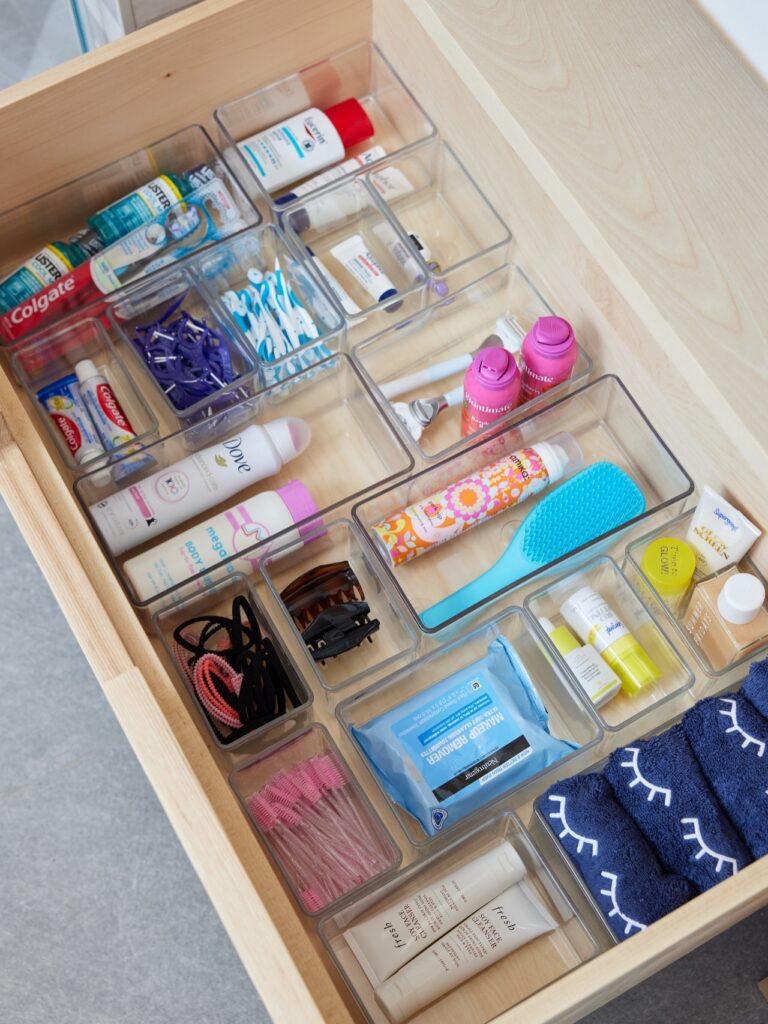
Small clear trays set side by side inside a drawer let you sort bathroom odds and ends by type, so toothpaste, deodorant, hair ties, and wipes each get their own box. The ones here look like acrylic, which is stiff, holds its shape, and wipes clean with a damp cloth. They come in several widths and lengths, so you can fit them together like tiles and leave very little dead space.
If you don’t have acrylic trays, shoe box lids and small cardboard boxes work, though they’ll stain faster and don’t let you see what’s inside. Plastic food containers or jar lids also hold things like clips and cotton swabs. Whatever you pick, measure the drawer first, then buy or gather containers that add up to that width. I’d put the daily items in the front row and the backups behind them.
A Labeled Storage Closet
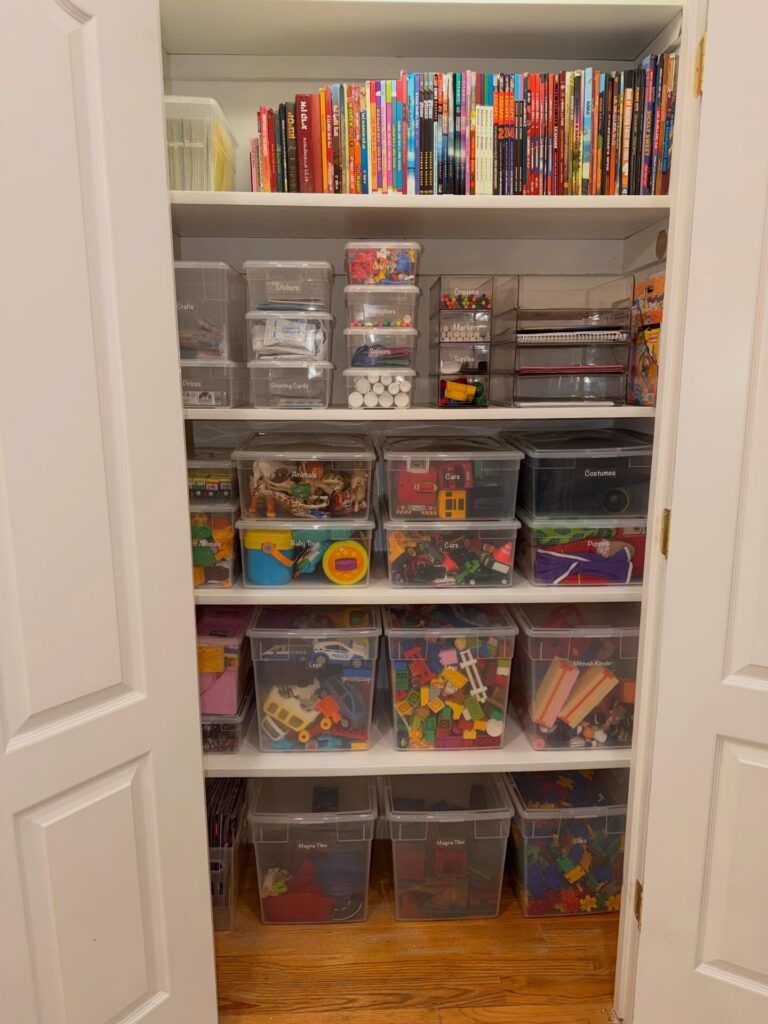
When toys, craft supplies, and games share a room, clear labeled bins on fixed shelves give each category a place, with books above. This setup fits households with closet space and items that can stay stored between uses; anyone who needs daily access may prefer open baskets near where things get used.

