25 Coffee Bar Ideas for Kitchen Counter
This site contains affiliate links. We may earn a small commission, at no extra cost to you. Article may contain some images for illustrative purposes only .
Coffee Bar with Open Shelves
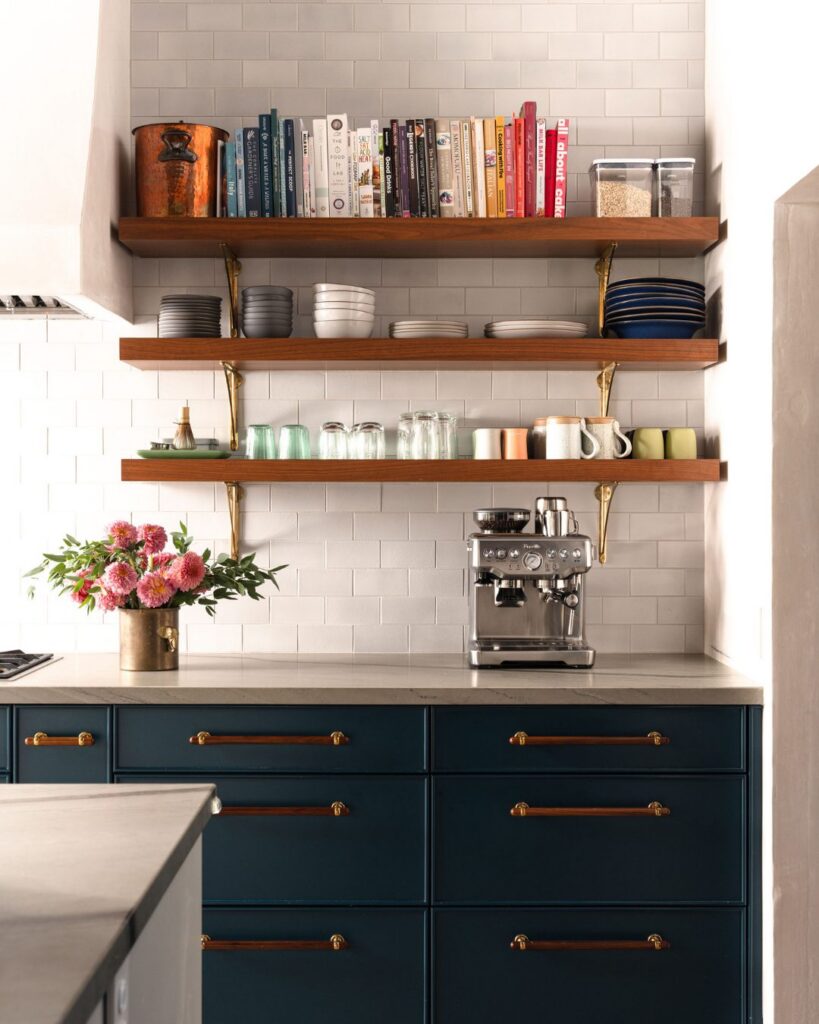
Above the espresso machine, open wood shelves hold cups and jars within reach while leaving the counter clear for brewing. Set the machine on the counter first, then mark shelf positions around its height and the space needed to refill it. The lowest shelf can hold glasses and mugs; place everyday cups directly above or beside the machine, with less-used dishes higher up.
Choose a shelf depth that holds cups without reaching far over the work area. A tiled wall gives the brass brackets a firm surface, but locate studs before fastening shelves that will carry books or plates. The key is checking clearance before drilling: leave room to work at the machine and enough space to remove cups without knocking them. Add a small tray for coffee tools.
Reflective Tile Backdrop
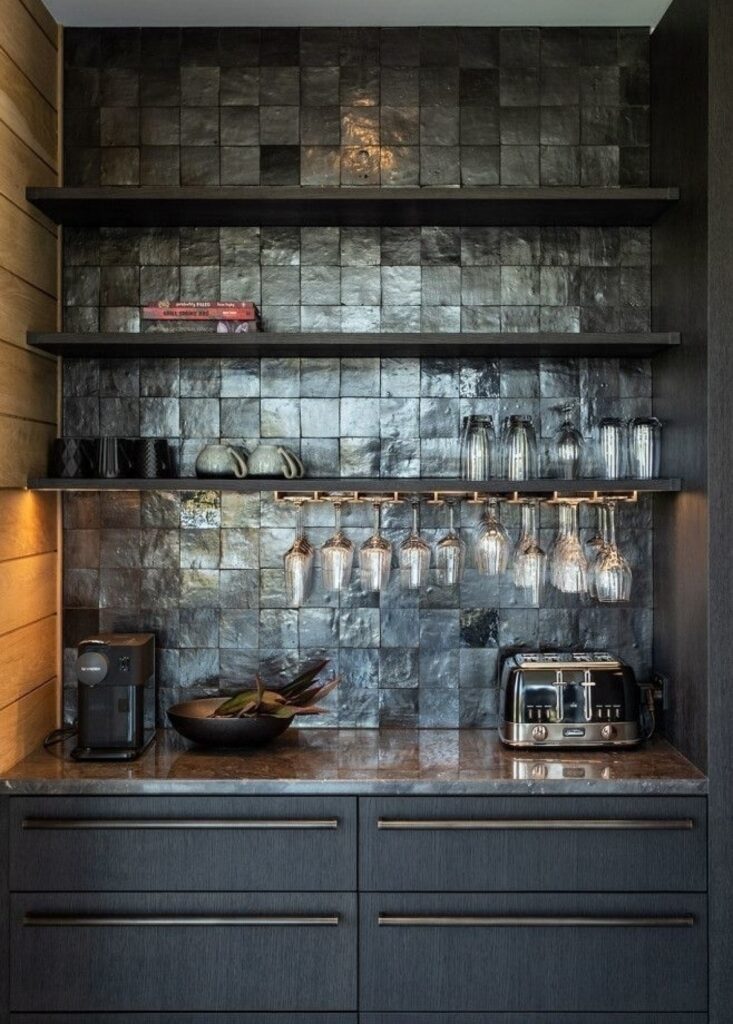
Run reflective tile behind the counter and all the way up between the shelves, rather than stopping at a low backsplash. The small squares catch light at different angles, giving the dark coffee bar depth without adding another color. Against a flat painted wall, the dark shelves and cabinets would blend together more, and the recess could feel like a closed cupboard.
Hang Mugs From a Rail
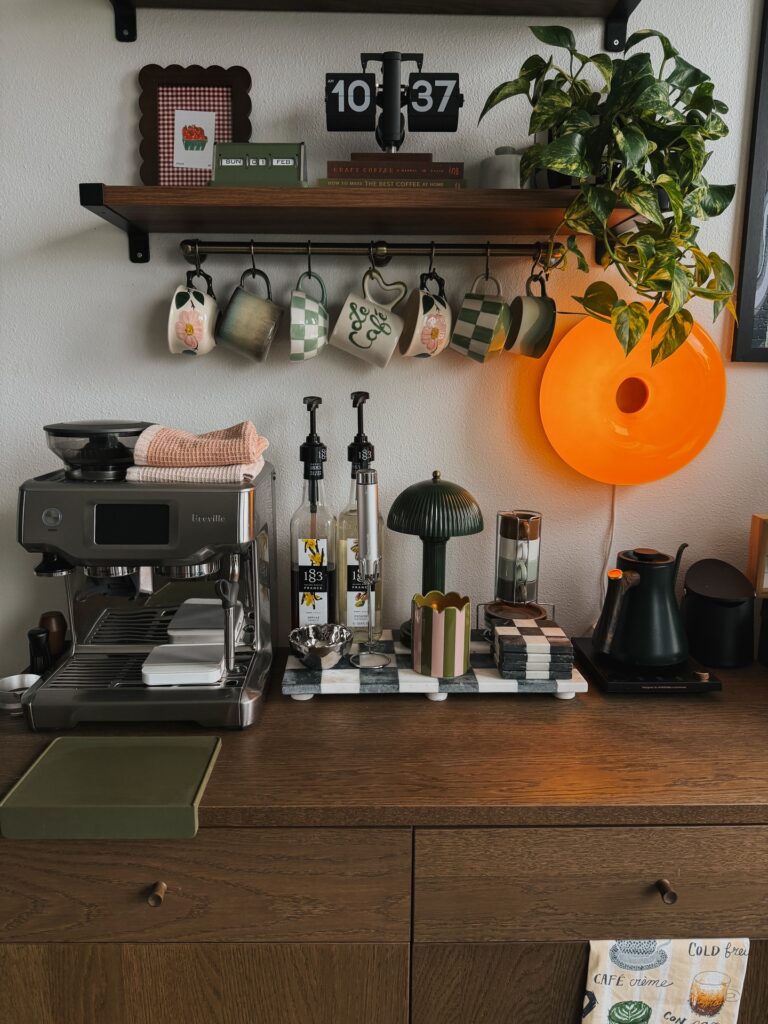
Wherever the wall above your counter is bare, a metal rail with hooks under a floating shelf can hold a whole set of mugs without a cabinet. It works on a dining room sideboard, a hallway console, or the short wall at the end of a kitchen run, anywhere you want coffee close to where people sit.
Mount the rail so the mugs hang clear of the machine and the tallest bottles. About a hand’s width of space under the mugs is enough. I’d stop at six or seven mugs, so guests can see everything on offer and pick one without reaching past the others.
Two-Tier Coffee Shelves
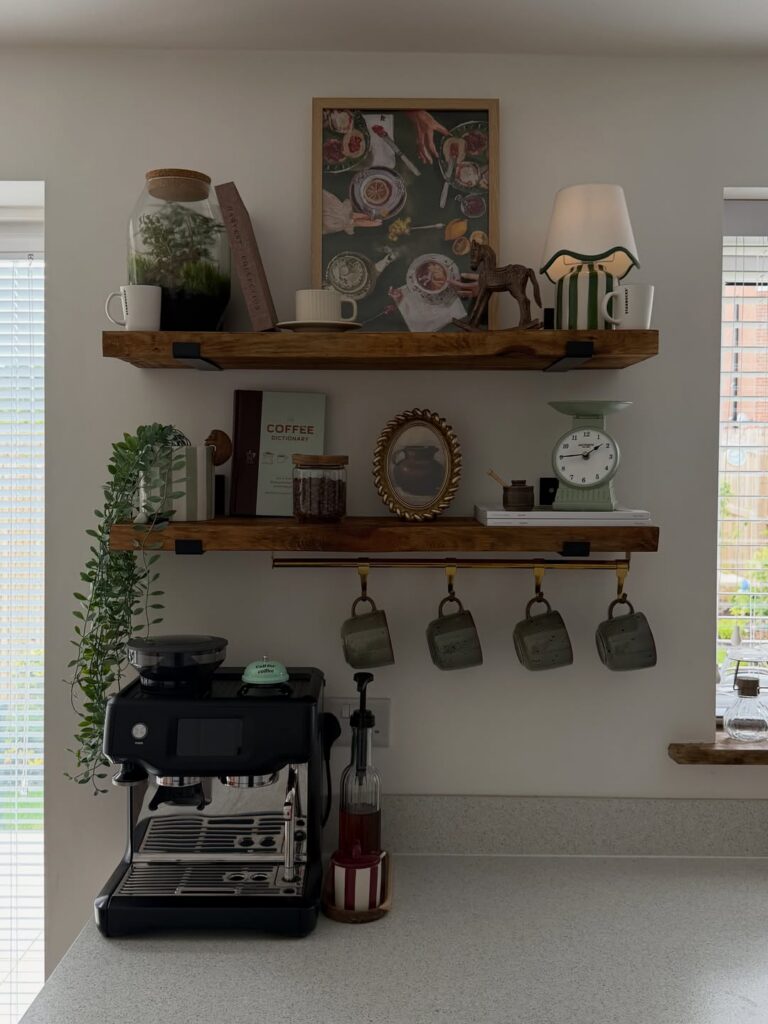
With two thick wood shelves above the counter, coffee gear gets its own vertical space without taking over the work surface. Choose solid boards deep enough for mugs and jars, then secure them to wall studs with sturdy brackets. If you do not have thick boards, a standard shelf with visible metal brackets gives the same layout; use anchors rated for the load when studs are out of reach.
A row of hooks beneath the lower shelf holds mugs by their handles and leaves the shelf top free for a scale, coffee tin, or small clock. Screw cup hooks into the underside, spacing them so the mugs do not knock together. Keep the espresso machine on the counter below, with room beside it for a grinder or milk pitcher. A trailing plant can soften the shelf edge, but leave the area around the machine clear for filling and cleaning.
Wooden Mug Cubbies
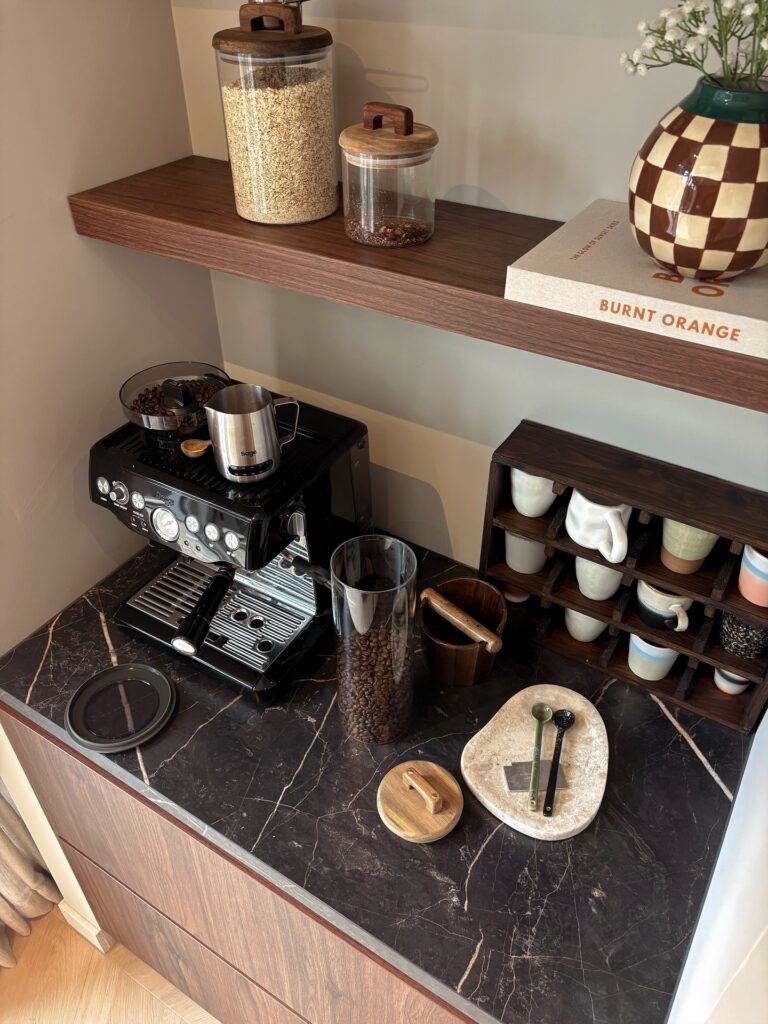
Give each cup its own slot in a wooden cubby beside the coffee machine. In dark wood, the rack matches the shelf above and stands out against pale mugs. A lighter wood would reduce that contrast and make the rack less prominent, especially if your counter is already dark.
Coffee Station Inside a Cabinet
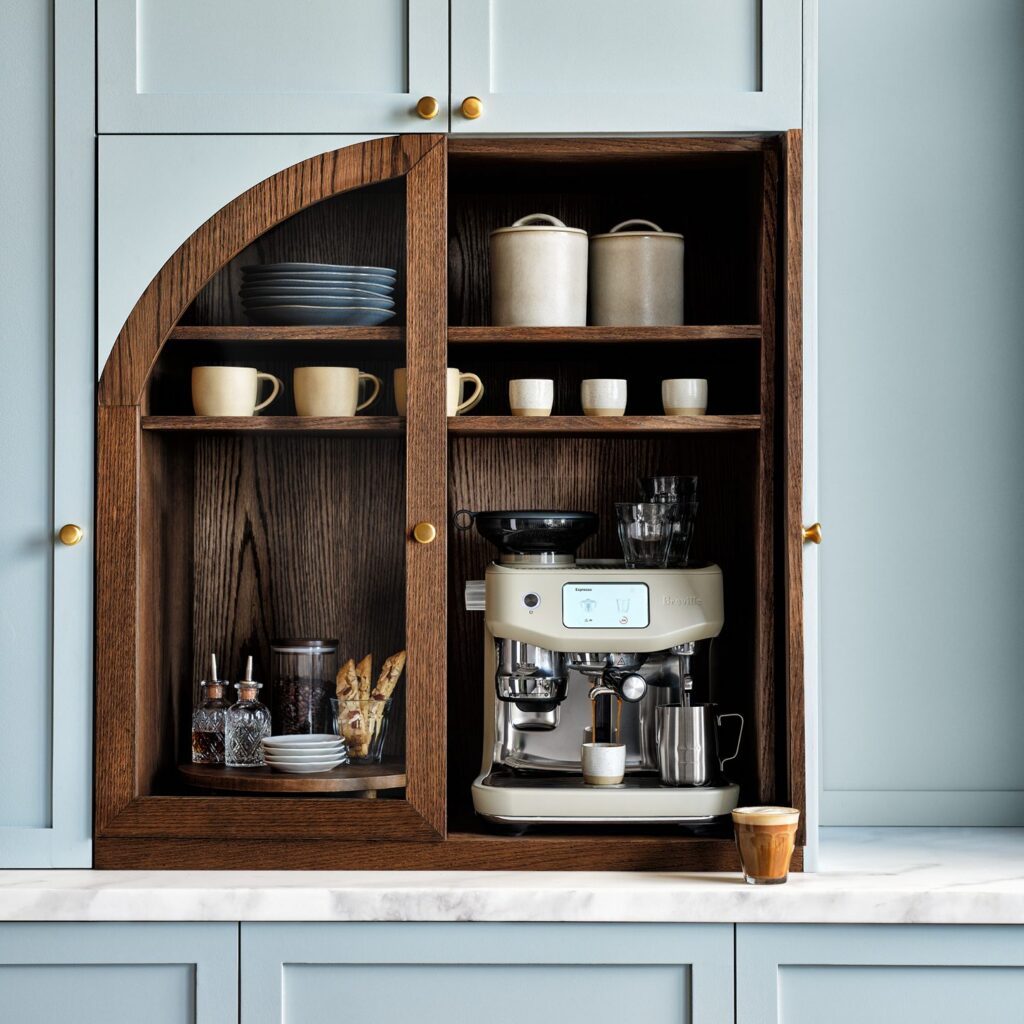
A cabinet with doors that open or slide back lets you keep the espresso machine plugged in and ready, then close everything away when guests come over. This works best for people who make coffee every morning and don’t want to carry a machine out of a cupboard each time. It also helps in an open kitchen where the counter is always in view.
If you only drink coffee now and then, or your machine is a small one, a tray on the counter is less work and costs less. The cabinet also needs an outlet inside it and enough height for the machine and the grinder on top, so measure before you commit. Renters should pick a different idea from the list.
Countertop Café Station
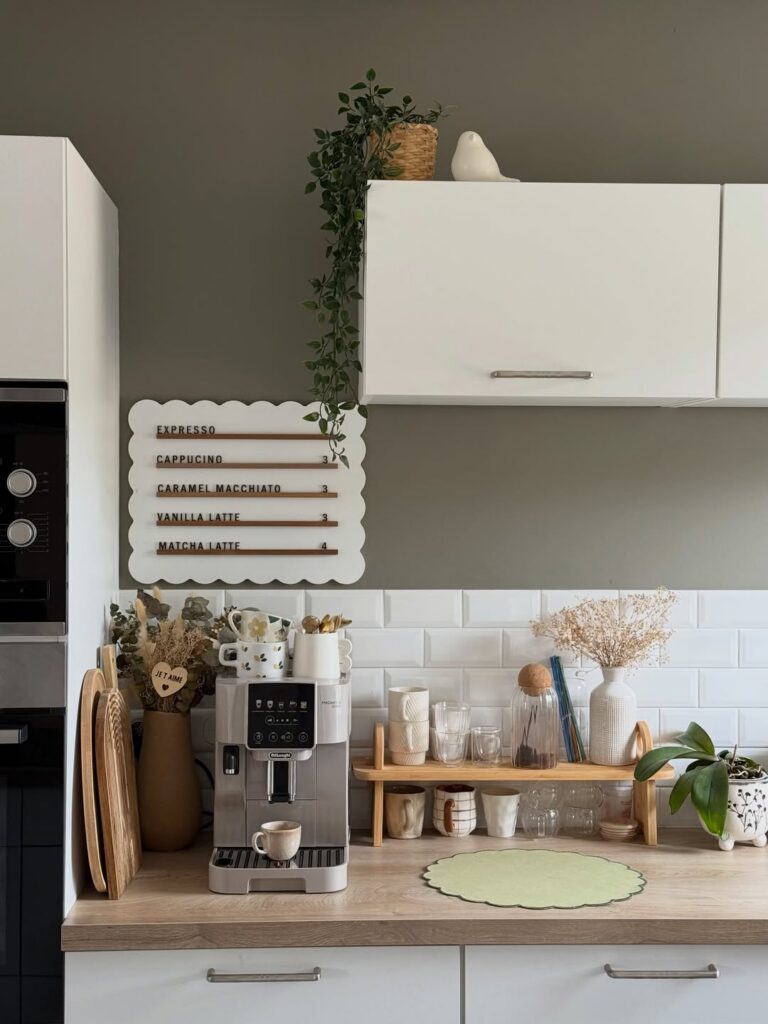
A small menu board above the coffee machine gives the counter a café-style setup, while a low riser keeps cups and glasses together. The arrangement gets crowded quickly if every mug, jar, and tool stays out, so leave space beside the machine for filling a cup and wiping spills. Choose a board that sits clear of the cabinet edge, and hang it high enough that trailing plants do not cover the lettering.
Keep daily-use items on the riser and store the rest in a cupboard.
Set Up Beside the Sink
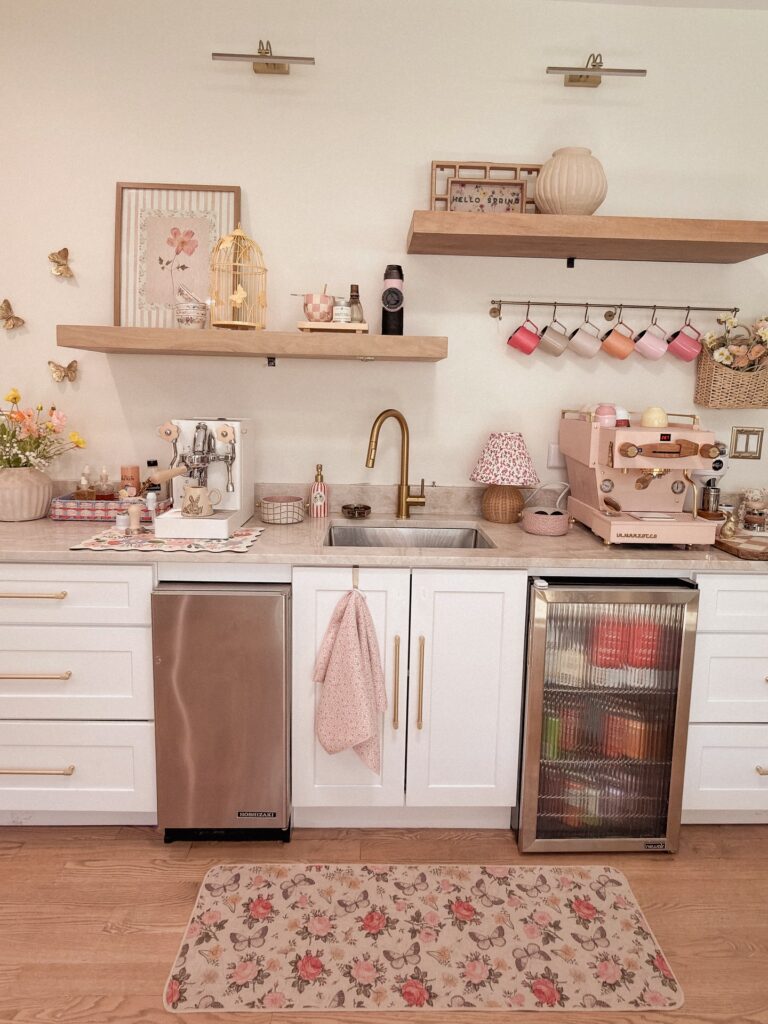
Place your coffee machine beside a small sink, especially on a stretch of counter away from the main cooking area. Leave a clear patch beside the basin for filling the water tank, rinsing cups, and setting down used spoons. A mug rail above the machine uses the wall rather than the worktop, so this layout is useful when the counter also needs room for milk, coffee supplies, and a cup while you make your drink.
Cup Cubby Beside the Machine
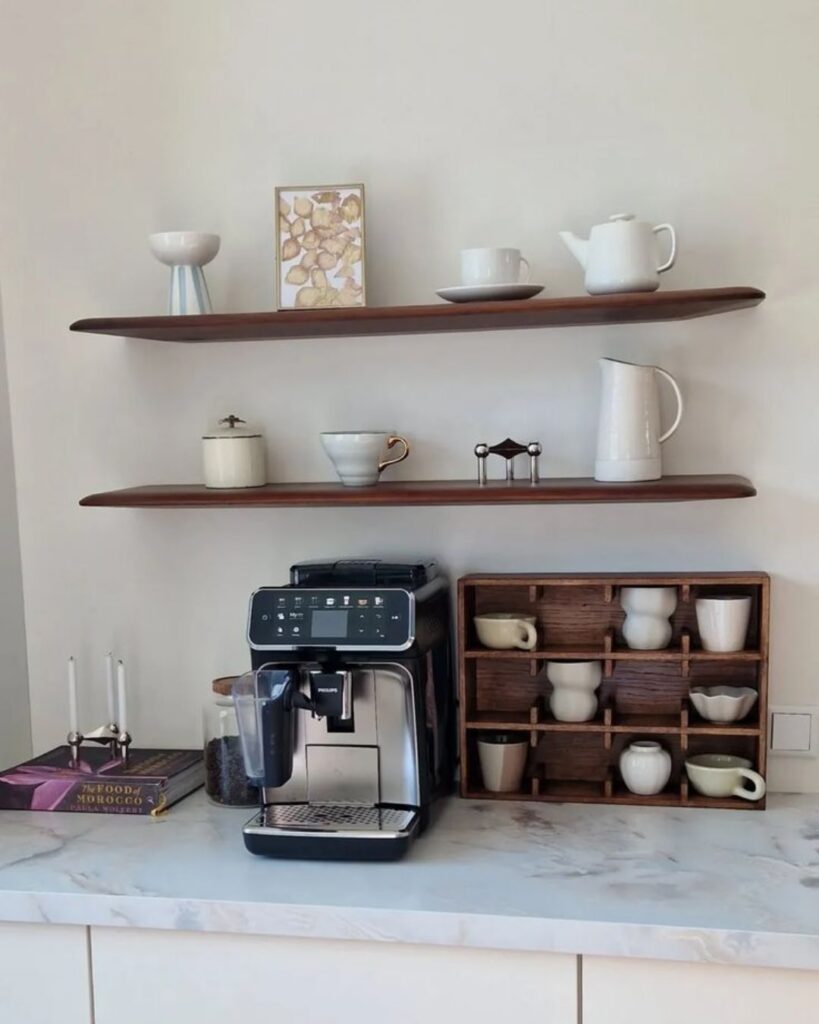
A small wooden cubby on the counter gives every cup its own slot, and that is what keeps this coffee corner from looking crowded. The machine is wide and dark, and the cubby sits right next to it with the same footprint, so the two read as one station. Nobody has to open a cabinet to find a mug.
Without the divided slots, those cups would end up stacked or lined up on the open shelves above, where they’d compete with the teapot, the pitcher and the framed print. Here the shelves hold only a few pieces, and the daily cups stay low and within reach. The dark wood of the cubby also matches the shelf boards, which ties the two levels together.
I’d measure your tallest mug before buying one. Each opening here fits a short cup or a rounded mug, and a tall travel mug wouldn’t go in.
Espresso Machine and Syrups
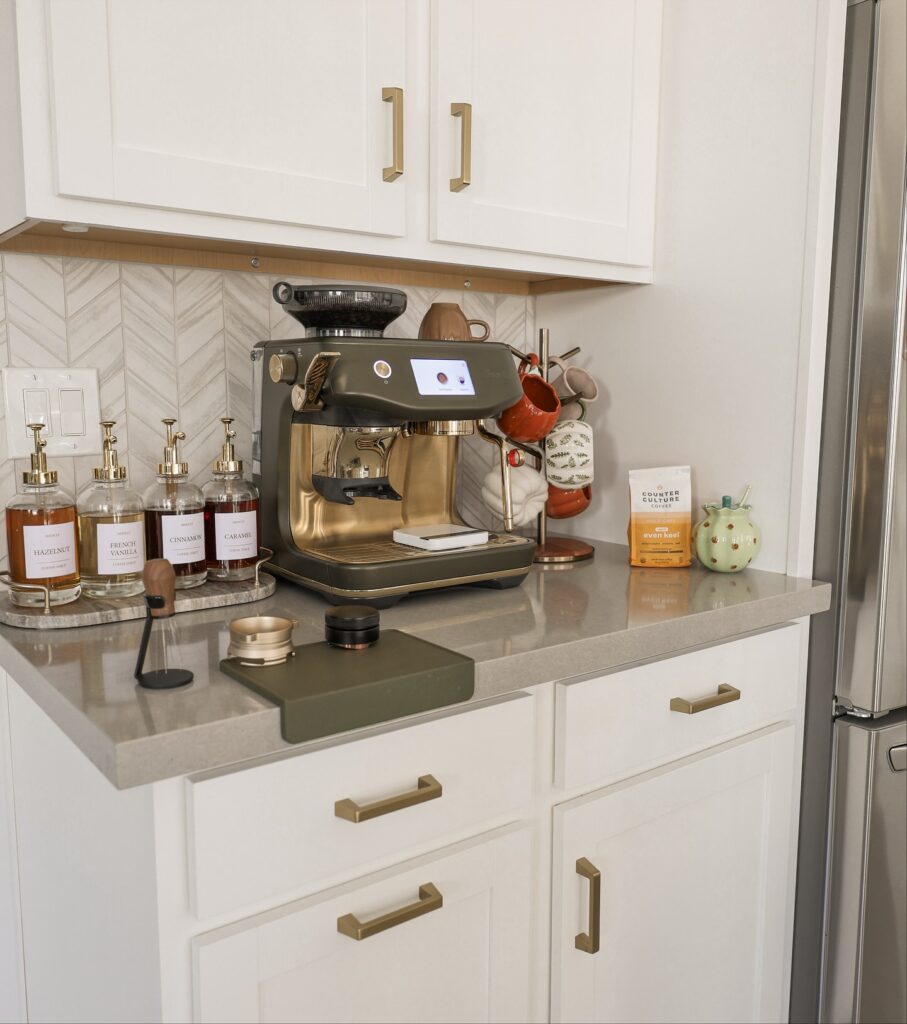
Set the espresso machine first, close to an outlet, and leave clear space in front for a cup and drip tray. Check its full working footprint before adding anything else; that clearance is the step that keeps the station usable rather than crowded. A machine needs room for its portafilter, steam wand, and water access, so measure with those parts in use, not just the machine body.
Next, group the syrups on a small tray beside the machine, with the labels facing out. A few slim bottles take less counter room than a wide cluster, and the tray catches drips. Place daily tools, such as a tamper, scoop, or small scale, on a flat mat at the front corner, where you can reach them without moving bottles. Hang a few cups on a rack or set them nearby, but leave the backsplash clear enough to wipe. Keep extra mugs and beans in a drawer so the work surface stays open.
A Narrow Wooden Coffee Riser
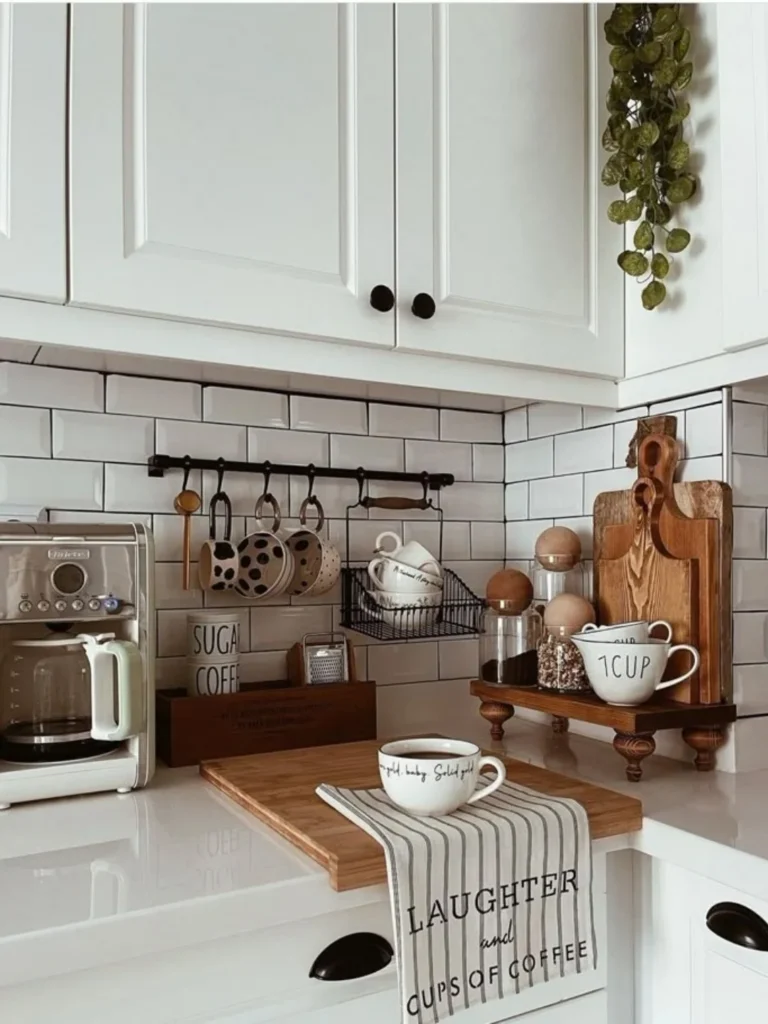
Give your coffee jars a raised spot with a narrow wooden riser tucked into the back corner of the counter. The wood breaks up the white surface, while the extra height separates the supplies from the area where you fill cups.
For a smaller counter, choose a stand just deep enough to hold one row of jars rather than a broad platform. That leaves more counter in front for setting down a mug, and you can reach each jar without moving another one first. Measure the widest container before choosing the depth, with enough room that its base sits fully on the wood. A shorter riser will also leave more clearance beneath upper cabinets when you lift the lids. Keep the stand long enough for the supplies you use daily; spare cups can stay in the cupboard.
Fall Themed Coffee Nook
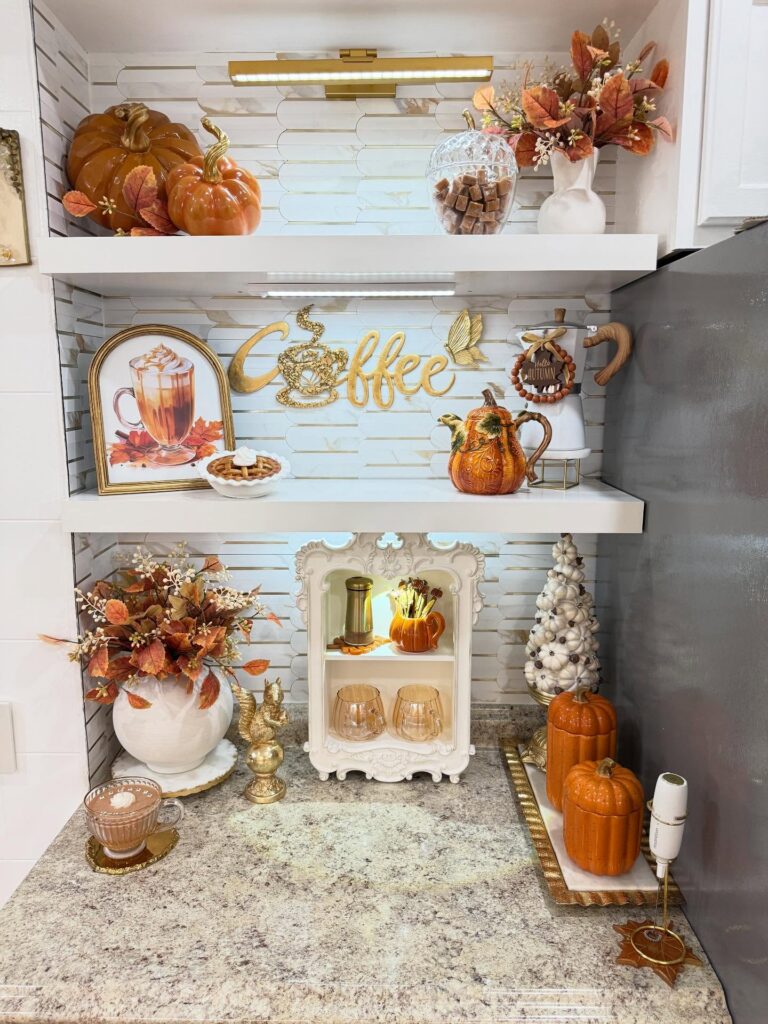
Two floating shelves, a strip of counter, and a handful of orange and cream pieces are all this takes. The shelves are white, so the color comes from the pumpkins, the faux leaf stems in white vases, and a ceramic pumpkin-shaped teapot. A gold “Coffee” wall sign and a few gold accents tie the pieces together.
Most of it is easy to copy with what’s on sale in any craft or home store in autumn. The pumpkins can be resin, ceramic, or foam, and the leaf stems can be any faux fall stem pushed into a plain white vase or pitcher. If you don’t have a sign like that, a gold-painted wood cutout or a small framed print of a latte does the same job.
I’d keep the real coffee supplies, like the mugs and the sugar jar, in the open front of the small cabinet so they stay within reach.
Syrups on Open Shelves
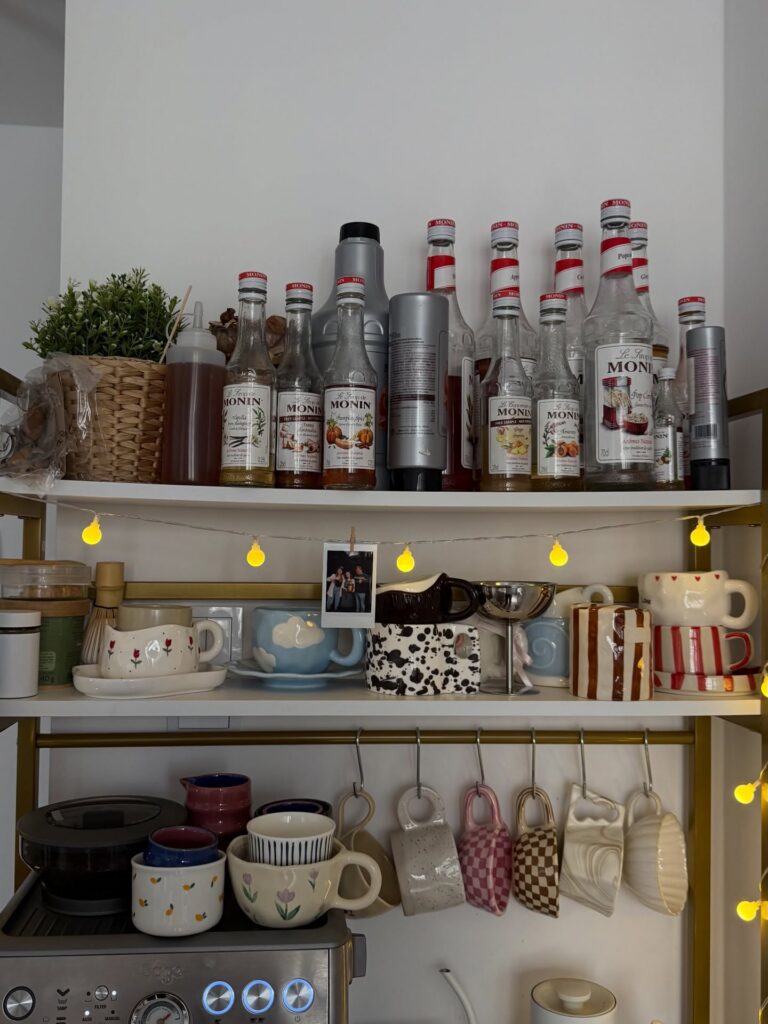
Rows of syrup bottles take up more room than they seem to, and a crowded shelf quickly hides the labels and leaves no space for daily mugs. Give the bottles one shelf, with the tallest at the back, and leave a clear gap beside them for the coffee maker or grinder.
A lower rail can hold a few cups by their handles, but too many hooks make cups knock together and crowd the counter. Keep only the syrups and mugs you use often within reach; store the rest elsewhere.
Painted Arch With Open Shelves
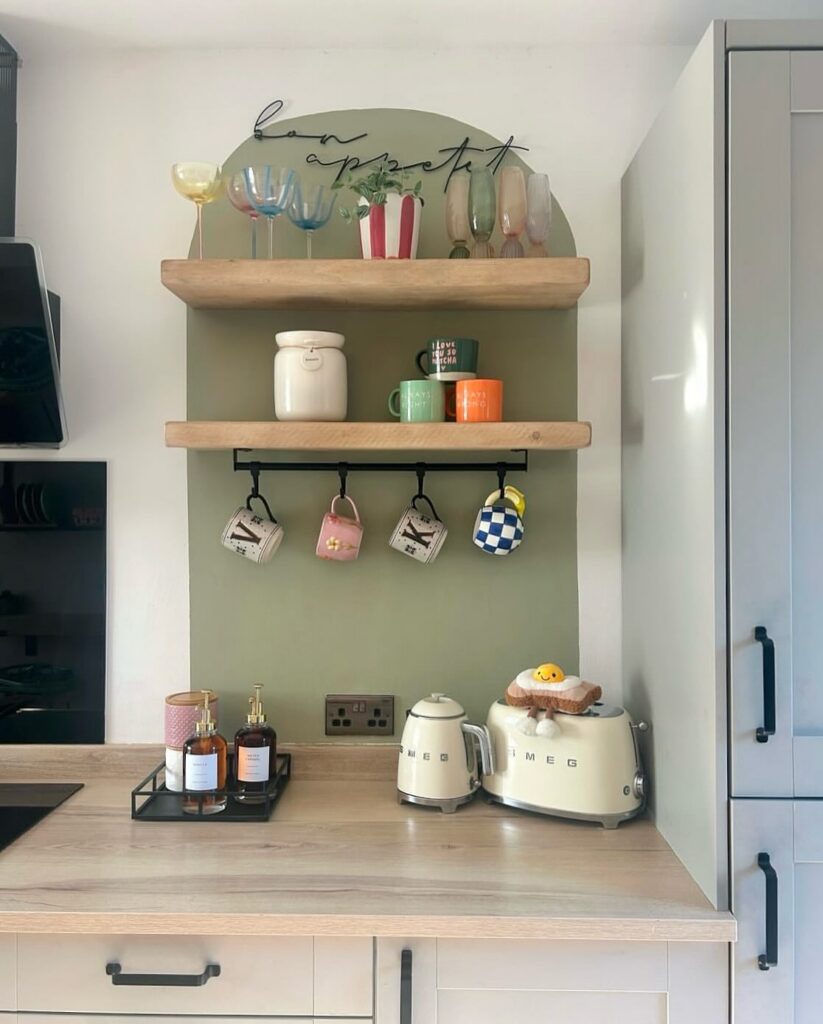
With a painted arch behind two wood shelves, a coffee corner gets a clear boundary without taking over the counter. This is a good choice if you have a small mug collection you want to display, with a rail below the lower shelf for the cups you reach for most.
If you need room for bulky coffee supplies or prefer to put everything behind doors, choose a cabinet-based setup instead. Open shelves make more sense when you’re happy to leave your cups on view.
Floating Shelves Above the Machine
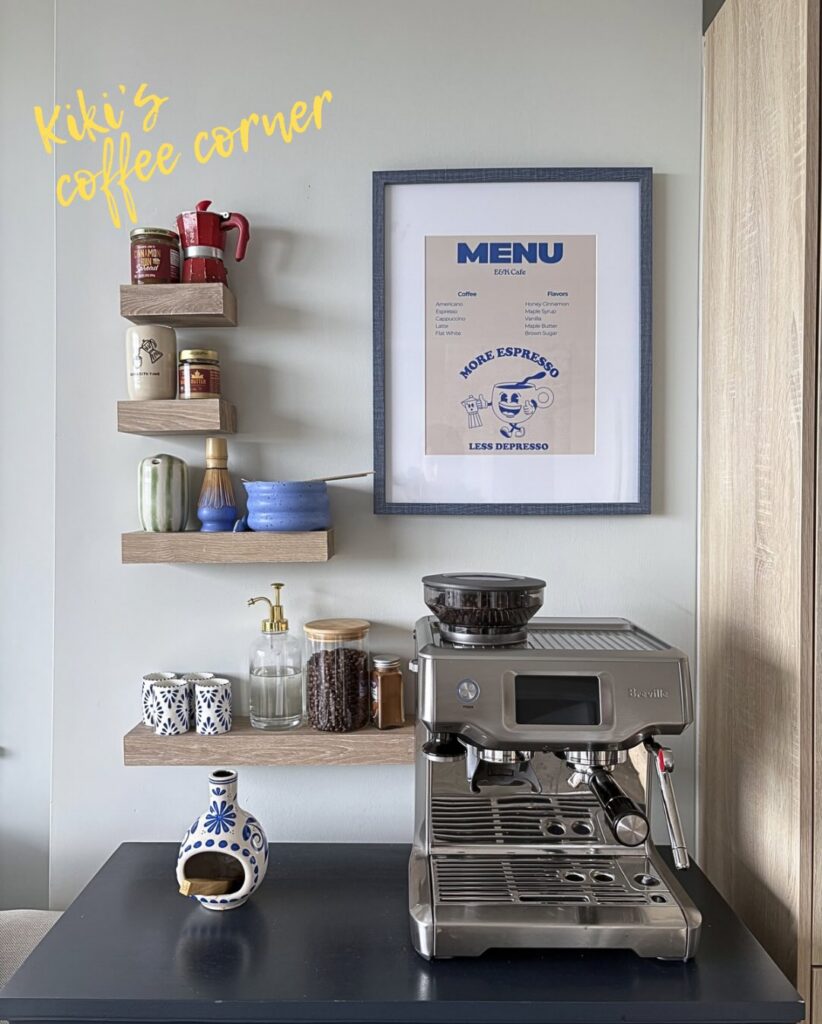
Mount a few narrow wood shelves on the wall directly above the espresso machine, and the counter stays clear for the machine itself. This works best in a small kitchen or a corner next to a cabinet. Keep mugs and the bean jar on the lowest shelf, within easy reach, and put the rarely used items higher up.
Olive Green Coffee Bar
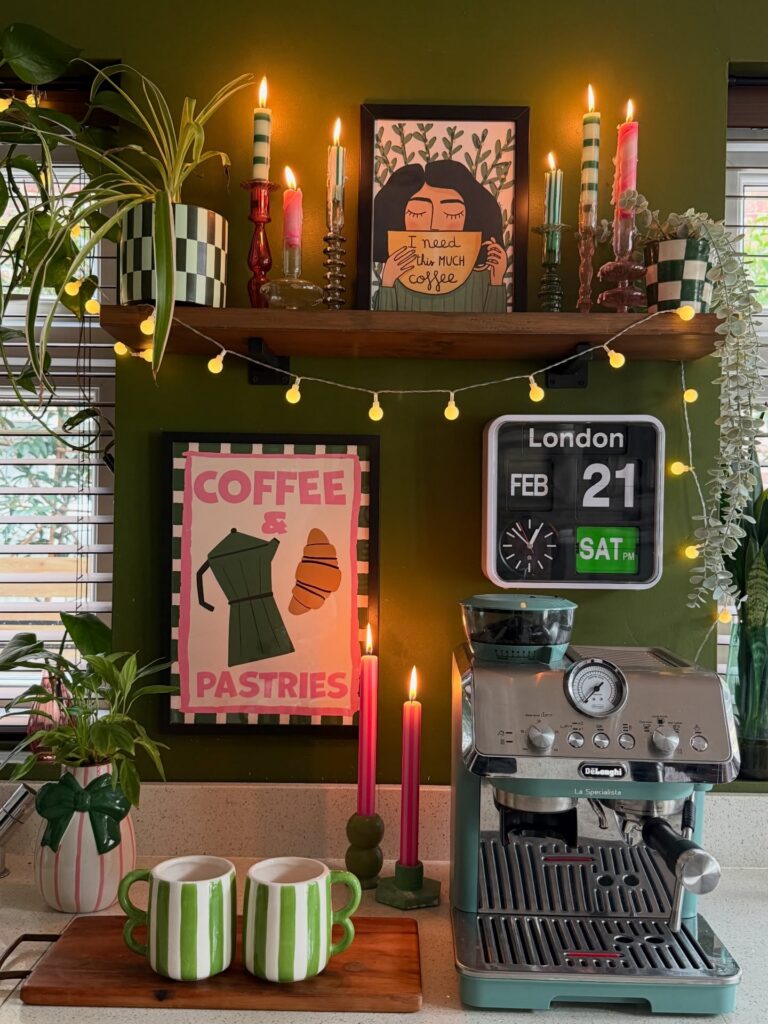
Paint the wall behind the counter a deep olive green, then let pink and cream details break up the dark field. A framed coffee print and a few slim candles carry those lighter colors up to the shelf, while the wood shelf keeps the setup grounded. Green-striped mugs repeat the wall color at counter level.
This palette gives a small coffee station a clear boundary without adding cabinets or taking up more counter space.
Recessed Coffee Station
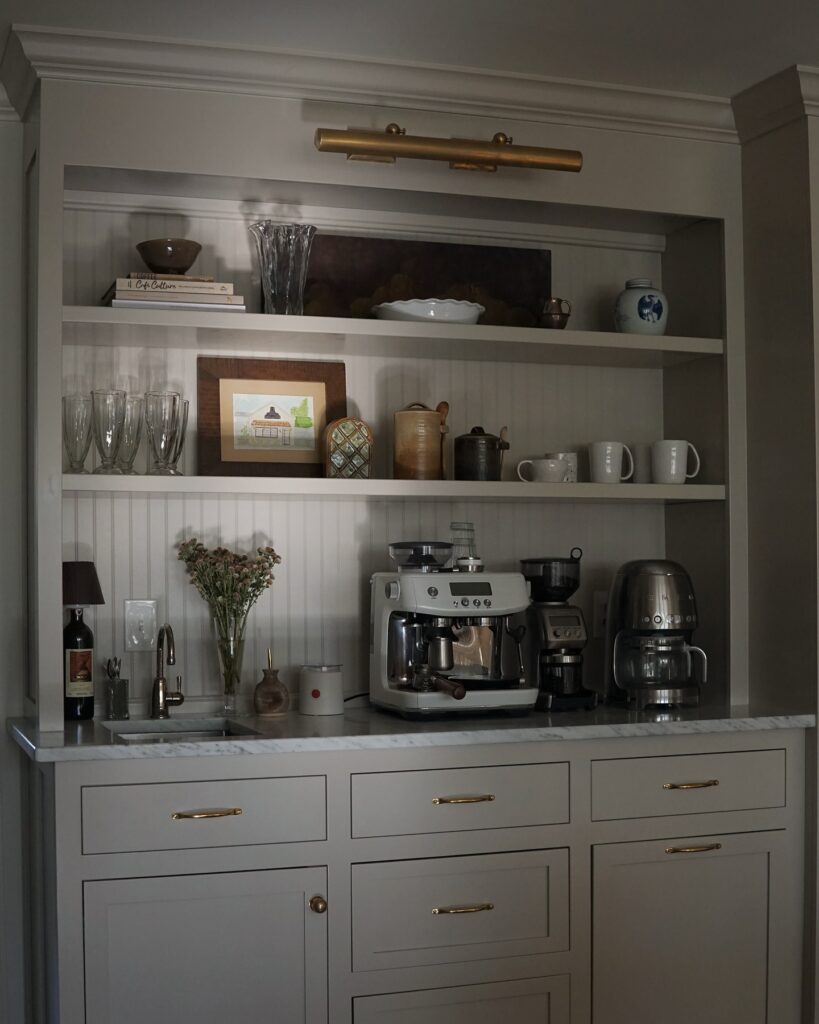
Set your coffee counter into a cabinet recess, with open shelves above and drawers below. Start by measuring the machines you plan to use, including the room each one needs when its lid or water tank is open. That clearance is the step that matters most; fix the shelf heights only after you’ve checked it.
Plan outlets before fitting the counter, then arrange the machines so you can reach their controls without moving anything. Leave a clear patch beside them for filling cups and setting down milk. Store beans and spare tools in the drawers rather than across that work area.
Use the lowest shelf for mugs you reach for daily and the upper shelf for less-used dishes. A brass picture light above the recess adds light without taking up counter space.
Wall Shelves Above the Counter
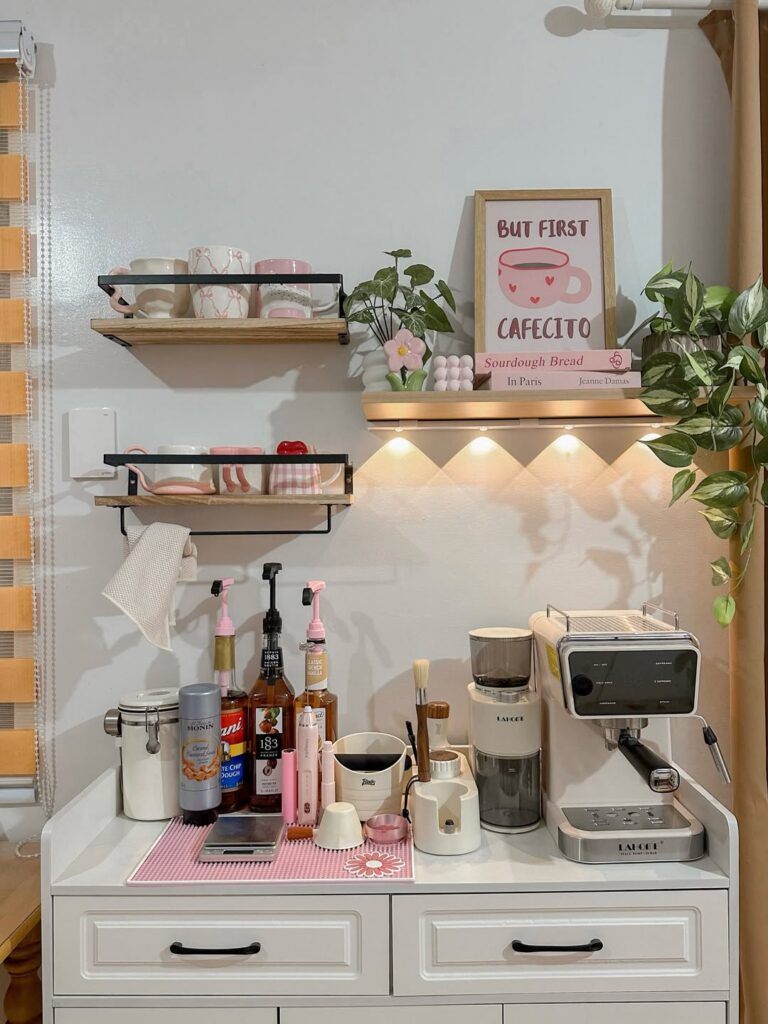
Open shelves hold mugs well, but they collect clutter fast. Here, two narrow shelves keep the cups off the counter, and a small light under the top one shines on the shelf below. Hang them close enough to reach without a stool, and leave a gap above the machine so steam doesn’t hit the wood.
Floating Wood Shelves
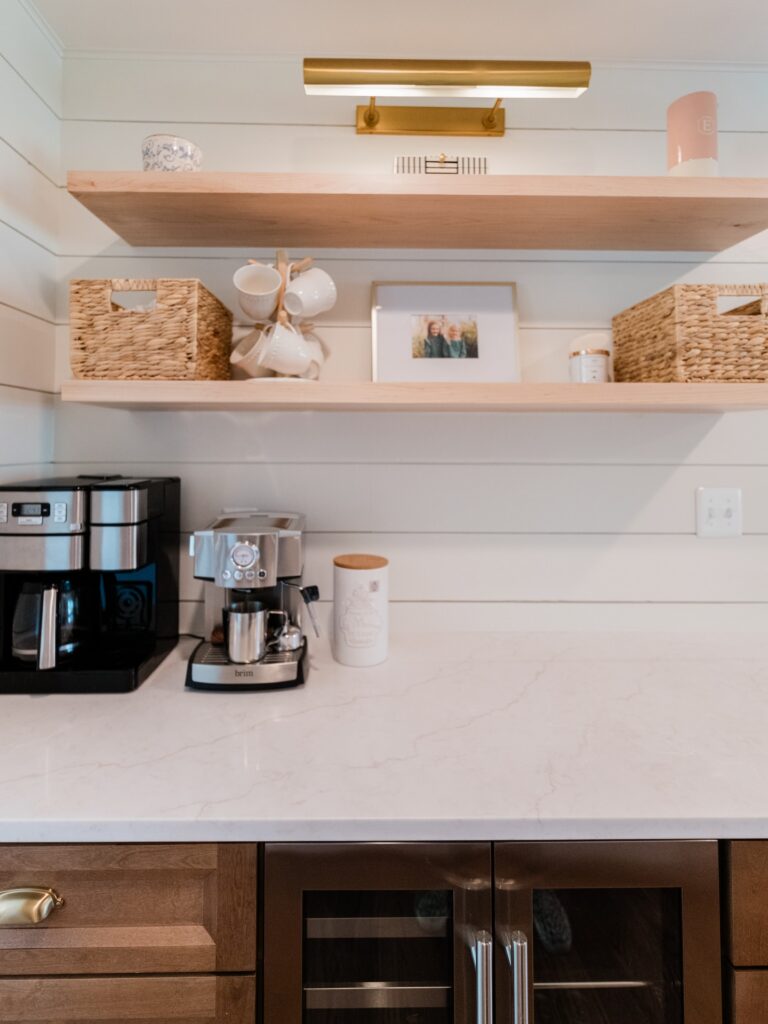
Floating wood shelves give a coffee bar room for mugs, baskets, and a small framed photo without using counter space. Use solid wood boards with hidden brackets, or mount pine boards on visible metal supports if you want a simpler build. Woven baskets hold tea and filters, while hooks beneath a shelf keep cups within reach. If wood shelving is impractical, a narrow wall-mounted rack can provide a similar place for cups and supplies.
Hang Mugs Below Shelves
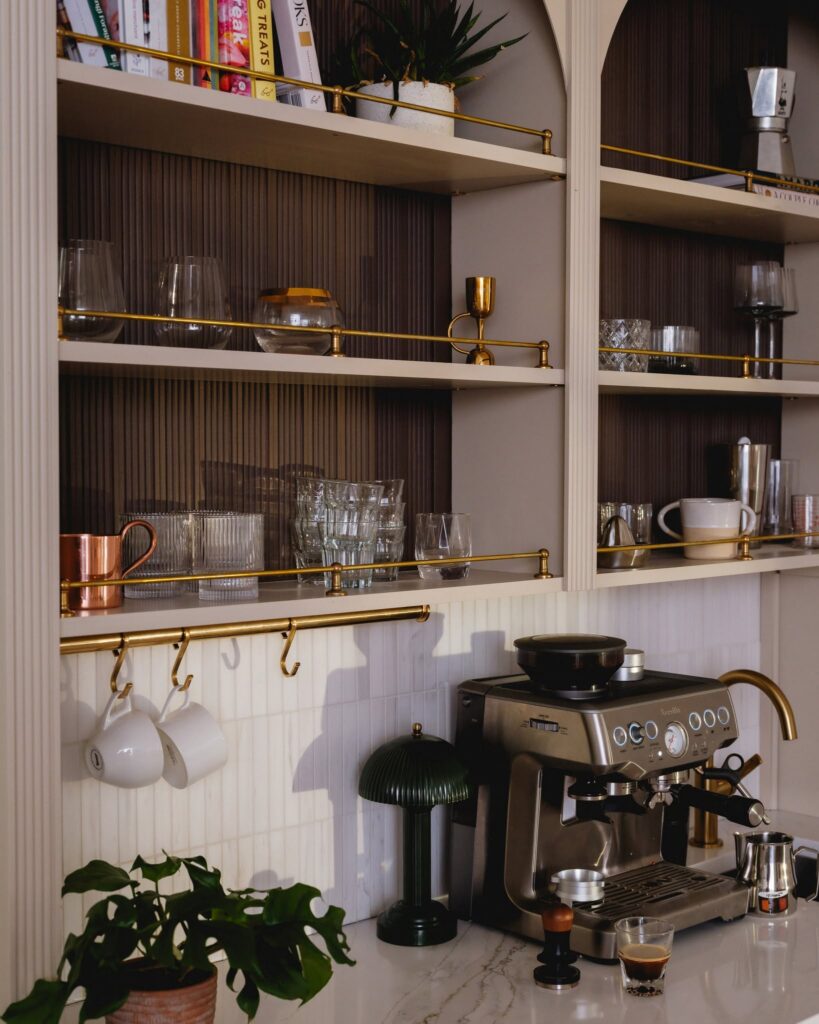
Fit a mug rail just below the lowest shelf so cups hang above the counter rather than beside the coffee machine. That strip of wall is often left empty, even when the worktop below is crowded. A narrow brass rail gives it a job without adding another shelf or a deep rack.
Space the hooks far enough apart that each mug can hang by its handle without knocking into the next one. The white cups stand out against the rail, and their placement leaves room below for making coffee. Without those hooks, the same cups would need a stack on the counter or space among the glasses above. Leave a few hooks empty rather than filling the bar from end to end; you want enough room to lift a mug off without moving its neighbor.
Floating Shelves Above the Coffee Station
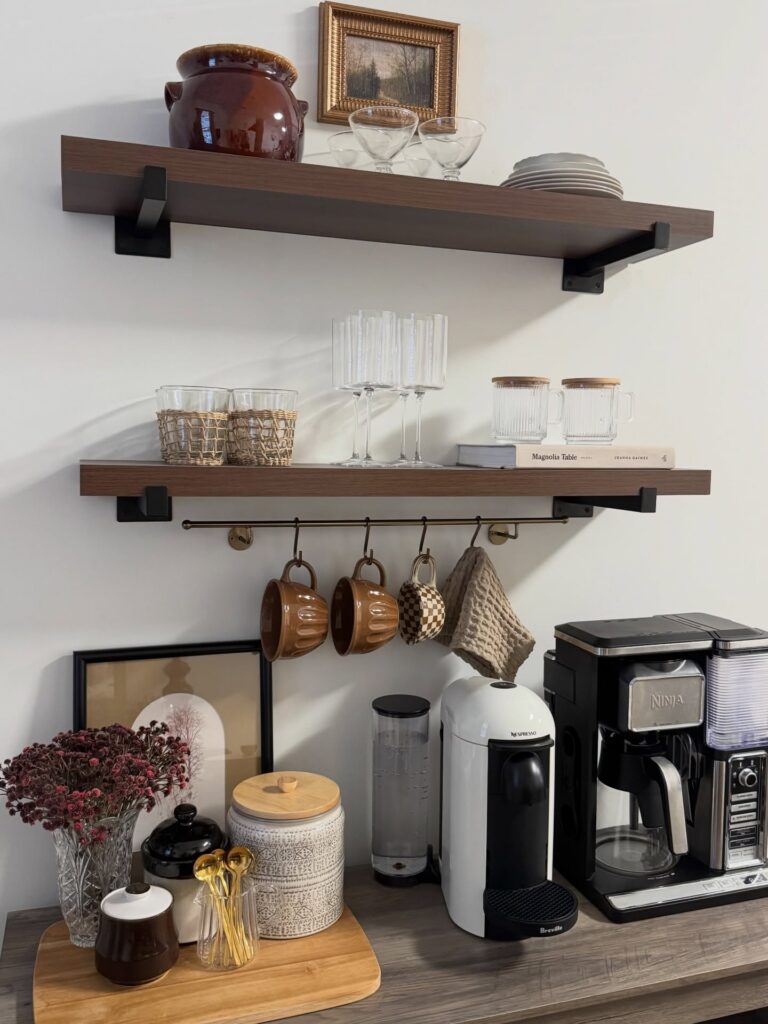
Two wall shelves over a counter work best for people who own more mugs and glasses than they have cabinet space for. A mug rail under the lower shelf keeps daily cups within reach, and the glassware stays up top.
If your counter is shallow or your ceiling is low, pick a different idea from the list. Shelves need a wall you can drill into, so renters should look elsewhere.
A Cabinet Coffee Station
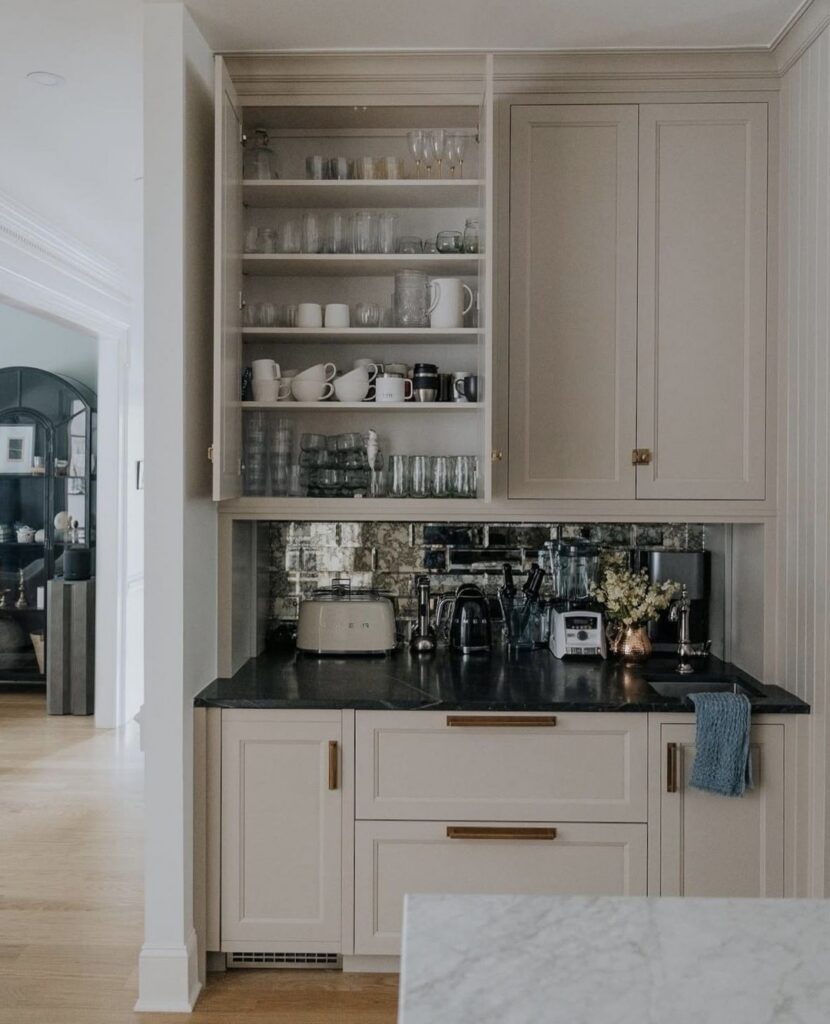
An appliance nook with open shelves above gives coffee gear a set place without taking over the kitchen counter. Start by choosing a stretch near an outlet, then measure the machine, kettle, and cups you use each day. Mark the appliance footprints before ordering cabinets; that is the step that matters most, since a counter that is too shallow or an outlet behind the machine makes daily use awkward.
Fit the counter and backsplash first, then add upper storage: open shelves for mugs and glasses, with closed doors beside them for filters, beans, and spare gear. Set the coffee maker closest to the outlet, leave room to fill its reservoir, and place cups within easy reach. A dark counter gives the appliances a clear base, while shelves keep the work surface free for brewing.
A Wooden Counter Riser
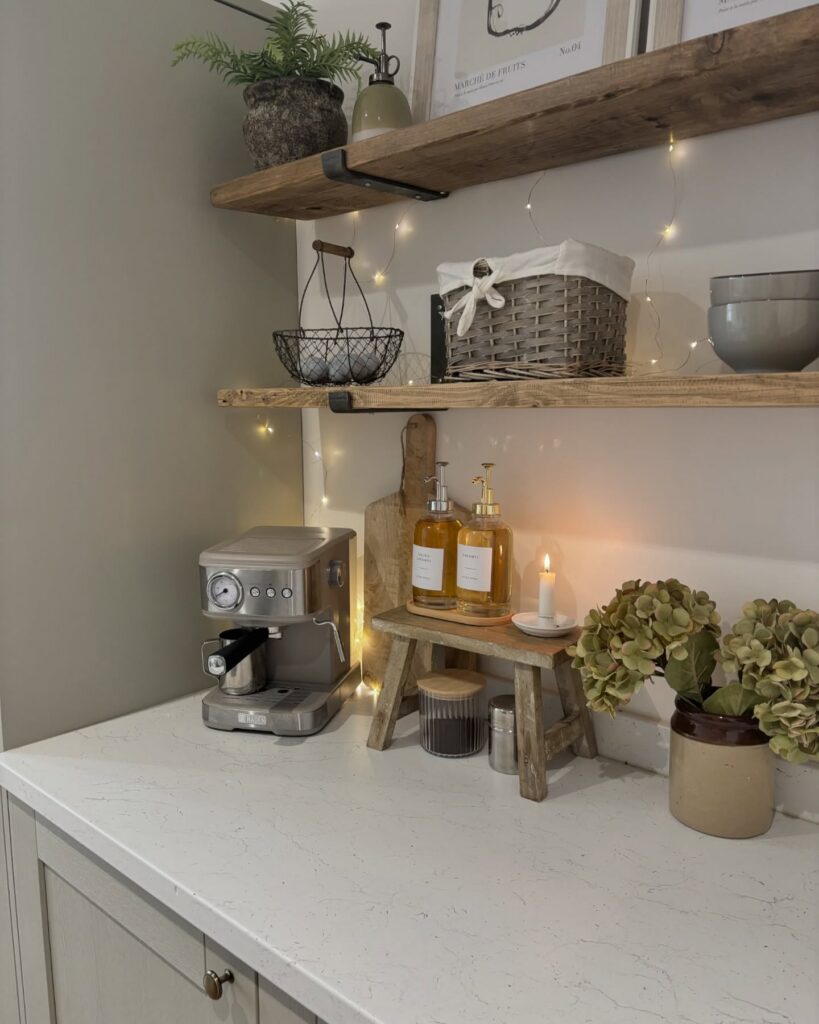
Set your coffee syrups on a wooden riser beside the machine, with room underneath for a coffee tin. A stool with thick legs brings rough wood onto the counter, but its height can make the bottles harder to reach beneath a shelf.
For a smaller counter, choose a lower riser made from thinner boards. Pale wood will stand out less against a light worktop, while the raised surface still separates the bottles from the area where you fill cups. Make the top just deep enough for a tray holding two pump bottles, rather than using a stool-sized platform.
Leave enough clearance underneath to slide your coffee tin out without lifting the riser. I’d measure that tin before choosing the leg height. You can reduce the wood’s bulk without losing the storage space below, and leave more counter exposed around the machine.
Open Shelves Above the Coffee Station
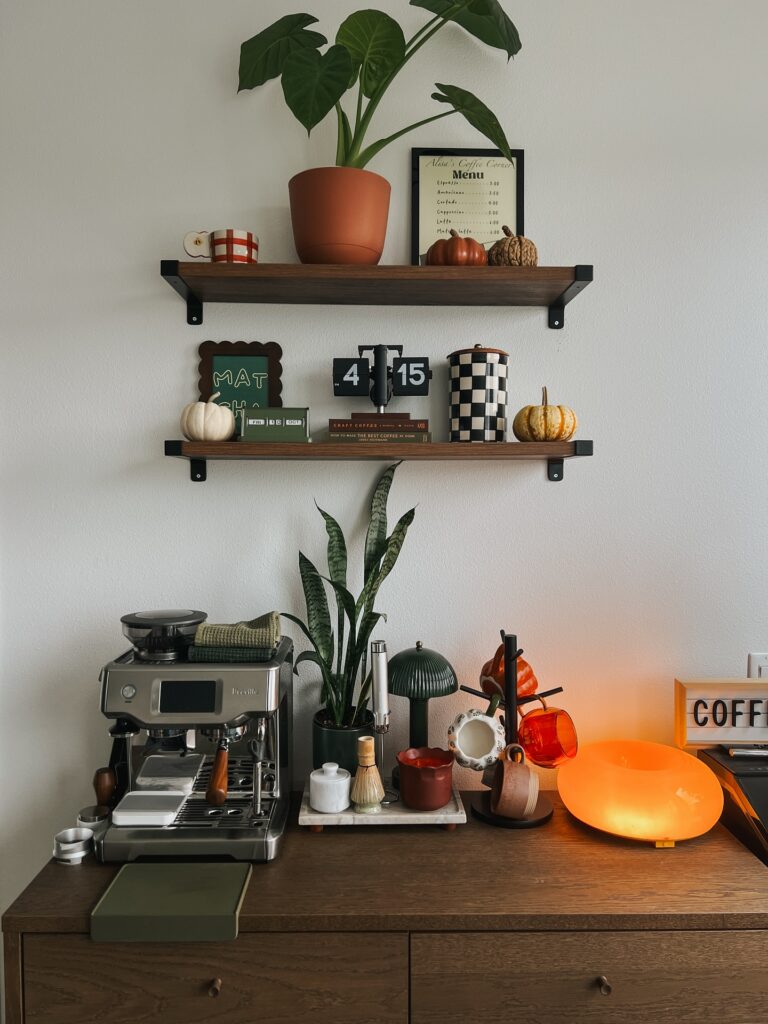
Two floating shelves over a wood dresser give the coffee station its own wall. These are dark wood boards on black metal brackets, which match the dresser top so the three pieces read as one set. The shelves hold a framed menu, a flip clock, a checkered canister, a few small books, and a trailing plant in a terracotta pot.
If you don’t have shelves like these, a pair of plain pine boards stained a darker shade will do, held up by any L-shaped brackets from a hardware store. I’d keep the top shelf for light things like the frame and plant, and put heavier items lower down.
Shelves That Echo the Cabinet
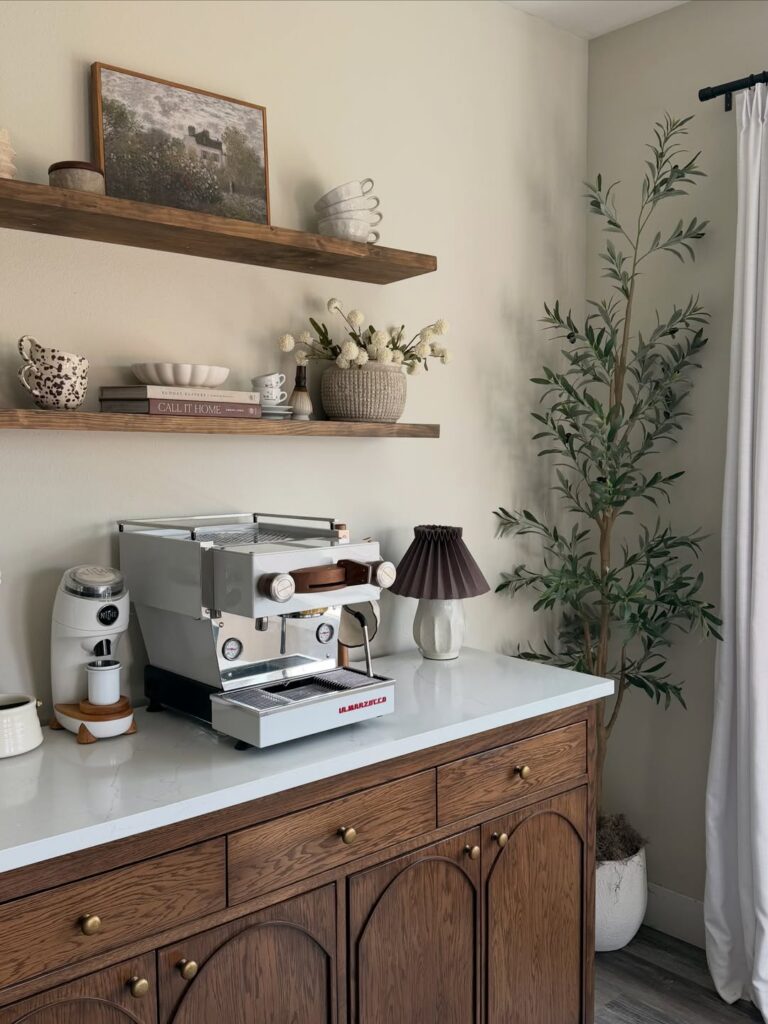
Above the espresso machine, two wood shelves carry the cabinet’s grain up the wall and tie the coffee setup to the furniture below. Their height gives cups, a few books, and a small vase room without crowding the counter. Without that layer, the machine and grinder would sit alone against a large blank wall, and the bar would feel more like an appliance station.