
23 Bathroom Remodel Ideas
This site contains affiliate links. We may earn a small commission, at no extra cost to you. Article may contain some images for illustrative purposes only .
This list has 23 bathroom remodel ideas, and they suit different people. Some are small changes for anyone who wants a fresh look without a long project. Others are larger plans for people ready to take a room down to the studs and start over.
A few will fit a tight budget, and a few will fit owners who have more to spend. Whatever your bathroom looks like now, you should find something that matches the size of your space and the time you have. Each idea comes with its own image and a short note below it.
Scroll through and look at them one by one. Pick out the ones that match what you need. Then set them side by side. Some readers will land on a single idea. Others will combine two or three into one plan. Both ways work. Save the ones you want to come back to when you start planning.
Wallpaper and Tile Zones
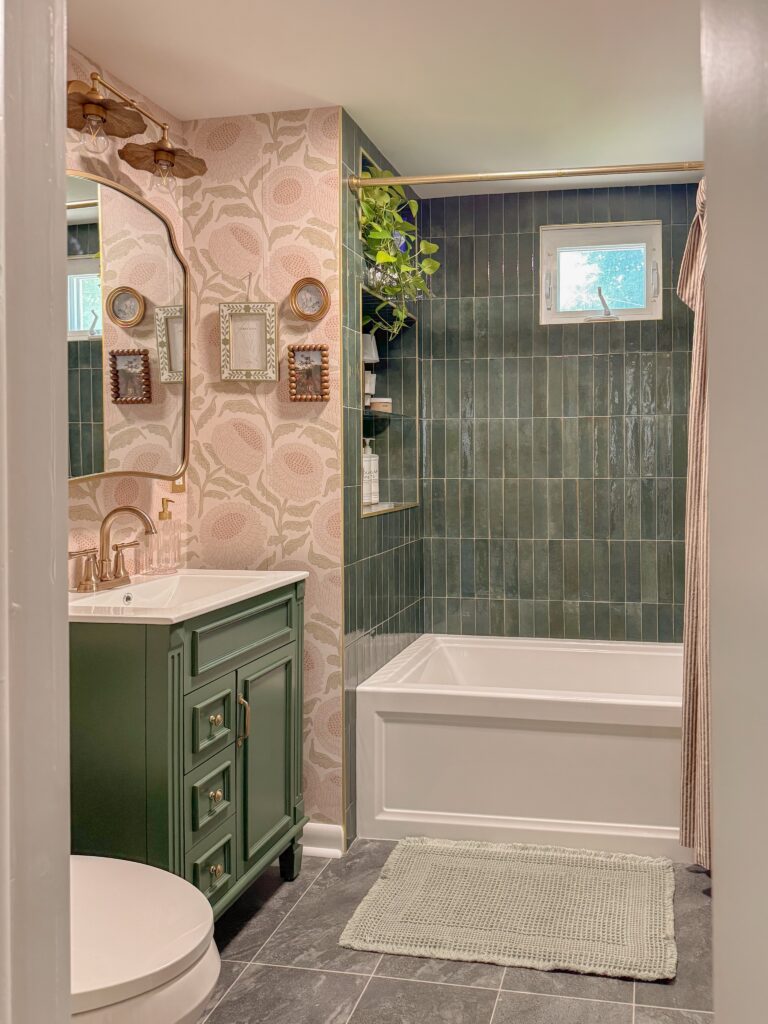
At the vanity, patterned wallpaper can bring detail to a dry wall without competing with the bath surround. Give the tub its own boundary with tile, running it around the walls that take regular splashes; a deep green glaze adds color while a vertical layout draws the eye upward. Keep the pattern on the sink side, where a mirror and wall lights can sit over it, and let the tile carry through the tub alcove.
This arrangement works well in a narrow bathroom because each finish has a clear job: wallpaper marks the sink area, while tile protects the bathing zone. A painted vanity can repeat one of the tile’s deeper tones and tie both sides together. Choose wallpaper made for bathroom use, and leave enough plain wall around small frames or shelves so the pattern stays easy to read.
Add A Skylight
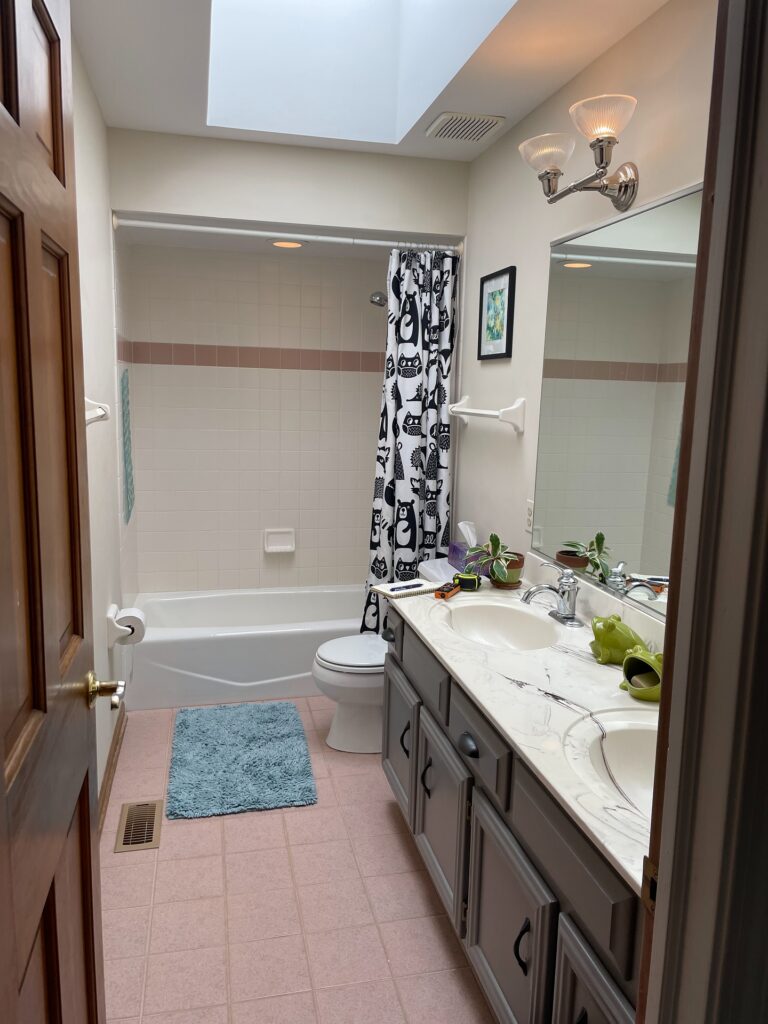
Bring daylight into a narrow bathroom through a skylight with a broad, white-painted light well. The sloped sides matter as much as the opening itself: they let the ceiling widen toward the room rather than leaving the glass at the end of a tight shaft.
Without that flare, a deep skylight can feel more like a hole overhead, with much of the ceiling still in shadow. Carry the ceiling paint up all sides of the well so there is no dark border around the opening.
Tile Below, Wallpaper Above
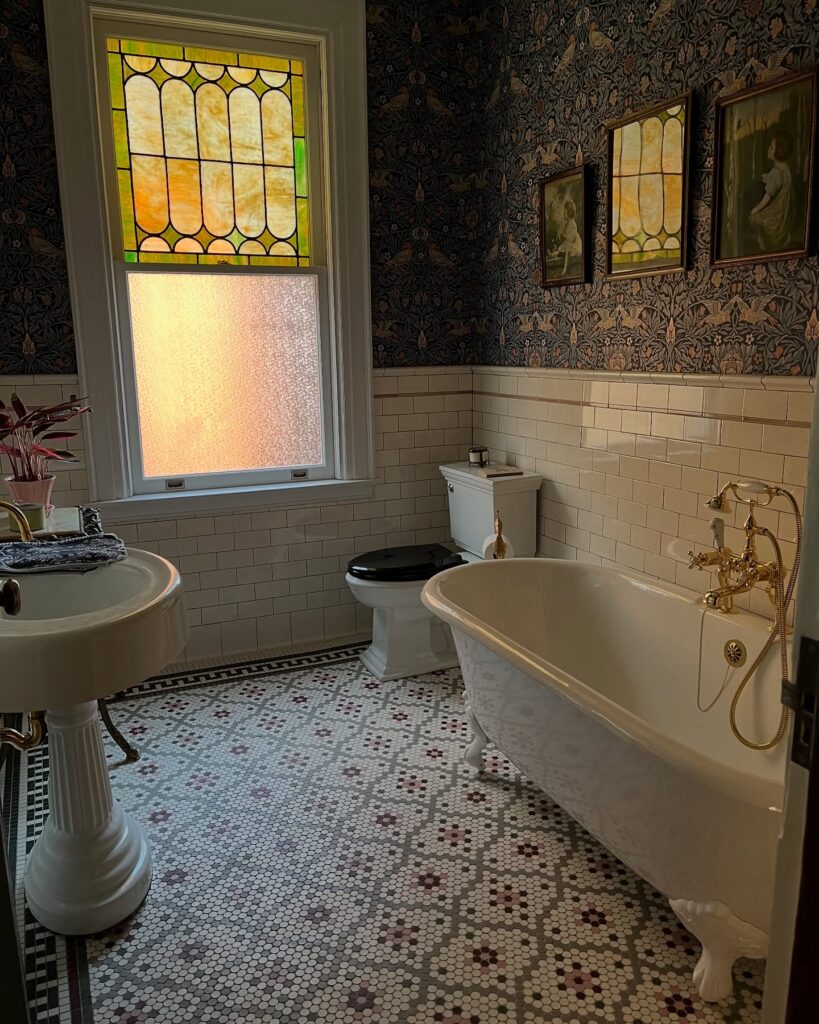
White tile runs about halfway up the wall, finished with a thin cap and a brown stripe, and a dark bird-print wallpaper takes over from there. It’s a way to get pattern into a bathroom without putting paper where the splashes land.
Do the floor first. Small hex tile with a black border has to be laid square to the room, and everything else is measured off it. Tile the walls next, then paint the trim and ceiling, and hang the wallpaper last, when the room is dry and clean.
The step that matters most is marking the height of the tile line before any tile goes up. Draw it level around the whole room, then check where it lands against the window casing and the toilet tank. A line that ends partway up a piece of trim looks like a mistake, so adjust it by a row or two until it meets something solid.
Once it’s finished, run the fan during every shower. Paper this close to a tub needs the steam cleared out of the room.
Vertical Green Tile
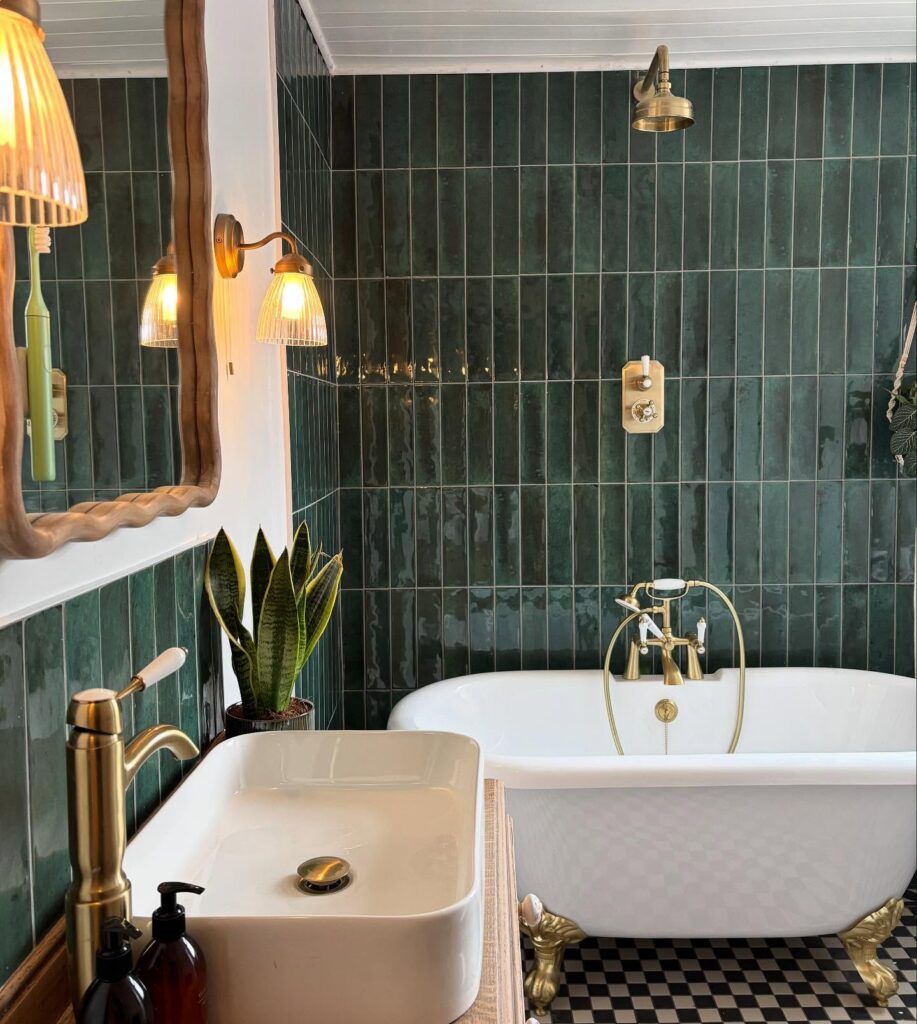
Run deep green glazed tile vertically across the shower wall to draw the eye upward and give the surface a clear pattern. Narrow ceramic tiles catch the light, while their grout lines break up the dark color. Carry the tile around the tub or onto a short vanity wall to connect the two areas. If you want less tile, use moisture-resistant green paint on dry walls and reserve glazed tile for the shower.
A grout shade close to the tile keeps the grid from becoming too busy.
White Subway Tile Wainscoting
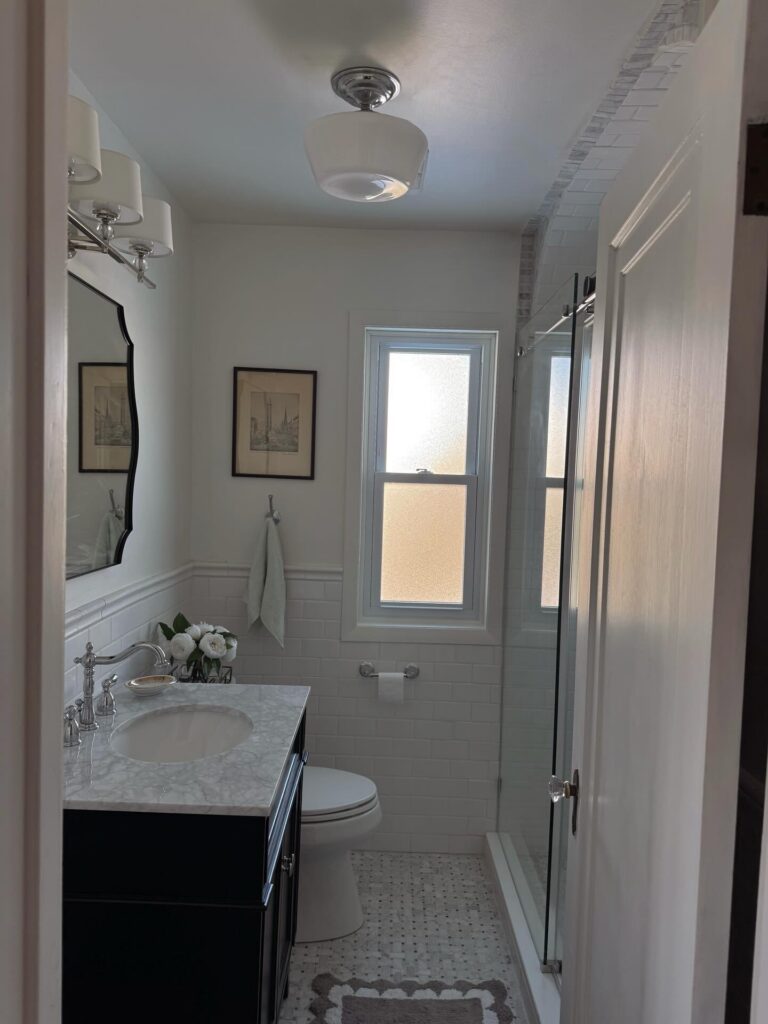
Run white subway tile partway up the bathroom walls, then carry it to the ceiling inside the shower. The trouble starts when those two heights meet without a plan, leaving awkward cuts around the glass or a raw edge above the sink. Mark the top line before tiling, and choose a finished cap rather than leaving tile edges exposed.
Around a window, lay out the rows first so you don’t end up with thin slivers beneath the sill. Use a waterproof backing system in the shower; tile and grout alone won’t stop water. Keep the grout joints narrow, with a sealant made for corners wherever tiled walls meet.
Busy Wallpaper in a Powder Room
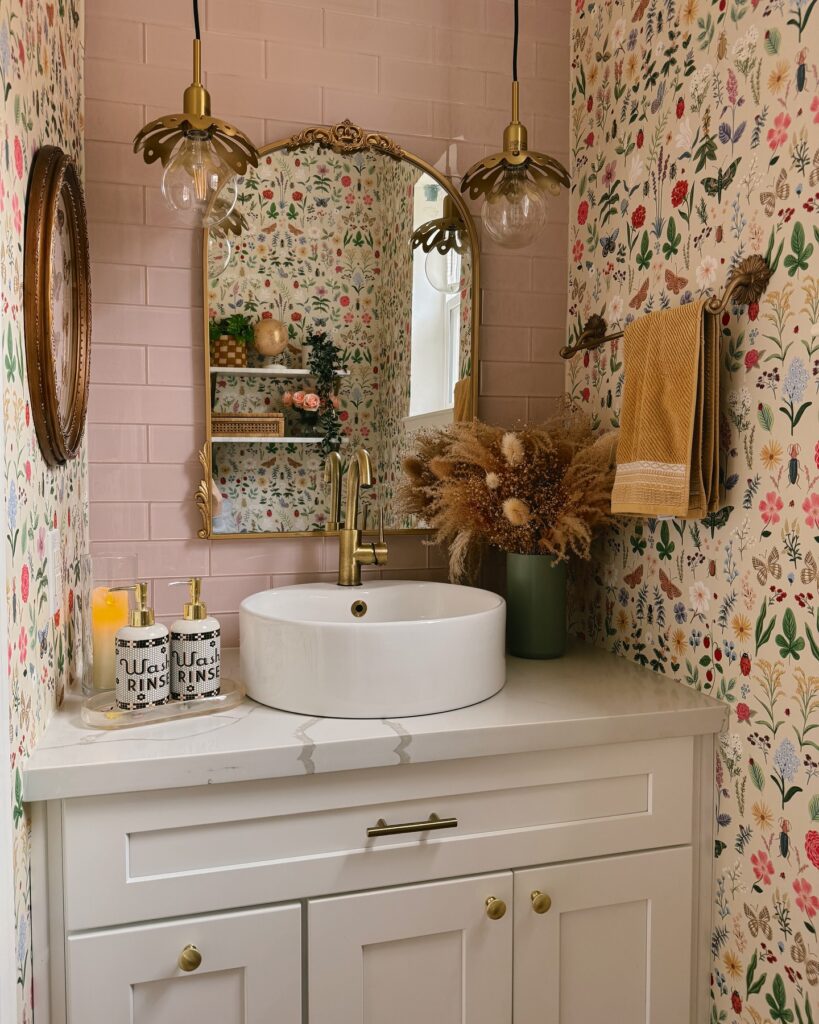
A small powder room is the best place to try a bold floral wallpaper, because you only need a couple of rolls and nobody spends long in there. The pattern here wraps the walls on either side of a pink tile backsplash, which gives the print a calm break and keeps it from crowding the sink.
This is right for you if you want a strong look but don’t want to commit to it in a bathroom you use every day. It’s also a good fit for a half bath with no tub or shower, since steam is what ruins paper over time. Check that the paper is rated for damp rooms, and plan to seal the seams near the counter.
I’d pick something else if your bathroom is the main one, with a shower running daily. A print this dense would also overwhelm a room with several doors, odd angles, or a lot of fixtures. In those cases, put a smaller dose of pattern on one wall, or use paint.
Botanical Shower Curtain
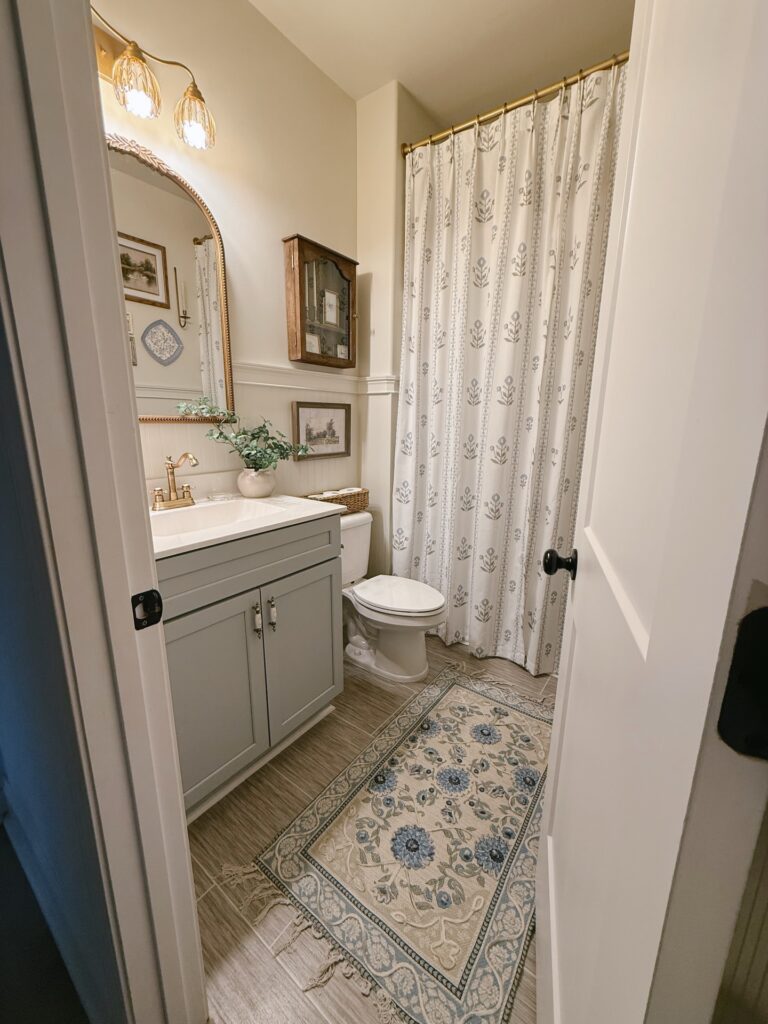
A botanical shower curtain adds pattern to the bathing area without changing the tile or wall finish. The pale fabric and gray plant motifs keep the large surface light, while the floral runner carries color along the floor. For a stronger version, choose a similar print on a deep blue or green ground.
The darker field will make the shower wall stand out, so keep the vanity and walls pale to avoid making the narrow room feel boxed in. Pay attention to the scale of the print, too. A small, spaced pattern is easy to live with across a full curtain, while a large repeat can look busy when gathered at the sides.
A curtain that reaches near the floor makes the pattern feel like one broad panel.
Add Half-Height Wall Panelling
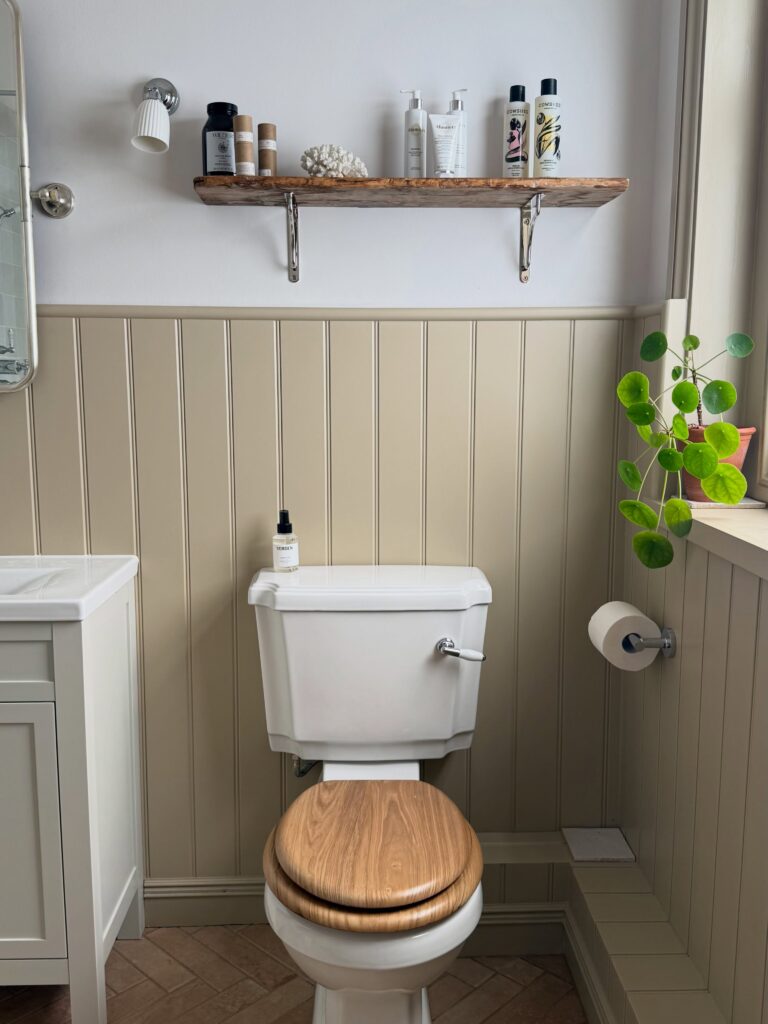
Run tongue-and-groove panelling up to a slim cap rail, then paint it beige. Use wood boards or moisture-resistant MDF away from direct splashes; PVC panels are an option where water is harder to avoid. Leave the wall above plain so the vertical grooves stand out.
Large-Scale Checkerboard Floor
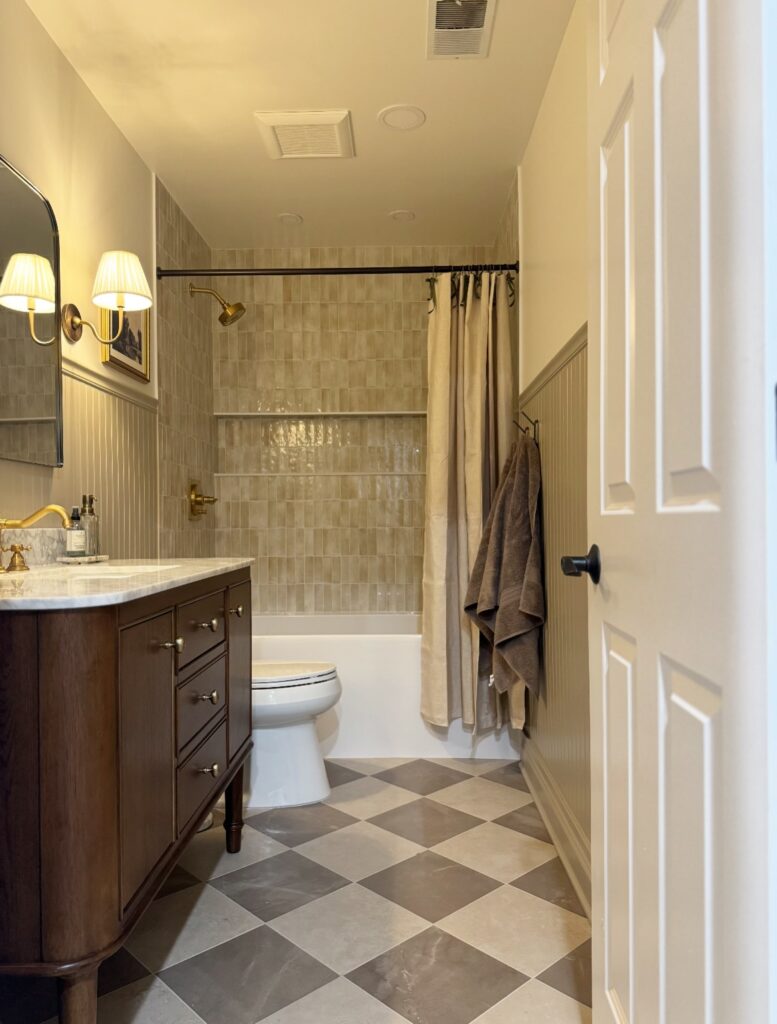
A checkerboard floor works in a narrow bathroom when the squares are big and the two colors sit close together. Here the tiles are set on the diagonal, in a light stone and a gray-brown, and the pattern pulls your eye toward the tub instead of cutting the room into pieces.
Contrast is the detail that matters. If one color were black or white, the grid would look sharp and busy, and in a room this tight it would feel like a chessboard. With two muted tones, the floor still has a pattern but stays quiet next to the dark wood vanity and the glazed wall tile.
I’d keep the grout close to the lighter tile so the lines don’t draw a second grid on top of the first.
Patterned Shower Floor
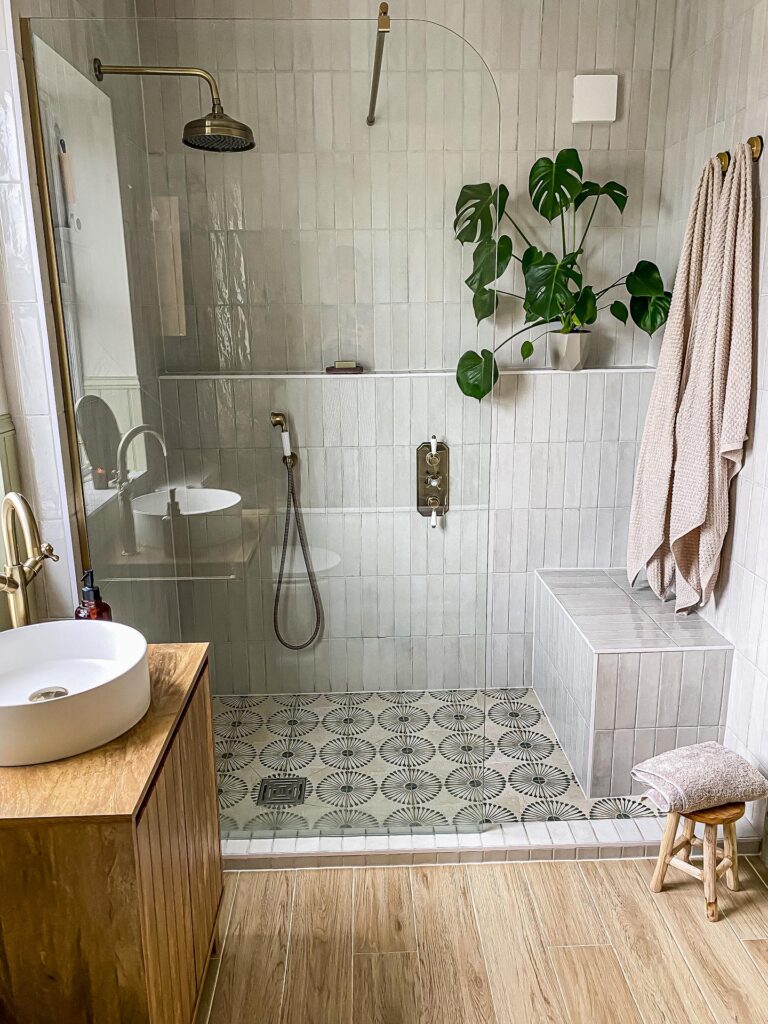
A small-scale patterned floor gives a walk-in shower a clear base without adding color to every wall. Pair a monochrome mosaic with slim white wall tile, and the floor carries the detail while the walls stay quiet. A matching tile curb can connect the shower to the rest of the room.
Add Woven Storage
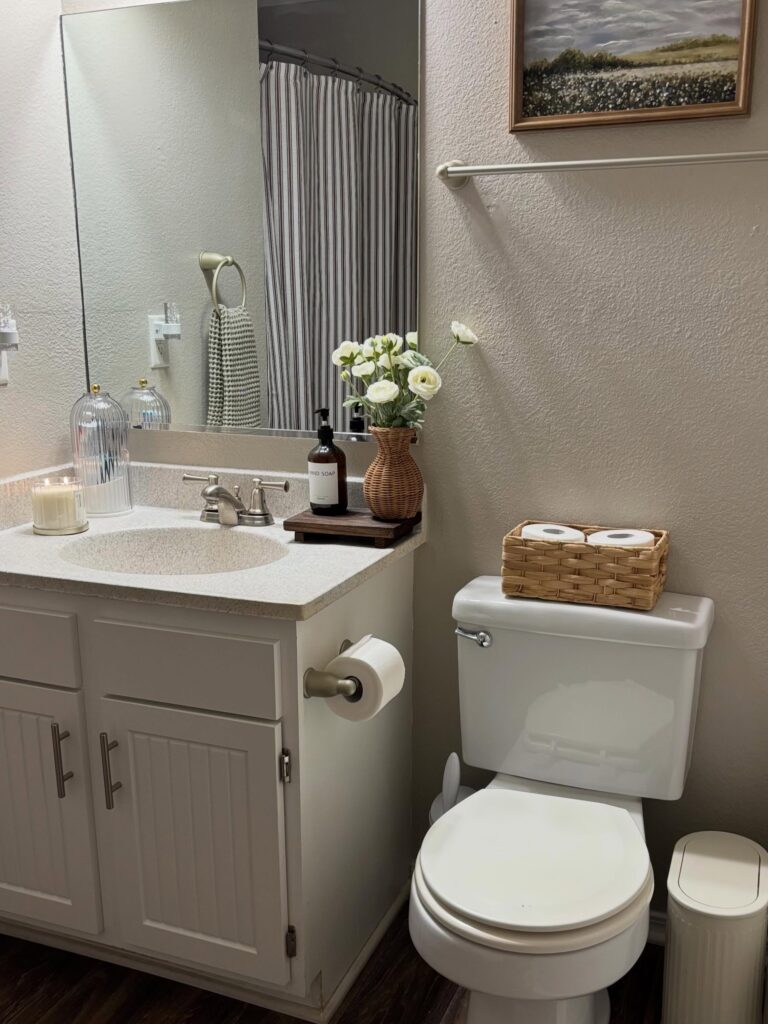
Use a woven basket on the toilet tank when you need extra storage without adding shelves or changing the layout. This is a good route for renters, or for anyone whose sink and toilet still work well enough to leave alone. The basket holds spare rolls within reach, while its brown weave adds contrast beside white fixtures.
For a bathroom with closed storage already, one basket may be all you need; a wicker vase on the vanity can repeat the material without taking over the counter. Choose another idea if your main problem is a lack of space for towels, cleaning supplies, or toiletries, because this won’t replace a cabinet. In a bathroom that stays damp, I’d use a washable bin instead, since woven fibers can collect dust and are harder to wipe clean.
Painted Vanity, Framed Walls
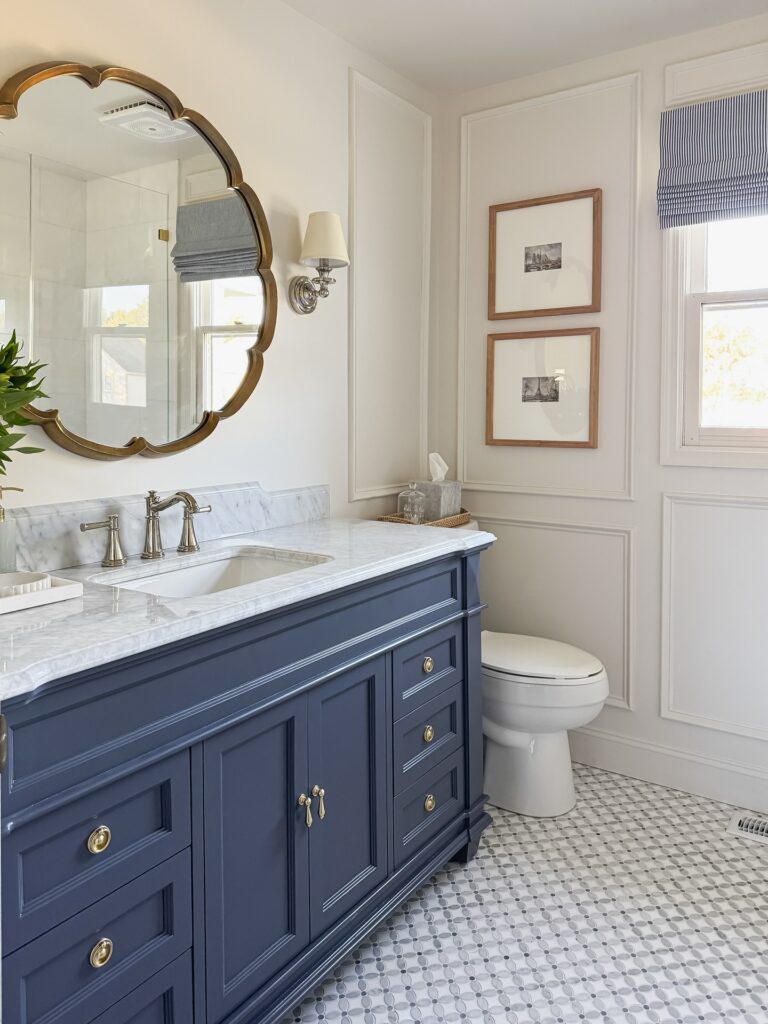
Install the wall molding first, then paint it and the walls together in one color so the trim reads as texture. Pick the vanity color last, once the wall paint is up, and hold the sample against it in daylight. A navy cabinet looks different beside white marble than it does in the store.
Repeat a patterned tile
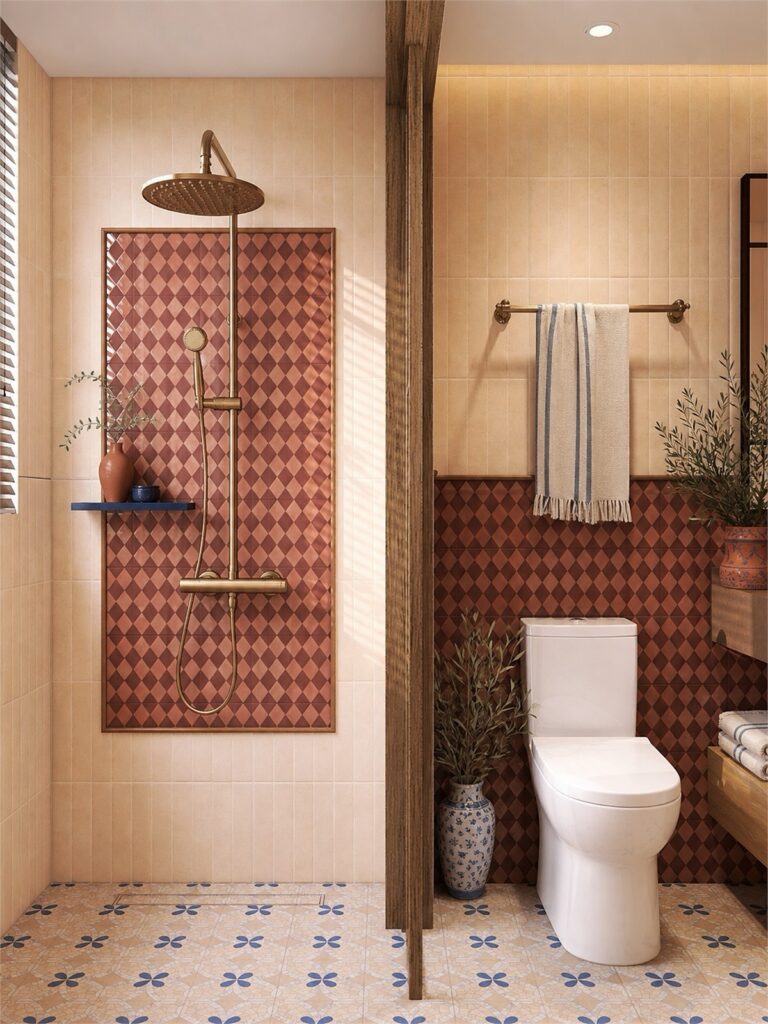
Run dark geometric tile behind the shower and around the toilet wall, stopping it at waist height outside the wet area. The repeat links the two zones, while pale tile above keeps the pattern from taking over a narrow room. A framed panel can define the shower end.
Use a Table as a Vanity
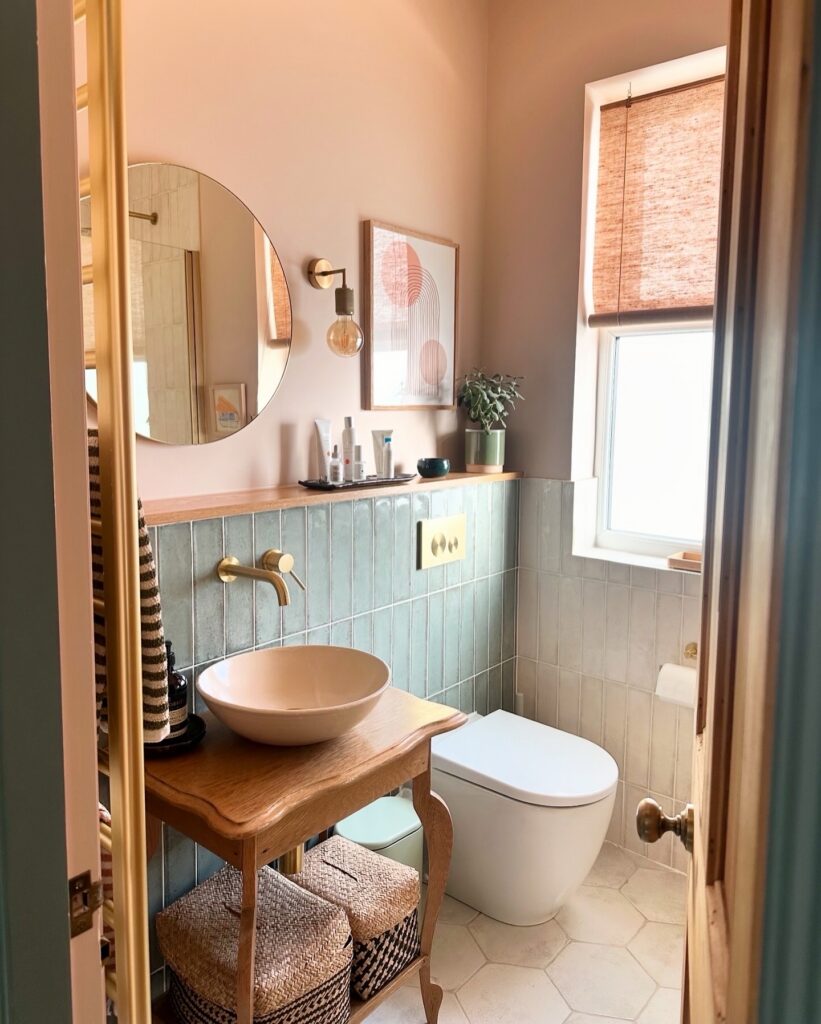
Turn a wooden table into a vanity, but work out the finished sink height before cutting any holes. A bowl basin adds height above the tabletop, so a standard table may need its legs shortened. Check that the tap will reach into the bowl without sending water over the rim.
Seal the wood on all sides, including cut edges around the drain, since splashes can leave marks or cause swelling. Plan the waste pipe route before choosing storage underneath; baskets need room to pull out without catching on the plumbing.
Use an Old Dresser as the Vanity
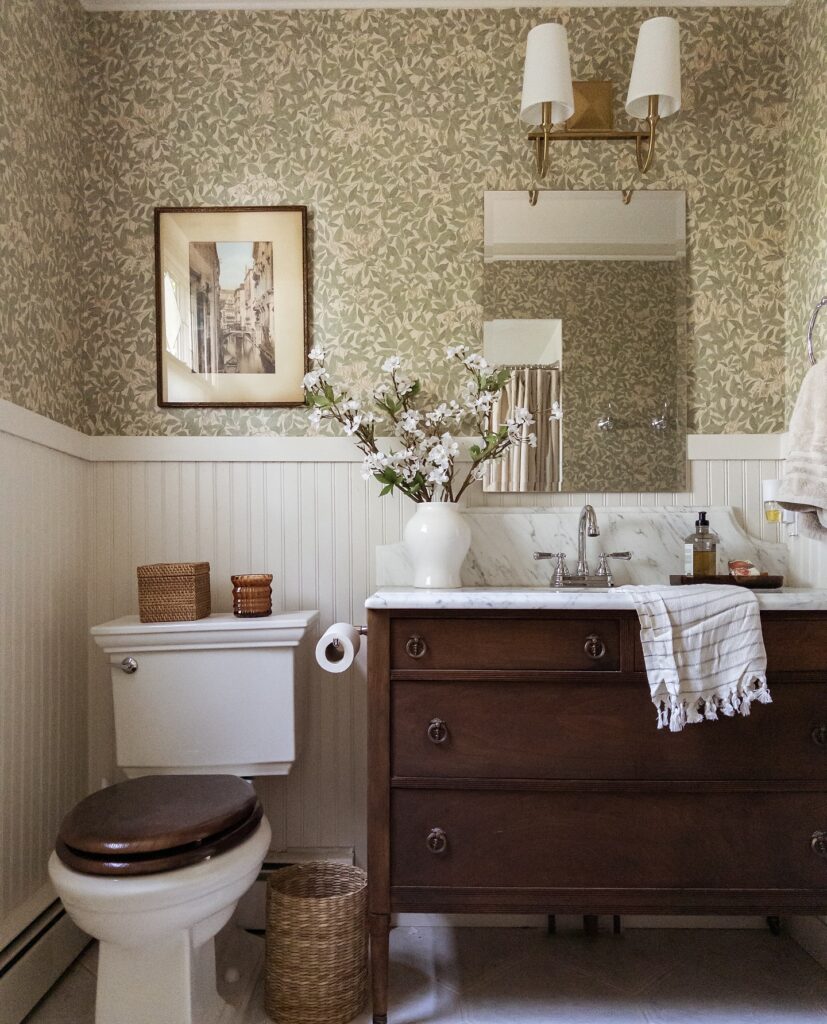
A dresser with drawers gives a small bathroom more storage than a pedestal sink or a wall-hung basin would, and the one that makes this version work is the marble top. The dark wood on its own would sit heavy against the green wallpaper and the white beadboard. The pale slab, with its short backsplash running up the wall, ties the cabinet to the paneling and keeps the wood from looking like a piece of bedroom furniture that wandered in.
Without the stone, you’d have a wooden top that needs sealing and would take water damage near the faucet. The ring pulls and the slightly tapered legs stay as they were, which is why it still looks like a dresser. I’d leave the legs showing, since seeing the floor underneath makes the cabinet feel lighter.
Vertical Green Tile
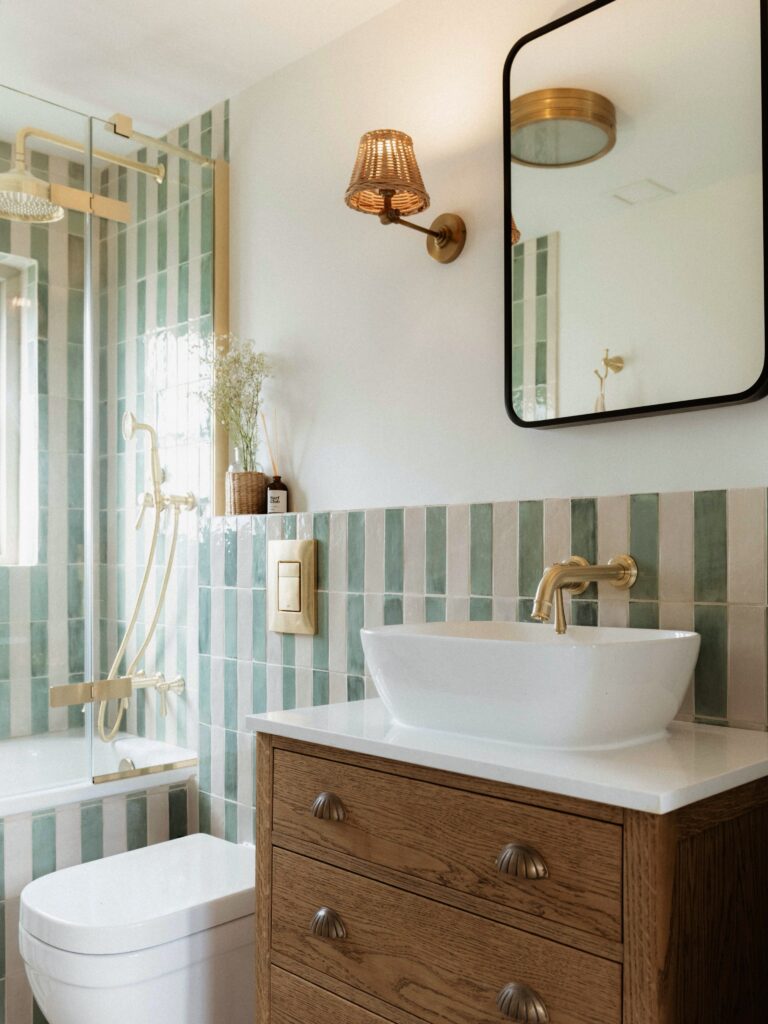
Vertical bands of green and pale tile give the bathroom pattern while leaving the upper wall white. This approach is for someone who wants color built into the surfaces and is happy to see the same stripe repeat around the shower and vanity. The tile’s height also draws the eye upward, which can help a compact room feel taller.
If you prefer a quiet wall or a single tile color, choose another idea; this much contrast will remain a strong part of the room.
Add Horizontal Shower Tile Stripes
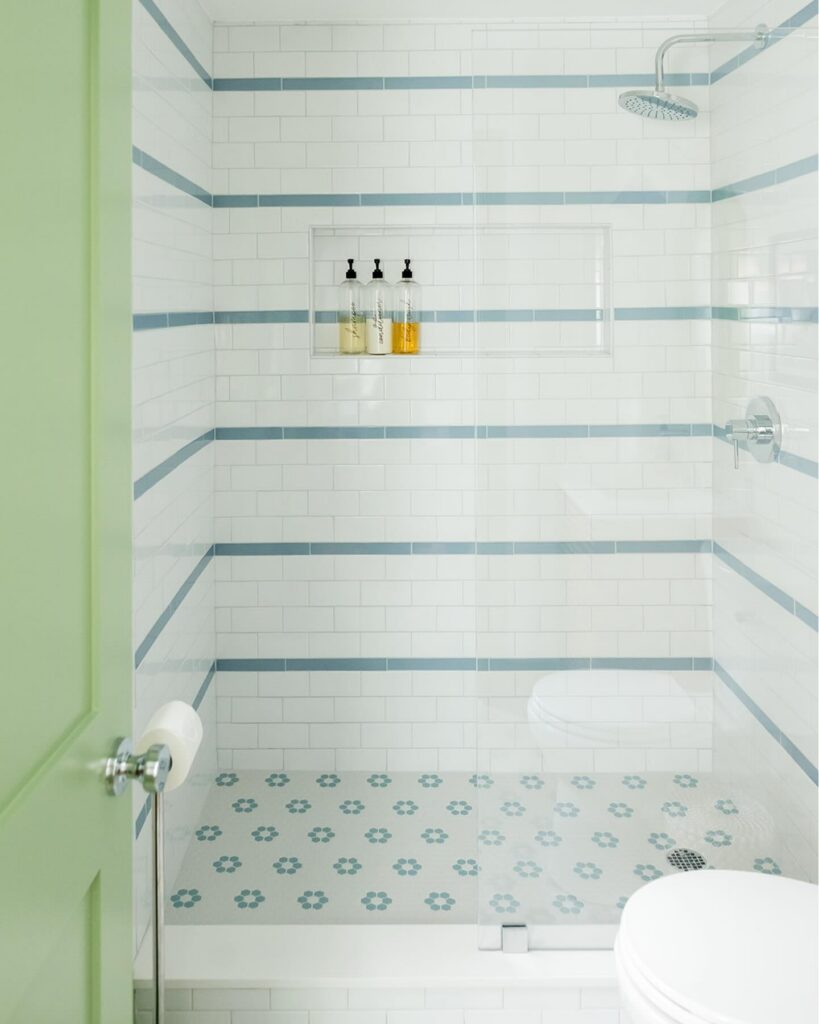
Run narrow bands of blue tile through white shower walls, with the lines continuing around each corner. Plan their height before tiling starts, especially where a band will cross a recessed shelf or meet the shower controls.
Small shifts at the corners become obvious with stripes, so mark level lines around the enclosure rather than measuring up from the floor at each wall. Shower floors slope toward the drain and aren’t a reliable starting line. Lay out a full wall on paper first to avoid thin cuts beneath the ceiling or around the shelf.
Check that the accent tile matches the white tile’s thickness and course height, including grout joints. A slight mismatch can force wider joints or leave an edge sticking out. If you also want a patterned floor, repeat the stripe color in a small motif rather than adding another set of lines.
Paint Above White Tile
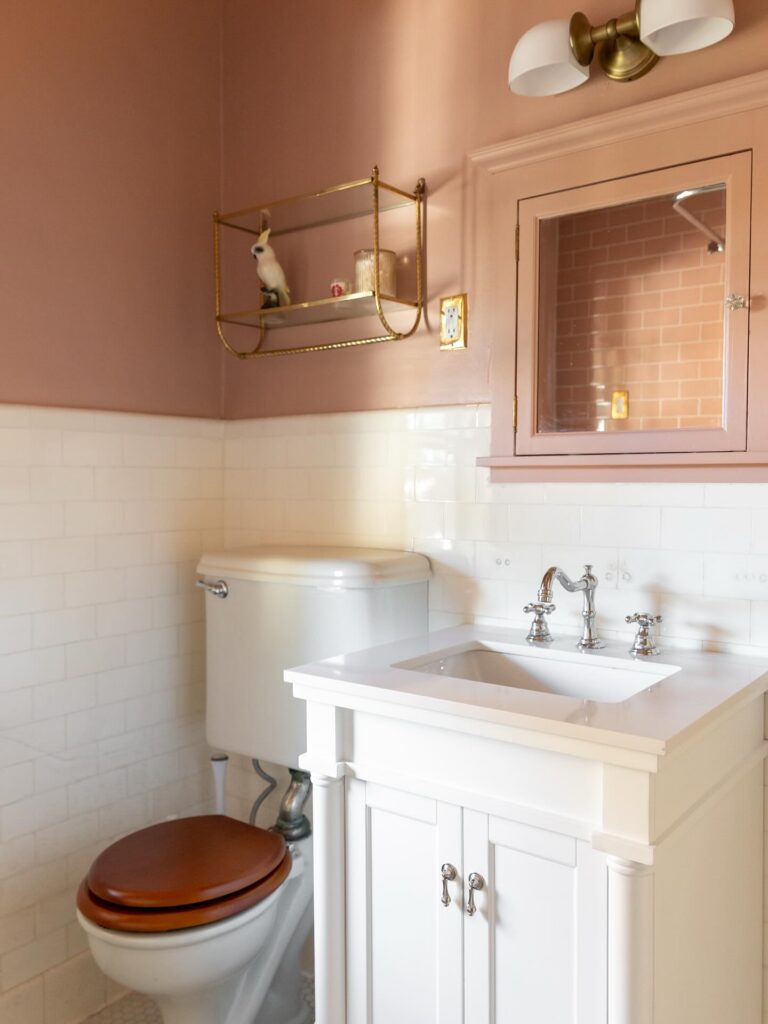
Dusty pink walls over white subway tile work best when the tile goes up first and stays about halfway up the wall. Pick the paint after the tile and grout are in, because white tile can lean cool or creamy and the pink needs to match that.
Test a sample next to the tile in the room’s own light. Paint the trim and the medicine cabinet frame the same color as the wall so they blend in. Add brass fixtures last.
Patterned Shower Curtains
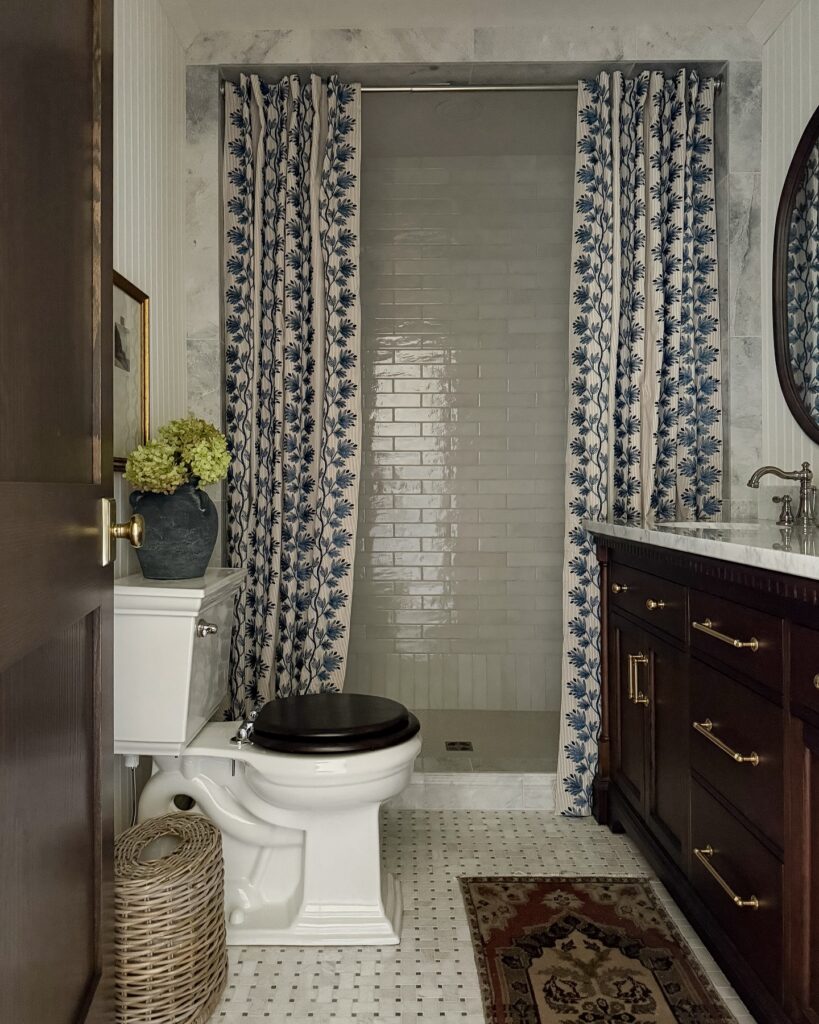
Fabric curtains can frame a walk-in shower without adding a glass door. Choose washable cotton or polyester with a water-resistant liner behind it; the liner handles spray while the outer panel carries the pattern. A ceiling-mounted rod lets the curtains hang beside the opening, and glossy tile keeps the shower walls easy to wipe down.
Paint The Trim Green
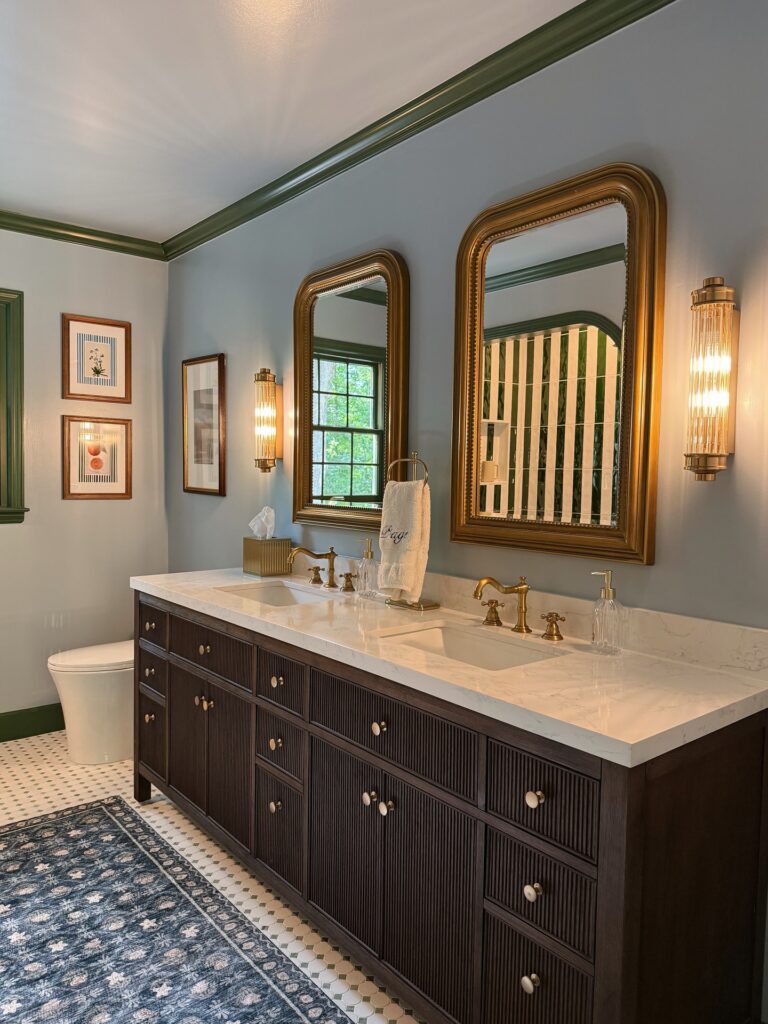
Paint the crown molding, baseboards, and window trim green rather than matching them to the walls. A lighter sage would soften the contrast with pale gray walls, so the trim would frame the room without drawing such a strong line around the ceiling. Take that same shade onto the door casing to connect the edges of the room, while leaving the vanity in dark wood for contrast below.
Keep the Original Pink Fixtures
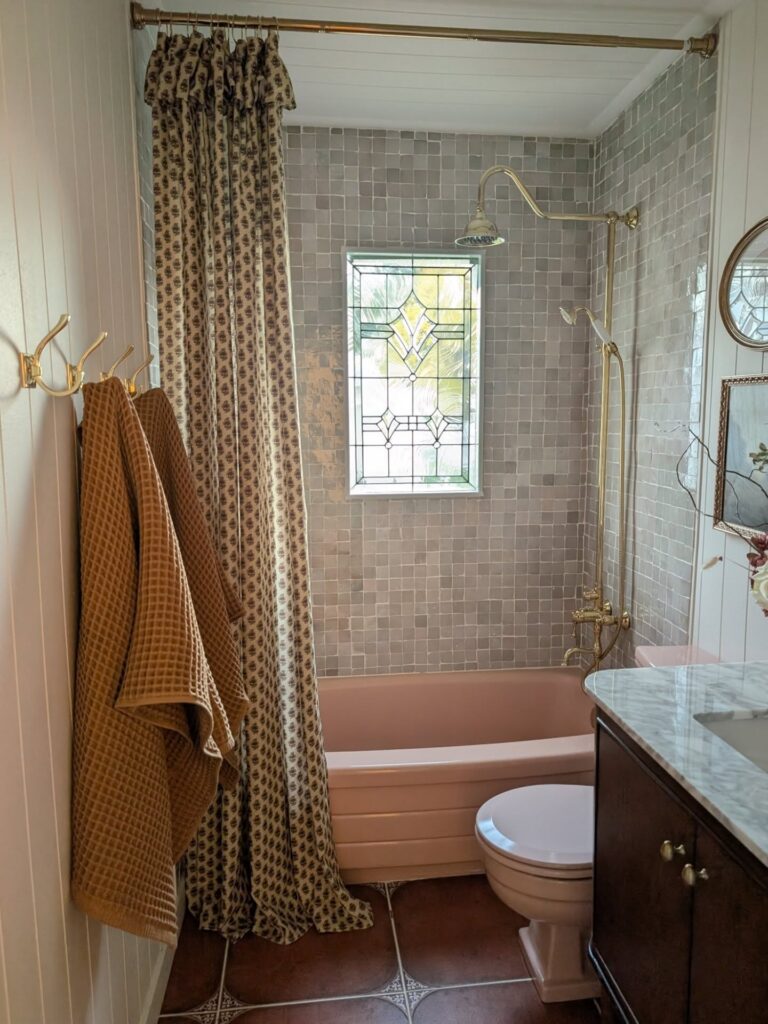
If the bathroom came with a pink tub and toilet, think twice before pulling them out. Vintage fixtures like these are heavy, well made, and hard to find now, and a tub that still has its finish is worth building the room around. Here the tub and toilet sit against gray-green tile with brass plumbing, and the colors hold together because nothing else in the room is competing with the pink.
This works best in a small bathroom with a single window and a short run of wall, where there’s only one or two big colors to manage. Choose a tile in a muted gray or green, then bring in wood and brass for the vanity, hooks and shower arm. A patterned curtain in tan and brown ties the pink to the dark floor tile.
I’d check the tub’s finish for chips and wear before you commit. Refinishing in the original color is hard to match, so you’ll want a surface that’s already in good shape.
Match the Built-In Cabinetry
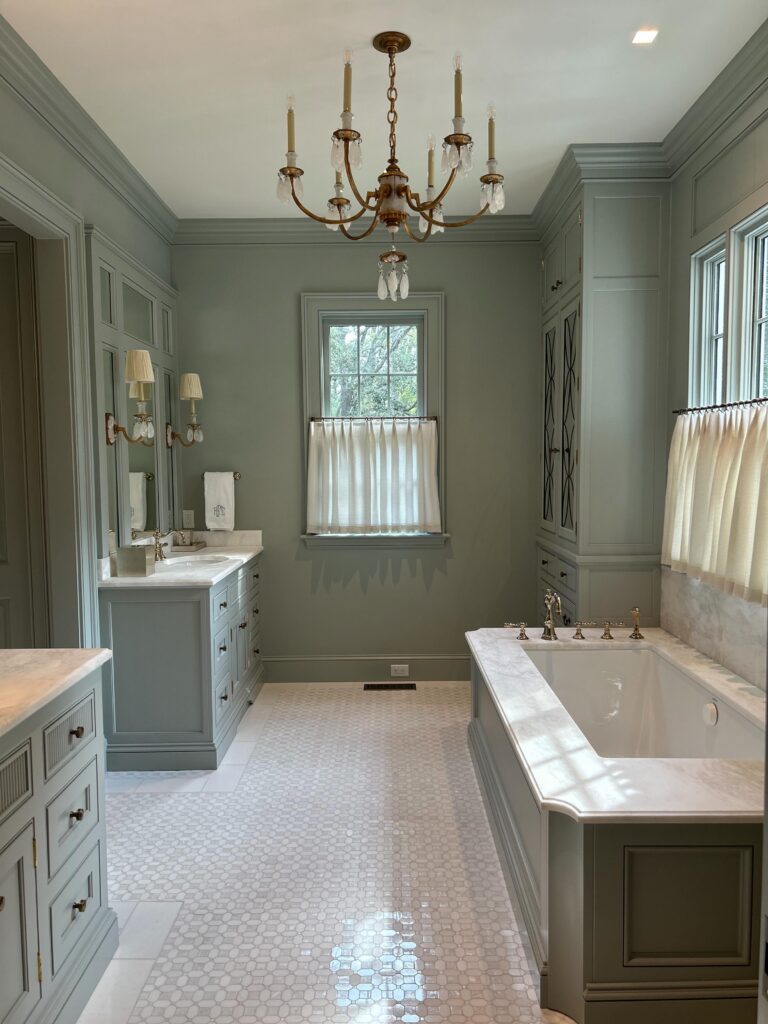
When the vanity, tub surround, and tall linen cupboards share one paint color, the room feels planned as a whole. This approach works well for a bathroom with enough floor space for several built-ins, especially if you need storage for towels and daily supplies. Muted green paint and paneled cabinet fronts give the storage a clear place in the room without making each unit look separate.
It is a good fit for homeowners who like traditional details and want cabinets to stay visible rather than disappear behind plain walls. The matching finish can also help a long room feel more connected from one end to the other. But if you prefer a spare look, or your bathroom is small enough that full-height cupboards would crowd the walkway, choose a different idea. A single painted vanity with open wall space above it would take up less visual room. Plan the cabinet depth and door swing before settling on the layout, particularly near a tub or narrow passage.
Choose a Furniture-Style Vanity
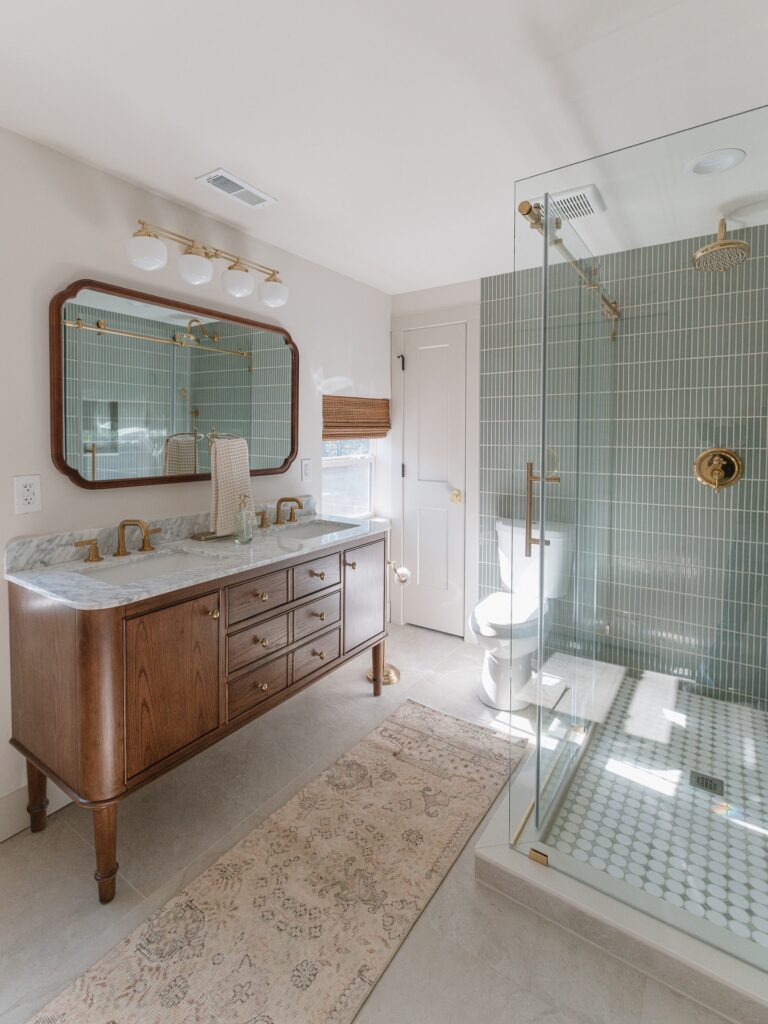
Plan for a wood vanity on legs before you set the water lines and drain. The raised base leaves the floor visible beneath the cabinet, while a stone top gives the wood a surface that can handle splashes. Rounded front corners carry the furniture look through without needing extra trim.
Start by measuring the wall, door clearance, and space needed around the toilet, then choose the cabinet before ordering the countertop. The most important step is checking where the sink bowls and drain pipes land inside it. Drawers need room to open and close without hitting the plumbing, so have your plumber review the cabinet layout before any pipes move.
Tile the floor beneath the full cabinet footprint, since the legs leave that area exposed. Once the vanity is secured to the wall, fit the top and seal its joint with the backsplash. Protect any cut wood edges around plumbing holes from moisture, too.

