
23 Apartment Christmas Decor Ideas for Small Spaces
This site contains affiliate links. We may earn a small commission, at no extra cost to you. Article may contain some images for illustrative purposes only .
Red and White Tree
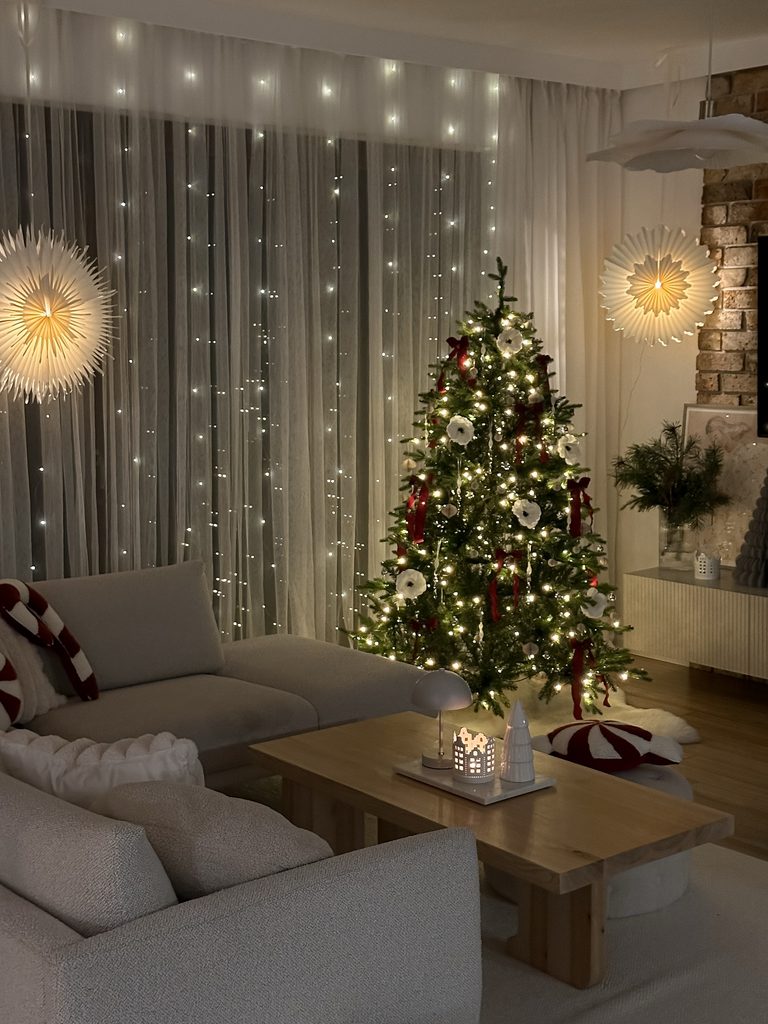
Red ribbon and white ornaments give a Christmas tree a clear color scheme without needing many kinds of decoration. Use a slim tree, then repeat those two colors through the branches: tie narrow ribbon in loose lengths and space larger white ornaments so they show between the needles. Warm white lights keep the red from taking over and make the white pieces visible after dark. I’d leave the rest of the room’s Christmas accents in the same range rather than adding several more colors.
A strand of small lights behind sheer curtains can extend the glow across the wall without taking floor space, while a low tree skirt or folded throw covers the stand. This approach has more contrast than an all-white tree, but it still looks orderly from across a small living room.
A Corner Christmas Tree
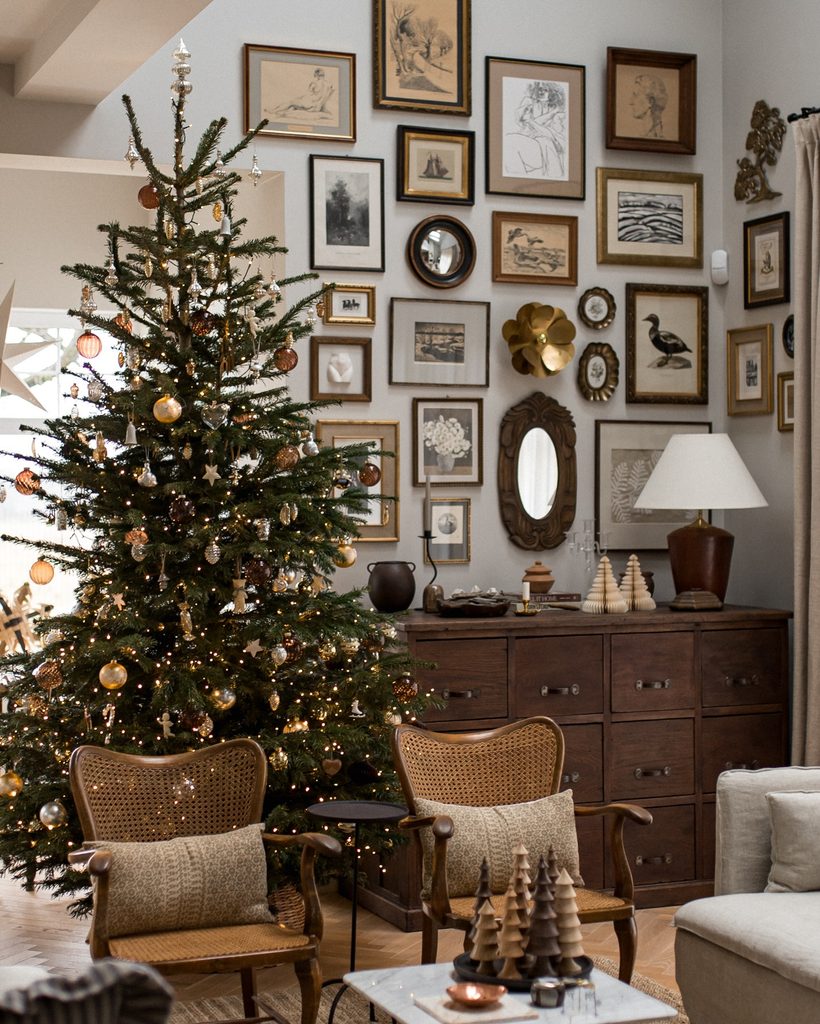
Place your Christmas tree in a corner beside the window, leaving the main path through the room clear. Choose one with gaps between the branches so you can hang ornaments farther in, rather than adding width at the tips. A real fir gives you that uneven outline, but an artificial tree with bendable branches works too.
Thread small string lights along the branches, then add glass balls, metal stars, and a few hanging figures. If you don’t have glass ornaments, use paper stars or lightweight wooden shapes on thread. Repeat two or three materials across the tree, and finish with a narrow topper that won’t spread beyond the highest branches.
Put a Full Tree in the Corner
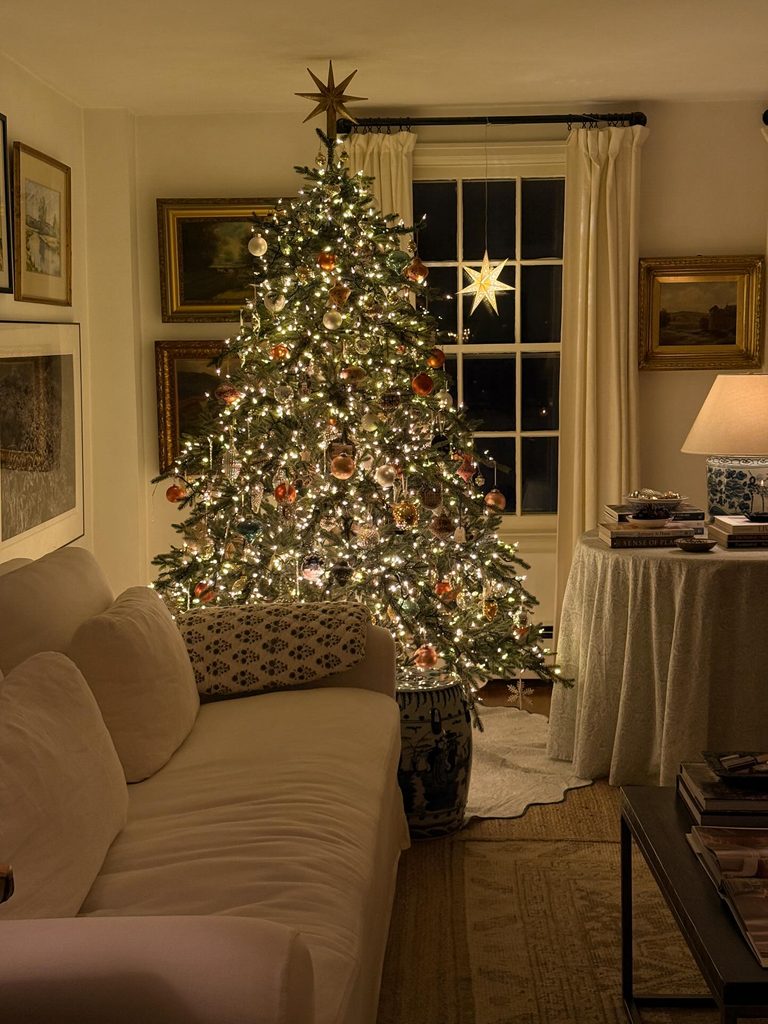
A tall tree tucked into the corner by a window takes up less floor than a shorter one set in the middle of the room. Start with the lights, before any ornaments, and put them on first so the cord ends up hidden deep in the branches. Work from the trunk outward and wrap each branch rather than circling the whole tree, which gives you that dense glow.
Hang the largest ornaments next, near the middle, then fill in with smaller ones. The step that matters most is the base: a ceramic garden stool or a small round drum hides the stand and keeps the footprint tight, and a thin round rug underneath catches needles. I’d keep the ornaments to a few colors so the tree doesn’t compete with the framed art behind it.
A Wreath Above the Bed
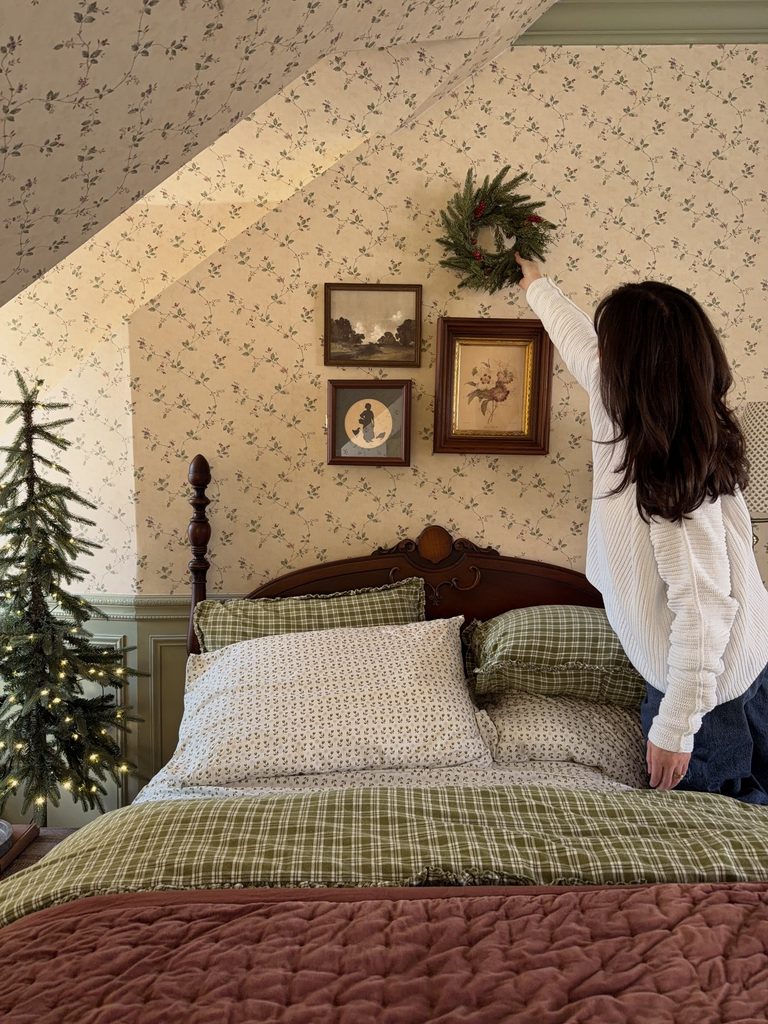
With a clear patch of wall above the headboard, a small evergreen wreath adds Christmas greenery without taking up a shelf or bedside table. In a narrow bedroom, leave space between the wreath and headboard so the wall does not feel crowded. A removable hook works if you cannot put a nail in the wall.
This idea is for someone who wants a seasonal detail in the bedroom, especially when there is little room for extra decor in the living room. A wreath also sits well among framed art, provided it has a little space around it. If you need to keep the wall clear, or your bed sits under a low sloped ceiling, a small tabletop tree or a bit of window decor may be a better choice. Near pillows, an artificial wreath avoids loose needles.
Group Stockings at One End
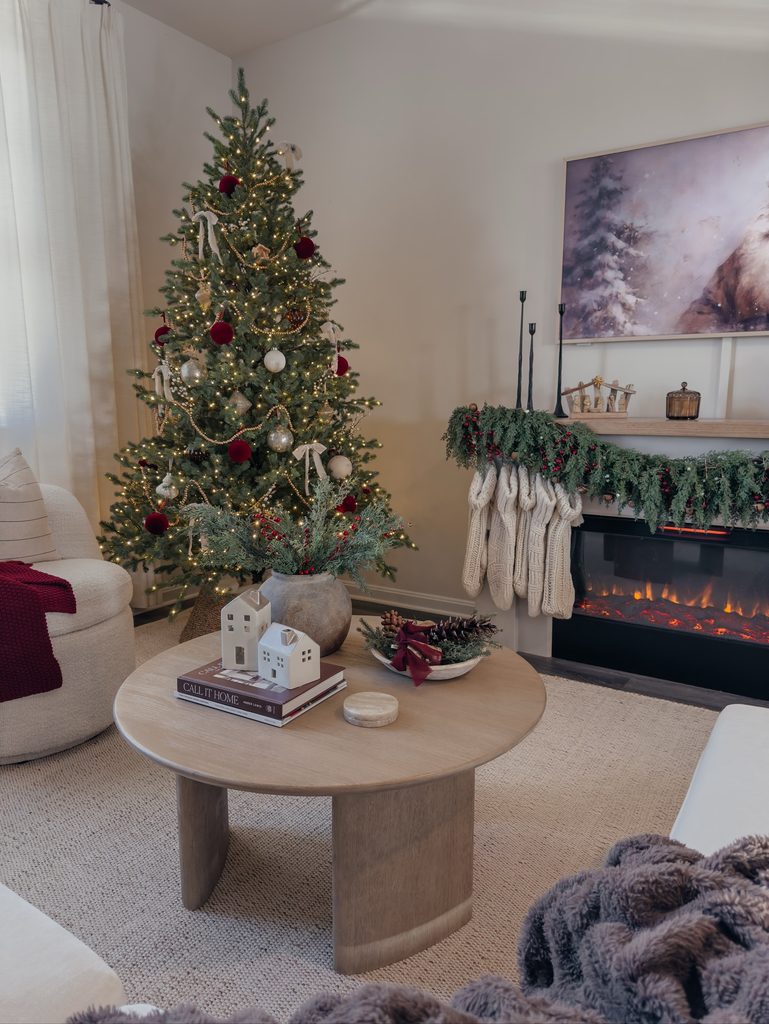
Hang the stockings close together at one end of the mantel rather than spacing them across its full width. The cream cable knit gives the group enough texture to stand out beneath a thick green garland, even without names or extra trim. Let the cuffs sit at roughly the same height, with the feet falling at slightly different levels so they don’t look like a flat row.
Across the full mantel, those same stockings would cover more of the fireplace surround and compete with the greenery above. Gathered to one side, they form one clear cluster while leaving the center open. Use hooks close enough that the stockings overlap a little, but not so close that one disappears behind another. Run the garland over the hook line so the greenery and stockings meet instead of leaving a bare strip between them.
Holiday Pillows and Throw
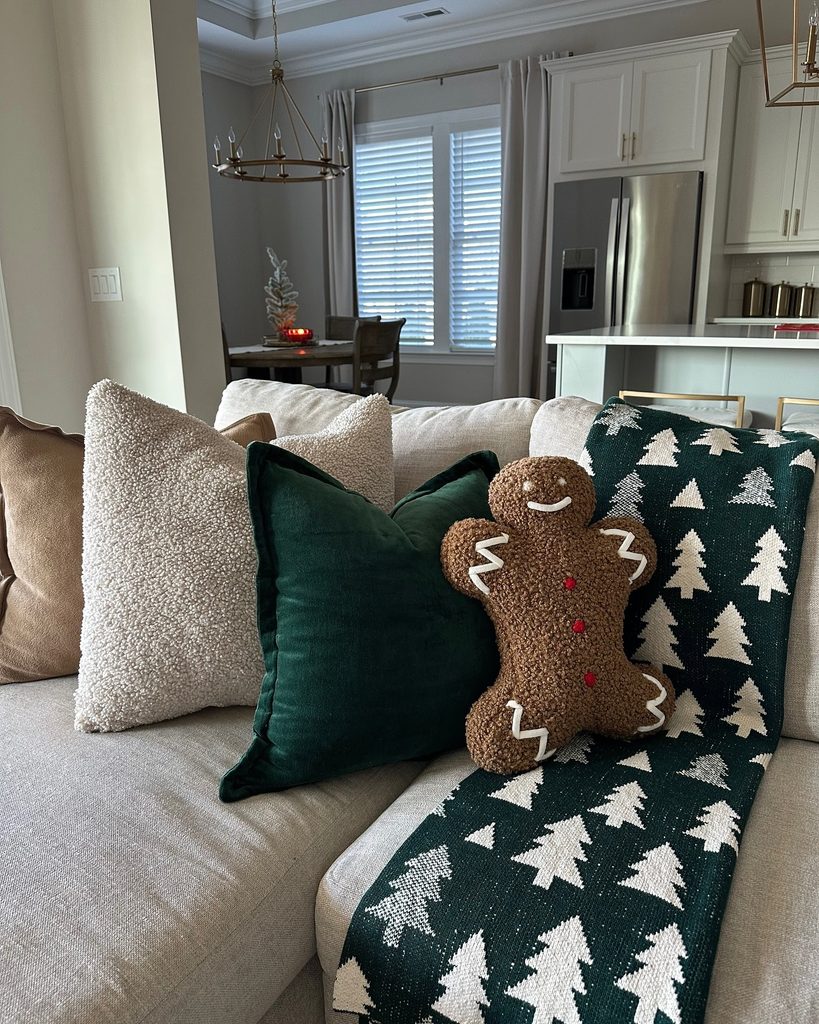
A sofa is the largest soft surface in a small living room, so it’s the easiest place to change for December. Leave the neutral pillows you already have and add two things: a gingerbread-shaped pillow and a throw with a tree pattern. The green velvet pillow in the middle ties the two together, because it matches the dark green of the throw.
Drape the throw over the arm or down one cushion instead of folding it into a basket. It takes up no floor space, and anyone sitting down can pull it over their legs. I’d put the gingerbread pillow on the cushion next to the throw so the brown stands out against the green.
When the holidays end, the throw and the green pillow can stay on the sofa through January. Only the gingerbread pillow needs to be packed away.
Red and Cream Tree

Red velvet bows, cream baubles, and warm lights give a tree a clear palette without relying on oversized decorations. Trouble starts when every branch gets a bow or ornaments hang so densely that the lights disappear; the tree can feel bulky beside a sofa or window. Choose a narrow tree that leaves room to walk, then repeat a few ornament shapes and colors from top to bottom. Hang heavier baubles close to the trunk so the branches do not droop.
Drape Garland Down One Side
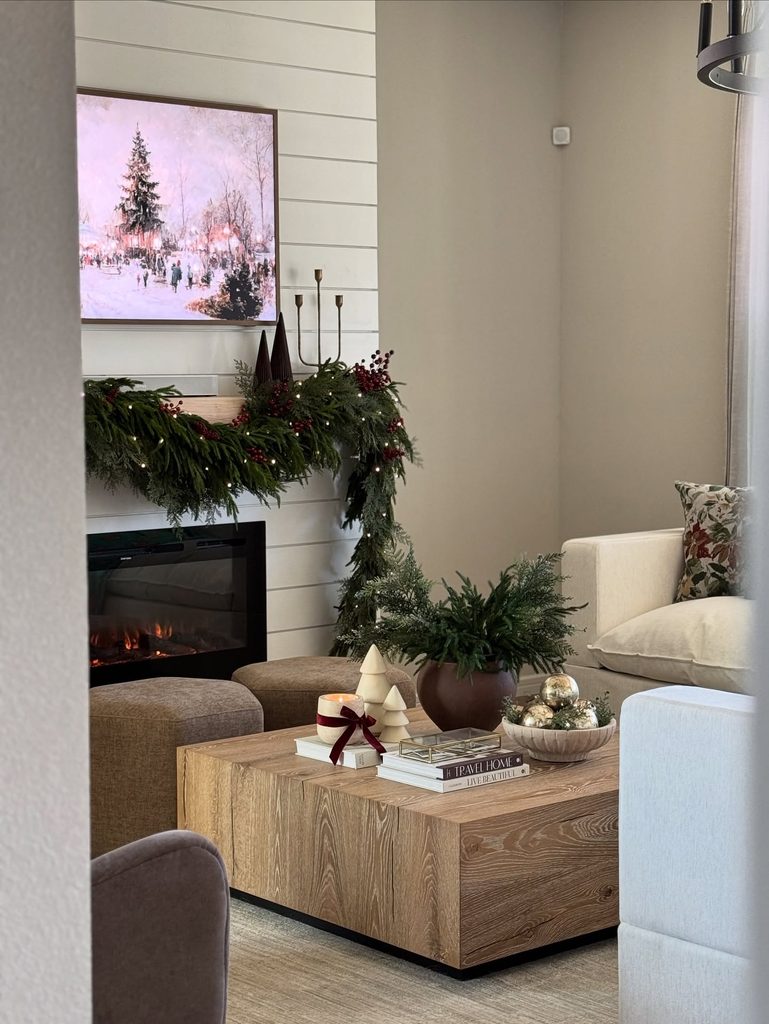
Run Christmas garland across the mantel, then let one end hang down beside the fireplace. In a living room where the mantel is visible from the sofa, this gives you a place to concentrate the decorations without spreading them over every table.
Choose the end farthest from a doorway or walkway for the long drop, and leave the other end near the mantel edge. Small lights threaded through the greenery carry the decoration from the shelf down toward the hearth.
Leave room on top for a few things you already display, rather than filling every gap with more Christmas decorations. The garland needs space to hang loose.
Garland Across the Mantel
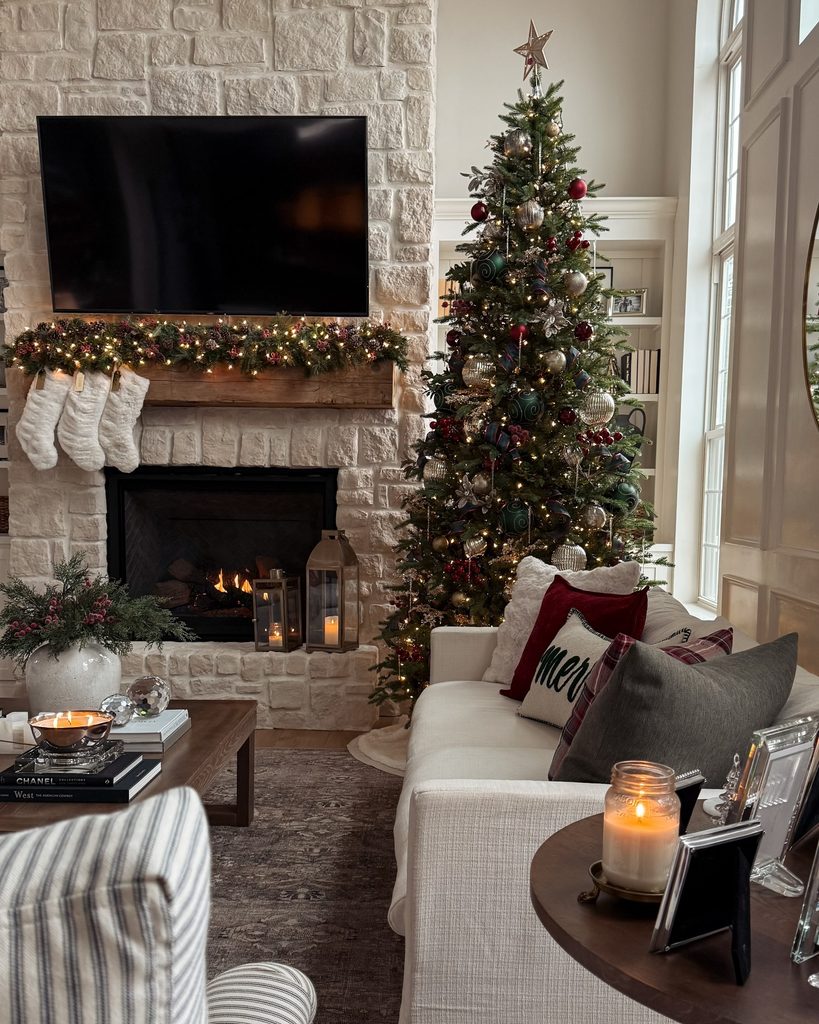
Start with the lights. Wind a warm white string through the garland before it goes up, then lay it along the mantel and tuck the ends behind the stockings. Add the berries and pinecones last, pushing the stems into the greenery so they stay put.
I’d hang the stockings an even hand’s width apart, since uneven gaps are the first thing you’ll notice.
Christmas Coffee Shelf
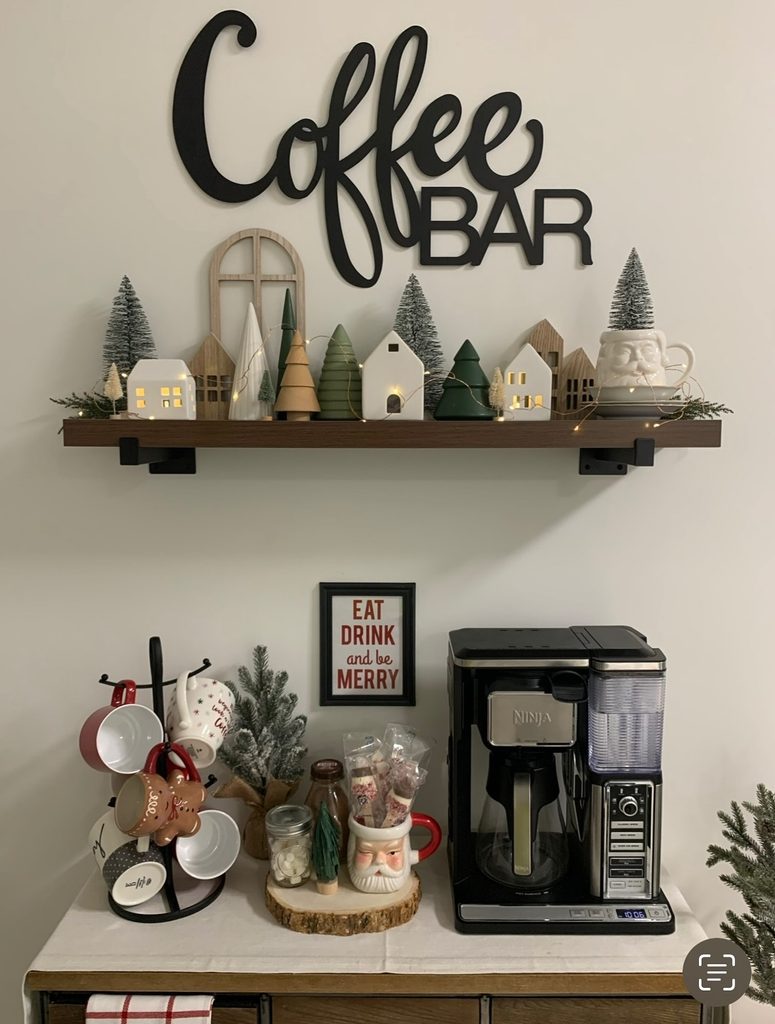
A slim shelf above the coffee maker gives a Christmas village its own level. White houses and deep green trees keep the display within a small palette, while the dark wood shelf adds contrast. I’d use pale wood instead for a lighter look, especially if the wall and counter are both white.
Ribbon Bows on the Tree
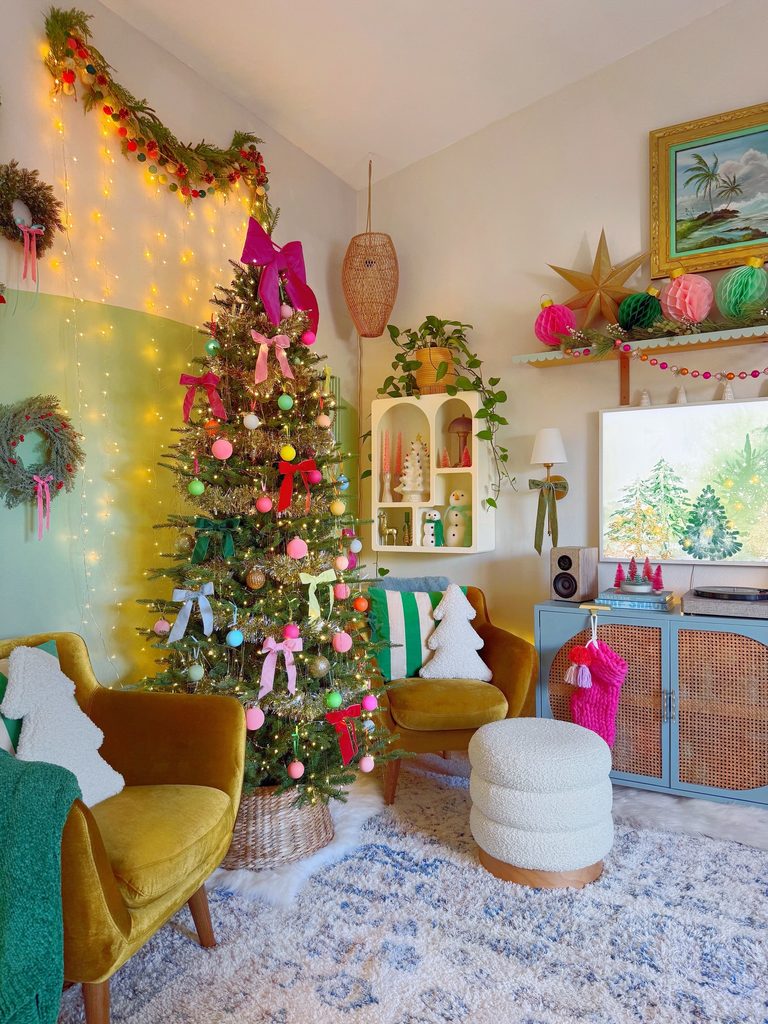
Tie ribbon bows between the branches, letting the tails hang below the round ornaments. Place larger bows near the top and spread the rest down the tree so the color repeats at every height. Without those long strips of ribbon, the small baubles can get lost among the needles.
Mixed Ornaments on One Tree
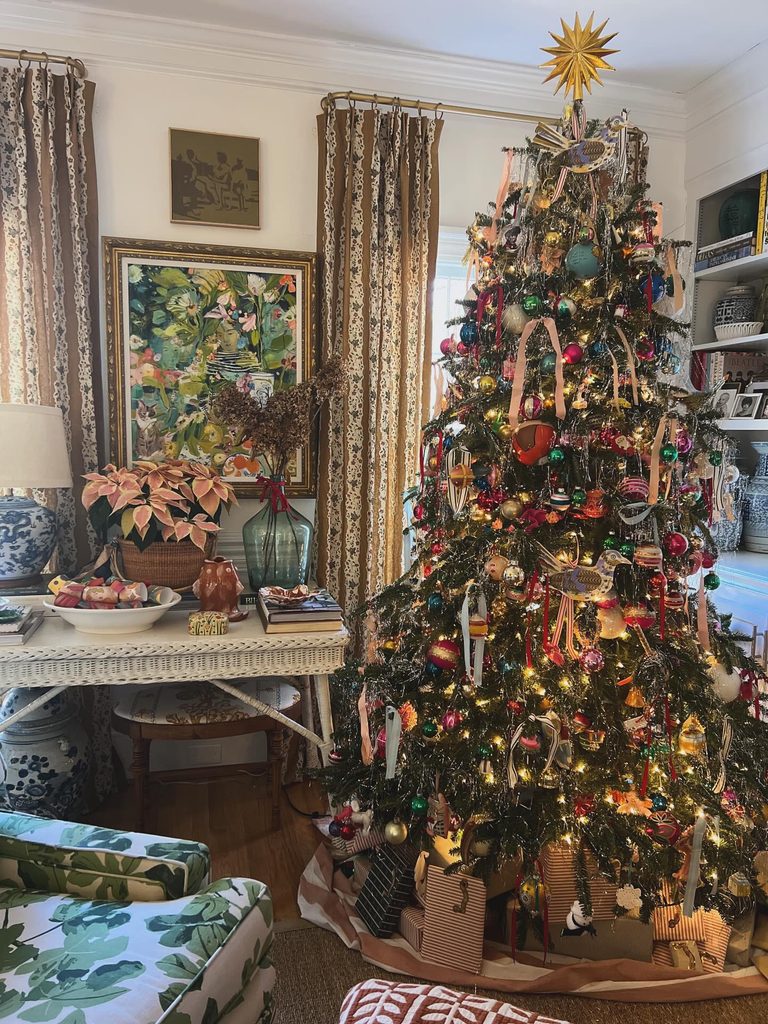
The tree here is a real-looking evergreen filled with glass balls in red, green, teal and gold, plus ribbon bows and a few small birds clipped onto the branches. A gold starburst sits on top. Nothing is matched, which means you can build it slowly from odds and ends. If you don’t own much glass, thrift shops and your own drawers work, and loose ribbon tied into bows fills gaps cheaply.
Christmas Vanity Greenery
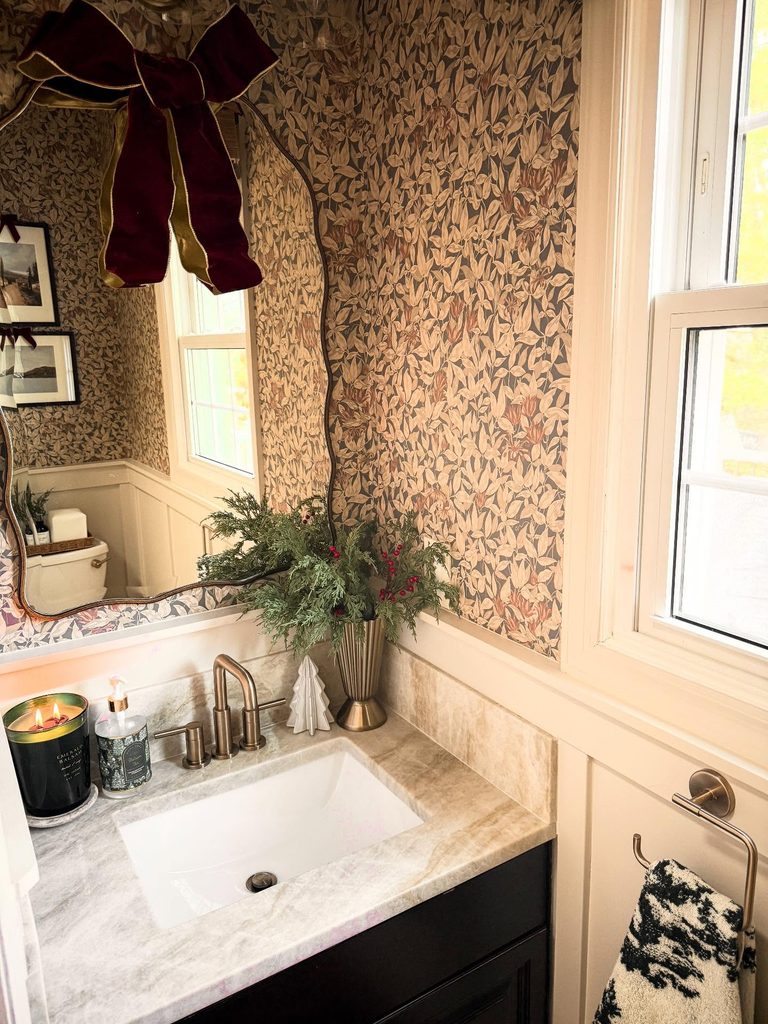
A few evergreen branches with red berries in a slim vase bring Christmas greenery to a bathroom counter without using floor space. A small ceramic tree can sit beside the sink, while a fabric bow at the top of the mirror adds color above the counter rather than taking up another surface.
This setup is for someone with a little spare counter space who wants seasonal decor in a room guests may use. It also works when a tree or mantel is out of the question, since the greenery stays in one vessel. Choose a vase with a narrow base so it does not crowd the faucet or leave too little room around the sink.
If the vanity is already tight with daily toiletries, this may become one more thing to move each morning. A wall wreath or small hanging decoration is a better fit for a counter that needs to stay clear. Faux greenery can also help avoid fallen needles near the basin.
Paper Stars Above the Bed
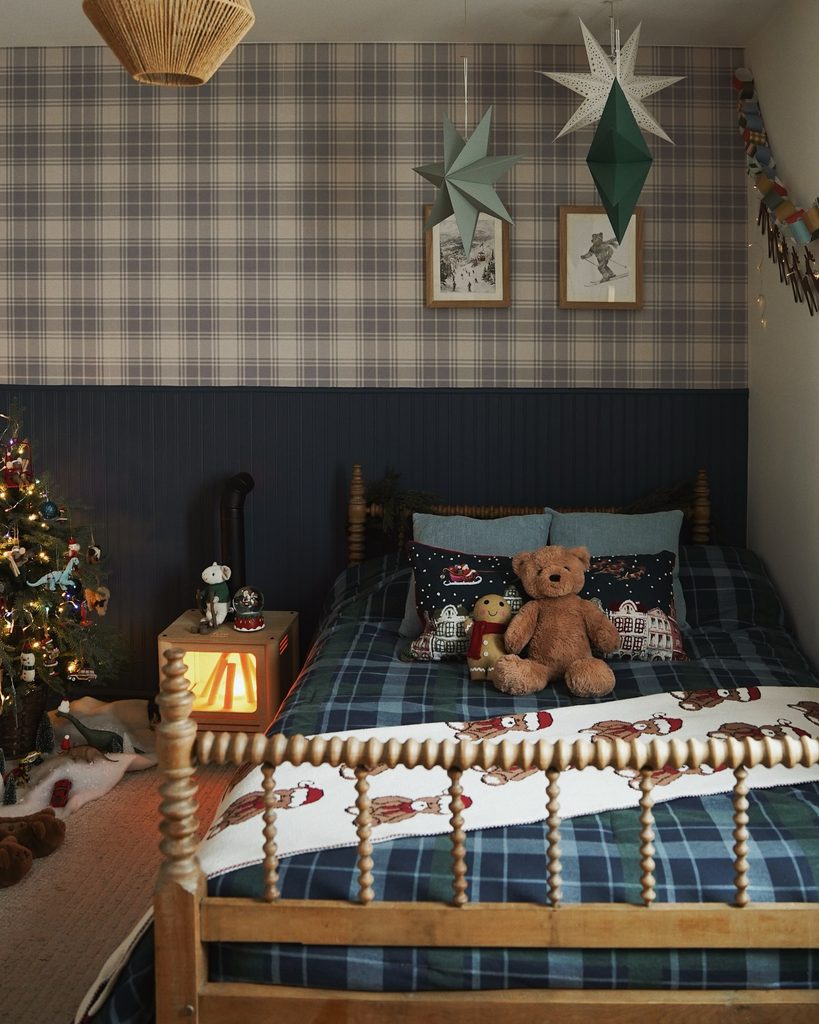
Hang paper stars at different heights above the bed, leaving enough room to sit up without brushing them. Green and white paper gives you a small set of colors to repeat without adding more patterns to the bedding. Measure the drop of each string before putting up hooks; stars that look small on a table can take up quite a bit of space overhead.
Leave gaps between the points so the shapes stay clear rather than overlapping into a tangle. Use ceiling fixings rated for the weight, and check whether adhesive hooks are suitable for your ceiling finish. Keep paper away from bulbs and heaters, and avoid attaching strings to the light fitting itself.
Dress the Armchair You Own
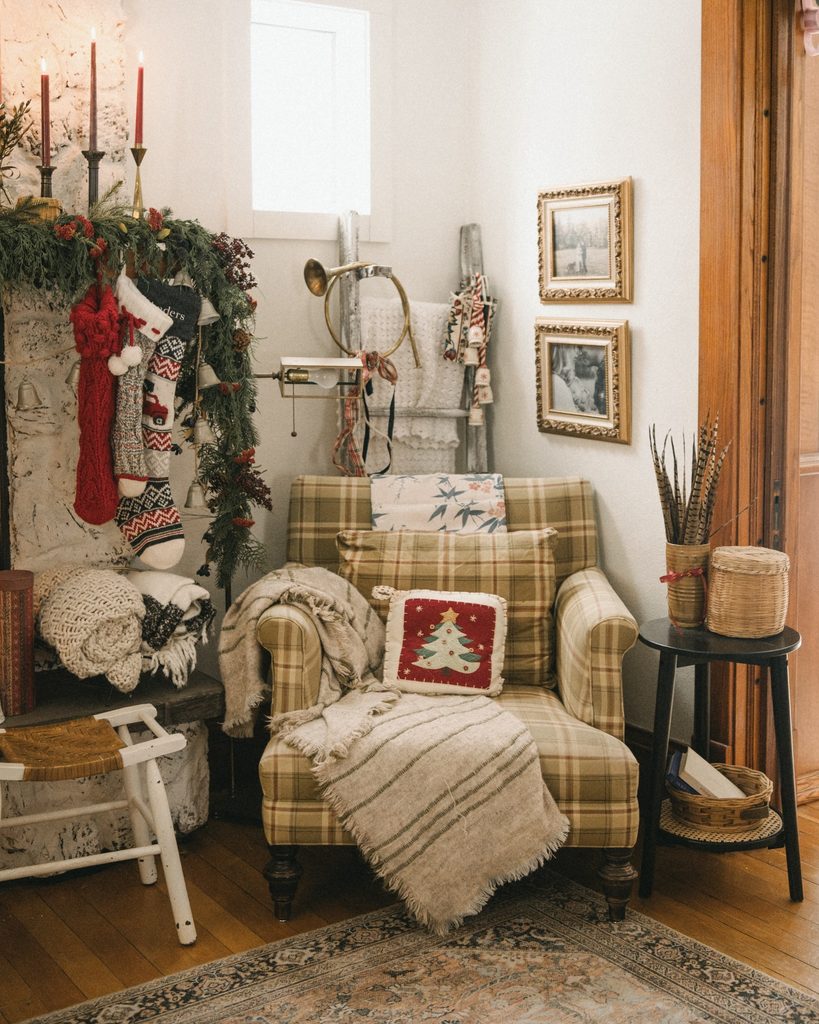
A single armchair can carry Christmas without a tree beside it, as long as you layer a few textiles on it. The chair is a green and tan plaid, and the holiday part is a small red pillow with a tree stitched on it, set in front of a larger plaid cushion. A striped wool throw with fringed ends hangs down the front, and a second knit throw lies over the arm.
Keep the colors close to what the chair already has. Tan, cream and one red are enough, and the plaid covers the rest.
If you don’t own a tree pillow, buy a red cover to fit a pillow you already have, or sew a felt tree onto a plain one with a few stitches. Any blanket from the bed works as the throw. Fold it in thirds and drape it so the ends reach the seat. I’d leave the fringe loose instead of tucking it under.
Stockings Under a Wreath
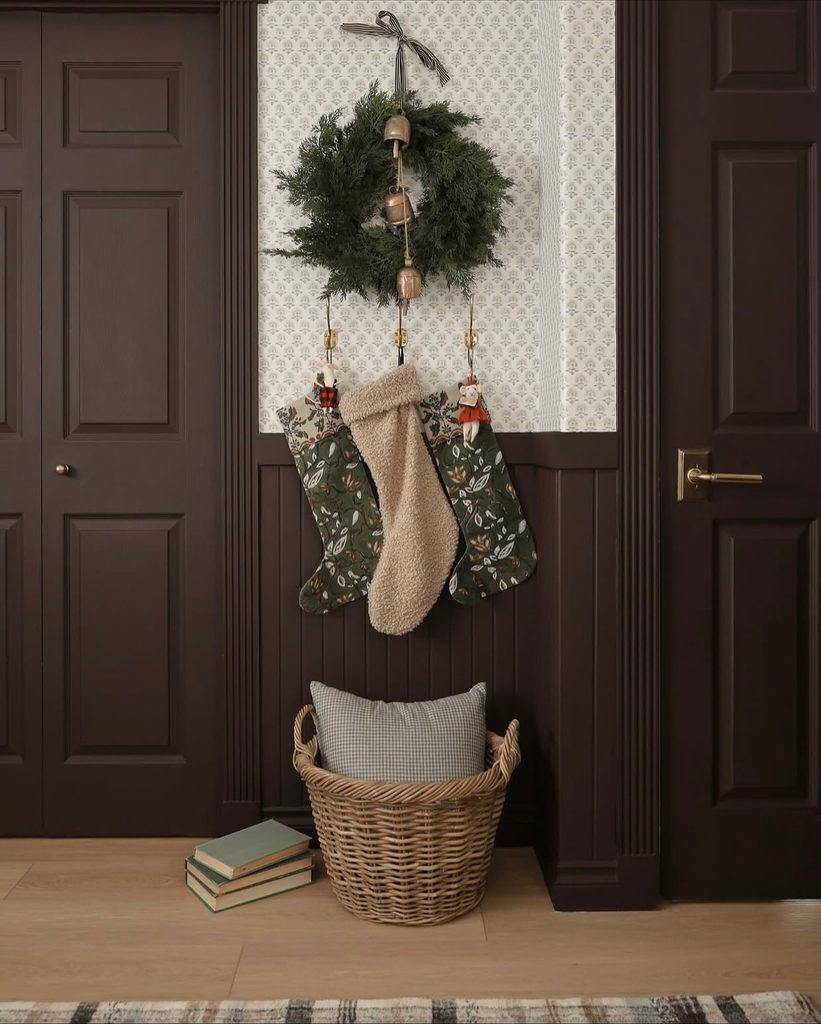
Stockings can hang from wall hooks beneath a small wreath, creating a clear top and bottom without using a mantel or shelf. The greenery matters because it ties the hooks into one display; without it, the stockings can look like separate items left hanging on the wall. Center the wreath over the middle stocking, and keep its width close to the span of the hooks so the grouping holds together.
A ribbon loop lets the wreath hang flat and keeps it from sticking out into a walkway. Different fabrics add texture, as the patterned green stockings and the soft center stocking show, but similar lengths help the group stay connected. This layout works best on a clear strip of wall, where the wreath and stockings can sit together rather than compete with nearby doors or frames.
Ribbon Bows Along the Mantel
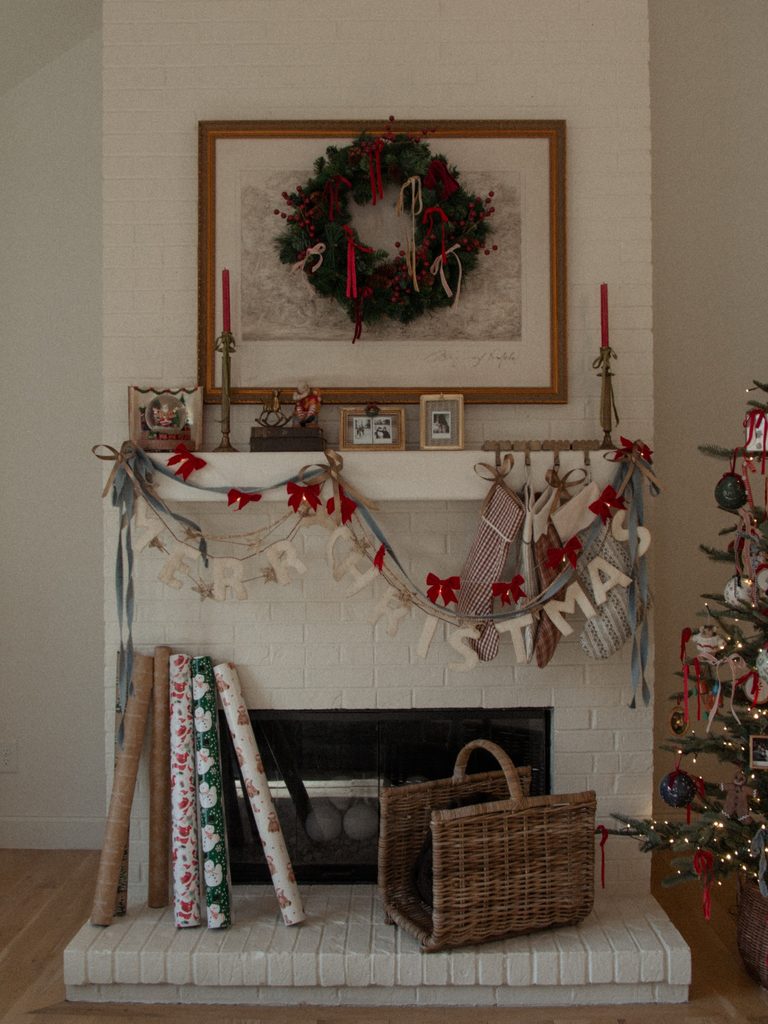
Tie small bows along a draped ribbon to make a mantel garland without adding more greenery. Red bows stand out against white brick, while long blue ribbon tails frame the ends. Let the middle dip below the mantel so the bows sit apart from the objects on top.
For a quieter version, use narrow blue ribbon for both the garland and the bows. It softens the contrast and leaves the stockings as the main pattern below the shelf. I’d use the same ribbon width throughout, with shorter tails on the small bows and longer ones at each end, so the garland has shape without covering much of the fireplace.
Decorate Existing Built-in Shelves
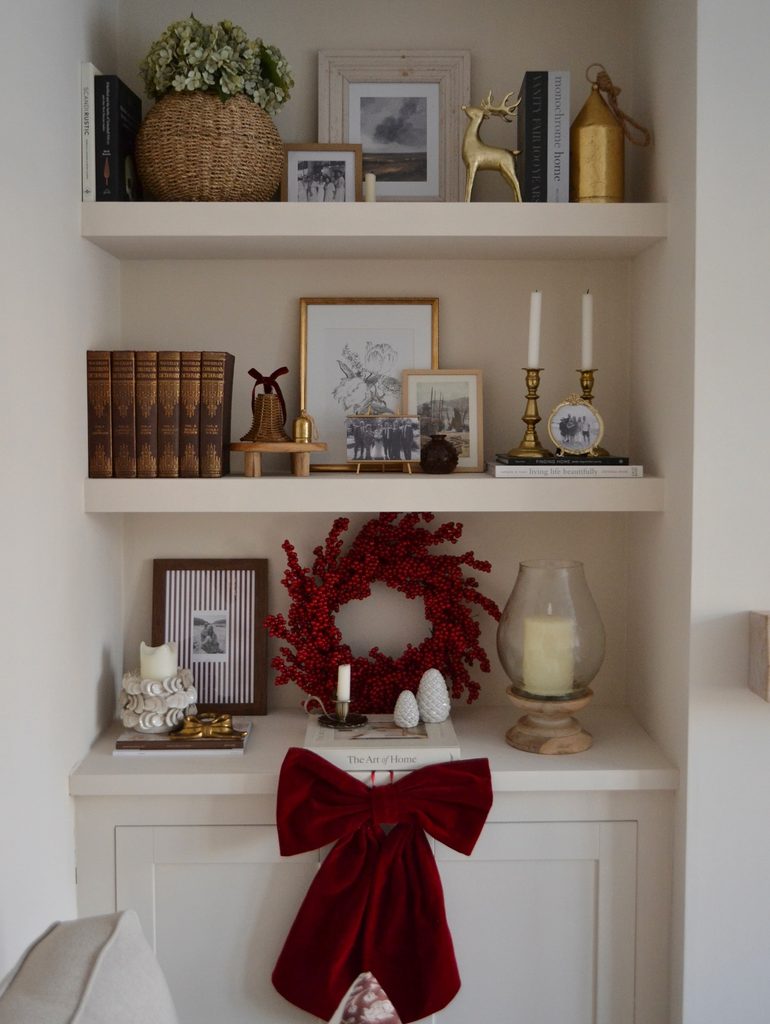
Shelves you already own can carry all of your Christmas decor if you leave the existing arrangement mostly alone. The usual mistake is clearing everything off and starting over, which leaves you with a crowded, unrelated pile of holiday items. Keep your framed prints and books, then add a red berry wreath, a pair of brass candlesticks and a brass reindeer where there’s a gap.
Stay with two or three colors, here red, brass and cream, so the shelves still look like yours. I’d tie the velvet bow lower on the cabinet door so it doesn’t compete with the wreath.
Garland on a Cabinet
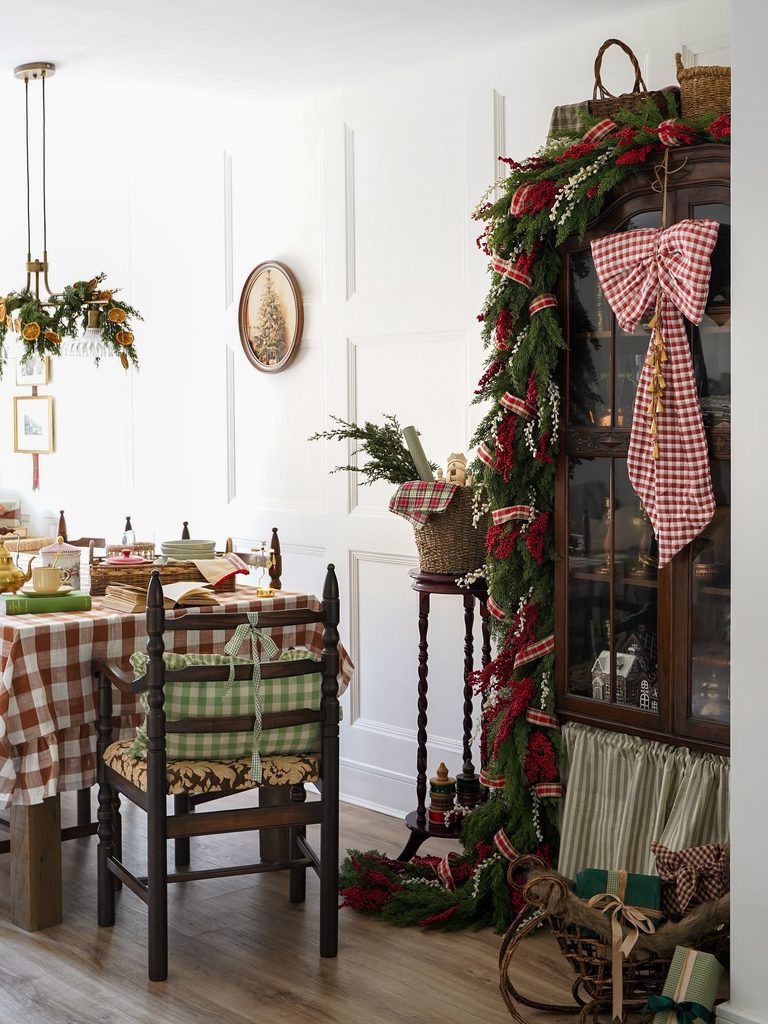
Drape evergreen garland over a tall cabinet to use vertical space instead of adding another floor-standing decoration. This works for anyone with a cabinet that can spare a little room around its doors; plaid ribbon gives the greenery a clear edge. If you use every shelf or need the doors fully clear, choose a smaller idea that stays on a wall or table.
Hang Stockings Beside the Bed
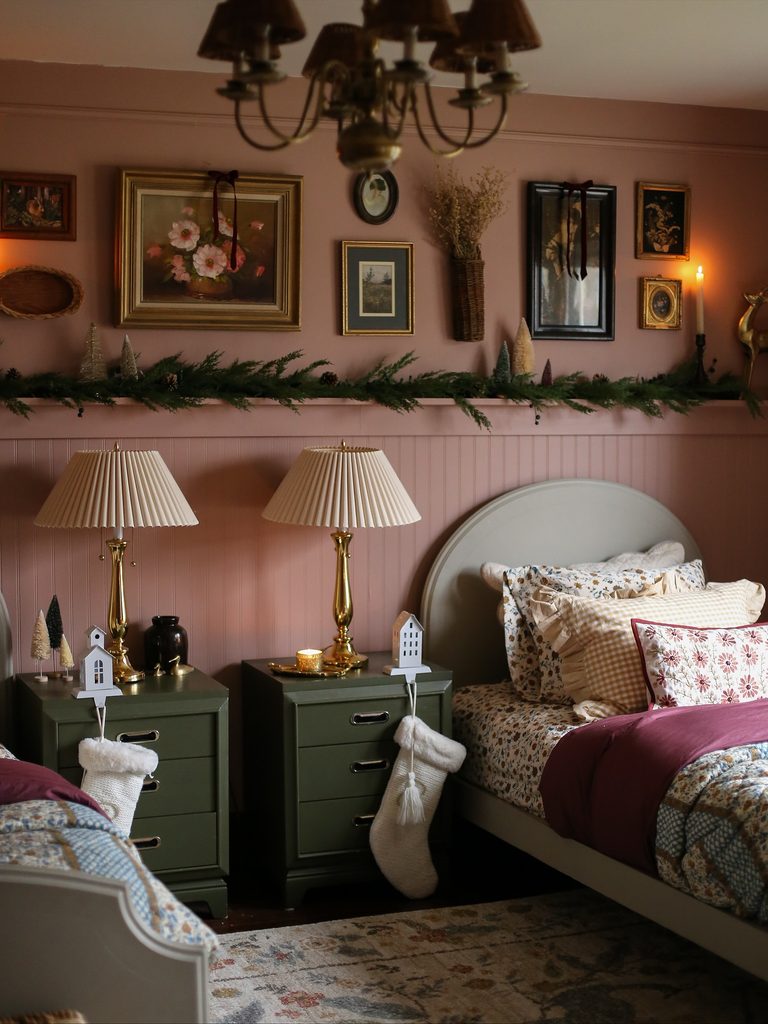
Hang Christmas stockings from holders on your nightstand rather than saving them for the living room. Set each holder near the front edge so the stocking falls down the side of the drawers, with enough room below for it to hang freely.
In a shared bedroom, give each bed its own stocking within reach of the pillow. White knit stockings stand out against dark bedside furniture, and you can leave them up through Christmas morning without rearranging the room.
Layered Counter Corner Scene
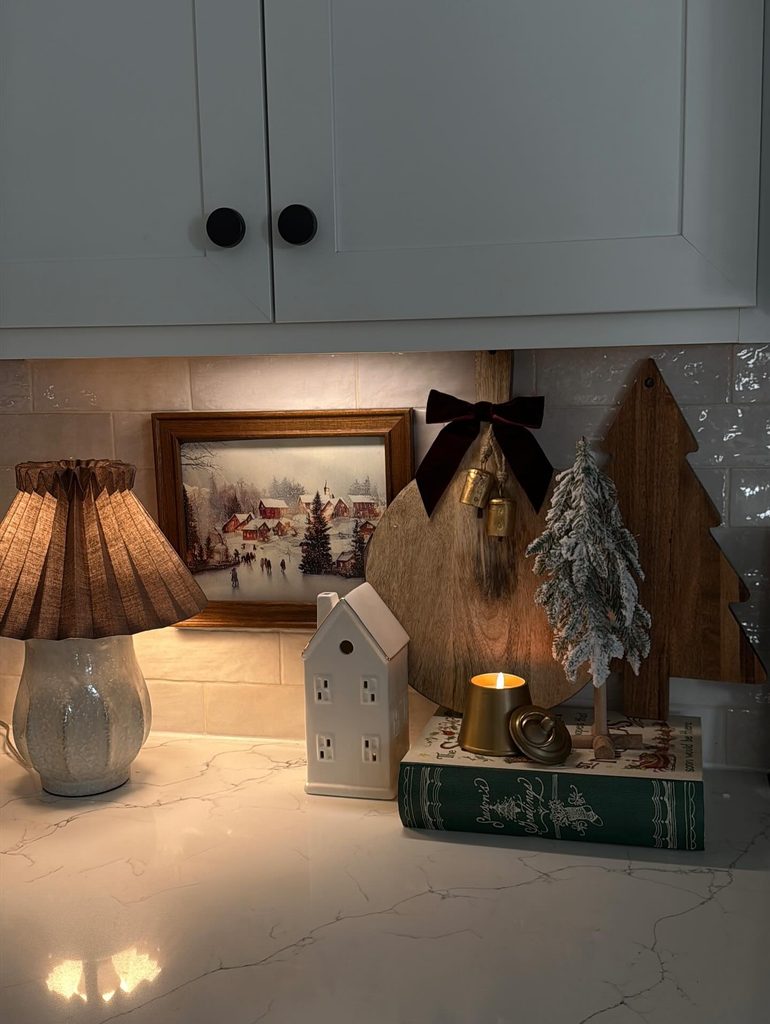
A corner of counter can hold a whole Christmas scene if you build it from the back forward. Lean the tallest, flattest pieces against the backsplash first: a framed winter print, a round wooden board, and a board cut in the shape of a tree. Let them overlap a little so no tile shows between them.
The step that matters most is raising something in the middle. Stack a book under a small flocked tree and a candle, so the eye moves up and down instead of along a flat line. Put the shortest piece, a little ceramic house, on the counter in front.
Tie a ribbon and a couple of brass bells to the round board last. I’d keep the whole group under two feet wide.
Frame a Built-In Nook
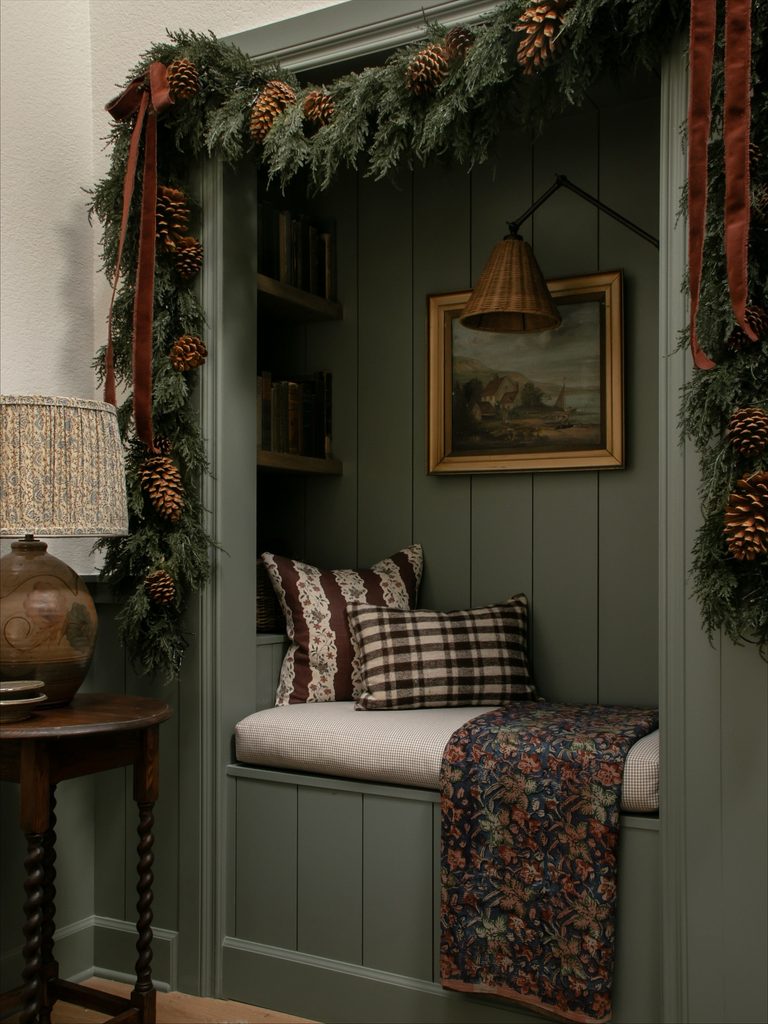
Run an evergreen garland across the top and down the sides of a recessed nook or built-in bench, fastening it to the trim rather than letting it cover the seat. Pinecones and long ribbon tails add detail without taking up floor or shelf space.
Use this approach in a living room or bedroom where a window seat already holds cushions, and leave the greenery up through the holiday season. Keep it clear of lamps and window hardware, and use removable hooks if you do not want holes in painted trim. A narrow seat needs only a slim garland; a deep alcove can take fuller branches.
A Cabinet Top Christmas Display
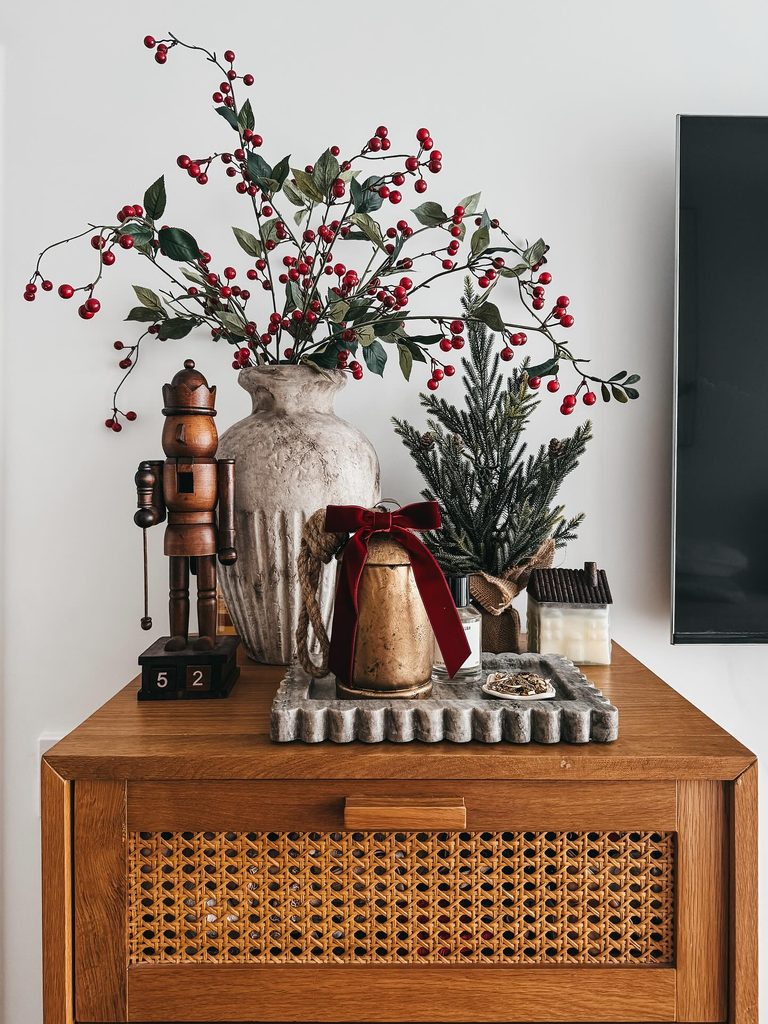
Gather your Christmas decorations on a cabinet top, with a tall vase of red berry branches at the back and a small tree beside it. Clear the surface first, then set down those two larger pieces before adding anything else so you can judge how much room is left.
Spread the branches enough to show their shape, but turn any that reach too far toward the wall or across a nearby screen. This is the step that matters most: the arrangement should rise above the cabinet without spilling beyond its edges or blocking what sits beside it.
Set a shallow tray in front for the smaller decorations, leaving some bare wood around it. A bell with a ribbon tied at the top gives you a lower point between the vase and tree, and the tray lets you move the smaller pieces together when you need to dust.

