
23 Farmhouse Kitchen Open Shelving Ideas
This site contains affiliate links. We may earn a small commission, at no extra cost to you. Article may contain some images for illustrative purposes only .
The mason jar of dried lavender sits between a stack of ironstone plates and a chipped enamel pitcher. That’s the whole shelf. No cabinet doors to hide behind, no clever storage hacks—just three everyday objects earning their keep on a plain pine board. Open shelving in a farmhouse kitchen works exactly like that: honest, a little imperfect, and built around the things you actually reach for before your first cup of coffee. Ahead, 23 ways to pull it off, from reclaimed barnwood ledges and black iron brackets to styled vignettes that mix crockery, cutting boards, and greenery without tipping into clutter.
Reclaimed Wood With Mismatched Edges
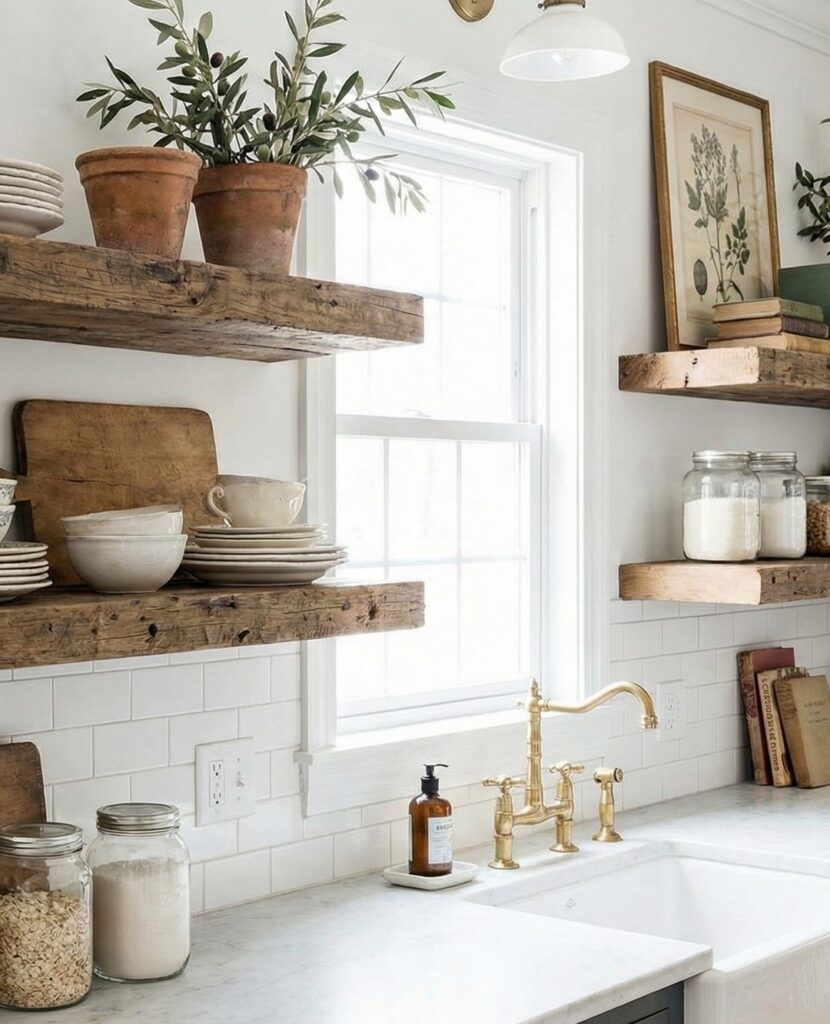
Those shelves aren’t cut from lumber yard stock — the edges are rough, uneven, and that’s doing a lot of the visual work here. To pull this off, look for reclaimed barn wood or old scaffold boards rather than buying “rustic-look” boards that are actually just sanded pine with a stain on top. The difference shows.
Stack your whites together — bowls, plates, cups — because the contrast between pale ceramics and dark, weathered wood is where the whole thing reads well. Terracotta pots work for the same reason. I’d skip the books personally, since they gather grease near a sink faster than you’d expect, but the glass jars with dry goods on the lower shelf are genuinely practical.
Keep the bracket hardware minimal or hidden.
Use a top-heavy display
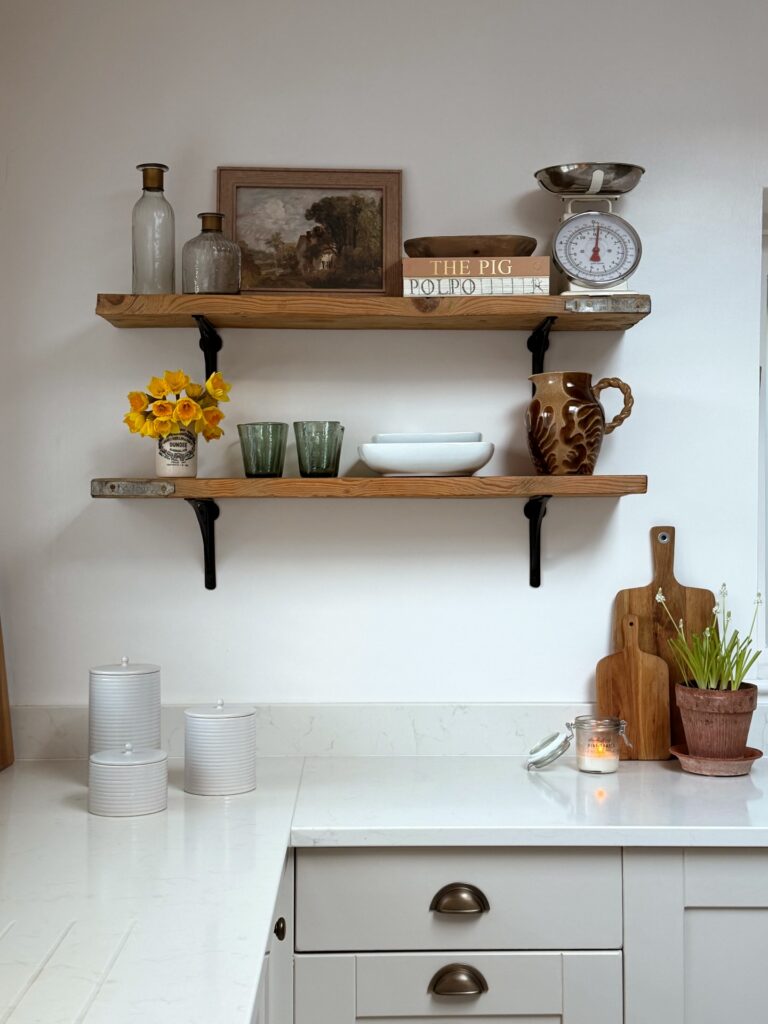
With two plain wood shelves, keep the things you touch less on the upper one and let one taller piece, like the kitchen scale, hold the end. The books under it matter. They give the scale height without needing another bulky object, and that little stack keeps the shelf from looking like storage pretending to be decoration.
Keep daily bits lower: tumblers, a shallow serving dish, maybe a jug you actually use. Simple enough. If you add flowers, use one small crock or tin rather than spreading stems across the whole shelf, because open shelving starts to feel messy when every gap gets filled.
I would skip the candle on the counter if this is near cooking grease; it will collect dust fast.
Two shelves, layered depth
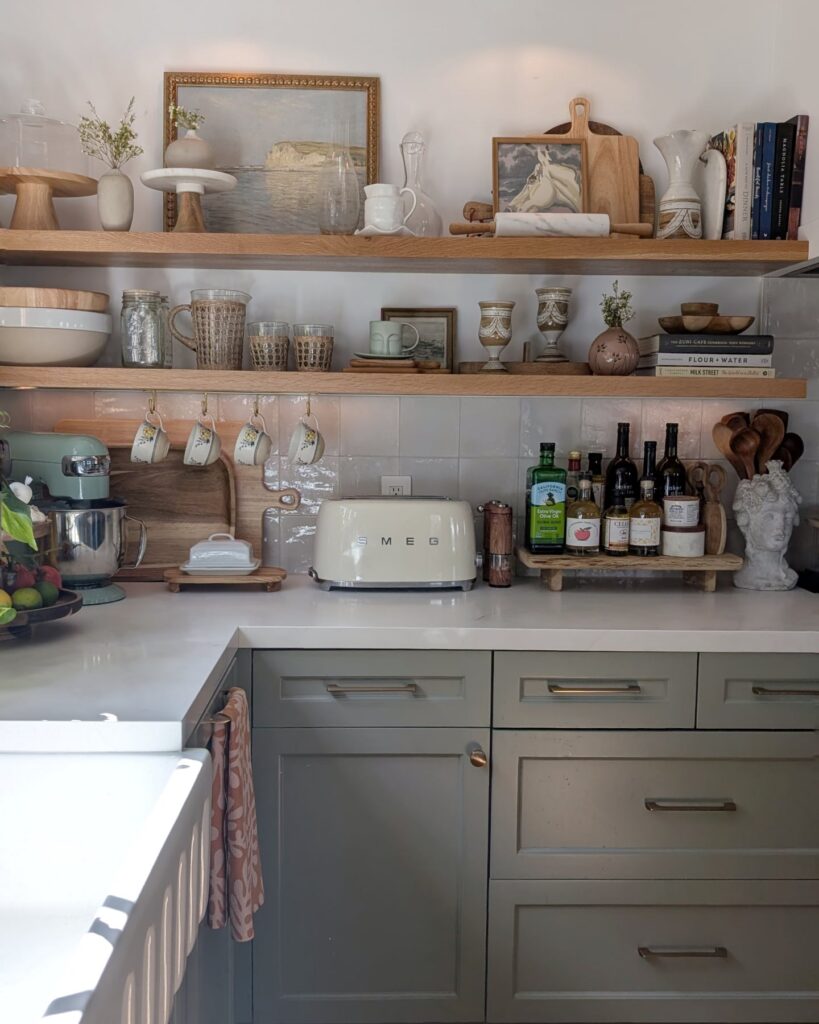
The trick here is depth. The top shelf leans a framed seaside painting against the wall, then stacks cake stands, small vases, and a decanter in front of it. Nothing sits in a single row. That’s what keeps open shelving from looking like a store display.
Mugs hooked underneath the lower shelf are the part I’d copy first. Tiny hooks, four mugs, and suddenly the shelf is doing two jobs.
One thing I’d change. Cookbooks stacked flat on the right look nice but you’ll never pull the bottom one out without toppling the vase next to it. Stand them upright, or keep only the one you actually cook from up there. The rest can live somewhere you’re not balancing a marble rolling pin to reach them.
Pipe brackets and rails
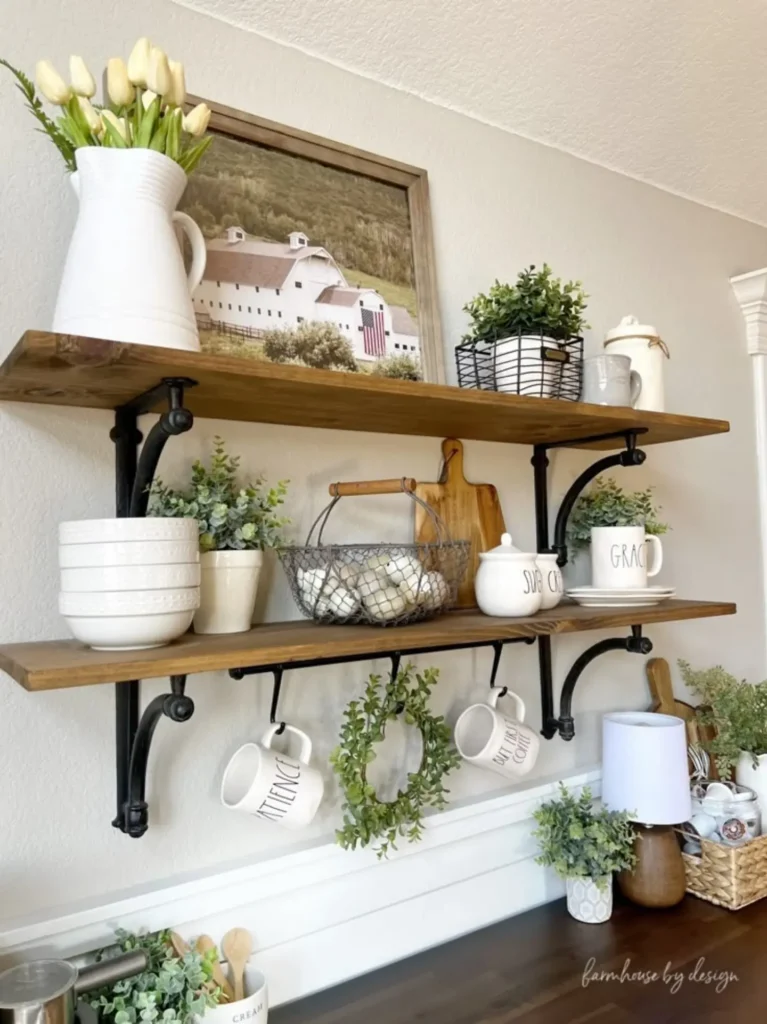
Go with thicker wood shelves if you want this look to hold up, because the black pipe brackets read a bit heavy and thin boards can start looking flimsy fast. What makes this setup useful is the second shelf rail with hooks underneath, which gives you a place for everyday mugs without filling the shelf surface with handles and clutter.
Keep the top shelf for taller pieces only, like a pitcher or a framed print leaning at the back, then use the middle shelf for things you actually grab. That split matters. It keeps the display side from creeping into the practical side.
A wire basket also helps here. Garlic, napkins, even coffee pods.
I’d skip hanging too many mugs if your shelves sit over a busy counter, since cups swinging around while you work can get annoying pretty quickly.
Mix Wood Shelves With One Statement Object
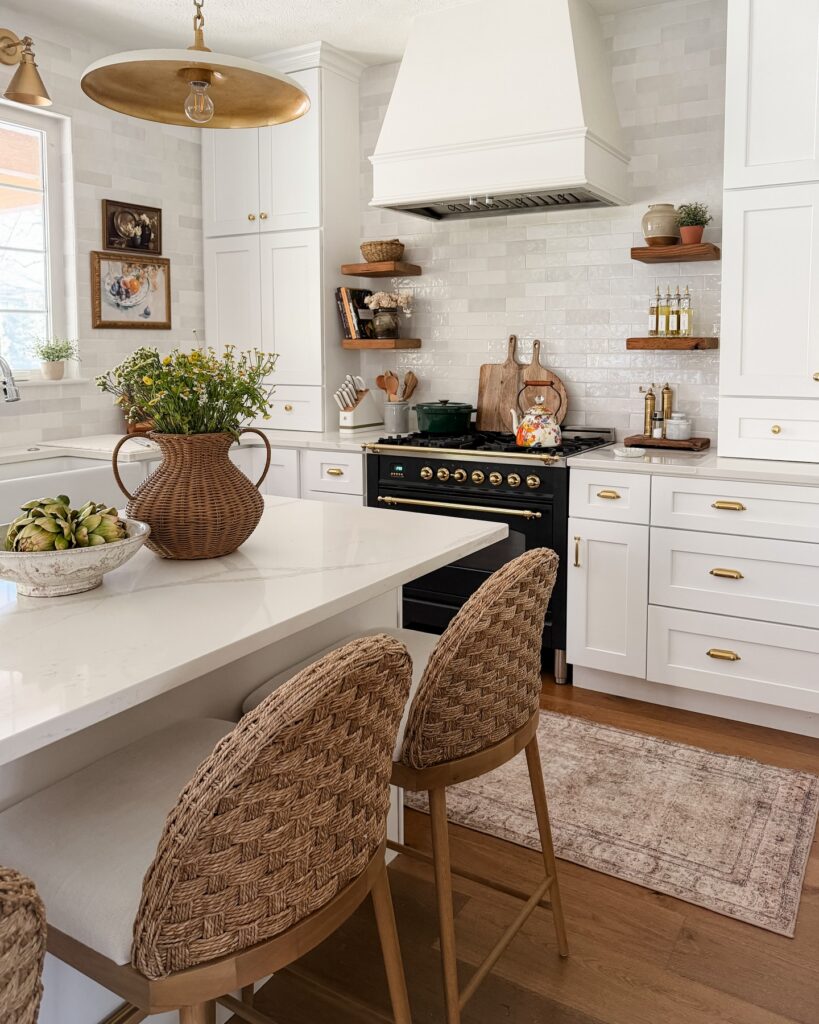
The wicker vase on the island is doing a lot of the visual work here, and that same logic applies to the open shelves above the range — each shelf has maybe two or three things on it, and one of them is slightly unexpected, like the floral kettle or a small potted plant. Wood shelves in a white kitchen can look flat if everything on them is white or neutral. Putting one object with color or texture on each shelf stops that from happening.
You don’t need much. A wooden cutting board leaned against the backsplash, a single dark ceramic, something that isn’t trying to match anything else. That’s really the whole trick.
Narrow shelves by the window
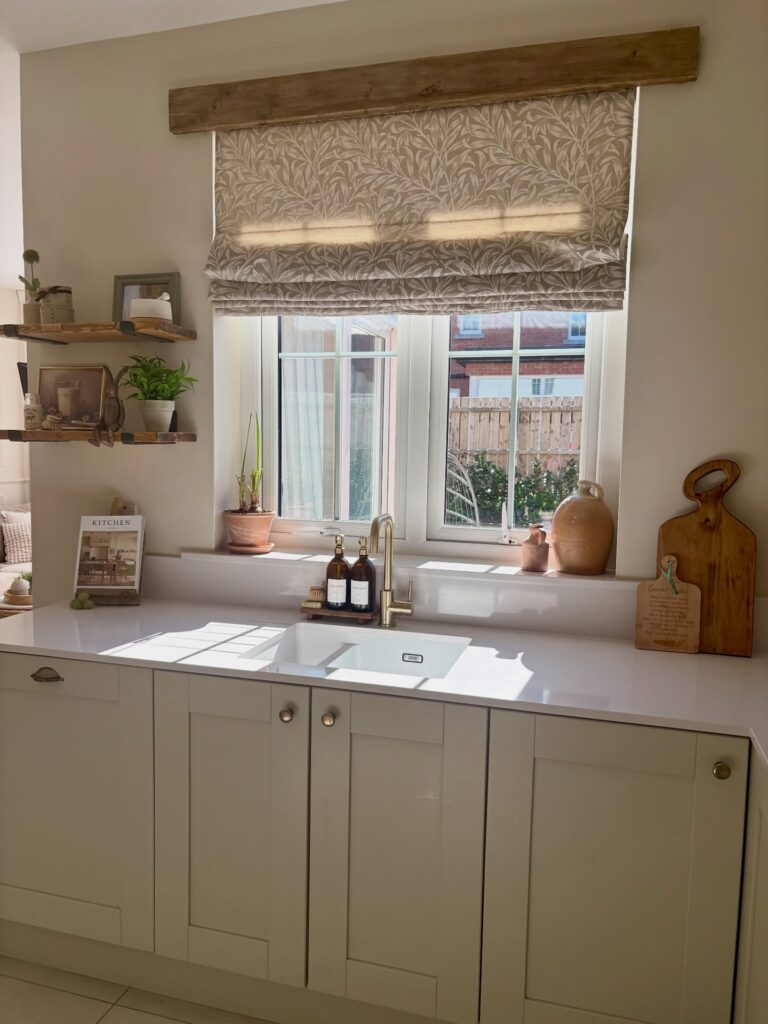
Tucked beside the window, two short timber shelves give you storage without taking over the wall. Keep the brackets visible if you want that farmhouse feel, because the little strip of dark metal against raw wood does a lot of the work. Leave some breathing room.
A plant, a framed kitchen print, and one mug or crock are enough for this kind of shelf, especially when the counter below already has boards and bottles sitting out. If your window gets strong sun, I’d skip herbs that dry out quickly and use pothos or a fake trailing stem instead. Mount the lower shelf high enough that tall things on the worktop do not start fighting with it.
Shelves Framing a Window
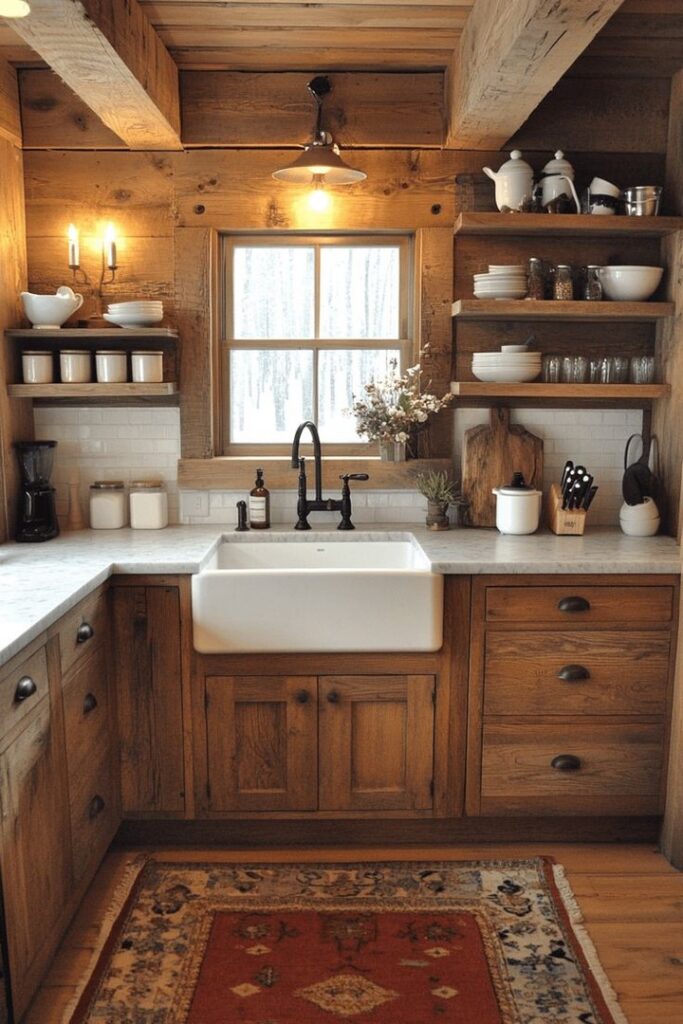
The window is the anchor here. Shelves flank it on both sides at matching heights, so the whole wall reads as one composition instead of two separate storage runs. This works best when your window sits centered over the sink and you’ve got at least 18 inches of wall on either side.
Keep the shelf ends open, not boxed in. That’s what lets the light bleed sideways across the dishes.
I’d stack the everyday whites and bowls on the side closest to your drying zone, and put the prettier stuff — teapots, jars, glass canisters — on the far side where you’re not grabbing constantly. One thing I’d change: the top shelf is a reach. Anything above eye level becomes display, not storage, so plan accordingly.
Mix display with use
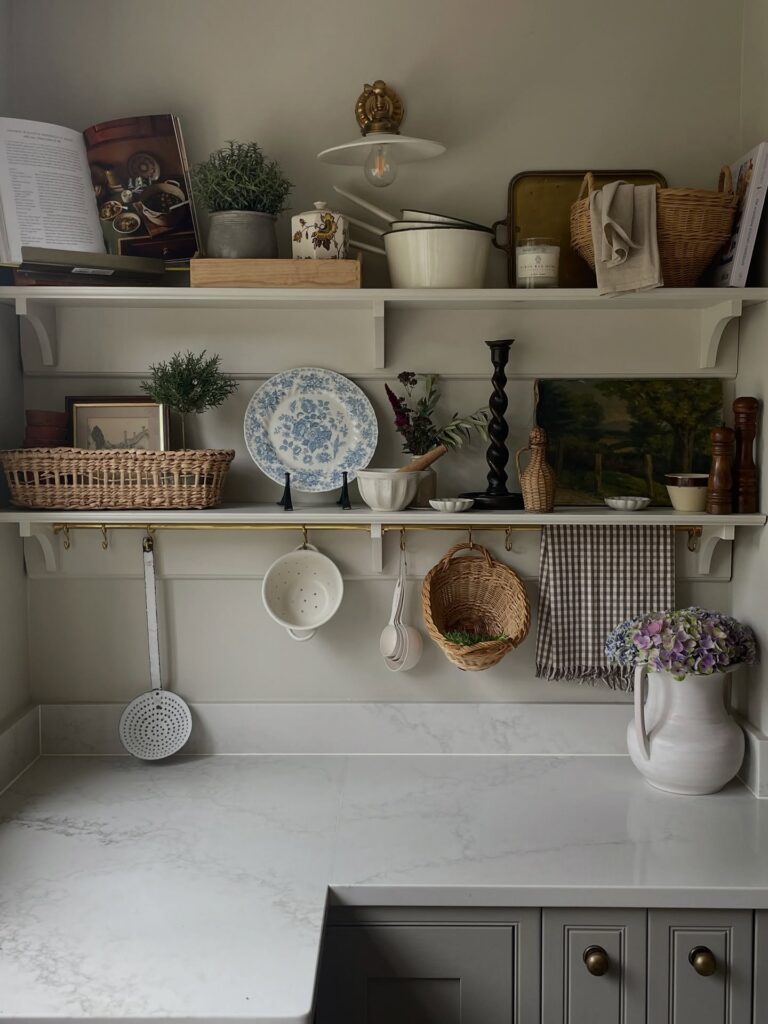
What makes this shelf setup work is that the pretty things are mixed in with kitchen stuff you’d actually reach for. A blue-and-white plate on a stand, a colander and measuring cups hanging below, then baskets and a checked towel off to one side. Nothing feels too staged.
Keep the shelf color quiet and let the objects do the work, especially if you’re using cream enamelware, wicker and darker wood pieces that already have enough contrast on their own. The rail with hooks is useful here because it stops the lower shelf from turning into a crowded line of small items.
I’d stick to three materials. Ceramic, basket weave, wood.
If you try this, leave one stretch of counter bare underneath, the way this setup does, or the whole thing starts reading more like storage overflow than open shelving.
Hang the Rail Below the Shelf
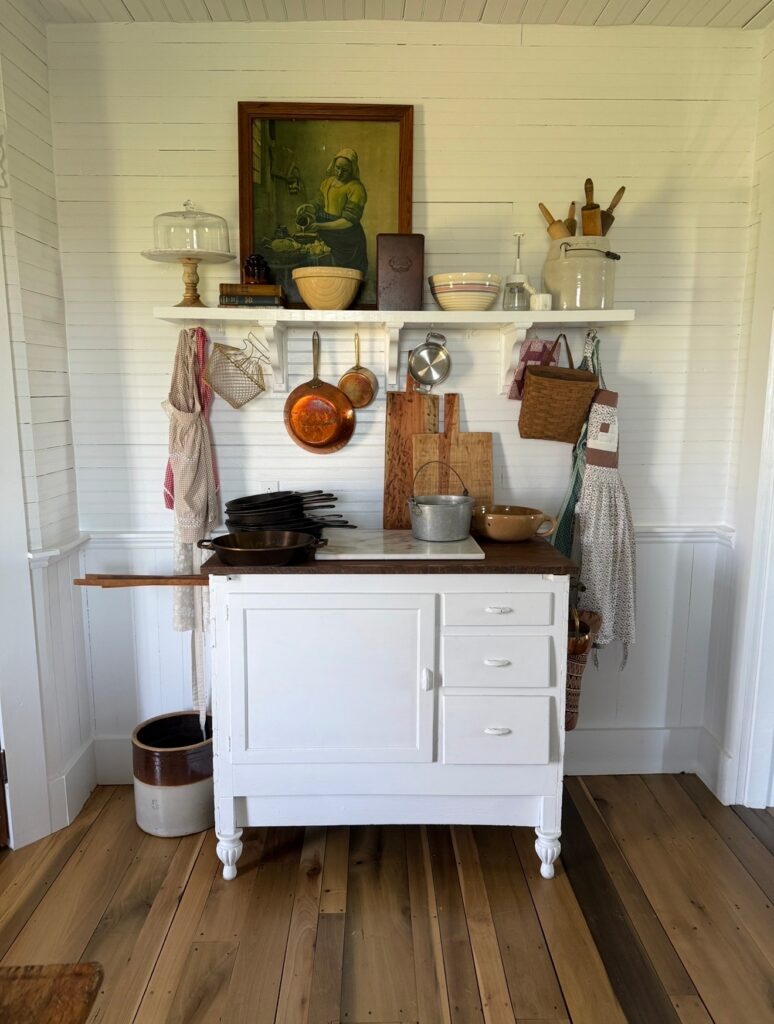
That strip between the shelf and the cabinet top is doing a lot of work — copper pans, cutting boards, aprons, a basket, all hung without taking up a single inch of counter. The rail just needs to be sturdy enough to hold cast iron if that’s what you’re putting on it. S-hooks are the easiest way to go, and you can rearrange things whenever the lineup changes.
What makes this specific setup readable is that not everything hanging is the same type of object. Pans next to linen next to wood. If you kept it all cookware, it would just look like storage.
One thing I’d actually skip — the aprons hung on the ends tend to drag and collect dust faster than you’d expect.
Wood Shelves With Daily Pieces
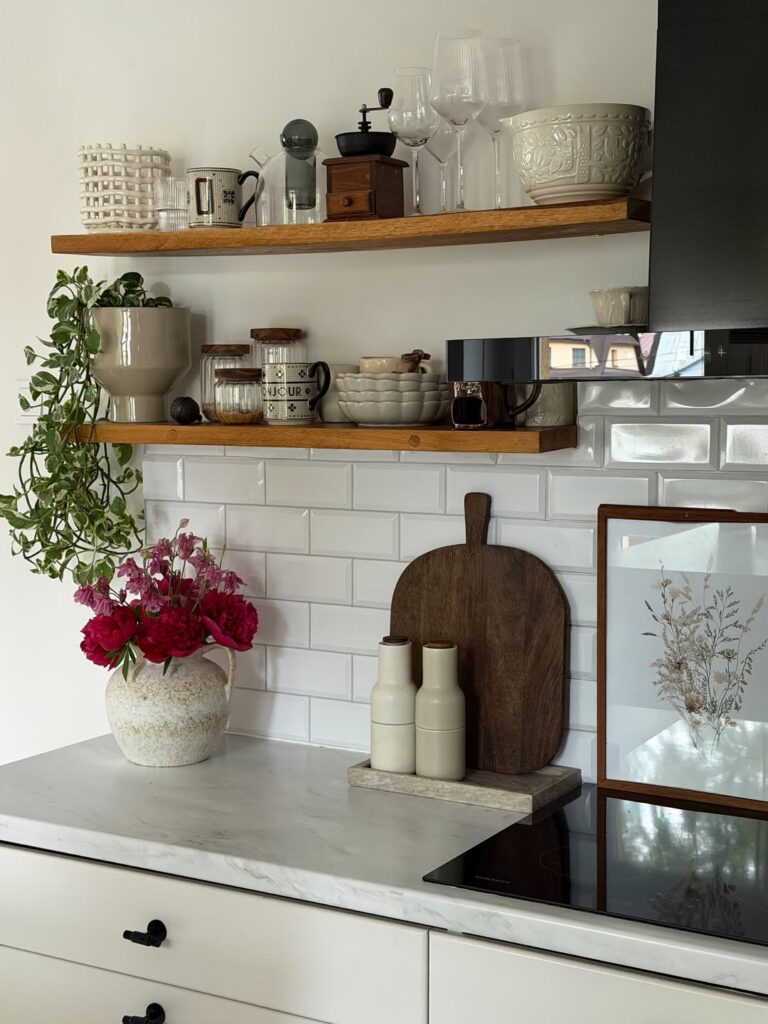
With two plain wood shelves, the trick is to mix the things you actually reach for with a few heavier pieces that stop it looking like storage overflow. Keep glasses and mugs near the coffee machine, then place bowls, jars, and a small grinder around them so the shelf has different heights without feeling too arranged. The trailing plant helps break up all the straight lines from the tile and shelving.
I’d skip too many tiny cups here. They collect dust fast. A large bowl or basket at one end does the job better and makes the whole shelf feel more settled.
The Brass Rail Below
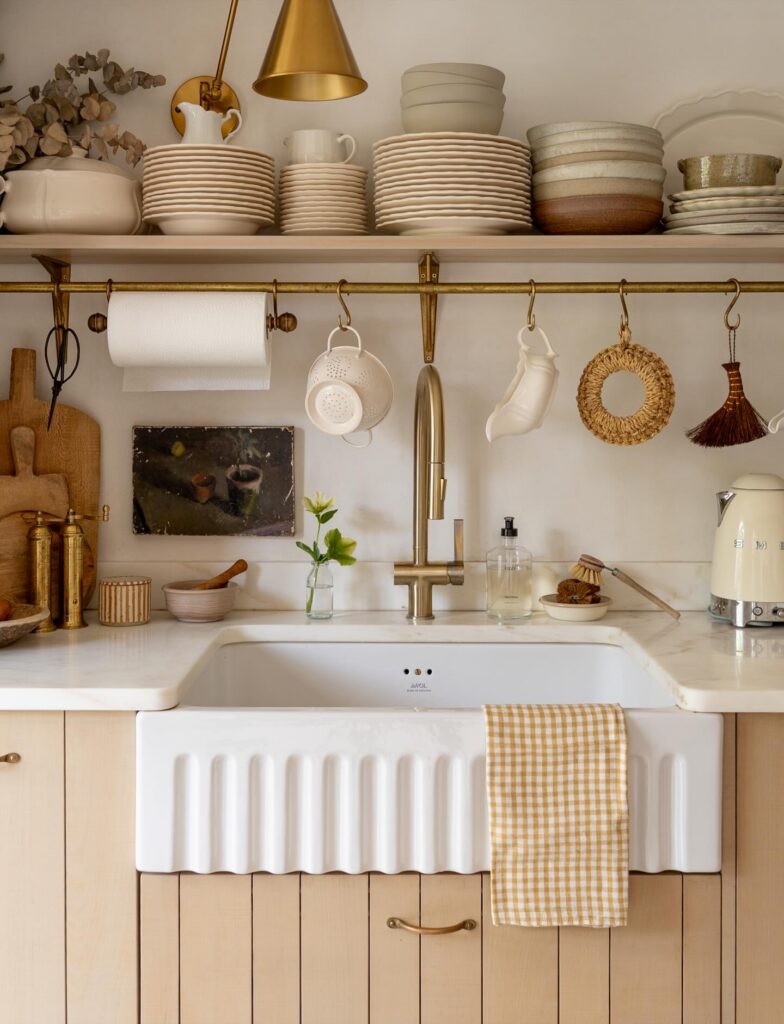
The shelf does half the work here. The brass rail underneath does the rest. S-hooks hold a colander, a small pitcher, a rattan trivet, a hand broom — things you’d otherwise be digging through a drawer for. This is the move if your shelf is too high to be practical for daily grabs.
A few things to know before you copy it. The rail needs to be anchored into studs or with proper wall plugs, because wet colanders and cast pans get heavy fast. Keep the hooks loose enough to lift off one-handed. I’d skip hanging anything you use more than twice a day directly over the sink faucet, though. You’ll be reaching around it constantly.
Mixed dishes, plain shelves
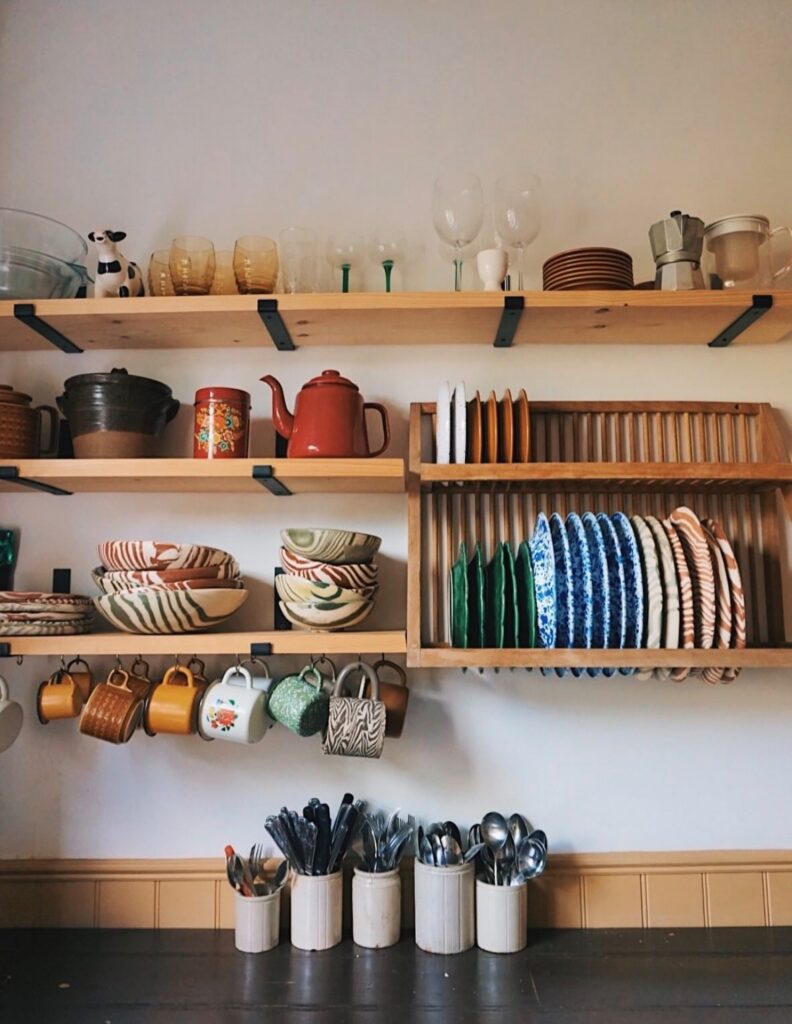
Start with two shelf levels, not five. The reason this setup works is the plain pine boards and black brackets keep the structure quiet, so the plates, mugs, and glassware can do the visual work without the wall turning fussy.
The wooden plate rack is the part worth borrowing. It lets you stack dinner plates upright by color or pattern, which looks better than short piles and is easier to grab when you cook every day. Very practical.
Keep the open shelves for things you use constantly: bowls, cups, glasses, serving plates. Then use crocks on the counter for cutlery so your drawers are freed up and the shelf run doesn’t have to hold every single tool in the kitchen. I’d skip hanging too many mugs underneath if your shelves sit this low, because it can start to feel crowded fast.
Mix Utility Items With Display Pieces
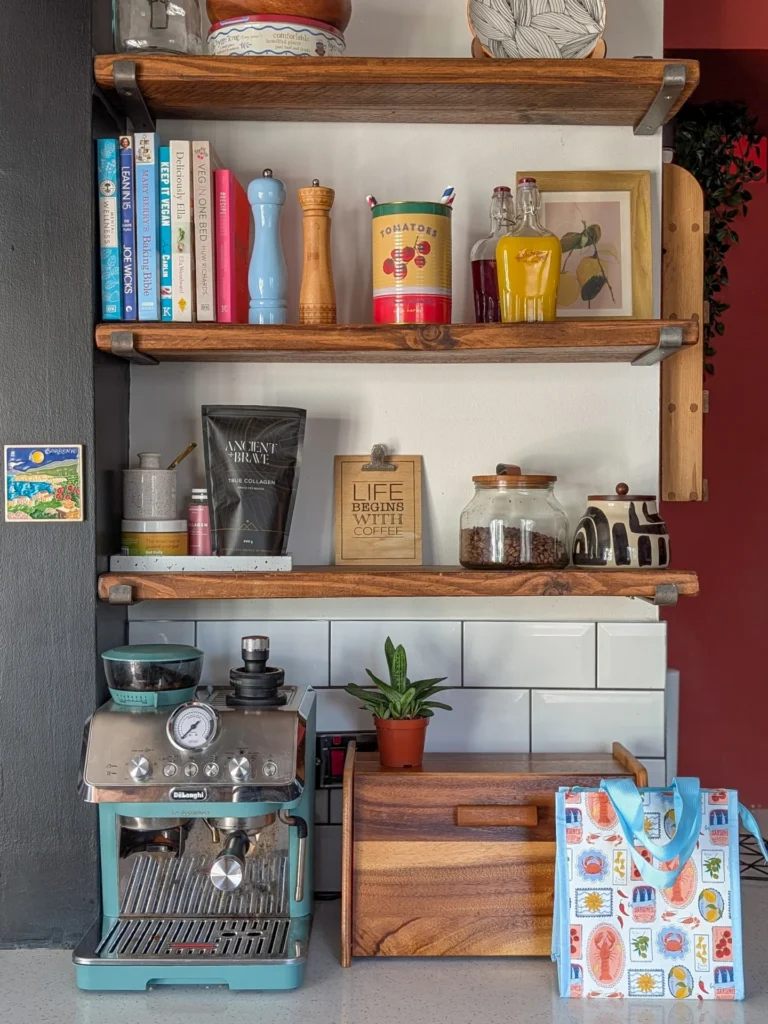
The coffee beans in the glass jar and the Ancient + Brave collagen bag are both functional items, sitting right next to a small wooden sign and a black-and-white ceramic pot — nothing is purely decorative. That’s the thing with open shelving that actually works day-to-day: it holds what you use, and the objects themselves do the visual job. Group things by what you reach for together.
The coffee station here — machine on the counter, beans on the shelf above, collagen and supplements nearby — makes sense as a zone. A wooden bread bin below anchors it. I’d probably move the tote bag off the floor, but the logic of the whole setup is sound.
Works best if you’re not precious about keeping it looking “finished.”
Mix pitchers with baskets
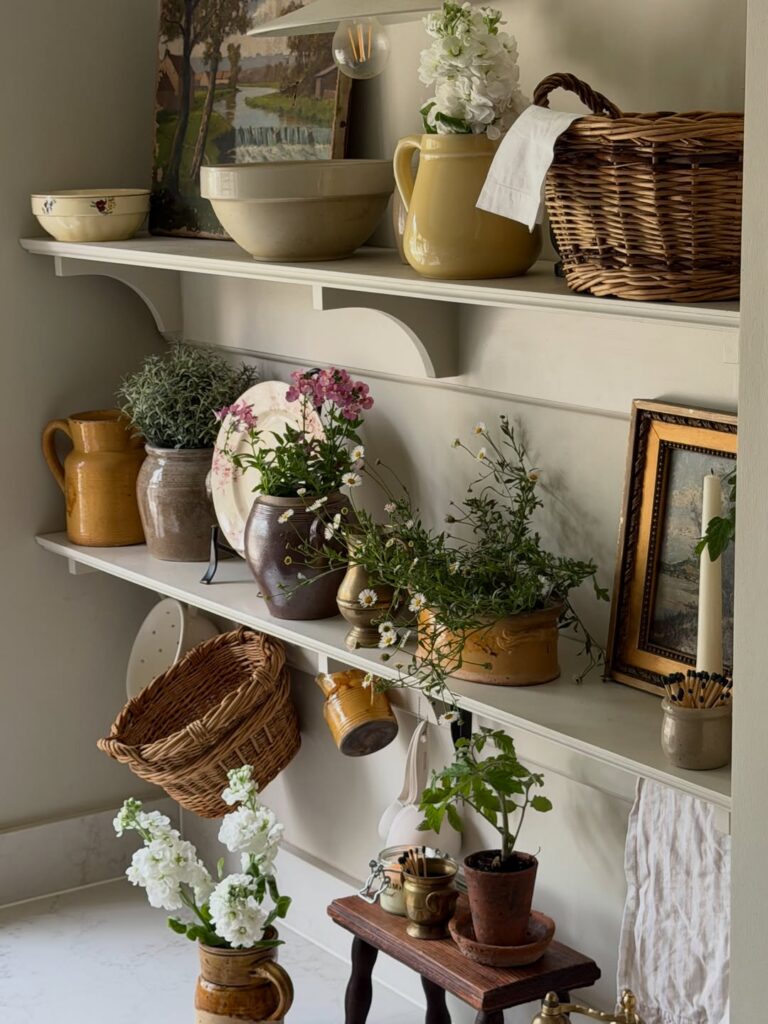
With shelves like these, let the bigger pieces hold the line: a wicker basket on one end, a yellow pitcher near the other, then small jars between them. Leave gaps. The brackets already add shape underneath, so the shelf does not need to be packed full.
A framed landscape or floral plate behind a pot gives the whole run that collected farmhouse look, especially when the colors stay a little faded. Use saucers. If you put real herbs or daisies up here, water rings on painted shelves are annoying to fix later.
I’d skip loose linens over baskets unless you use them often, since they can start looking like forgotten laundry pretty fast.
Stacked Shelves Above The Sink
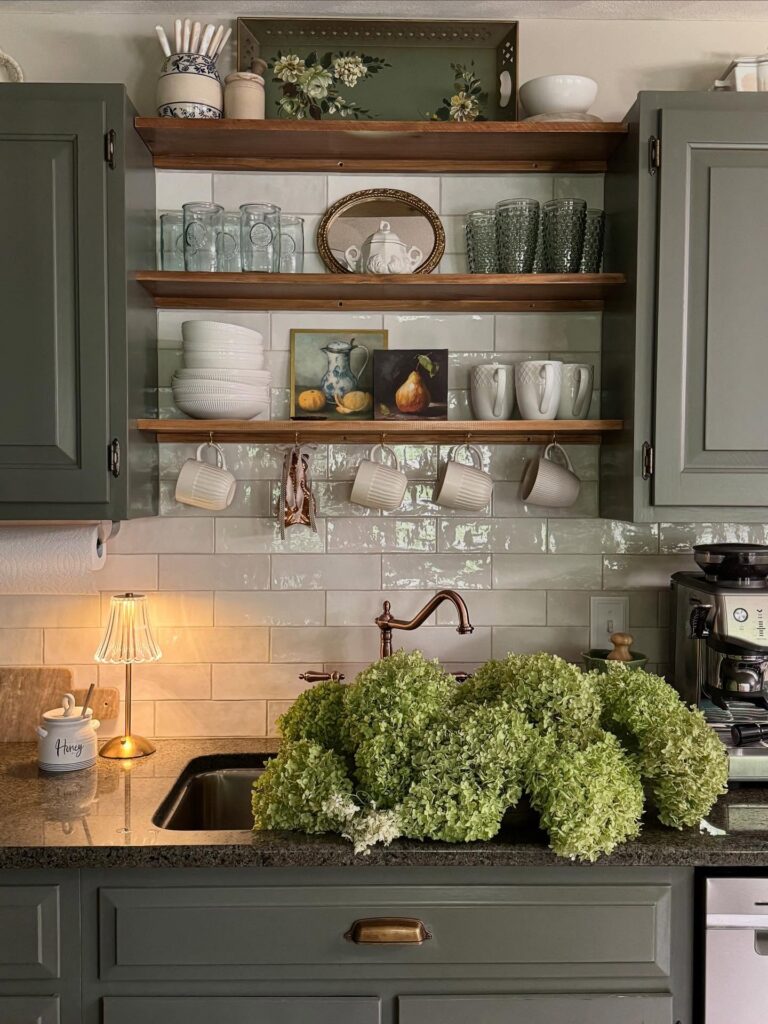
Three shelves stacked above the sink pulls a lot of weight in a small footprint. The lowest one here has hooks screwed into the underside for mugs, which is the detail I’d actually copy. It doubles your storage without adding another shelf.
Group by type. Glassware on one, bowls and art on another, decorative pieces up top where you don’t reach daily. The little paintings propped against the tile do more than a vase would in that spot.
One thing. Shelves directly over a sink get splashed and steamed, so keep anything porous or precious higher up. I wouldn’t put the good ceramics on the bottom row. Everyday mugs, sure — they’re going back in the dishwasher anyway.
Mix useful with collected
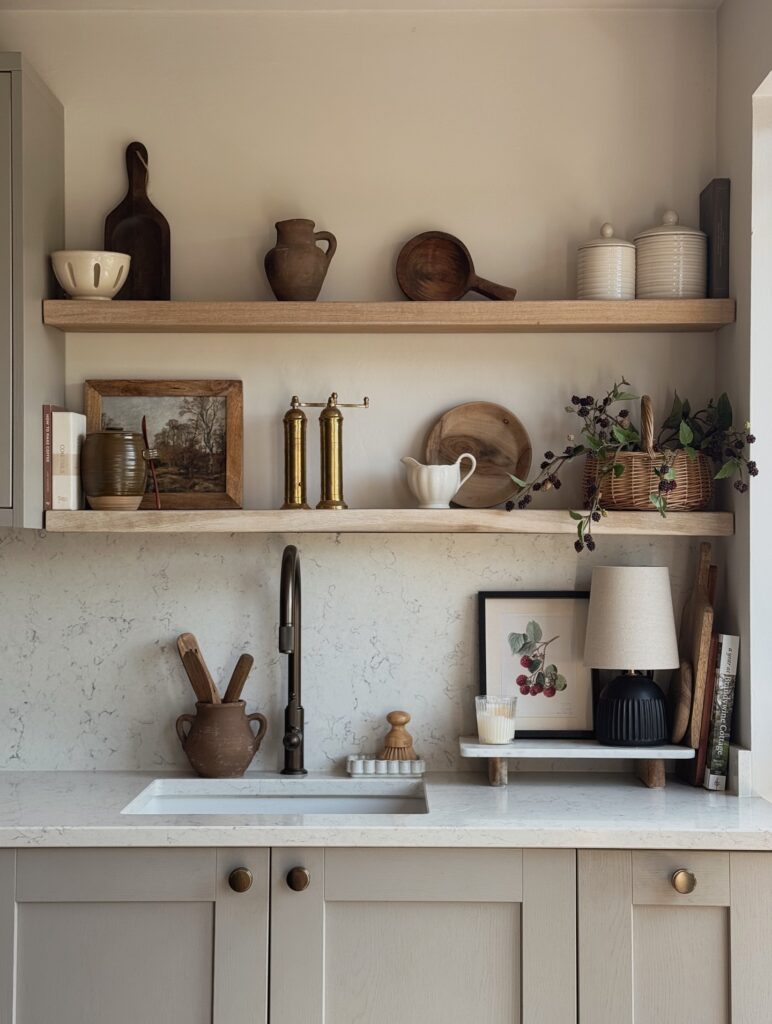
Open shelves look better when you stop treating them like storage alone. Here, the trick is the mix of working pieces and slower ones: a brass mill set near the sink, a little jug, boards leaned at the back, then a framed picture and lamp off to one side.
That offset matters. It breaks the run of kitchen stuff so the shelves don’t start reading like a shop display, and the darker wood pieces keep the pale shelves from looking washed out against the light wall.
Keep the everyday items on the lower shelf. Much easier.
I’d copy the stacked cutting boards and one small basket with a trailing plant, but I’d skip two matching canisters unless you genuinely use them, because pairs can get a bit stiff in farmhouse kitchens.
Mix Cutting Boards With Quieter Objects
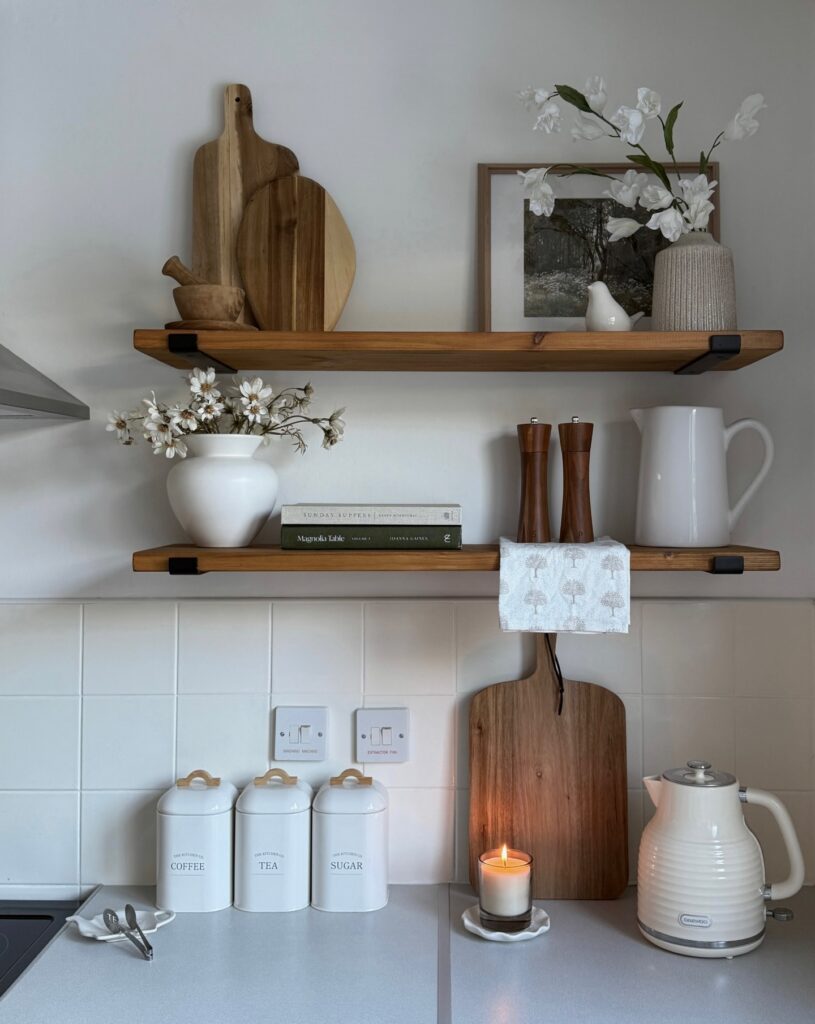
Leaning two or three cutting boards of different shapes against the back wall of a shelf does a lot of the visual work for you — the varied outlines (round, rectangular, paddle-style) create enough difference that nothing looks staged. What keeps it from tipping into clutter is the stuff around them. Here, a small mortar and pestle sits in front, low enough not to block anything.
That kind of layering — taller boards behind, shorter objects in front — is worth copying directly. The framed print and ribbed vase on the same shelf pull the eye sideways rather than straight up. One thing I’d skip: matching the cutting boards too closely in size, because then you’re just stacking rectangles and it loses the point entirely.
Shelf With Pegs
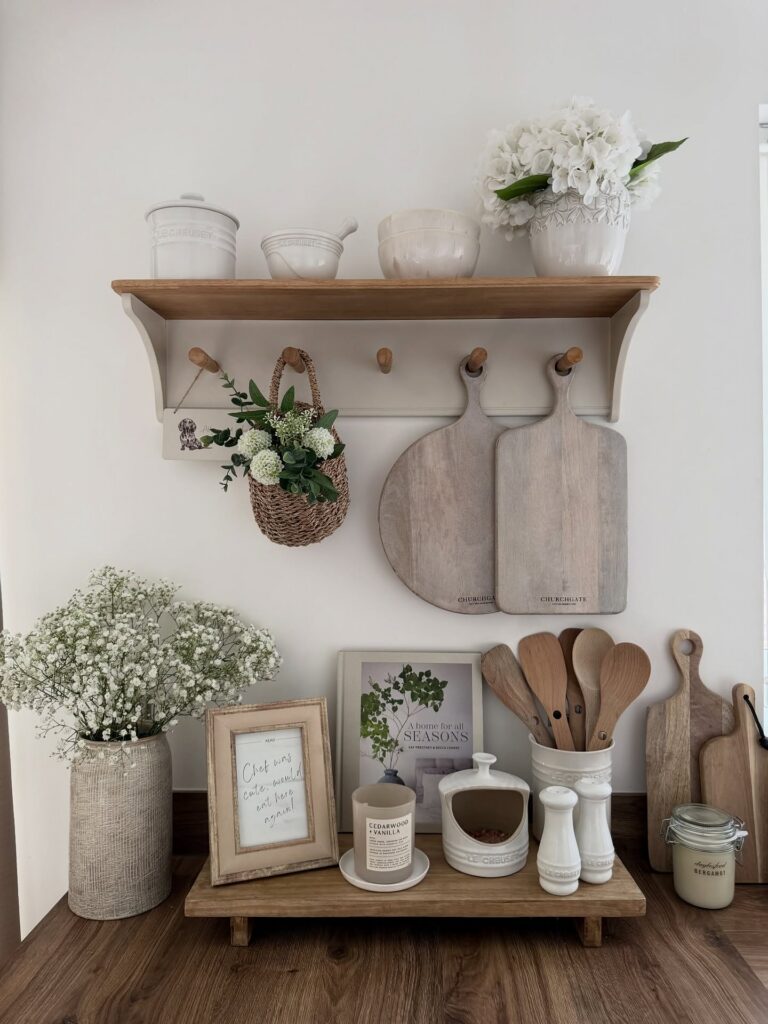
Instead of stopping at a plain shelf, add a peg rail underneath so the wall starts doing more of the kitchen work. It earns its space. The pegs can hold a basket of greens, two cutting boards, or even a towel if this sits near the sink.
Keep the top shelf mostly to white jars, bowls, and one vase so it doesn’t start looking like storage overflow. All in one finish. I would skip hanging too many boards here, though, because once they overlap too much, you stop reaching for them and they turn into wall decor only.
Add a Small Lamp
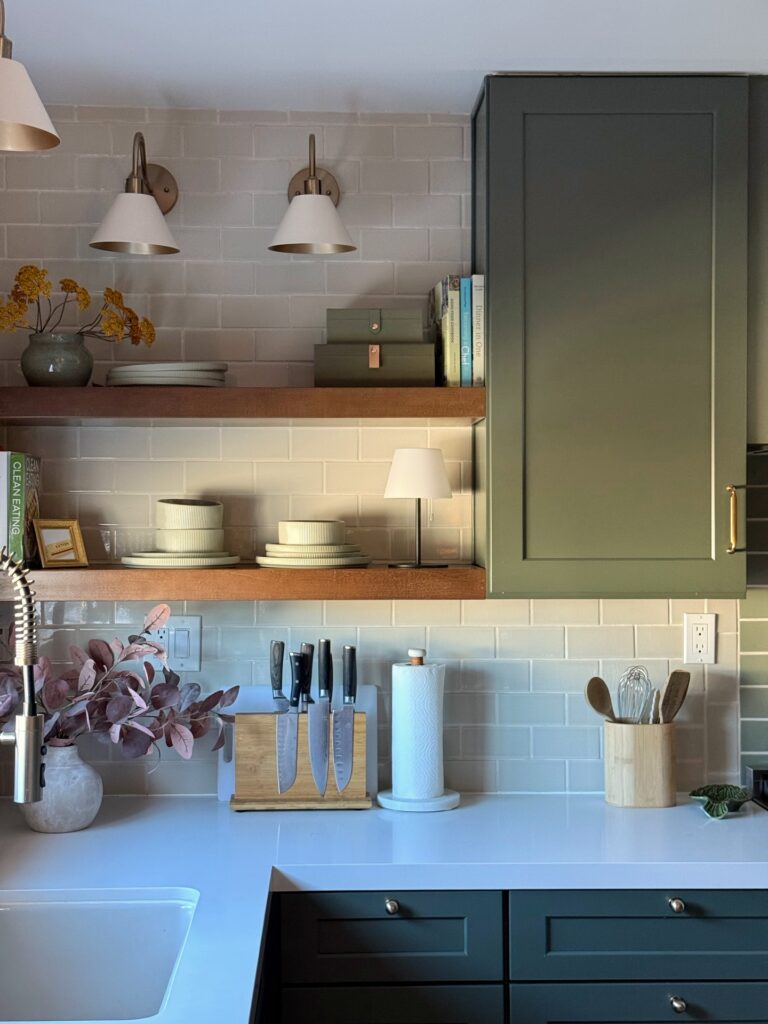
A little cordless lamp on the shelf, tucked between the stacked dishes, changes how the whole corner reads at night. The overhead sconces do one job. The lamp does another — softer, lower, closer to the counter where you actually stand chopping things.
Pick one with a small footprint so it doesn’t eat shelf space you need for plates. Rechargeable is worth it here. Running a cord down a tiled backsplash looks bad and you’ll resent it within a week.
If your shelves are shallow, skip the shade with a wide base and go for something slim. This works best when the rest of the shelf stays quiet — a few dishes, one vase, nothing fighting the lamp for attention.
Mix shelves with glass fronts
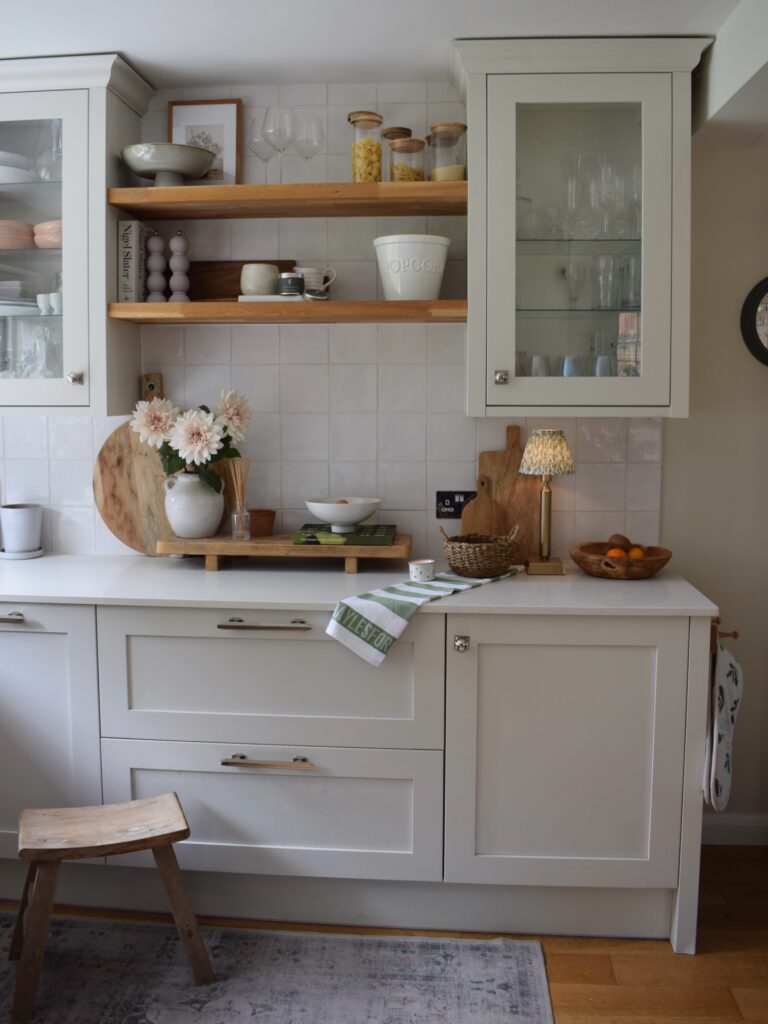
Open shelves work better here because they’re boxed in by two glass-front cabinets, so the whole wall doesn’t start looking loose or unfinished. That’s the part worth copying. Use the shelves for the things that have some shape to them — jars with pasta, a stack of bowls, a board leaned at the back — and keep the fully practical stuff behind glass where it still lightens the run of cabinetry.
Leave breathing room. If every inch is filled, the shelves stop looking useful and start looking like storage overflow, which farmhouse kitchens can slip into pretty fast.
The wood shelves help. They break up the painted cabinets and white tile without asking for much else.
I’d skip the tiny decor pieces unless you really love dusting them. One vase, one board, a couple of everyday dishes is usually enough.
Mix Food Storage With Decorative Pieces
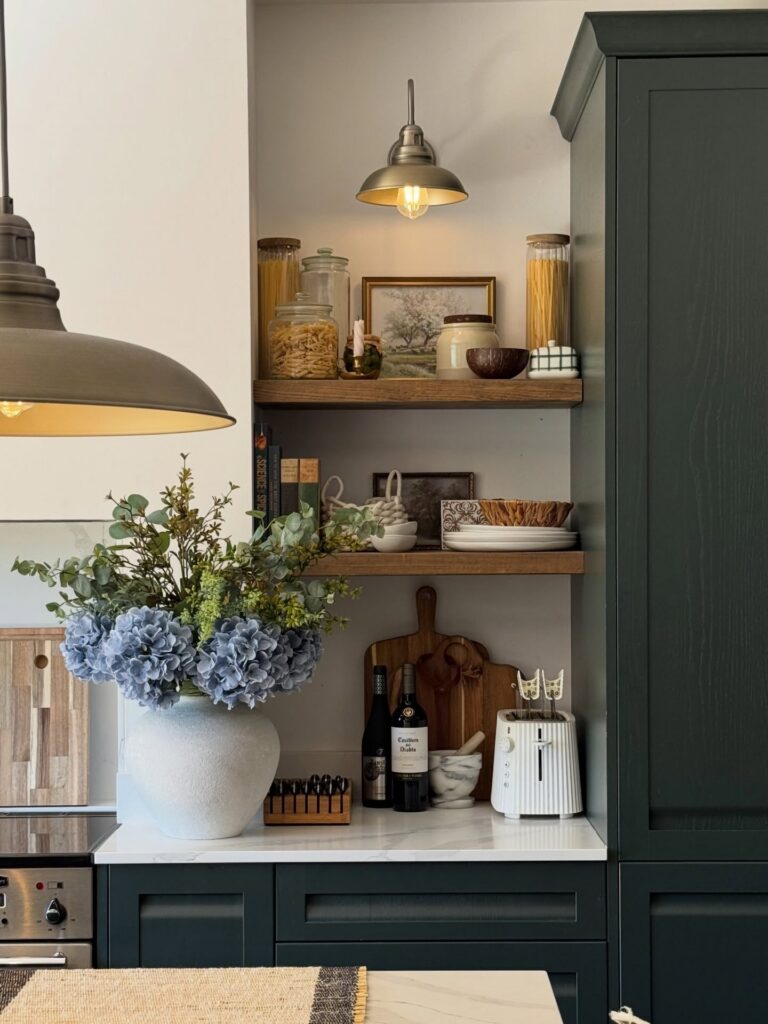
Glass jars filled with dry pasta sit right next to a small framed print and a ceramic pot — and that mix is exactly what stops the shelves from looking like a pantry overflow. The trick is keeping the containers uniform enough that they read as a set, then breaking it up with one or two things that have nothing to do with food. A pendant light mounted inside the alcove pulls everything together without you having to do much else.
If your shelves sit in a darker corner, that’s actually worth solving before you style anything — even a plug-in pendant makes a real difference. I’d personally skip the bottles on the bottom shelf and use that space for something you reach for daily. Works best if you’re okay with those jars being regularly reorganized.
Shelves With Guard Rails
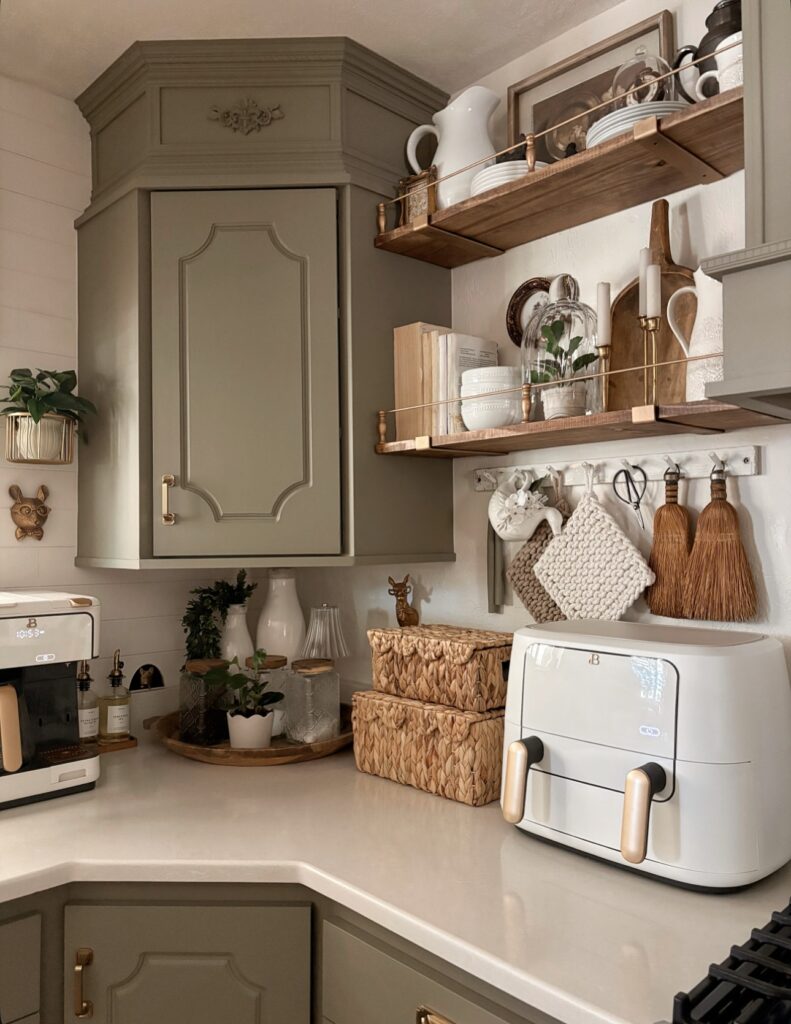
With a slim brass rail along the front, the open shelves can hold plates, pitchers, and small jars without looking like everything might slide off when you grab one thing. Use the lower shelf for the pieces you touch most, like mugs or a glass cloche, and let the higher shelf take the extra dishes. Keep heights mixed.
The wood works because it repeats the broom handles, basket texture, and cabinet pulls instead of sitting there as a random shelf choice. I would skip stacking too many plates near the edge, though, unless the rail is fixed well into the wall and not just into drywall.
The Full Green Pantry Wall
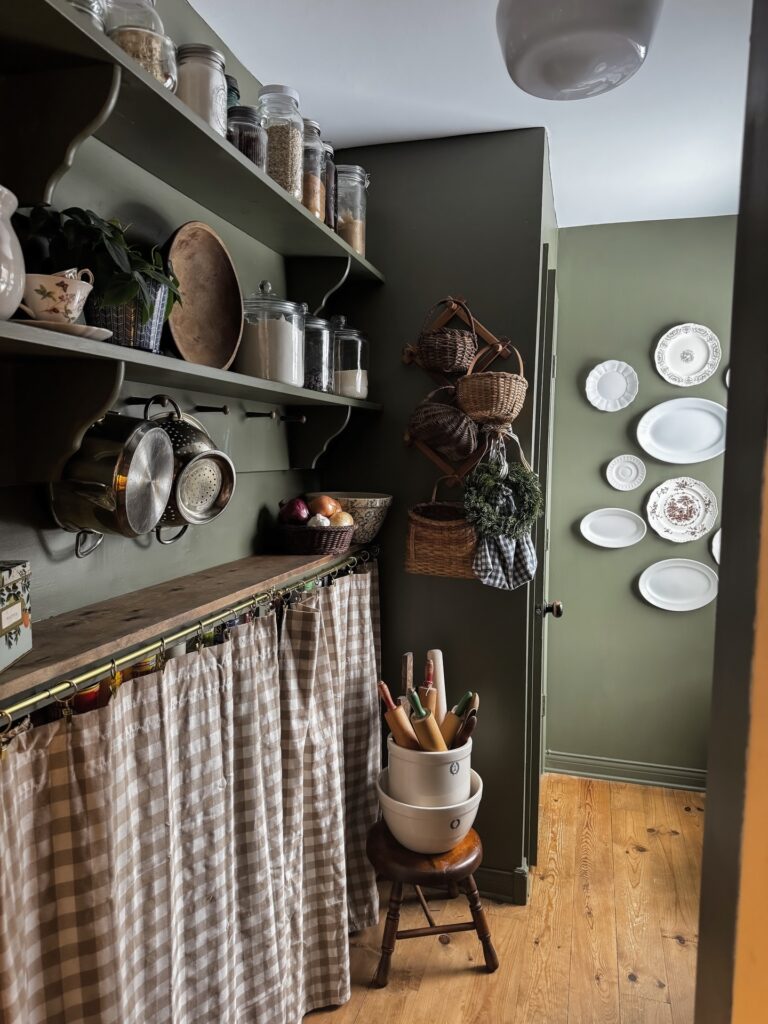
Painting the shelves, the walls, and the back of the door all in the same olive green is what makes this work. If the shelves were white against green walls, you’d notice every mismatched jar and dented colander. Here, the color absorbs everything and the objects float. That’s the trick.
Commit fully. Ceiling trim, shelf brackets, inside the doorway. Half-measures look like you ran out of paint.
The gingham curtain under the counter hides whatever isn’t pretty enough for display, which is most things honestly. I’d skip the plate wall in the next room though — competing with the shelves for attention and losing. One focal wall is enough when the color is this heavy.
Best for older houses with wood floors and some ceiling height to spare.
